---
title: Ingesting data to CluedIn with Python
url: https://documentation.cluedin.net/develop/python-sdk/ingestion
content_type: how-to
section: Develop & APIs > Python SDK
---
# Ingesting data to CluedIn with Python
> how-to: Steps to accomplish one task.
In this article, we will explore how to ingest data to CluedIn Ingestion Endpoints with Python. We will use Databricks as a data source and CluedIn as a destination. The same approach can be used with any other data source like Microsoft Fabric, Azure Synapse Analytics, Snowflake, or any other data source that can run Python code.
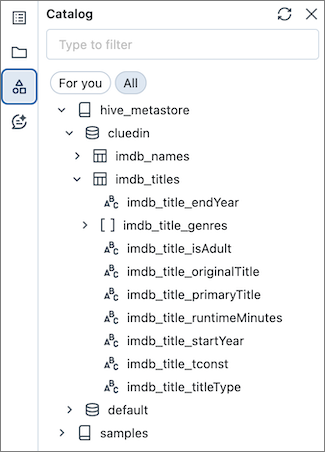
Let's start with a simple example. We have a table named `imdb_titles` in Databricks with 601_222 rows:
 ## CluedIn
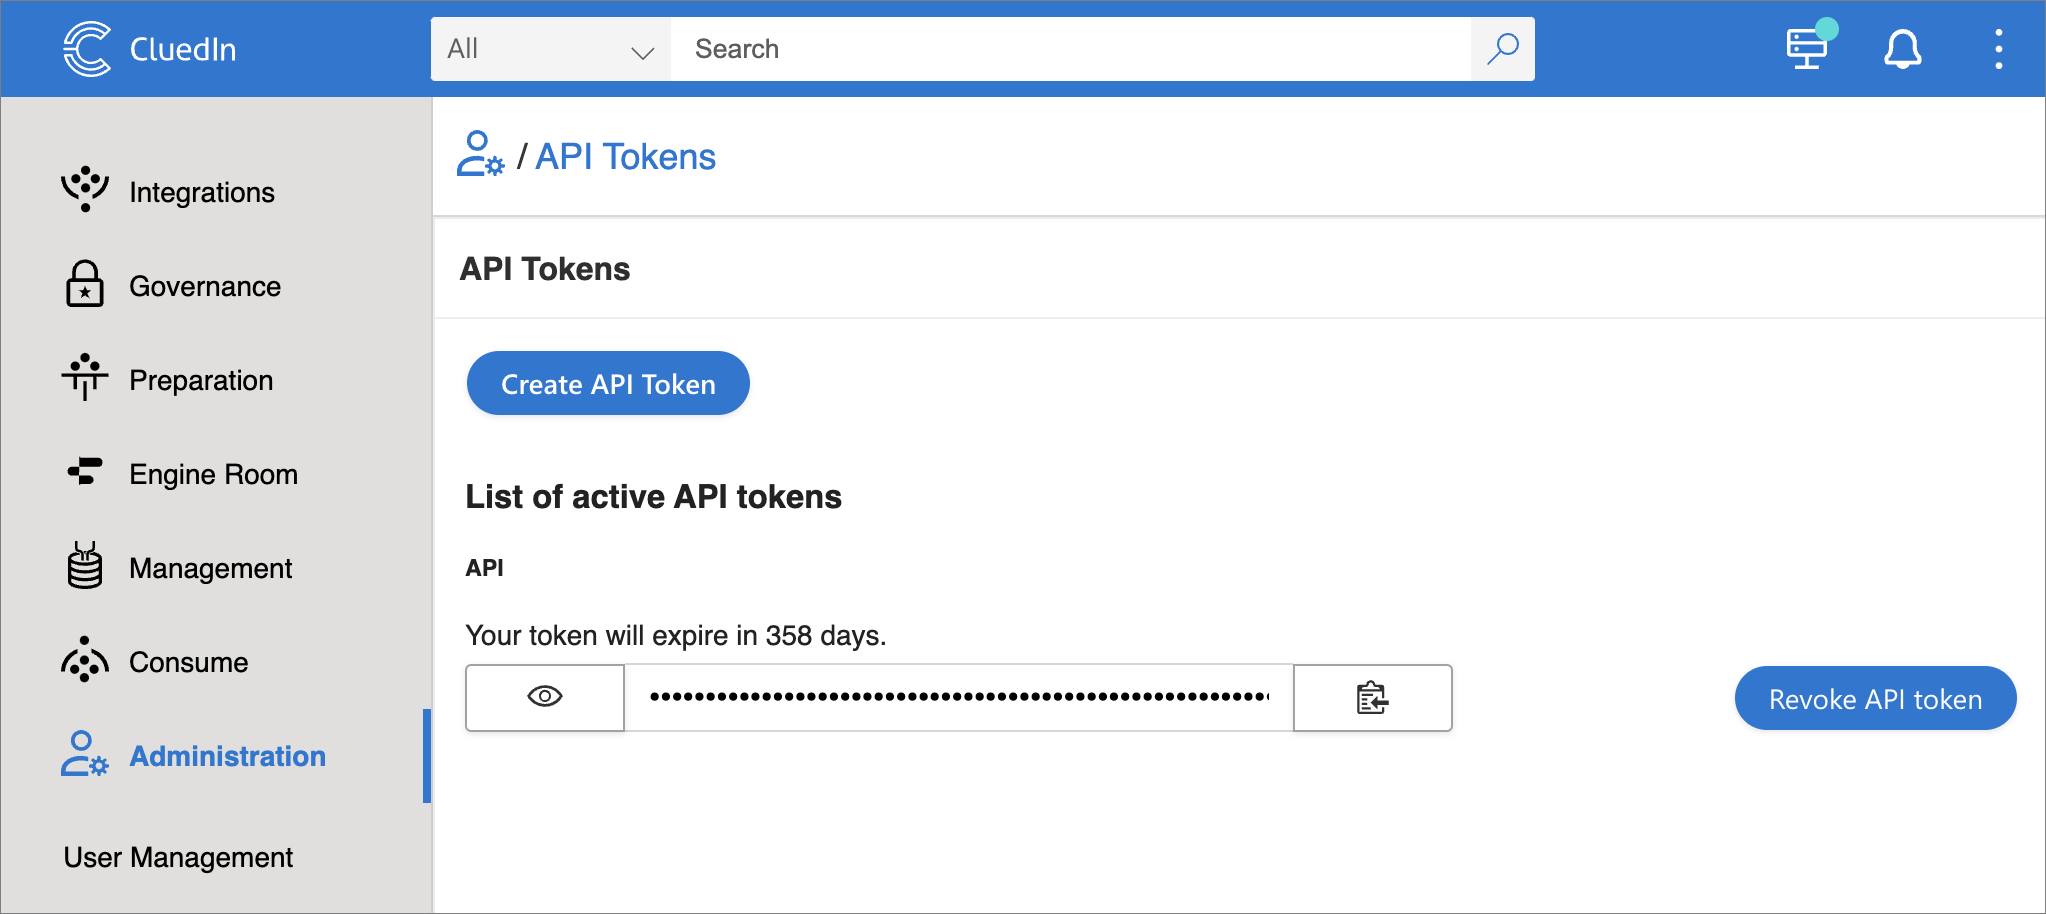
1. Load this data to CluedIn. To do this, we need to create an API token in CluedIn. Go to **Administration** > **API Tokens** and create a new token.
## CluedIn
1. Load this data to CluedIn. To do this, we need to create an API token in CluedIn. Go to **Administration** > **API Tokens** and create a new token.
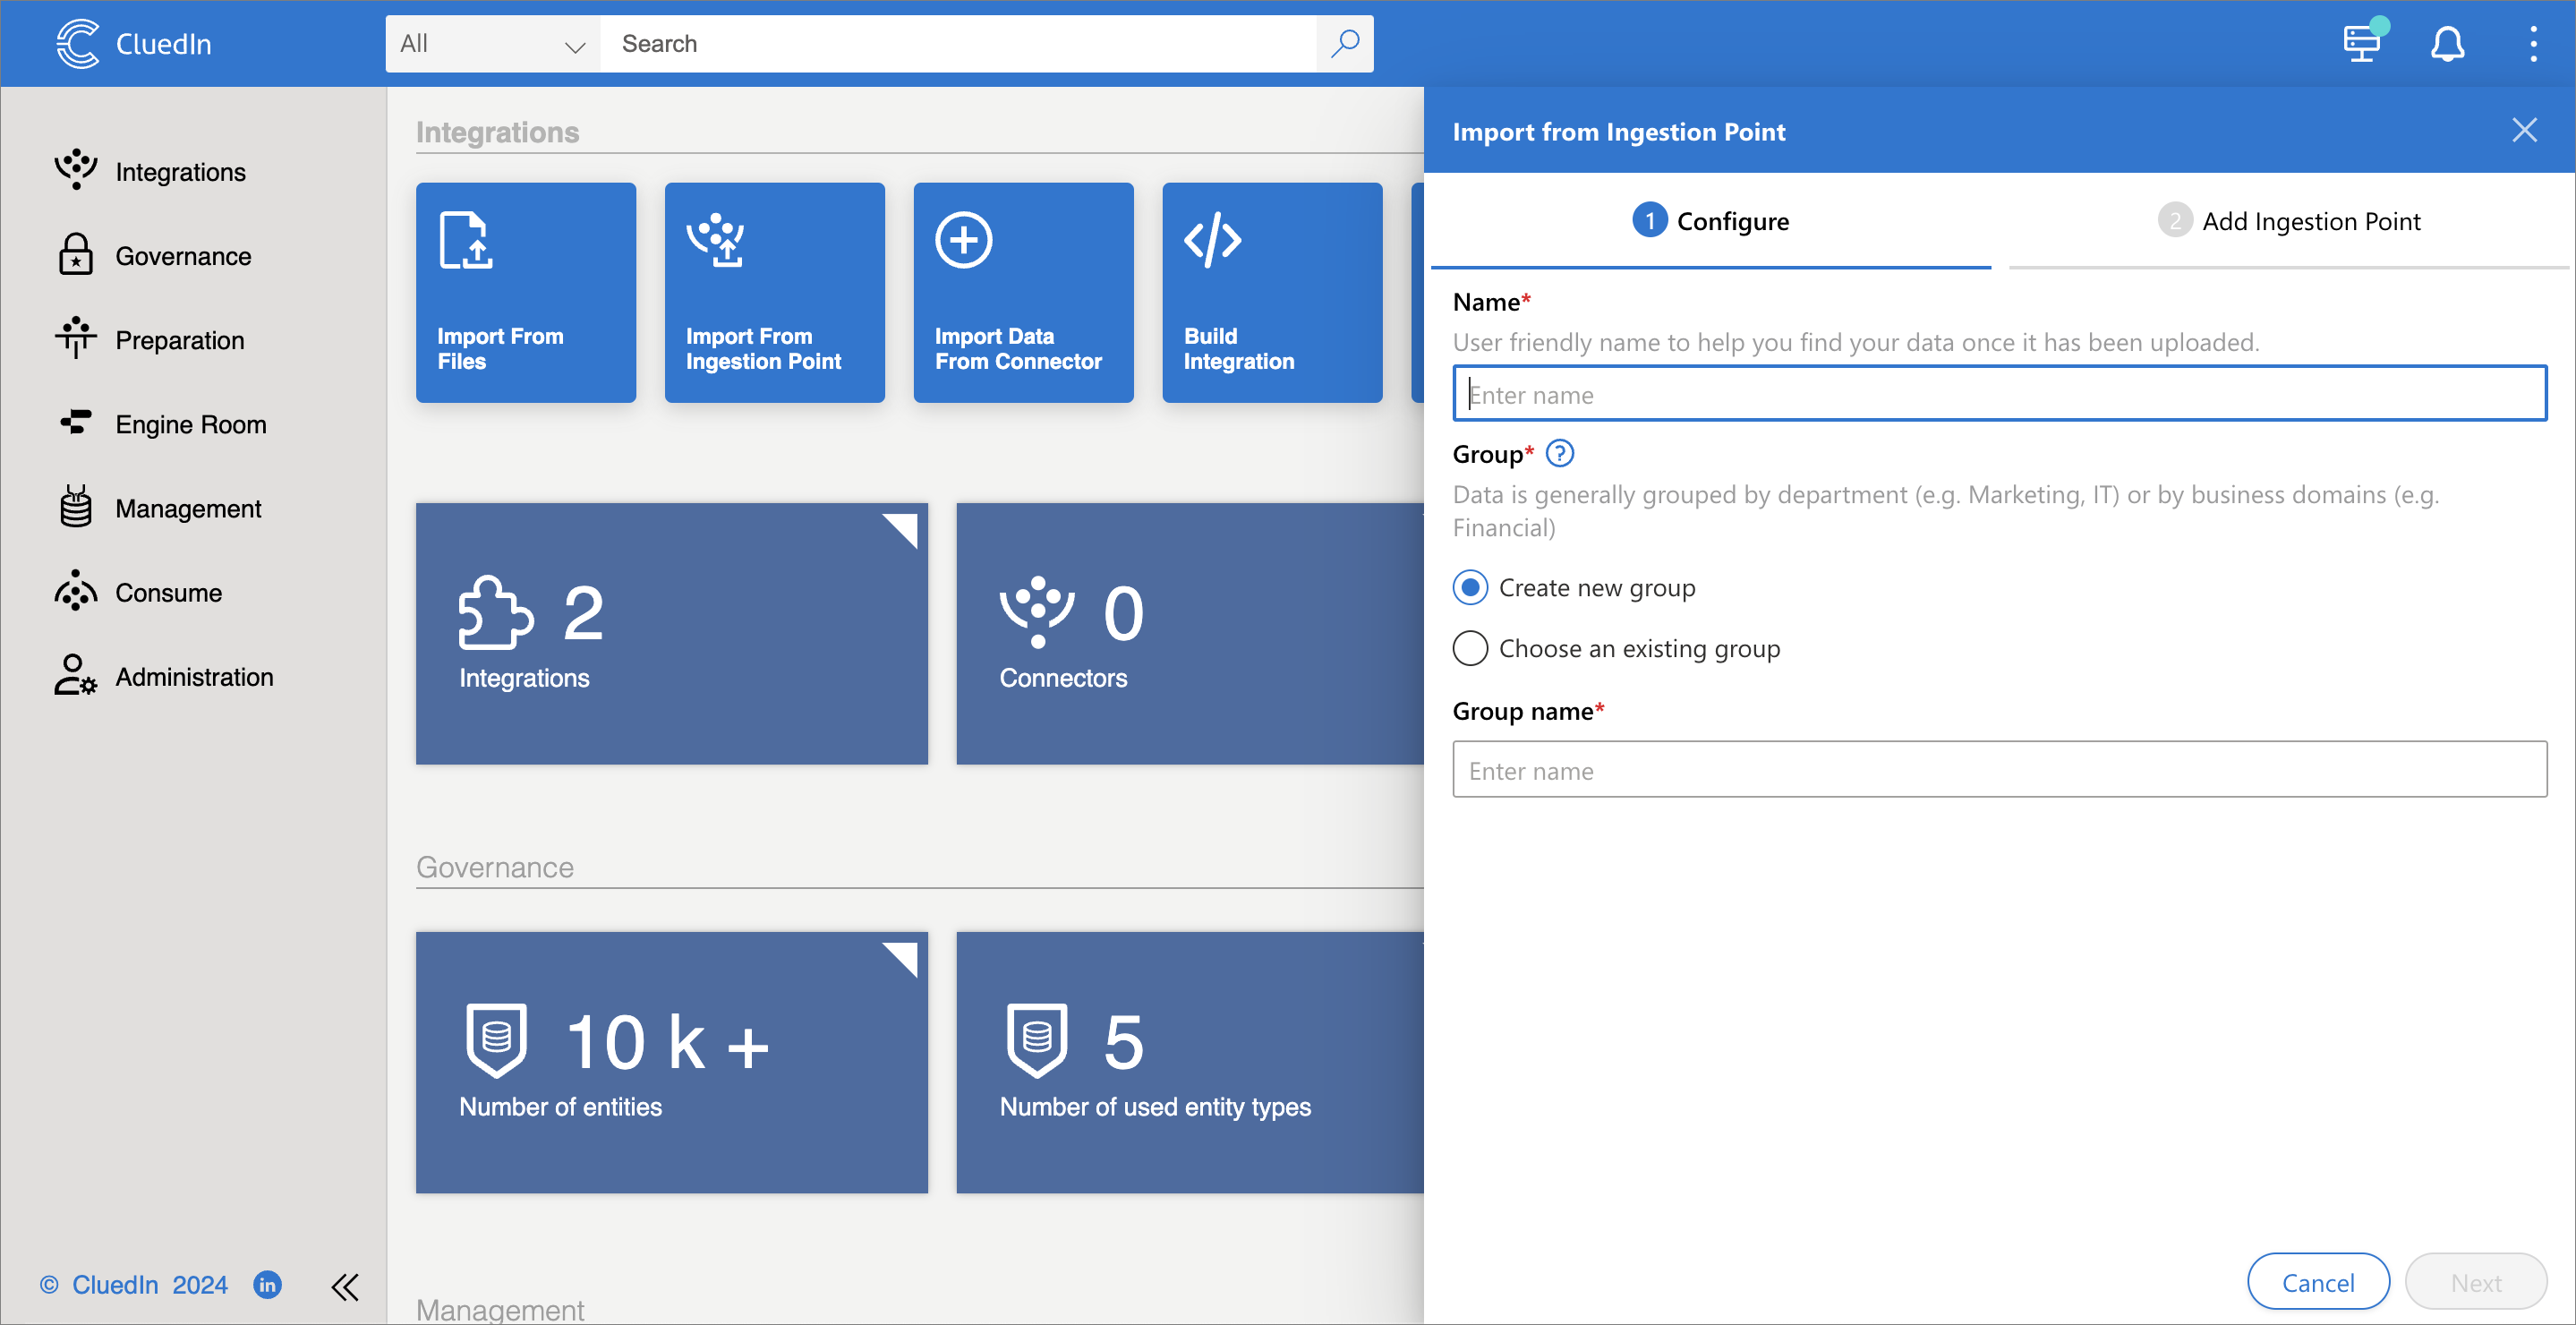
 1. Create an endpoint in CluedIn. From CluedIn's main page, select **Import From Ingestion Endpoint** and create a new endpoint. You will need to enter the endpoint's name, group name, and select a business domain (previously called _entity type_).
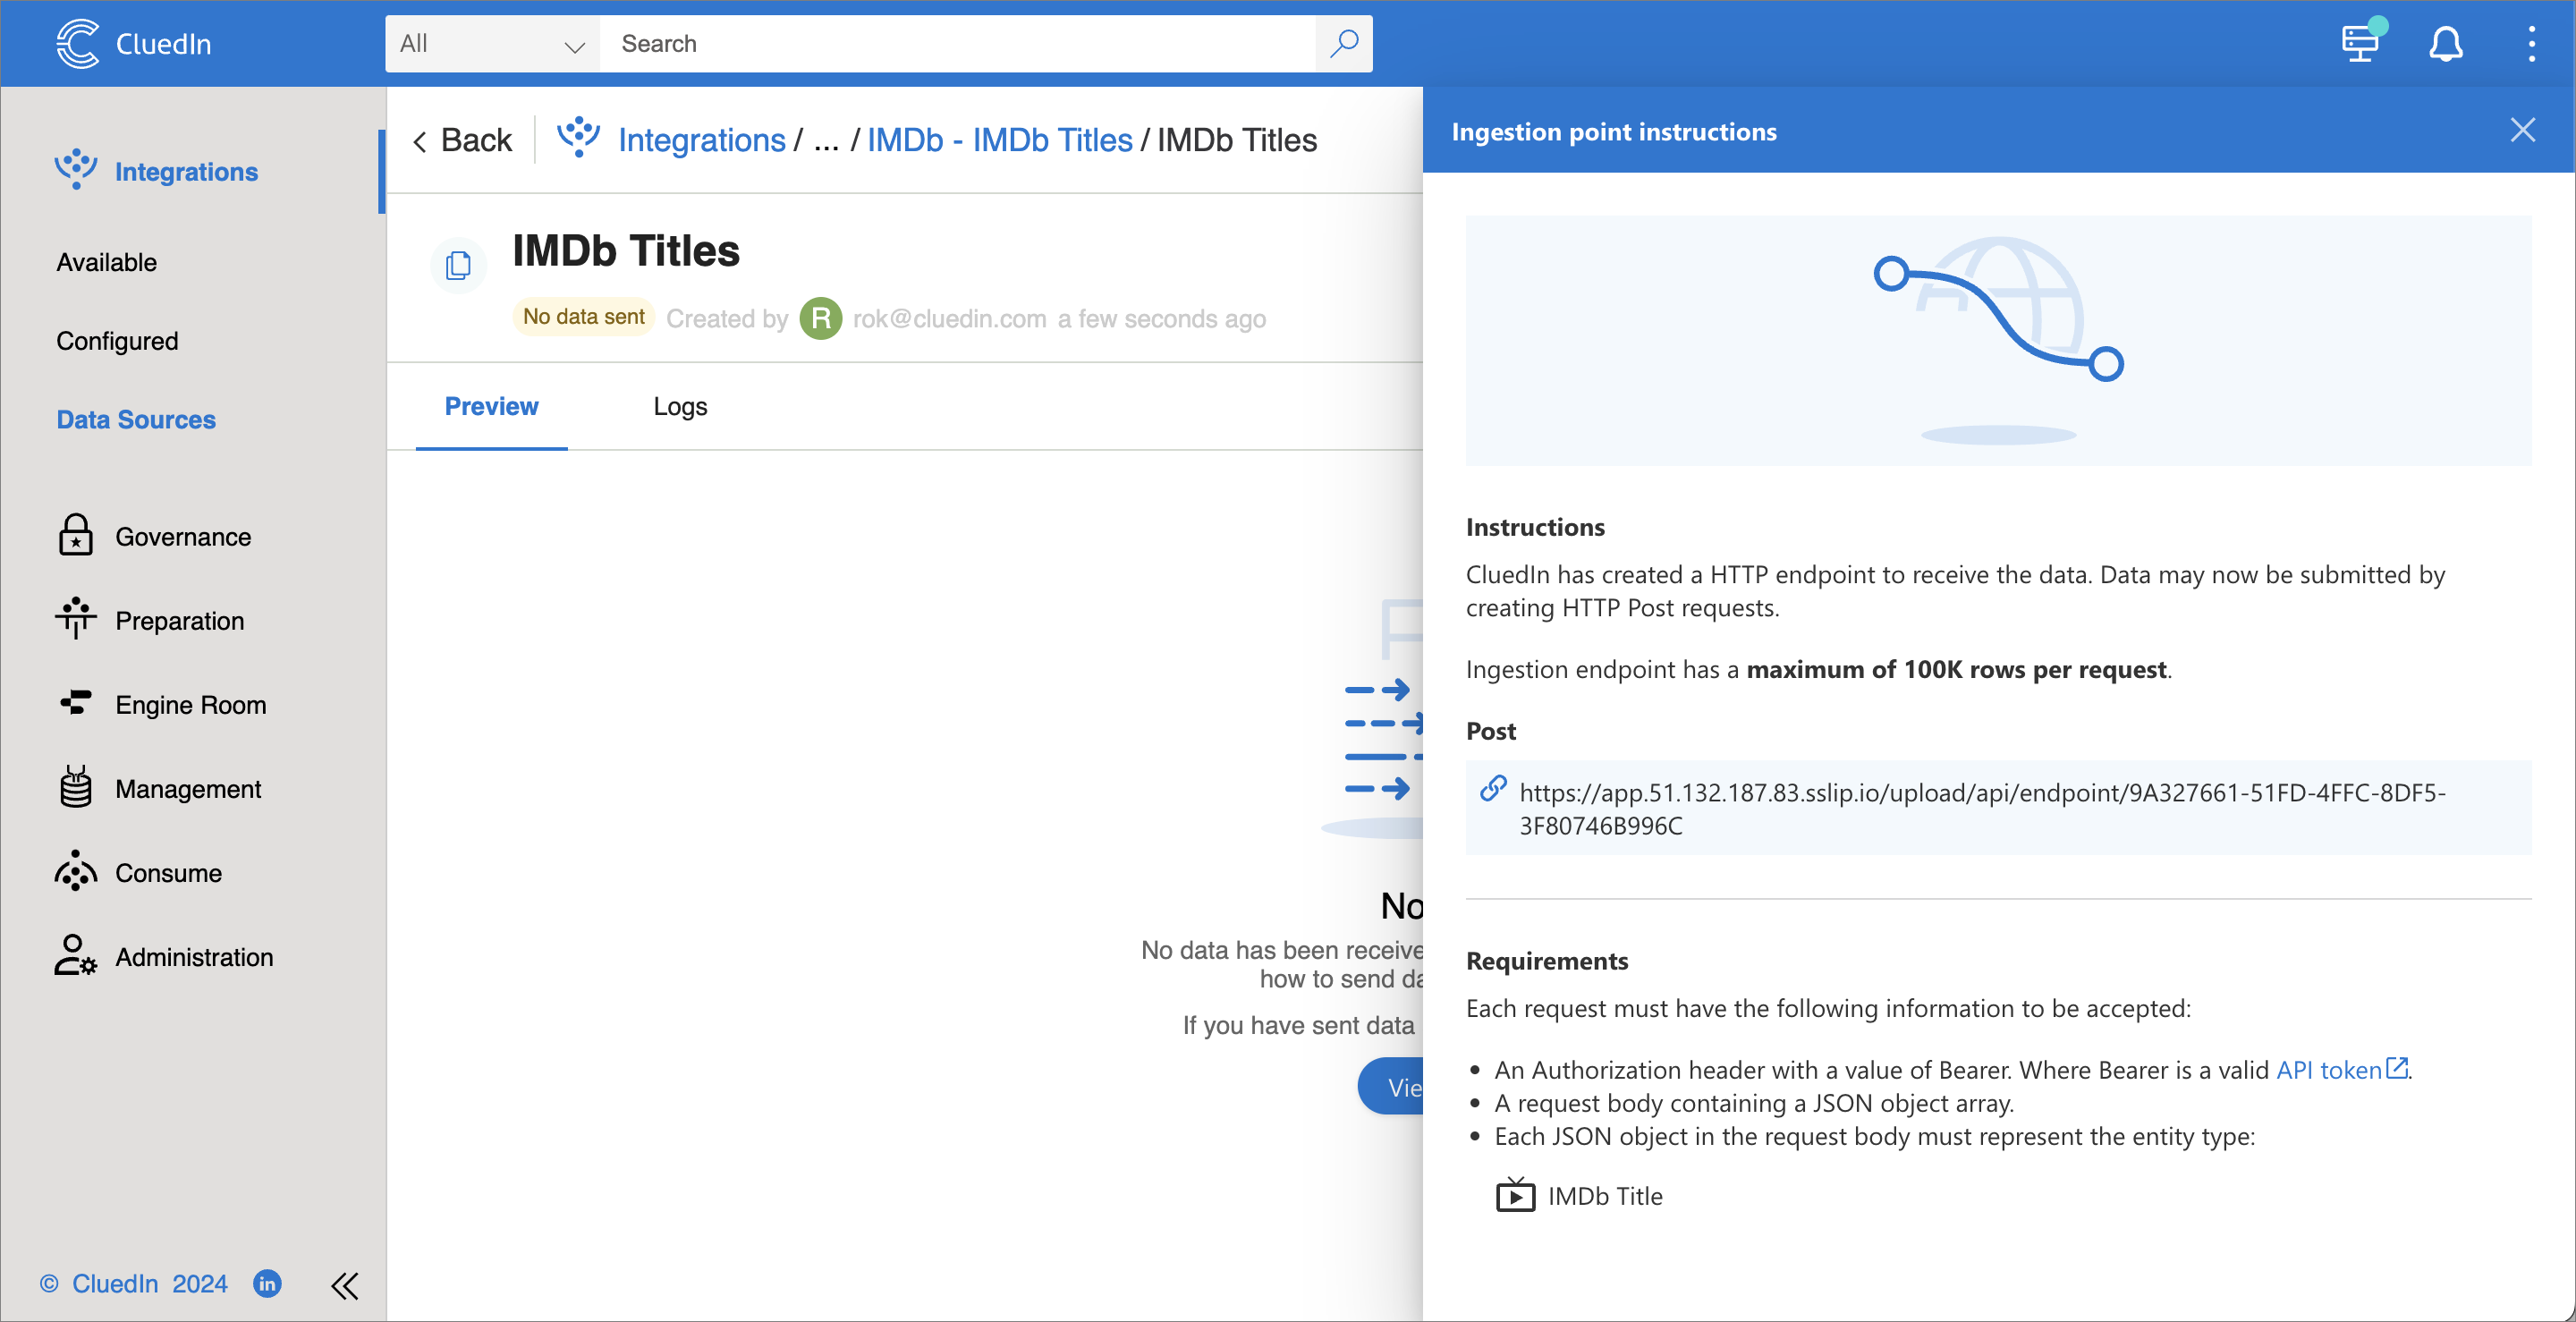
 After you create the endpoint, you will find its URL in the **View Instructions** section.
 We are ready to load data to CluedIn. Now it's time to set up Databricks.
## Databricks
1. In Databricks, we create a Jupyter notebook and install the `cluedin` library.
```python
%pip install cluedin
```
1. Import the `cluedin` library and create a CluedIn context object.
```python
import requests
import cluedin
ctx = cluedin.Context.from_dict(
{
"domain": "51.132.187.83.sslip.io",
"org_name": "foobar",
"access_token": "(your token)",
}
)
ENDPOINT_URL = "https://app.51.132.187.83.sslip.io/upload/api/endpoint/9A327661-51FD-4FFC-8DF5-3F80746B996C"
DELAY_SECONDS = 5
BATCH_SIZE = 100_000
```
In our example, the URL of our CluedIn instance is `https://foobar.51.132.187.83.sslip.io/`, so the domain is `51.132.187.83.sslip.io` and the organization name is `foobar`. The access token is the one we created earlier.
1. Pull data from Databricks and post it to CluedIn.
Here is a simple method to select all rows from a table and yield them one by one:
```python
from pyspark.sql import SparkSession
def get_rows():
spark = SparkSession.builder.getOrCreate()
imdb_names_df = spark.sql("SELECT * FROM hive_metastore.cluedin.imdb_titles")
for row in imdb_names_df.collect():
yield row.asDict()
```
1. Create a method that posts a batch of rows to CluedIn.
```python
import time
from datetime import timedelta
def post_batch(ctx, batch):
response = requests.post(
url=ENDPOINT_URL,
json=batch,
headers={"Authorization": f"Bearer {ctx.access_token}"},
timeout=60,
)
time.sleep(DELAY_SECONDS)
return response
def print_response(start, iteration_start, response) -> None:
time_from_start = timedelta(seconds=time.time() - start)
time_from_iteration_start = timedelta(
seconds=time.time() - iteration_start)
time_stamp = f'{time_from_start} {time_from_iteration_start}'
print(f'{time_stamp}: {response.status_code} {response.json()}\n')
```
`print_response` is a helper method that prints the response status code and the response body.
1. Iterate over the rows and post them to CluedIn. Note that:
- We are posting the rows in batches of `BATCH_SIZE` rows.
- `DELAY_SECONDS` is the number of seconds to wait between batches.
However, we will need to post a small batch of rows first to set up mapping on the CluedIn side. We will post ten rows. To do that, we will add the following lines in the code below.
```python
if i >= 10:
break
```
Here is the code that posts the rows to CluedIn:
```python
batch = []
batch_count = 0
start = time.time()
iteration_start = start
for i, row in enumerate(get_rows()):
if i >= 10:
break
batch.append(row)
if len(batch) >= BATCH_SIZE:
batch_count += 1
print(f'posting batch #{batch_count:_} ({len(batch):_} rows)')
response = post_batch(ctx, batch)
print_response(start, iteration_start, response)
iteration_start = time.time()
batch = []
if len(batch) > 0:
batch_count += 1
print(f'posting batch #{batch_count:_} ({len(batch):_} rows)')
response = post_batch(ctx, batch)
print_response(start, iteration_start, response)
iteration_start = time.time()
print(f'posted {(i + 1):_} rows')
```
After we run the code, we will see ten rows in CluedIn.
We are ready to load data to CluedIn. Now it's time to set up Databricks.
## Databricks
1. In Databricks, we create a Jupyter notebook and install the `cluedin` library.
```python
%pip install cluedin
```
1. Import the `cluedin` library and create a CluedIn context object.
```python
import requests
import cluedin
ctx = cluedin.Context.from_dict(
{
"domain": "51.132.187.83.sslip.io",
"org_name": "foobar",
"access_token": "(your token)",
}
)
ENDPOINT_URL = "https://app.51.132.187.83.sslip.io/upload/api/endpoint/9A327661-51FD-4FFC-8DF5-3F80746B996C"
DELAY_SECONDS = 5
BATCH_SIZE = 100_000
```
In our example, the URL of our CluedIn instance is `https://foobar.51.132.187.83.sslip.io/`, so the domain is `51.132.187.83.sslip.io` and the organization name is `foobar`. The access token is the one we created earlier.
1. Pull data from Databricks and post it to CluedIn.
Here is a simple method to select all rows from a table and yield them one by one:
```python
from pyspark.sql import SparkSession
def get_rows():
spark = SparkSession.builder.getOrCreate()
imdb_names_df = spark.sql("SELECT * FROM hive_metastore.cluedin.imdb_titles")
for row in imdb_names_df.collect():
yield row.asDict()
```
1. Create a method that posts a batch of rows to CluedIn.
```python
import time
from datetime import timedelta
def post_batch(ctx, batch):
response = requests.post(
url=ENDPOINT_URL,
json=batch,
headers={"Authorization": f"Bearer {ctx.access_token}"},
timeout=60,
)
time.sleep(DELAY_SECONDS)
return response
def print_response(start, iteration_start, response) -> None:
time_from_start = timedelta(seconds=time.time() - start)
time_from_iteration_start = timedelta(
seconds=time.time() - iteration_start)
time_stamp = f'{time_from_start} {time_from_iteration_start}'
print(f'{time_stamp}: {response.status_code} {response.json()}\n')
```
`print_response` is a helper method that prints the response status code and the response body.
1. Iterate over the rows and post them to CluedIn. Note that:
- We are posting the rows in batches of `BATCH_SIZE` rows.
- `DELAY_SECONDS` is the number of seconds to wait between batches.
However, we will need to post a small batch of rows first to set up mapping on the CluedIn side. We will post ten rows. To do that, we will add the following lines in the code below.
```python
if i >= 10:
break
```
Here is the code that posts the rows to CluedIn:
```python
batch = []
batch_count = 0
start = time.time()
iteration_start = start
for i, row in enumerate(get_rows()):
if i >= 10:
break
batch.append(row)
if len(batch) >= BATCH_SIZE:
batch_count += 1
print(f'posting batch #{batch_count:_} ({len(batch):_} rows)')
response = post_batch(ctx, batch)
print_response(start, iteration_start, response)
iteration_start = time.time()
batch = []
if len(batch) > 0:
batch_count += 1
print(f'posting batch #{batch_count:_} ({len(batch):_} rows)')
response = post_batch(ctx, batch)
print_response(start, iteration_start, response)
iteration_start = time.time()
print(f'posted {(i + 1):_} rows')
```
After we run the code, we will see ten rows in CluedIn.
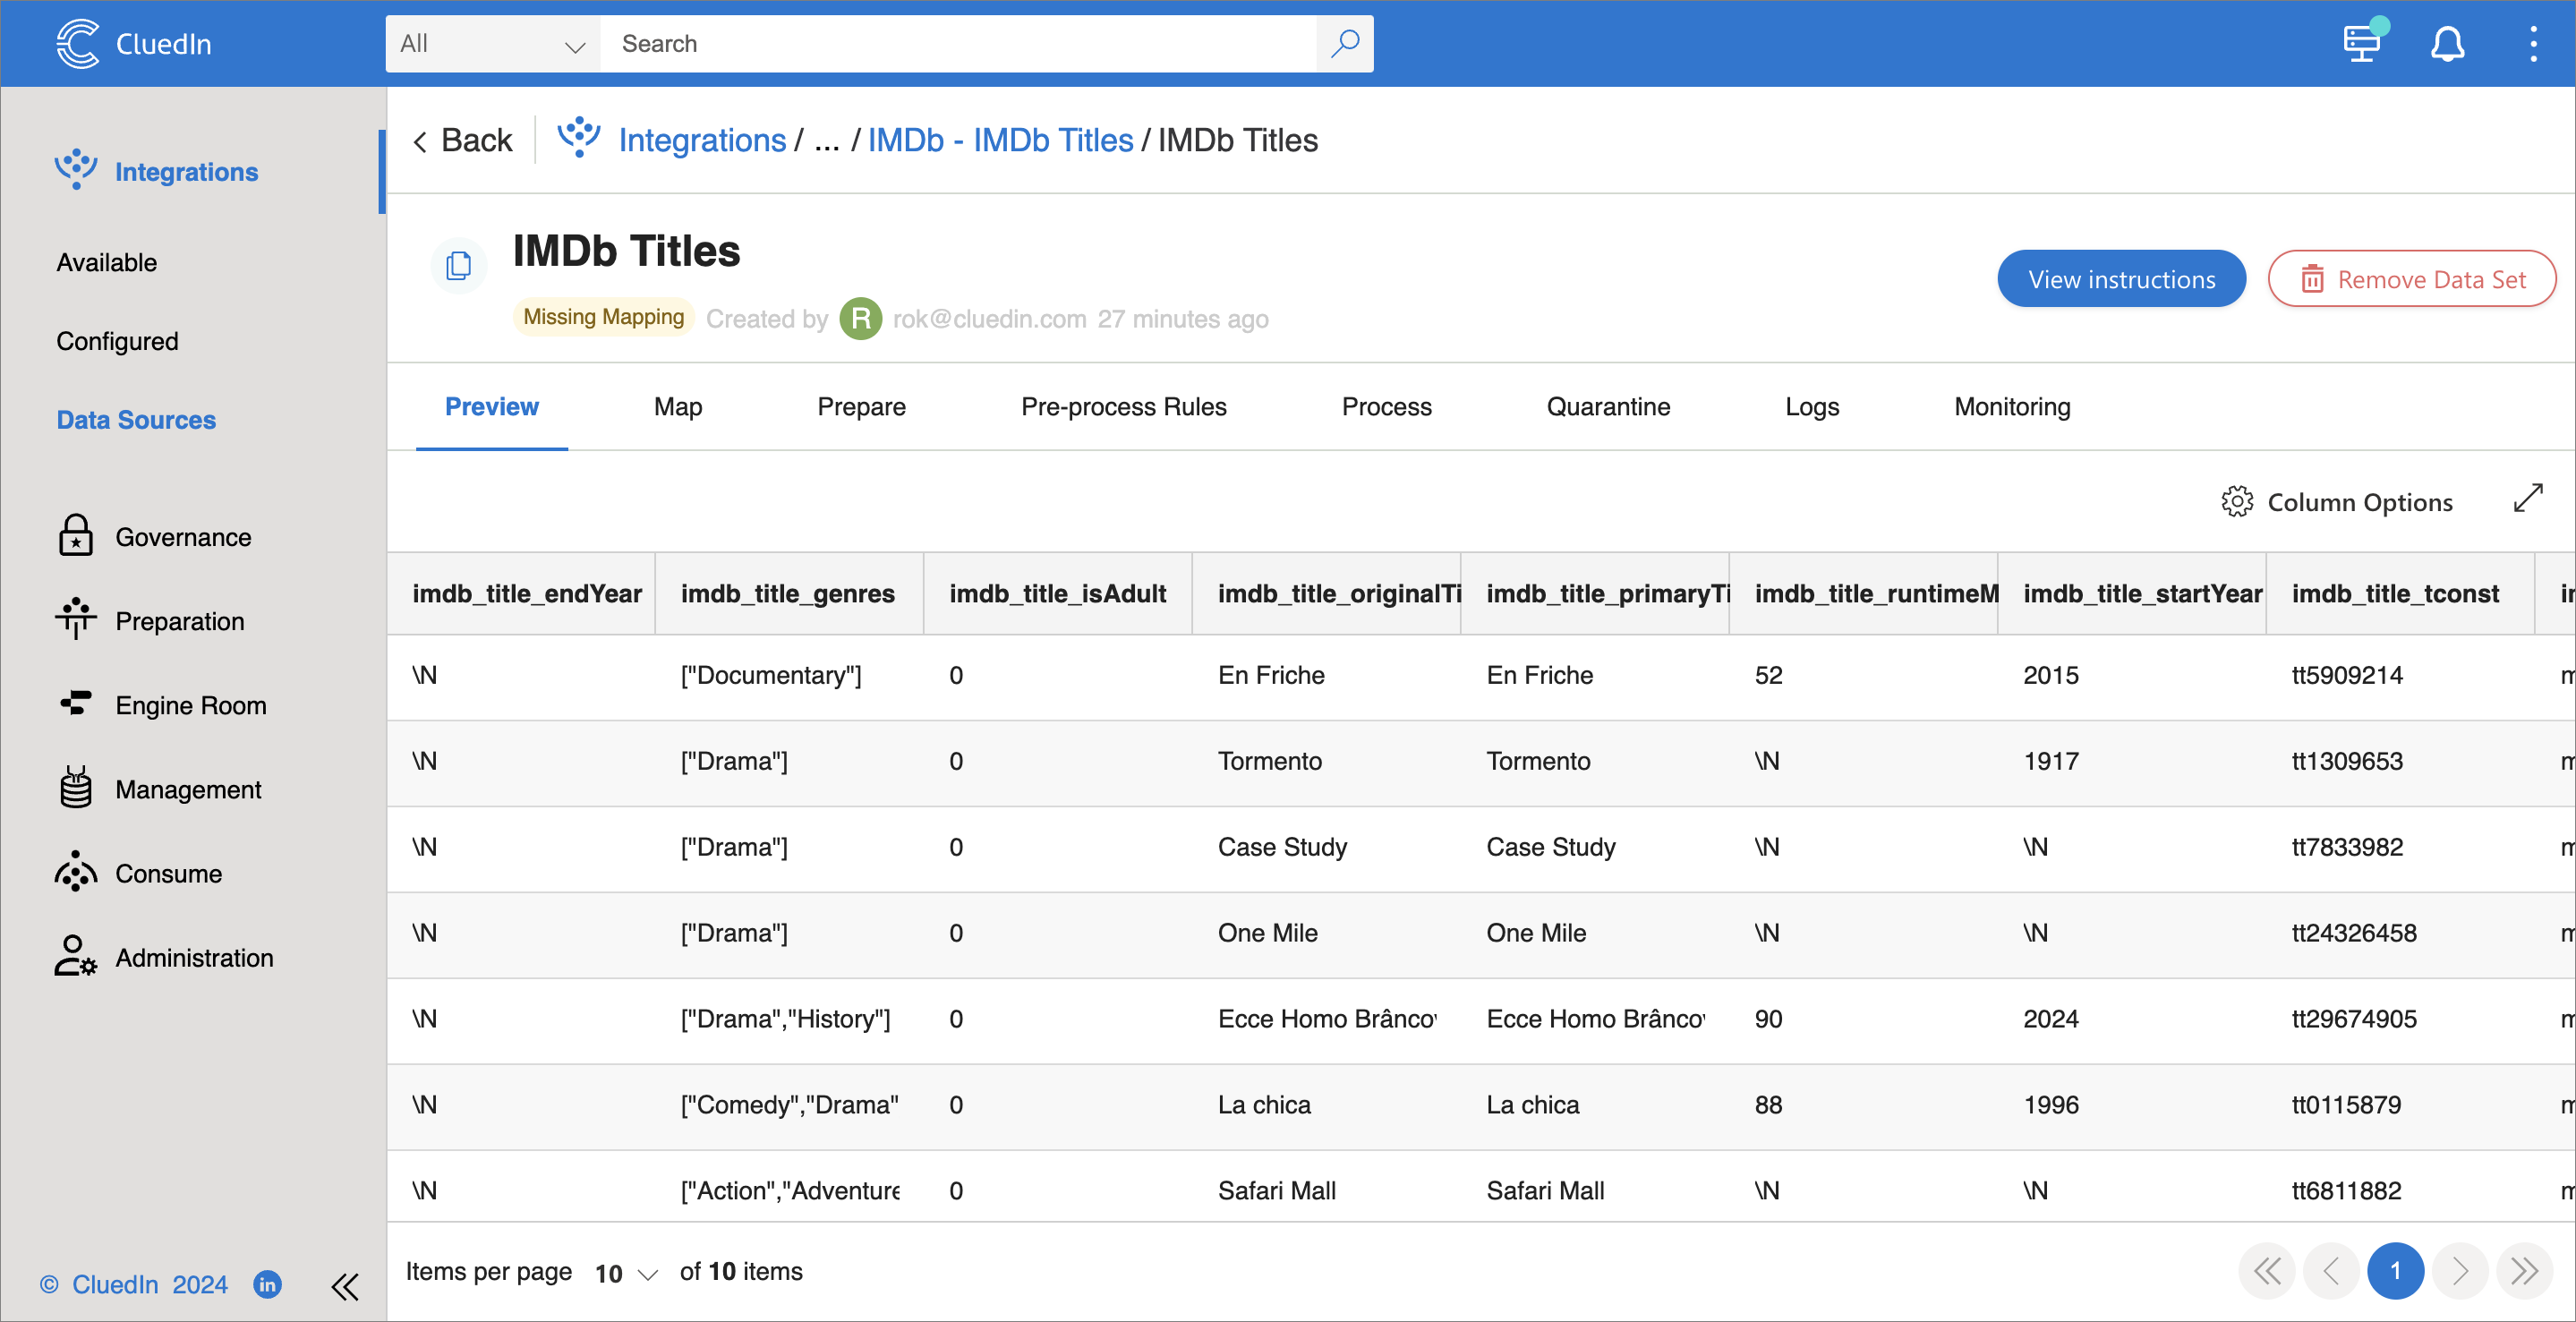 1. On the **Map** tab, create an automatic mapping:
1. Select **Add Mapping**.
2. Select **Auto Mapping**, and then select **Next**.
3. Ensure the business domain is selected or enter a new business domain name. Then, select **Create**.
4. Enter a new vocabulary name, such as **imdb.title**, and then select **Create**.
5. Select **Create Mapping**.
1. On the **Map** tab, create an automatic mapping:
1. Select **Add Mapping**.
2. Select **Auto Mapping**, and then select **Next**.
3. Ensure the business domain is selected or enter a new business domain name. Then, select **Create**.
4. Enter a new vocabulary name, such as **imdb.title**, and then select **Create**.
5. Select **Create Mapping**.
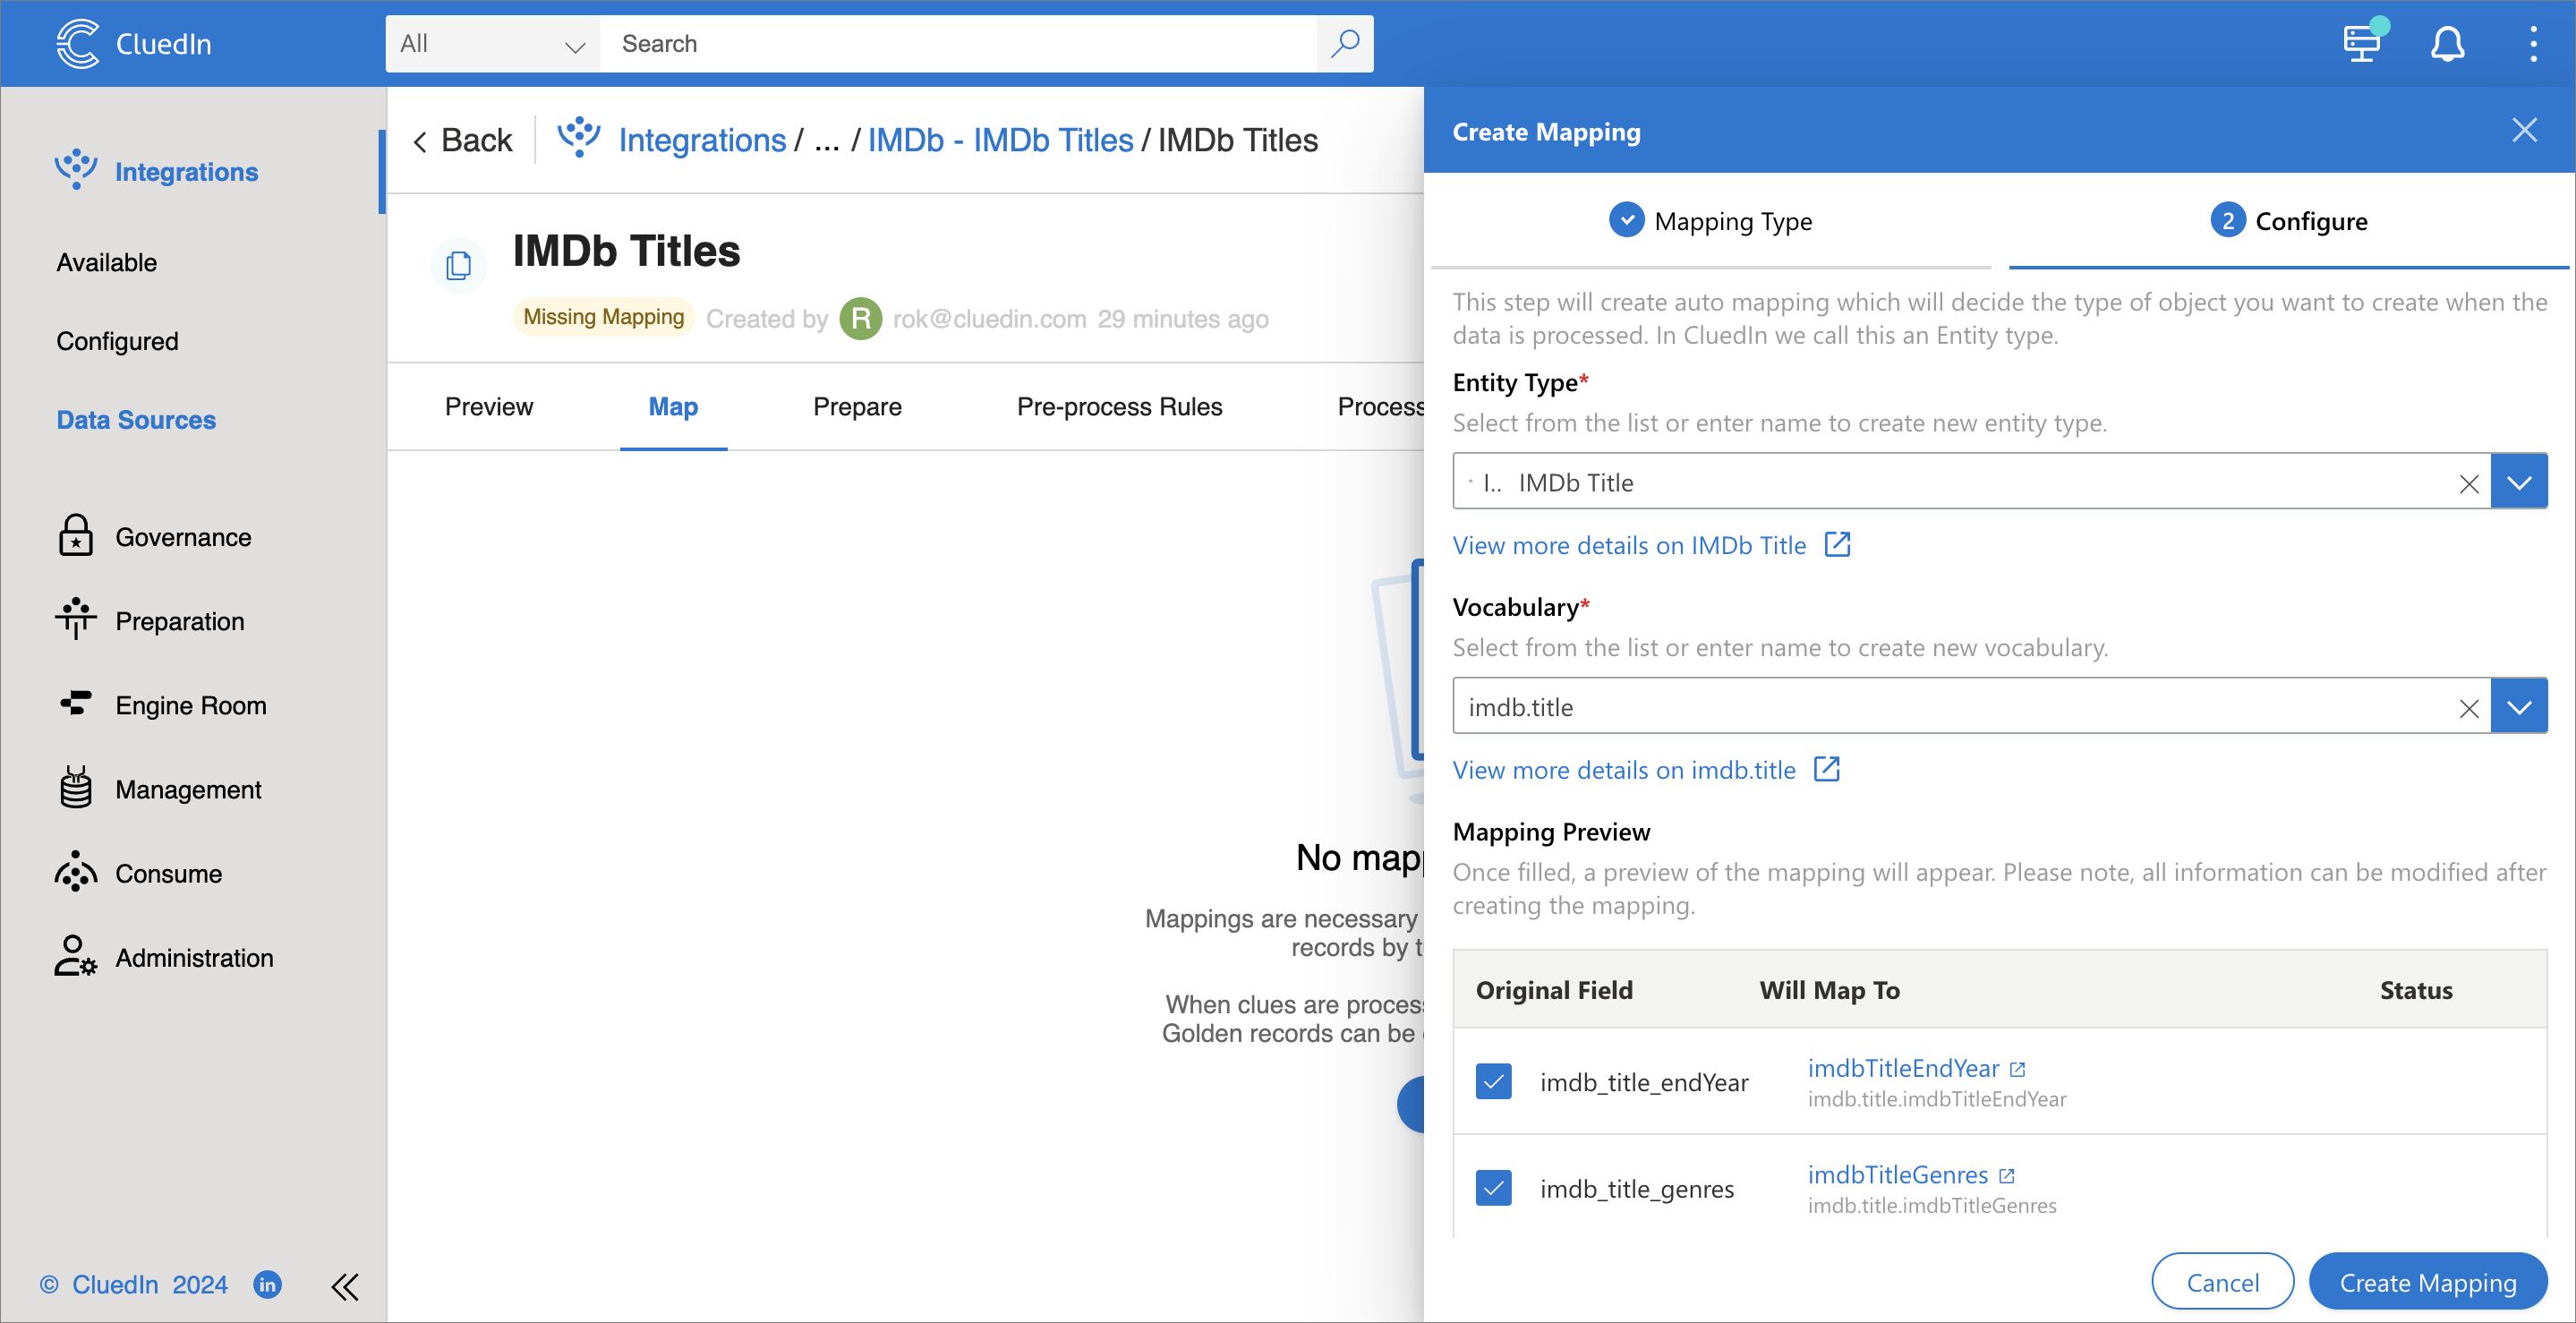 6. Select **Edit Mapping**.
7. On the **Map Entity** tab, select the property used as the entity name and the property used for the origin entity code:
6. Select **Edit Mapping**.
7. On the **Map Entity** tab, select the property used as the entity name and the property used for the origin entity code:
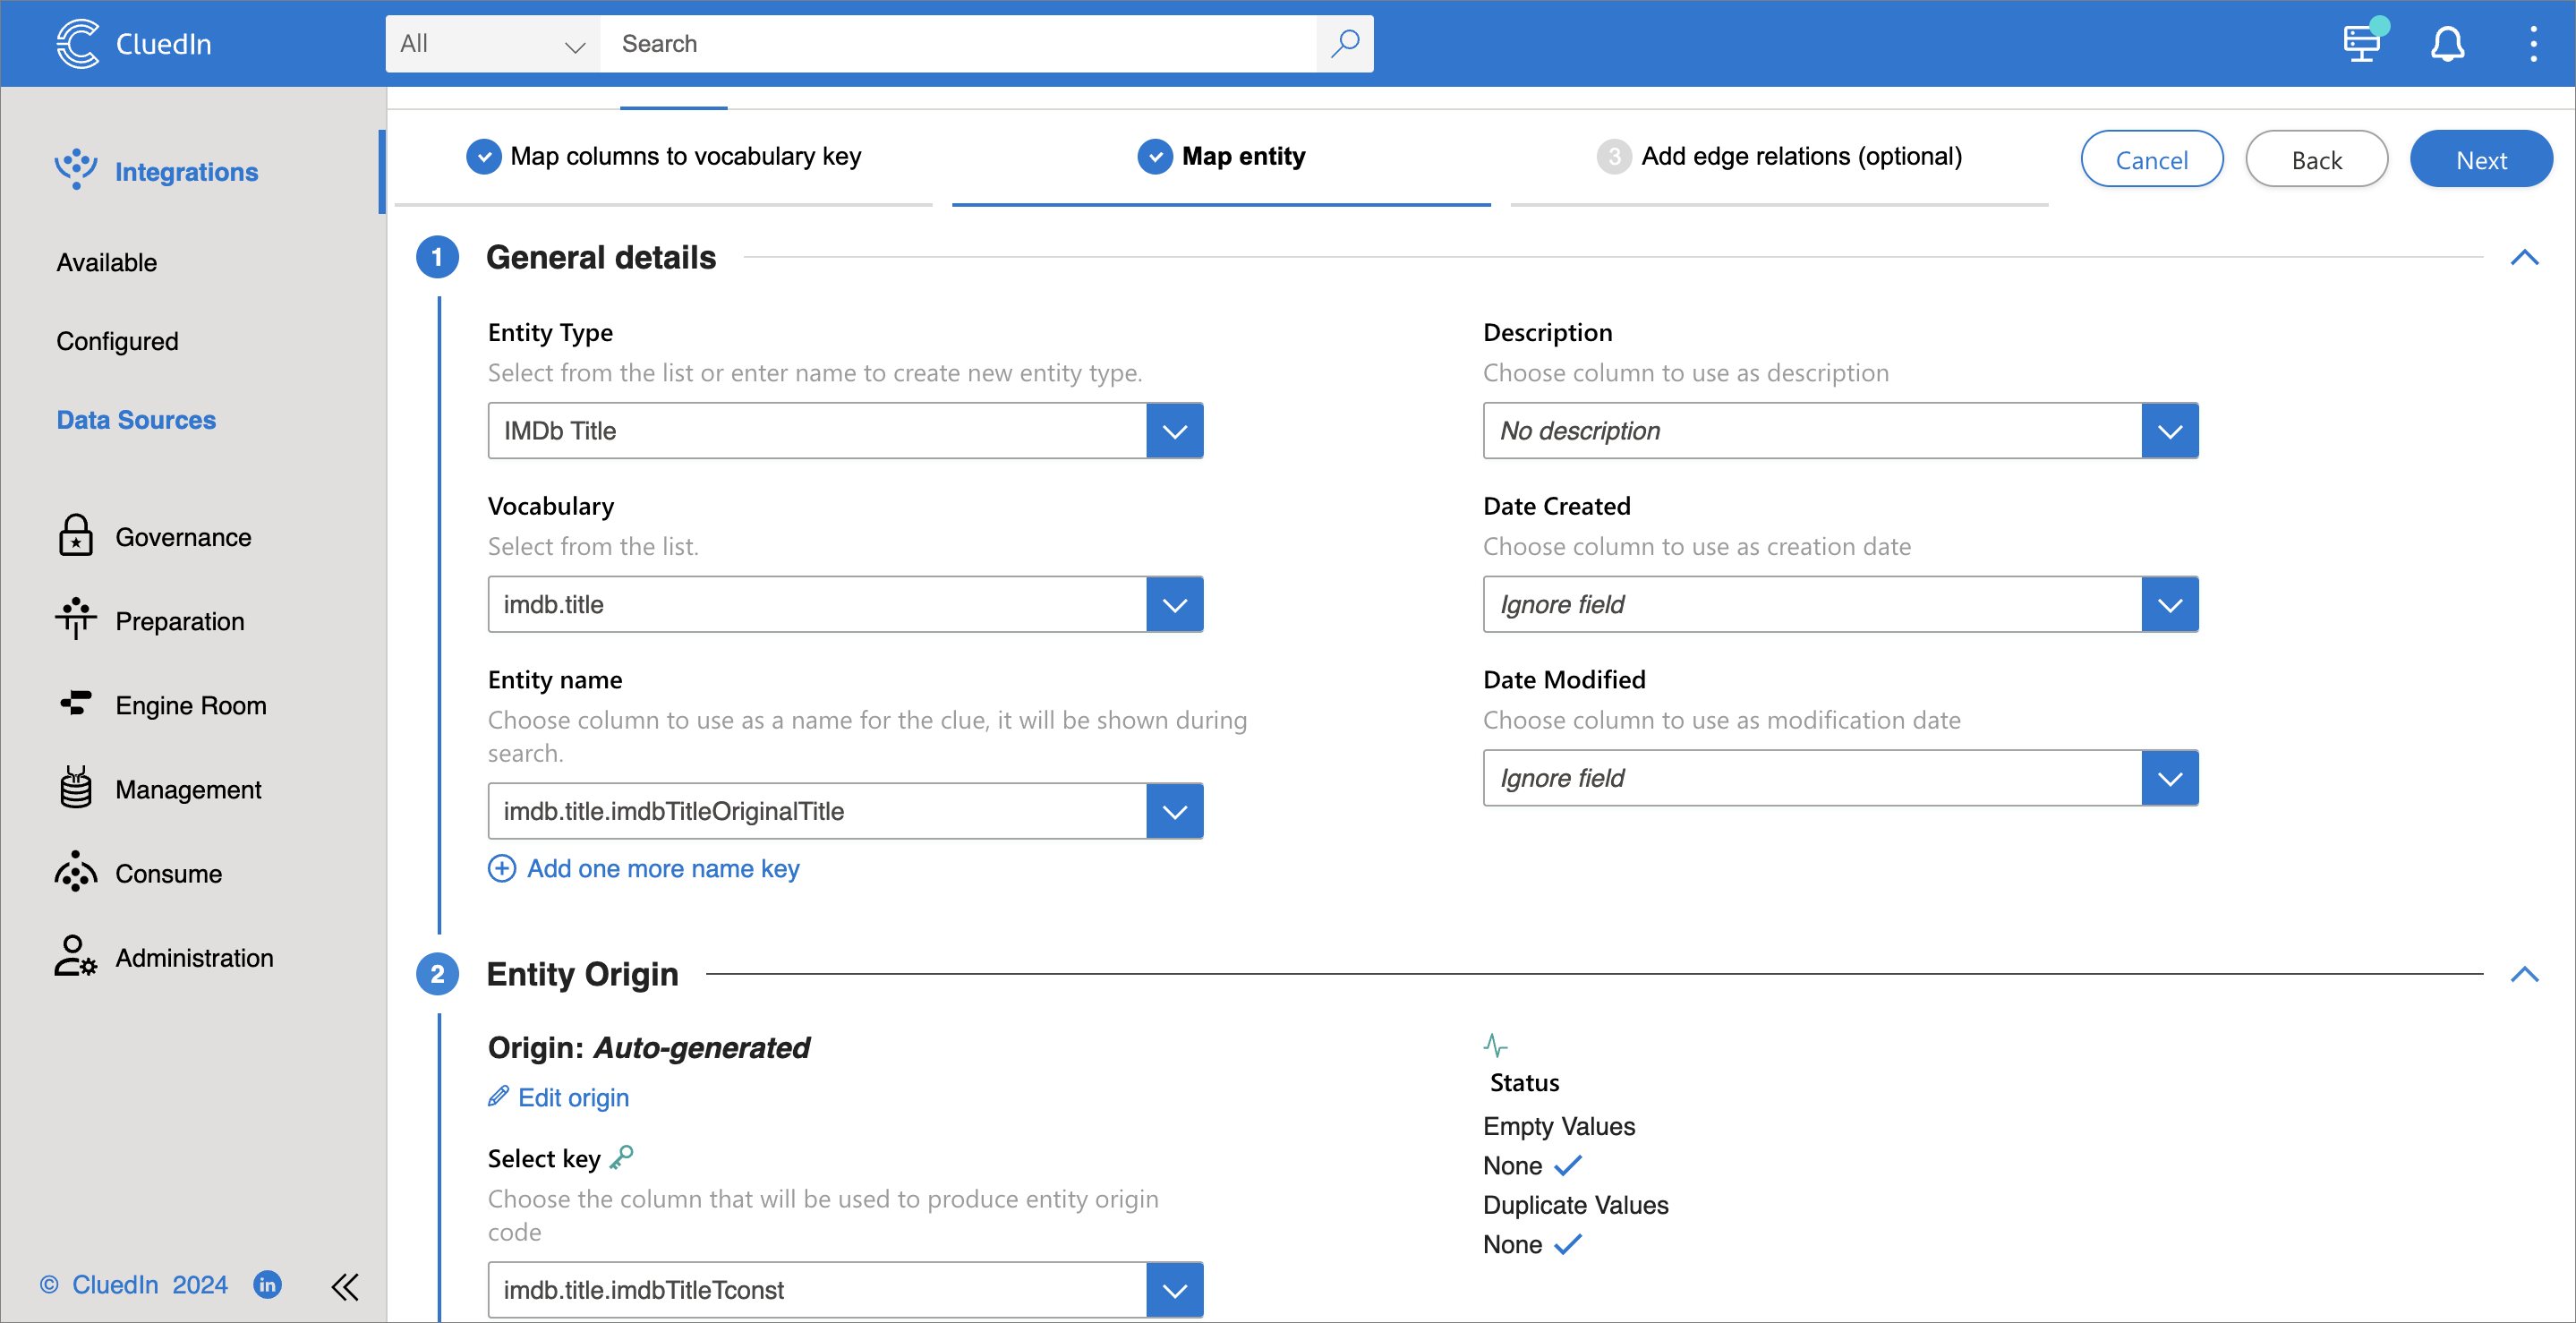 8. Select **Next**, and then select **Finish**.
9. On the **Process** tab, enable **Auto submission**, and then select **Switch to Bridge Mode**.
8. Select **Next**, and then select **Finish**.
9. On the **Process** tab, enable **Auto submission**, and then select **Switch to Bridge Mode**.
 10. After you complete the previous step, you can remove or comment on these lines in the notebook and rerun it:
```python
if i >= 10:
break
```
All table rows will be posted to CluedIn. The output in the notebook will look like this:
```
0:00:13.398879 0:00:13.398889: 200 {'success': True, 'warning': False, 'error': False}
posting batch #2 (100_000 rows)
0:00:22.021498 0:00:08.622231: 200 {'success': True, 'warning': False, 'error': False}
posting batch #3 (100_000 rows)
0:00:30.709844 0:00:08.687518: 200 {'success': True, 'warning': False, 'error': False}
posting batch #4 (100_000 rows)
0:00:40.026708 0:00:09.316675: 200 {'success': True, 'warning': False, 'error': False}
posting batch #5 (100_000 rows)
0:00:48.530380 0:00:08.503460: 200 {'success': True, 'warning': False, 'error': False}
posting batch #6 (100_000 rows)
0:00:57.116517 0:00:08.585930: 200 {'success': True, 'warning': False, 'error': False}
posting batch #7 (1_222 rows)
0:01:02.769714 0:00:05.652984: 200 {'success': True, 'warning': False, 'error': False}
posted 601_222 rows
```
1. Give CluedIn some time to process the data, and you should see 601_222 rows in CluedIn.
The same approach works not only with Databricks but also with any other data source. You must change the `get_rows` method to pull data from your source.
Up: [Python SDK](https://documentation.cluedin.net/develop/python-sdk.md)
10. After you complete the previous step, you can remove or comment on these lines in the notebook and rerun it:
```python
if i >= 10:
break
```
All table rows will be posted to CluedIn. The output in the notebook will look like this:
```
0:00:13.398879 0:00:13.398889: 200 {'success': True, 'warning': False, 'error': False}
posting batch #2 (100_000 rows)
0:00:22.021498 0:00:08.622231: 200 {'success': True, 'warning': False, 'error': False}
posting batch #3 (100_000 rows)
0:00:30.709844 0:00:08.687518: 200 {'success': True, 'warning': False, 'error': False}
posting batch #4 (100_000 rows)
0:00:40.026708 0:00:09.316675: 200 {'success': True, 'warning': False, 'error': False}
posting batch #5 (100_000 rows)
0:00:48.530380 0:00:08.503460: 200 {'success': True, 'warning': False, 'error': False}
posting batch #6 (100_000 rows)
0:00:57.116517 0:00:08.585930: 200 {'success': True, 'warning': False, 'error': False}
posting batch #7 (1_222 rows)
0:01:02.769714 0:00:05.652984: 200 {'success': True, 'warning': False, 'error': False}
posted 601_222 rows
```
1. Give CluedIn some time to process the data, and you should see 601_222 rows in CluedIn.
The same approach works not only with Databricks but also with any other data source. You must change the `get_rows` method to pull data from your source.
Up: [Python SDK](https://documentation.cluedin.net/develop/python-sdk.md)