---
title: Azure Relay
url: https://documentation.cluedin.net/solutions/master-data-services/azure-relay
content_type: how-to
section: Solutions & integrations > Master Data Services
---
# Azure Relay
> how-to: Steps to accomplish one task.
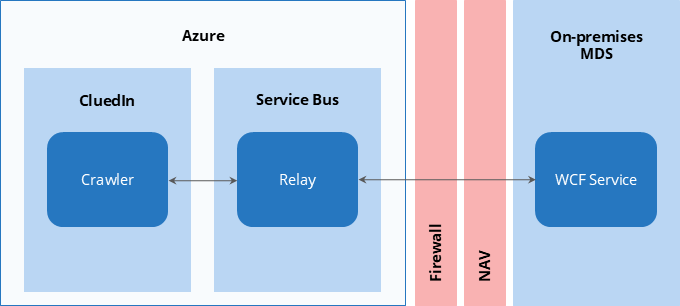
In this article, you will learn how to expose on-premises Master Data Services (MDS) to CluedIn in Azure by using Azure Relay. Use this approach if CluedIn does not have a routable network path to your on-premises MDS server - for the alternative, see [Direct connection](https://documentation.cluedin.net/solutions/master-data-services/direct-connection.md).
**Prerequisites:**
- An outbound internet connection from on-premises MDS server.
- Administrator access to on-premises MDS server for one-time reconfiguration.
- An Azure subscription. If you don't have one, [create a free account](https://azure.microsoft.com/free/) before you begin.
## Set up Azure Relay
1. Sign in to the [Azure portal](https://portal.azure.com/).
2. Select **Create a resource**.
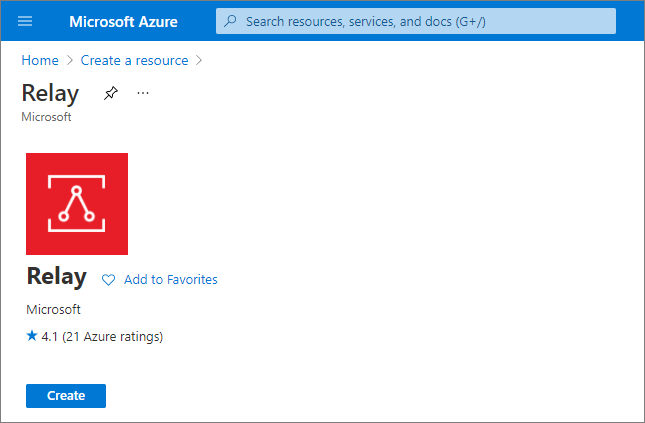
3. Search for **Relay**. Then, select **Create**.
4. In the **Subscription** field, select an Azure subscription in which to create the namespace.
5. In the **Resource group** field, choose an existing resource group in which to place the namespace, or create a new one.
6. In the **Name** field, enter a namespace name.
7. In the **Location** field, select the country or region in which your namespace should be hosted.
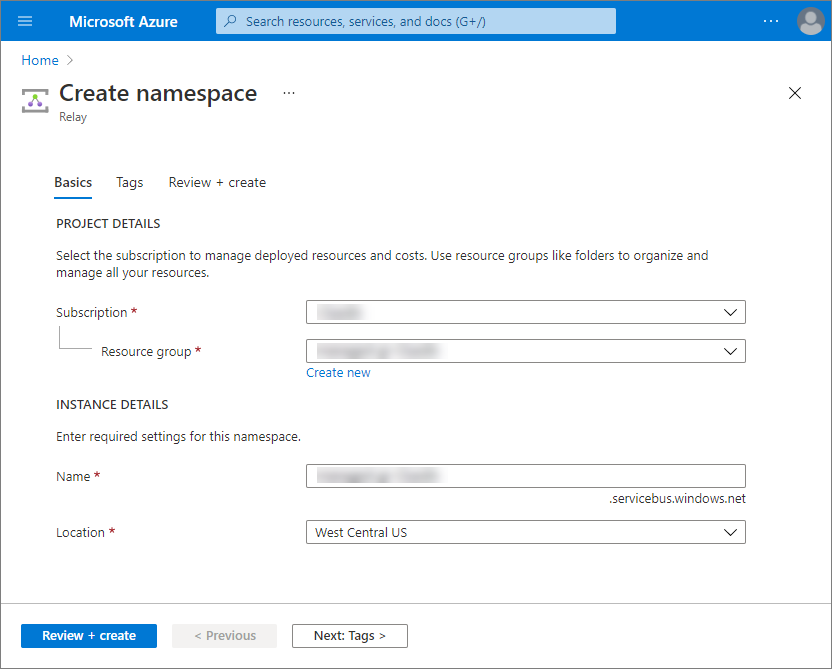
8. Select **Create**.
The Azure portal creates your namespace and enables it. After a few minutes, the system provisions resources for your account.
## Create WCF Relay
1. Select **WCF Relays**, and then select **+ WCF Relay**.
2. In the **Name** field, enter _mds_.
3. In **Relay Type**, select **Http**.
4. Clear the **Requires Client Authorization** checkbox. Authorization will be performed by the MDS service itself.
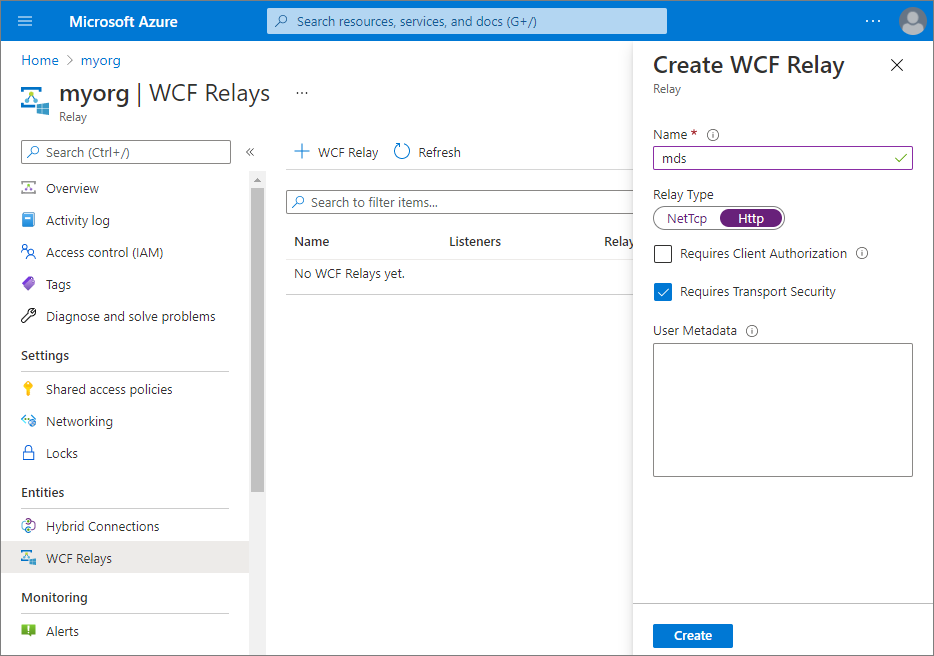
5. Select **Create**.
## Get management credentials
1. Select **All resources**, and then select the newly created namespace name.
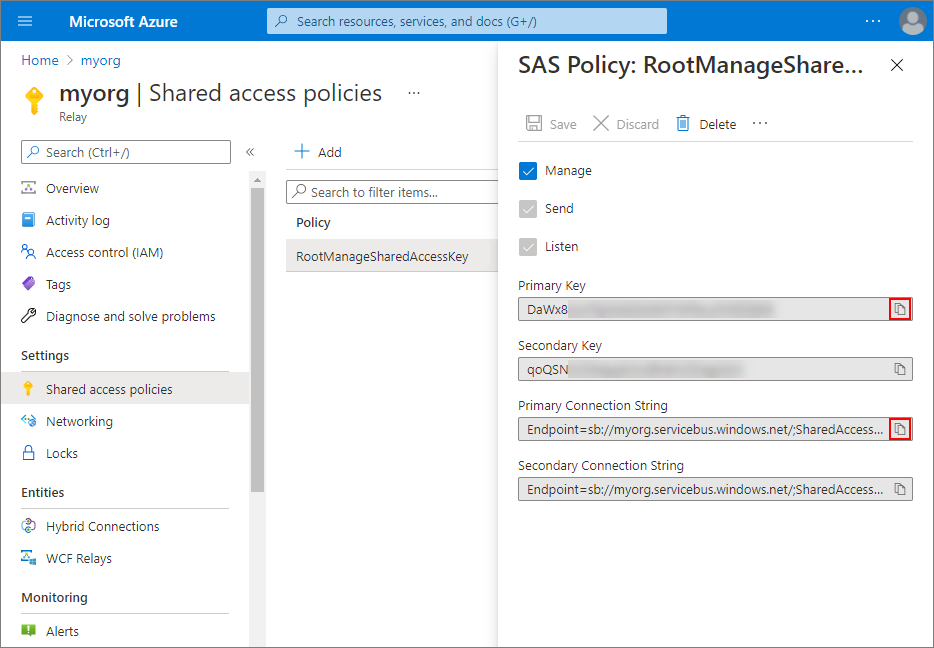
2. Select **Shared access policies**, and then select **RootManageSharedAccessKey**.
4. In the **SAS Policy: RootManageSharedAccessKey** pane, do the following:
- Select the **Copy** button next to **Primary Connection String**. This action copies the connection string to your clipboard for later use. Paste this value into Notepad or some other temporary location.
- Select the **Copy** button next to **Primary Key**. This action copies the primary key to your clipboard for later use. Paste this value into Notepad or some other temporary location.
## Configure on-premises MDS server
1. Using IIS, locate the physical path for the MDS website. The default location for SQL Server 2019 Master Data Services is `C:\Program Files\Microsoft SQL Server\150\Master Data Services\WebApplication`.
2. Download [WindowsAzure.ServiceBus](https://www.nuget.org/packages/WindowsAzure.ServiceBus/) from nuget and extract **Microsoft.ServiceBus.dll** to the bin folder in the previously located path.
3. Make the following modifications to the `web.config` file in the previously located path. Note that you may need to create the parent nodes if not already present.
>Add the following behaviour to `system.serviceModel/behaviors/endpointBehaviors`.
>```xml
>
>
>
> key="[YOUR_KEY]"/>
>
>
>
>```
>Add the `basicHttpRelayBinding` to `system.serviceModel/bindings`.
>```xml
>
>
> relayClientAuthenticationType="None">
>
>
>
>
>```
>Add the following to the `system.serviceModel/services/service` node whose `name` attribute matches your MDS service name. For a default install the name attribute will be `MDS1`.
>```xml
> binding="basicHttpRelayBinding"
> contract="Microsoft.MasterDataServices.Services.ServiceContracts.IService"
> behaviorConfiguration="AzureRelay"/>
>```
>Add the following to `system.serviceModel/extensions/behaviorExtensions`
>```xml
> type="Microsoft.ServiceBus.Configuration.TransportClientEndpointBehaviorElement, Microsoft.ServiceBus"/>
>```
>Add the following to `system.serviceModel/extensions/bindingExtensions`
>```xml
> type="Microsoft.ServiceBus.Configuration.BasicHttpRelayBindingCollectionElement, Microsoft.ServiceBus"/>
>```
## Verify configuration
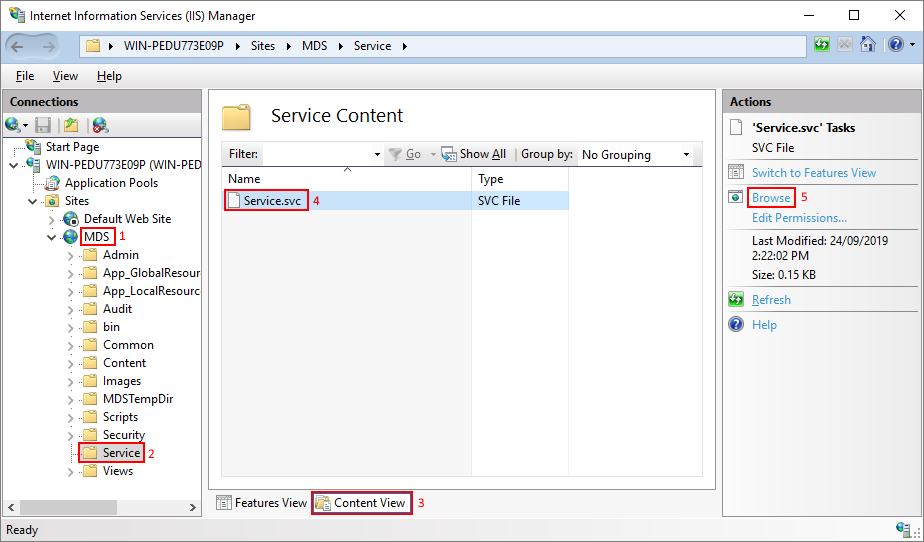
1. Verify the configuration by loading the service endpoint. For this, perform the sequence of steps as displayed on the following screenshot.
The screenshot below shows MDS installed as its own site. If your MDS is installed as an application under another site instead (for example, Default Web Site), the path in the tree will start from that site - the steps are otherwise the same.
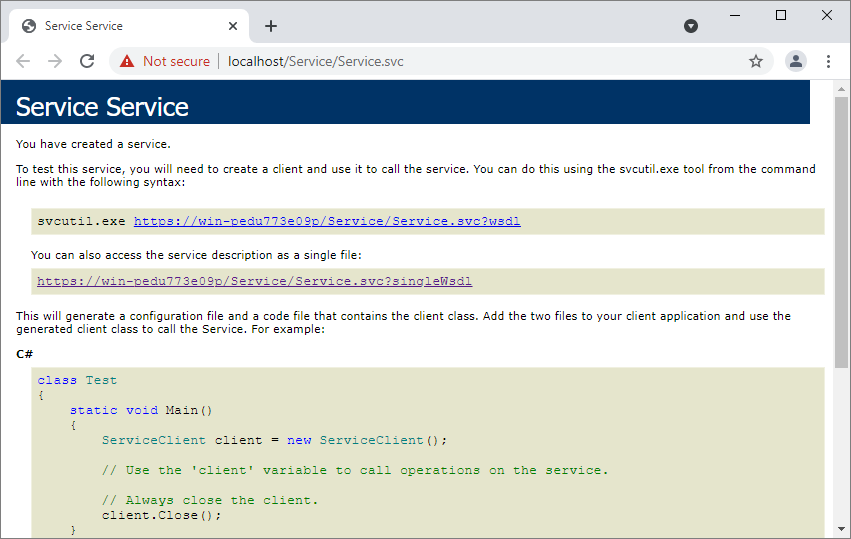
As a result, you will see the screenshot similar to the following.
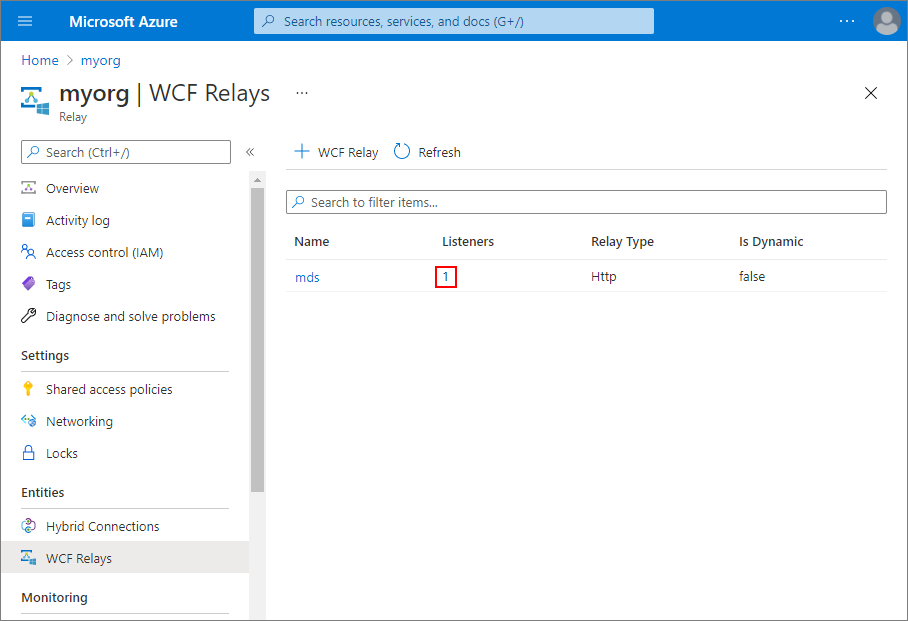
2. Verify that the on-premises MDS service has registered successfully with the Relay.
## In CluedIn
When adding the MDS crawler in CluedIn, leave **Configuring MDS for CluedIn** unchecked, and use the relay address as the **MDS Url**, for example `https://yournamespace.servicebus.windows.net/mds`. The **Username**/**Password** fields are still your usual MDS credentials - they are authenticated by MDS itself, the relay does not require its own credentials.
Up: [Master Data Services](https://documentation.cluedin.net/solutions/master-data-services.md)