Ingest data
On this page
Ingesting data to CluedIn involves three basic steps: importing, mapping, and processing data. As a result, your records will become searchable and ready to be cleaned, deduplicated, and streamed.
In this guide, you will learn how to import a file into CluedIn, create a mapping, process the data, and search for golden records.
File for practice: training-data.csv
Import file
The easiest way to add data to CluedIn is to import a file. In the following procedure, we will import a CSV file containing 500 records.
A CSV (comma-separated values) file format allows data to be saved in a tabular format, making it compatible with most spreadsheet programs such as Excel. So, if you are using Excel for your data analysis or management tasks, importing a CSV file is a convenient option.
To import a file
-
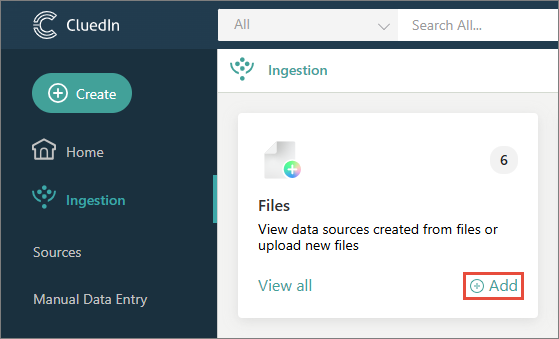
On the navigation pane, go to Ingestion, and then in the Files section, select Add.
-
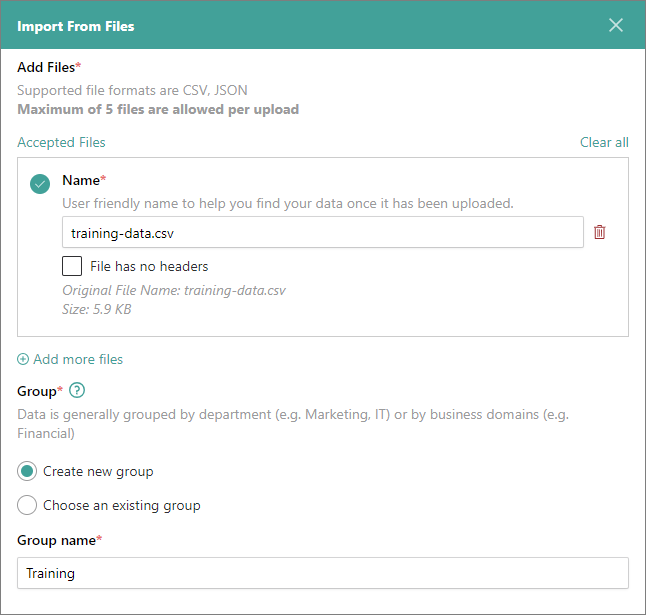
In the Add Files section, add the file. You may drag the file or select the file from the computer.
-
In the Group section, leave the default Create new group option selected, and then enter the name of the group.
A group indicates a department or domain within your company that is associated with the data. Think of a group as a folder where you can store files related to similar types of data.
-
Select Upload.
View imported data
After you uploaded the file, you can view the data from the file as a table with columns and rows.
To view imported data
-
On the navigation pane, go to Ingestion > Sources.
-
Find and expand the group that you created in the previous procedure.
-
Expand the element contained in the group. This element is called a data source; think of a data source as a database.
-
Select the element contained in the data source. This element is called a data set; think of a data set as a table in the database.
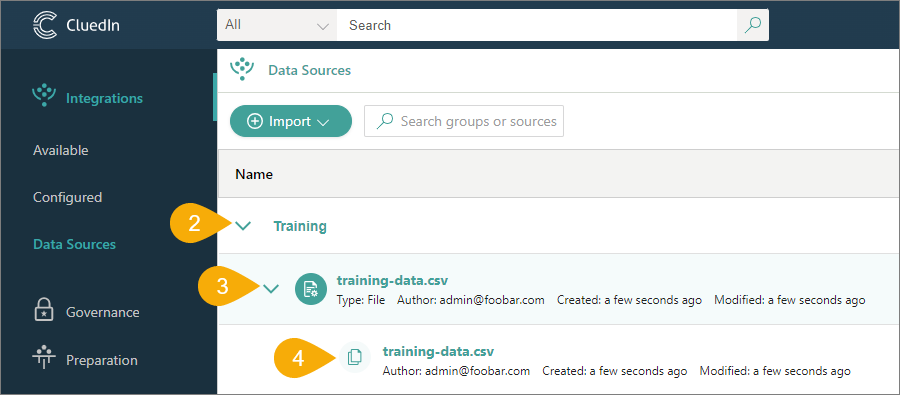
The data set details page opens, where you can view imported data.
The data is parsed and stored in CluedIn, but it is not yet been processed.
What does it mean if the data is not processed?
Unprocessed data is not available for any data management tasks. What is more, if you try to search for data, the results won’t return any records. This is because the data is not yet visible for CluedIn. To make the data available for use within CluedIn, you need to create a mapping and process the data.
Create mapping
Mapping is the process of creating a semantic layer for your data so that CluedIn understands it. This process involves the mapping of original fields to standard fields as well as assigning appropriate data types.
To create a mapping
-
On the data set details page, select the Missing Mapping label.
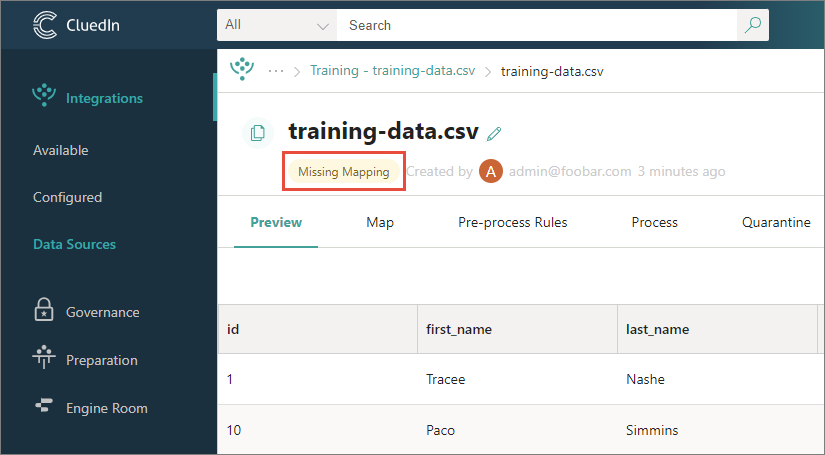
Alternatively, go to the Map tab.
-
In the middle of the page, select Map Data.
-
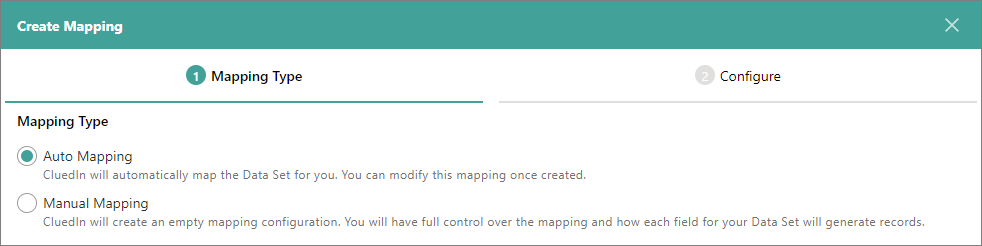
In Mapping Type, leave the default Auto Mapping option selected.
-
Select Next.
-
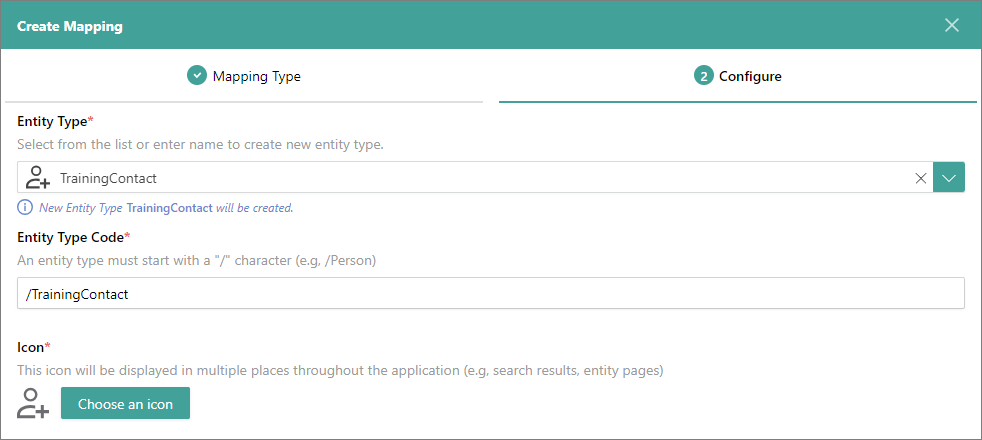
In Business Domain, enter the name of a new business domain and select Create. A business domain is a specific business object within the organization. A well-named business domain is global and should not be changed (for example, Person, Organization, Car) across sources.
The Business Domain Identifier is created automatically; it is a string that represents the business domain in code (for example, in clues).
-
In Icon, select the visual representation of the business domain.
-
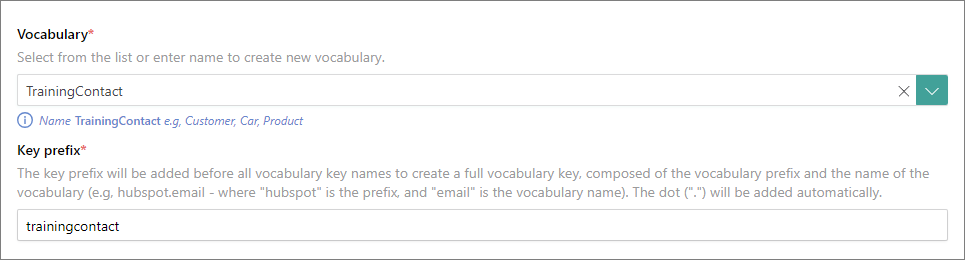
In Vocabulary, enter the name of a new vocabulary and select Create. A vocabulary is a structured framework for creating a unified view of your data. The purpose of vocabulary is to translate your original fields to the language CluedIn understands.
The Key prefix is created automatically; it is added before the original field names to establish consistent and well-organized standard fields.
-
In Primary Identifier, review the field that was selected automatically for generating a unique identifier for each record.

-
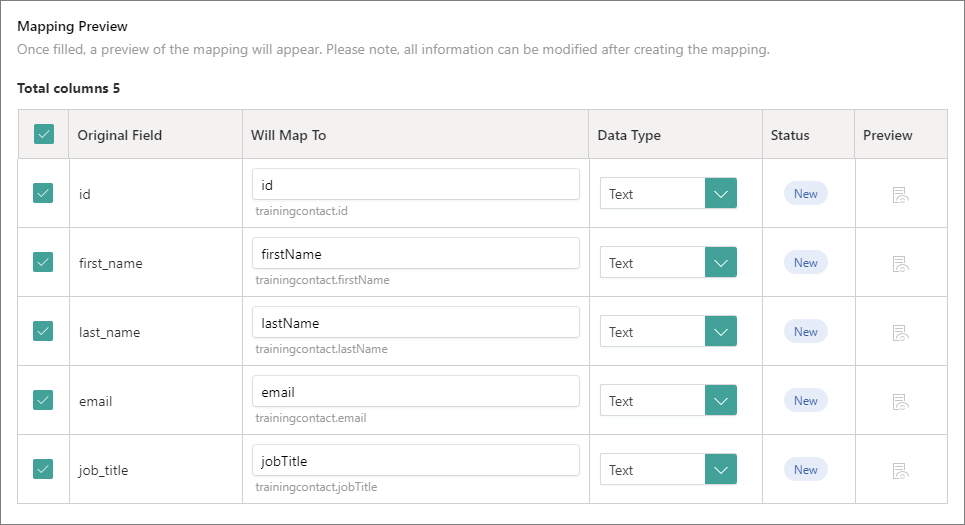
In Preview, review the mapping of original fields to standard fields. You can edit the names of standard fields that come after the key prefix, and you can change the data type if needed.
-
Select Create Mapping.
As a result of the mapping process, you can view how the fields from the file are linked to the standard fields in CluedIn.

Process data
Processing turns your data into golden records that can be cleaned, deduplicated, and streamed.
To process data
-
On the data set details page, select the Not Processed label.
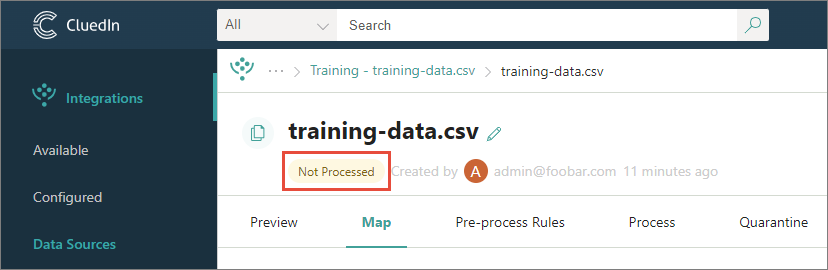
Alternatively, go to the Process tab.
-
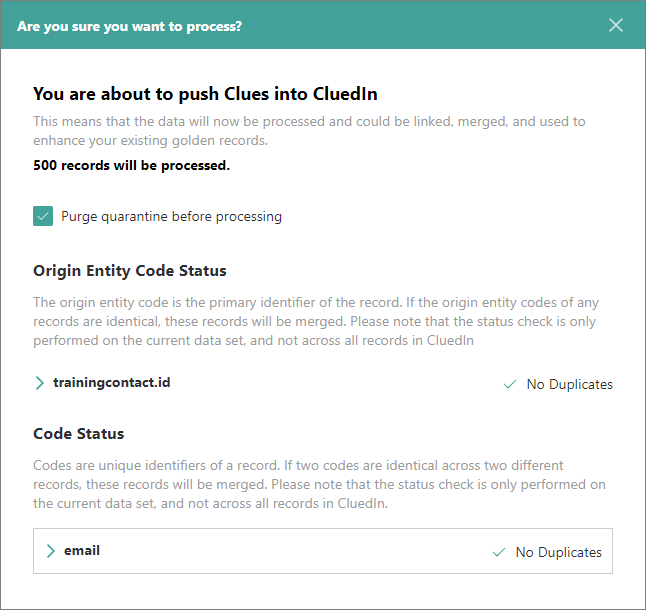
Select Process.
-
Review information about records that will be processed. Pay attention to the Primary Identifier Status section. If there are duplicates, they will be merged during processing.
-
Select Confirm.
After the records are processed, you can view the resulting golden records on the Data tab.
Search for data
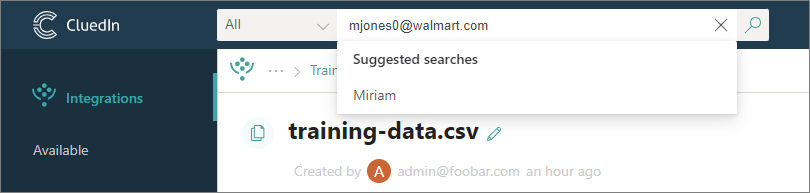
After the data has been processed, you can search for any property and view all golden records where it is used. In the following procedure, we will use the email address as an input to search for data.
To search for data
-
On the Preview tab of the data set, copy any email address.
-
Paste the email address in the search field, and then select the search icon.
-
On the search results page, select the name of the record.
-
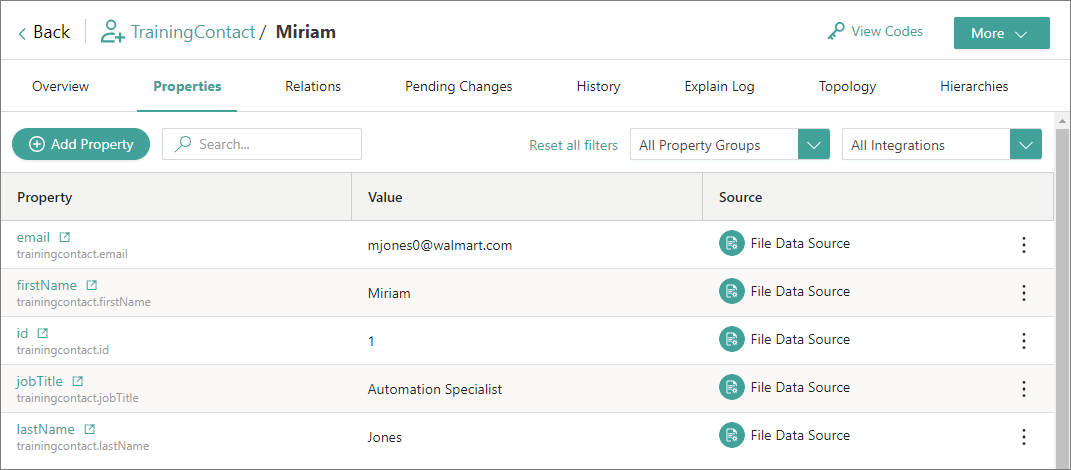
On the golden record details page, go to the Properties tab. Here, you can view all the properties of the golden record.
Results & next steps
In this guide, you learned how to import data into CluedIn using a file, create auto-mapping, process the data, and perform data searches. After completing all steps outlined here with our practice file, you now have 500 golden records in the system. With these golden records, you can perform various data management tasks.
In the following guides, you’ll find detailed instructions about common data management tasks. If you find errors in your golden records, such as misspelled job titles or emails, you can fix them using the clean functionality. To learn how to do it, go to the next guide, Clean data.