Create hierarchies
On this page
- Enable Manual Hierarchies
- Build hierarchy
- Manage hierarchy
- Update stream configuration
- Results
- Next steps
Hierarchy Builder allows you to visualize relations between golden records. For example, you can create a corporate structure hierarchy within a company, or a hierarchy representing relations between companies (parent, subsidiary, branch).
In this article, you will learn how to create hierarchies in CluedIn using the Hierarchy Builder tool.
Prerequisites
Before proceeding with hierarchies, ensure that you have completed the following tasks:
-
Ingested some data into CluedIn. For more information, see Ingest data.
-
Created a stream that keeps the data synchronized between CluedIn and the Microsoft SQL Server database. For more information, see Stream data.
Enable Manual Hierarchies
To be able to create hierarchies in CluedIn, enable the Manual Hierarchies feature.
To enable the Manual Hierarchies feature
-
On the navigation pane, go to Administration > Feature Flags.
-
Find the Manual Hierarchies feature.

-
Turn on the toggle next to the feature status. Then, confirm that you want to enable the feature.
The status of the Manual Hierarchies feature is changed to Enabled.
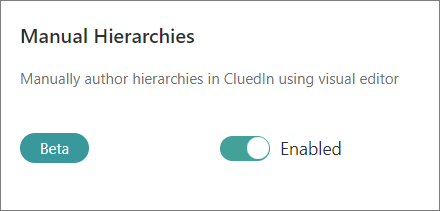
Now, you can build hierarchies.
After enabling the Manual Hierarchies feature, the Hierarchy tab is added to the golden record page. If you disable the feature, then the tab will no longer be displayed. However, if you enable the feature again, the tab and all previously created hierarchies will be displayed again.
Build hierarchy
After you enabled the Manual Hierarchies feature, you can build hierarchies.
To build a hierarchy
-
On the navigation pane, go to Management > Hierarchy Builder.
-
Select Create Hierarchy.
-
On the Create Hierarchy pane, specify the details of the hierarchy:
-
Enter the name of the hierarchy.
-
If you want to limit the records for building the hierarchy, find and select the entity type.
All records belonging to the selected entity type will be available to build the hierarchy. If you do not select the entity type, then all records existing in the system will be available to build the hierarchy.
-
In the lower-right corner, select Create.
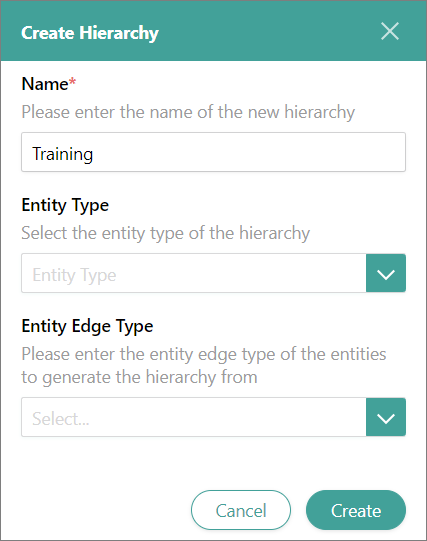
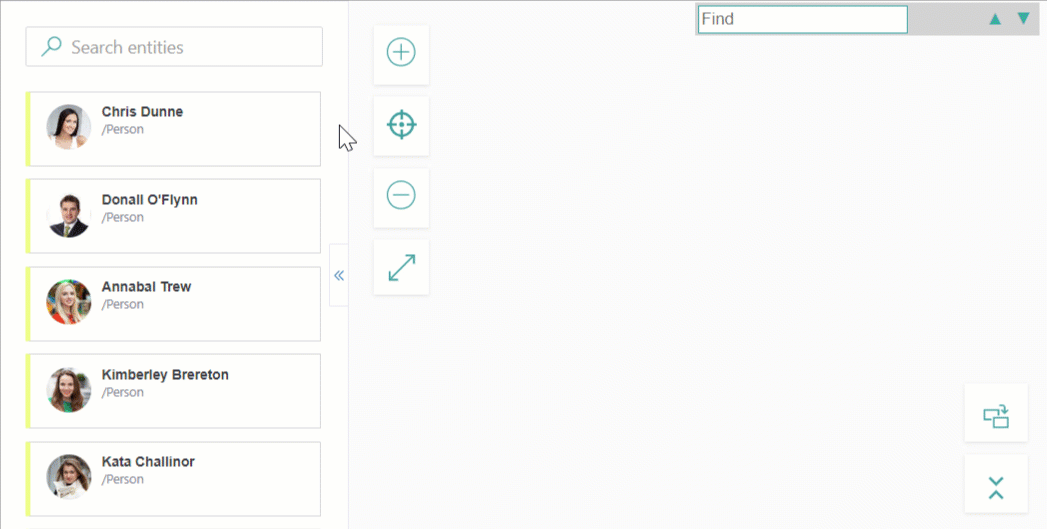
The hierarchy builder page opens.
-
-
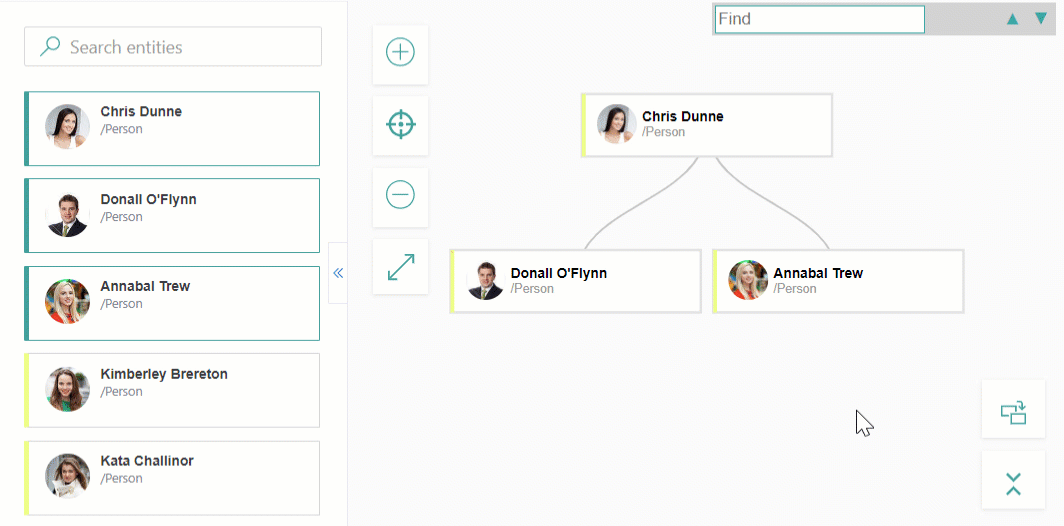
Build the visual hierarchy by dragging the records from the left pane to the canvas.
-
In the upper-right corner of the page, select Save.
The status of the hierarchy becomes Draft. Although the hierarchy is in CluedIn, the relations between the elements within the hierarchy have not been established yet. To establish the relations between the elements of the hierarchy, publish the hierarchy.
-
In the upper-right corner of the page, select Publish. Then, confirm that you want to publish the hierarchy.
You created the hierarchy.
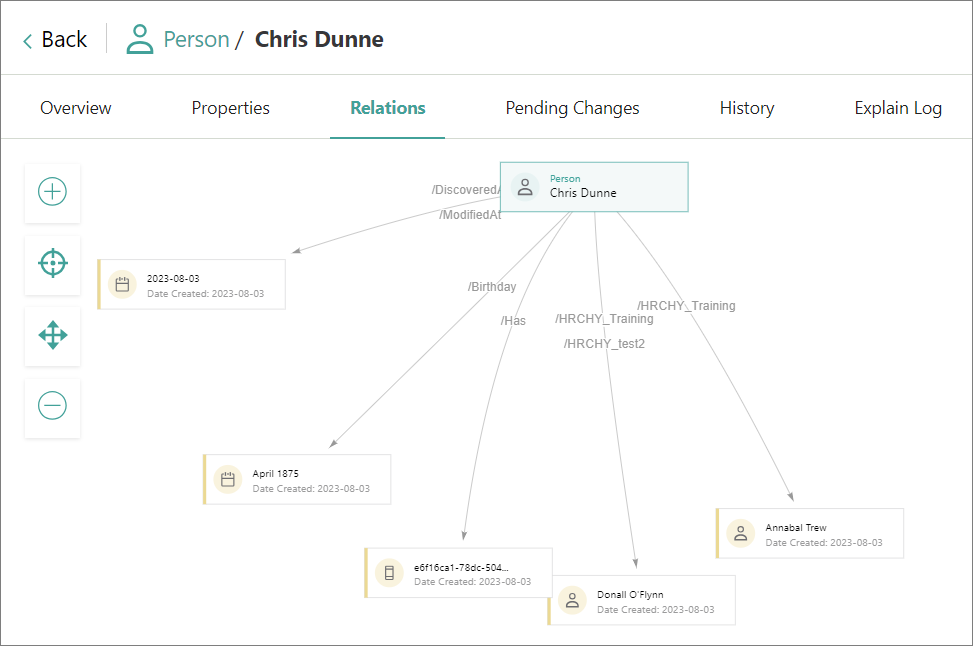
You can view the hierarchy on the Hierarchy Builder page or on the Hierarchies tab of the golden record page. In addition, you can view the relations between the records on the Relation tab of the golden record page.
To make sure that the data in the Microsoft SQL Server database reflects the relations that you set up, update the stream configuration.
Manage hierarchy
After you created the hierarchy, you can do the following actions with the elements of the hierarchy:
-
Replace elements.
-
Collapse and expand elements. To collapse all elements below a certain element, point to the needed element and select Collapse. To expand the collapsed elements, point to the parent element, and select Expand.
You can also collapse all elements under a parent element. To do that, in the lower-right corner, select Collapse all (
 ).
). -
View the data associated with the elements. To do that, select the element.
Update stream configuration
After you published the hierarchy, update the stream to ensure that the data in the database reflects the relations between the records that you set up.
To update the stream
-
On the navigation pane, go to Consume > Streams.
-
Open the needed stream.
-
Go to the Export Target Configuration page. Then, select Edit Target Configuration and confirm that you want to edit the stream.
-
On the Choose a connector tab, select Next.
-
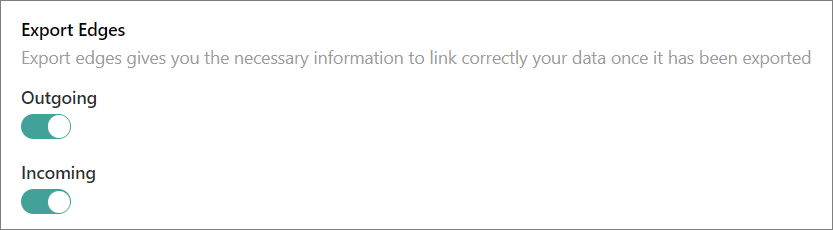
On the Properties to export tab, find the Export Edges section. Then, turn on the Outgoing and Incoming toggles.
-
In the upper-right corner, select Save. Then, confirm that you want to save your changes.
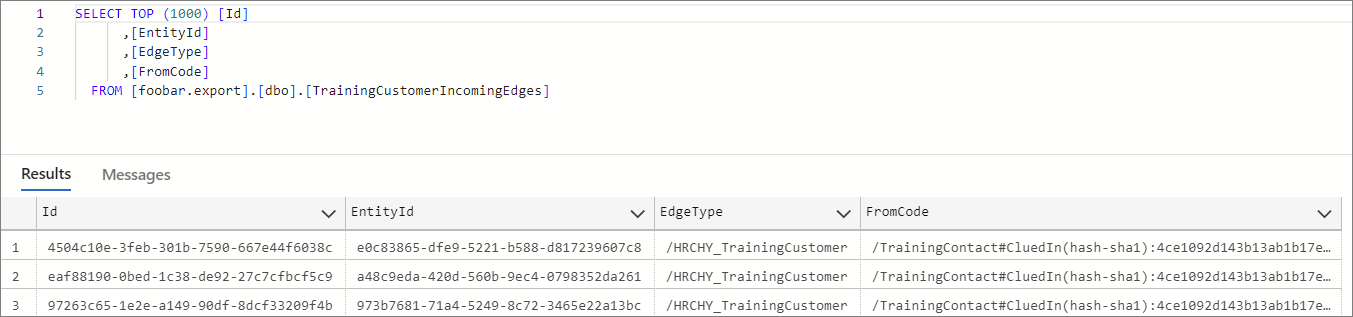
The stream is updated with the relations between records. As a result, new tables are created in the database: dbo.xyzOutgoingEdges and dbo.xyzIncomingEdges, where xyz is the target name.
If you update the hierarchy, the relations between records will be automatically updated in the database.
Results
You have created a hierarchy in CluedIn.