

Create, configure, and run an AI agent
how-to Steps to accomplish one task
On this page
- Prerequisites
- Inputs
- Create an AI agent
- Organize AI agents into folders
- Configure an AI agent job
- Verify the result
- What this changes
- If something goes wrong
Create an AI agent when you want CluedIn to analyze a set of golden records and suggest changes for a specific task, such as fixing data quality issues, finding duplicates, or creating rules. AI Agents is a CluedIn product feature: you create the agent, give it one or more jobs, test each job on a sample, and then run it. A run produces suggestions; for most skills, golden records change only when the suggestions are approved.
Prerequisites
- The AI Agents feature is enabled, and a platform, a deployment and a model endpoint are configured. See Prerequisites to using AI agents.
- Golden records for the job to work on, and the vocabulary keys that hold the values you want the agent to analyze.
- If you want to check that a built-in agent already covers your task, see Built-in AI agents.
Inputs
| Where | Field | Required | What it accepts | Example |
|---|---|---|---|---|
| AI agent | Name | Required | A user-friendly name. | Financial Data Steward |
| AI agent | Description | Optional | Text displayed in the CluedIn UI that explains the agent’s purpose. | AI agent that ensures financial data quality |
| AI agent | Instructions | Optional | Instructions that apply to all jobs of the agent, formatted as Markdown. | Fix incorrect date formats |
| AI agent | Folder | Optional | An existing folder, or a new folder name. | Data Quality Agents |
| Job | Name | Required | A user-friendly name. | Fix client data |
| Job | Description | Optional | What the job does and why. | A job that fixes data quality issues in client data |
| Job | Endpoint | Not marked as required | A configured model endpoint. | gpt-4.1 |
| Data source | Name | Required | A user-friendly name. You refer to the data source by this name in the prompt. | Clients |
| Data source | Type | Required | A data source type. Query sends rows of golden record data to the model. | Query |
| Data source | Sampling, Sampling Size | Optional | A number of golden records to limit the data source to. | 100 |
| Data source | Modified Since Last Run | Optional | On: only golden records modified since the last successful run. Off: all golden records. | On |
| Data source | Conditions | Required | A filter that selects the golden records. | Business domain equals TrainingContact |
| Data source | Vocabulary keys | Not marked as required | One or more vocabulary keys that the job analyzes. | trainingcontact.firstName |
| Prompt | Skill | Not stated | One skill from the Skills section, such as Fix Data Quality Issues, Find Duplicates or Create Data Validation Rules. | Fix Data Quality Issues |
| Prompt | Instructions | Not stated | The task in natural language, with the data source dragged in. | Fix data quality issues in Clients: capitalize the first letter of trainingcontact.firstName |
| Schedule | Recurring Schedule | Optional | Once every N minutes, hours, or days. | Every 1 day |
Create an AI agent
An AI agent is a component that uses artificial intelligence to analyze data, provide suggestions, and perform actions on your golden records. It consists of jobs—operational units within an AI agent that define what the agent should do.
To create an AI agent
-
On the navigation pane, go to AI Agents (or, Management > AI Agents).
-
Select Create Agent.
-
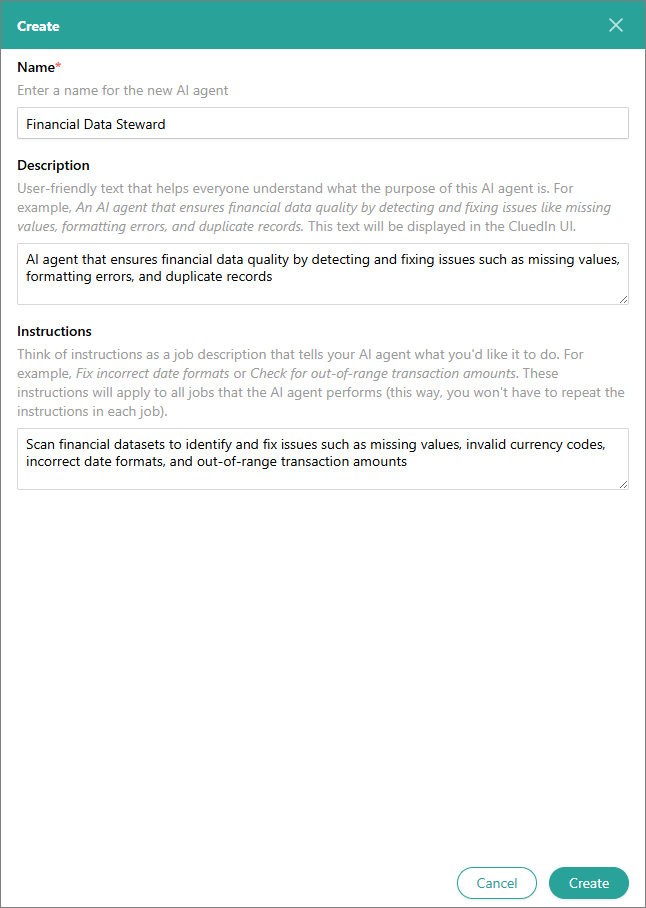
Enter a user-friendly Name of the AI agent.
-
Provide a user-friendly Description for the AI agent that helps everyone understand what the purpose of this AI agent is. This text will be displayed in the CluedIn UI.
-
Provide Instructions for the AI agent. Think of instructions as a job description that tells your AI agent what you’d like it to do. For example, Fix incorrect date formats or Check for out-of-range transaction amounts.
Use the toolbar above the Instructions field to format your text with bold, italic, inline code, headings, blockquotes, bullet and numbered lists, links, and tables. The formatting is saved as Markdown, so instructions you have already written continue to work without any changes.
These instructions will apply to all jobs that the AI agent performs (this way, you won’t have to repeat the instructions in each job).
-
Select Create.
After you created an AI agent, proceed to configure it by adding jobs.
Organize AI agents into folders
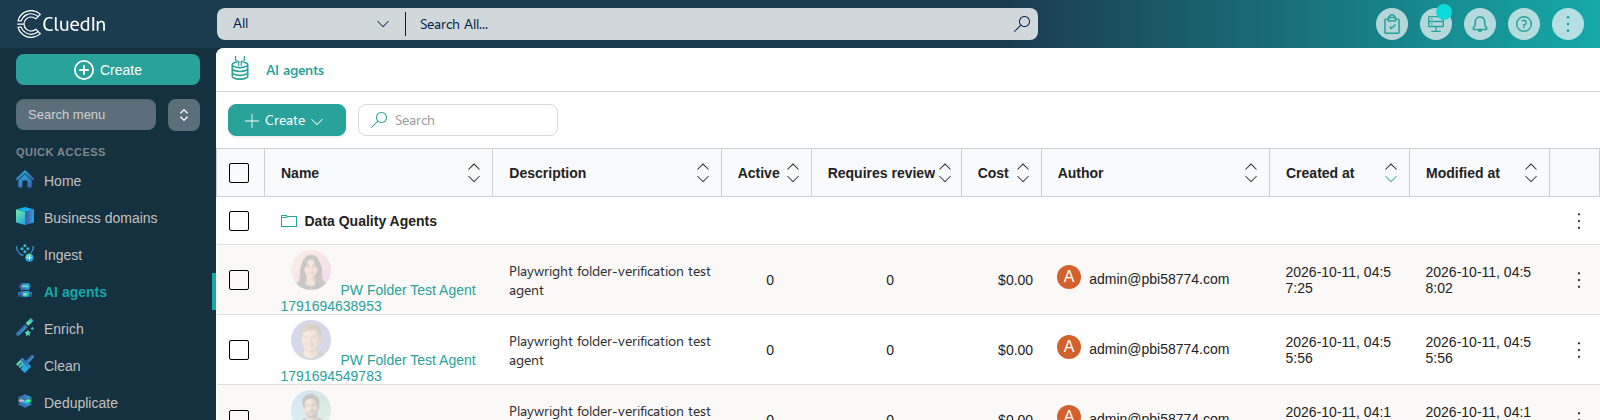
You can use folders to organize AI agents—for example, by team or by the type of data quality work they perform. Folders and AI agents appear together in the same list, similar to files and folders in a file explorer. AI agents that aren’t assigned to a folder appear in the root list, alongside any folders.
To create a folder
-
On the navigation pane, go to AI Agents (or, Management > AI Agents).
-
Select Create > Add folder.
-
Enter a folder name, and then select Save.
The new folder appears as a row in the list.
To assign an AI agent to a folder
-
Drag the AI agent row and drop it onto the folder row.
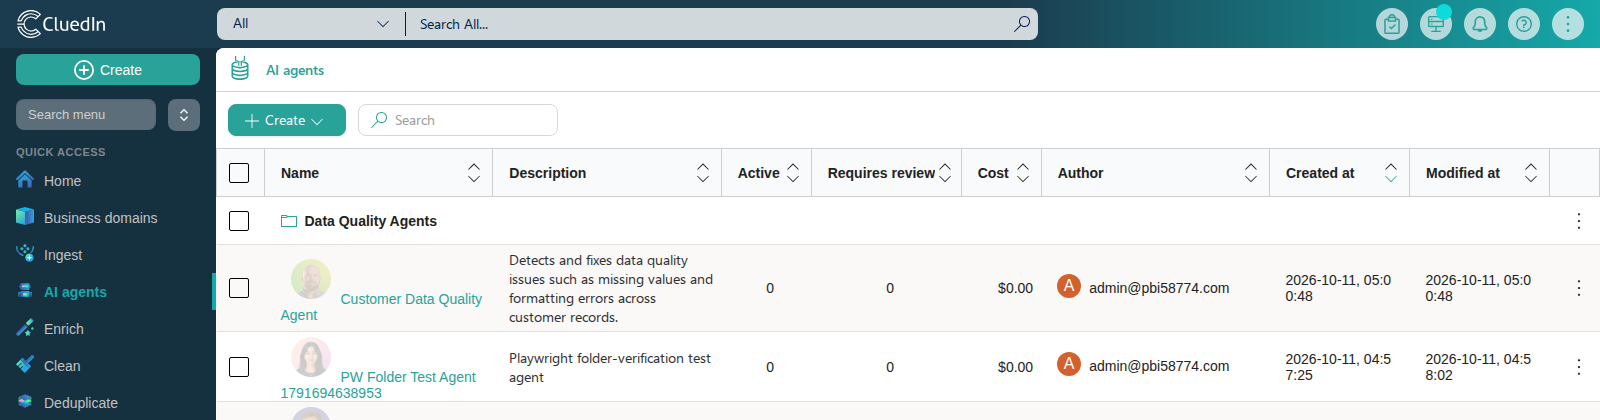
You can also assign a folder from the AI agent’s Settings tab: in Folder, select an existing folder, or type a new folder name to create one, and then select Save. This field is also available on the Create Agent pane when you create the AI agent.
To view the AI agents in a folder
-
In the list of AI agents, select the folder that you want to view.
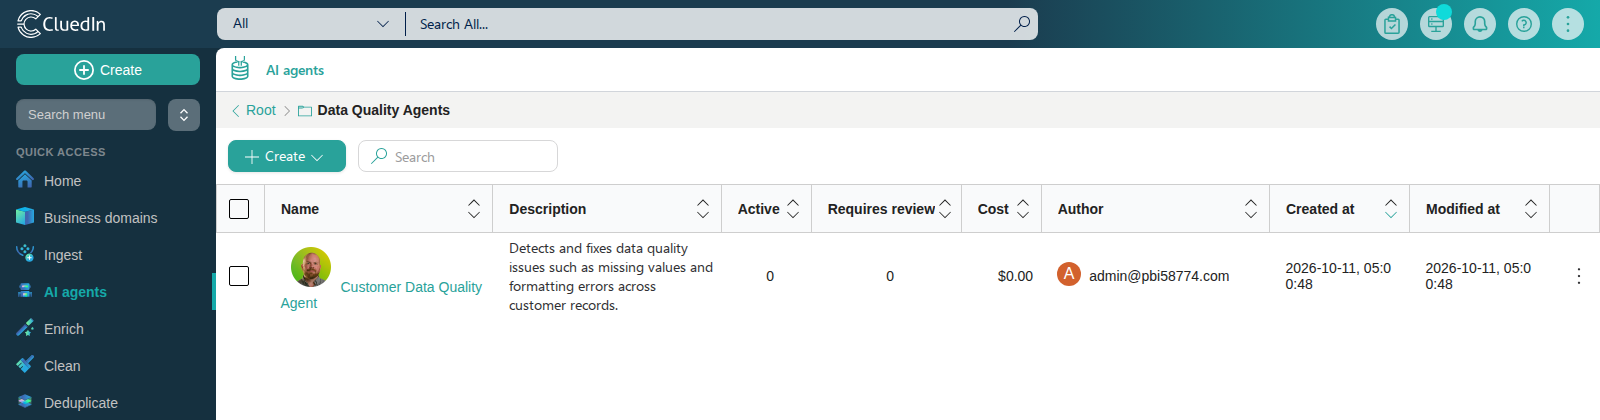
The breadcrumb at the top of the list shows Root >
<folder name>. Select Root in the breadcrumb to return to the merged list of folders and unfoldered AI agents.
To remove an AI agent from its folder
- While viewing the folder’s contents, drag the AI agent row and drop it onto Root in the breadcrumb. The AI agent returns to the root list. You can also remove the AI agent from the folder from its Settings tab by clearing the Folder field and selecting Save.
Configure an AI agent job
To enable an AI agent to perform a specific task, you must create and configure one or more AI agent jobs. A job defines a specific task assigned to the agent—such as detecting duplicates, identifying and resolving data quality issues, or generating rules—based on a specific set of golden records.
Setting up an AI agent job involves the following steps:
-
Creating a job – add a new job for an AI agent.
-
Adding a data source – specify a set of golden records the agent should operate on. This is not an ingestion data source; see Add a data source.
-
Configuring a prompt – define the instructions the agent should follow to complete the task.
-
Testing the job – verify the job’s setup by running a preliminary test on a subset of golden records to ensure the agent performs as expected.
-
Running the job – execute the job on the full set of data according to the provided instructions to produce AI suggestions.
Create a job
A job is the operational unit within an AI agent. It defines what the agent should do and which golden records it should work on.
To create a job
-
On the navigation pane, go to AI Agents (or, Management > AI Agents).
-
Select the AI agent for which you want to add a job.
-
Select Create Job.
-
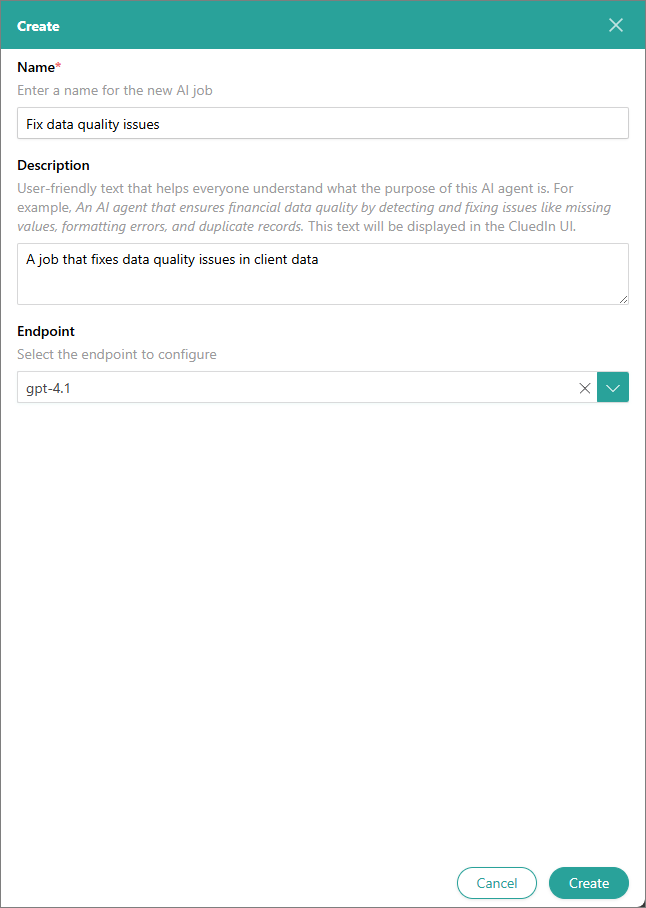
Enter a user-friendly Name of the job.
-
Provide the Description of the job, focusing on the details about what this job will do, its purpose, or any special instructions.
-
Select the Endpoint that the job will use. This is the API endpoint of a specific deployed AI model that your job will call to perform its task. Choosing the correct endpoint ensures the job uses the right AI capabilities.
-
Select Create.
Once you added a job, proceed to add a data source to specify the set of golden records the job will operate on.
Add a data source
A data source within a job refers to a specific set of golden records that the job will operate on. The data source defines the input data for the AI agent, ensuring that the job processes the correct records for a specific task.
In an AI agent job, a data source is a set of golden records already in CluedIn, selected with filter conditions. It is not an ingestion data source: it does not bring records into CluedIn.
To add a data source
-
On the navigation pane, go to AI Agents (or, Management > AI Agents).
-
Select the AI agent for which you added the job. Then, select the job.
-
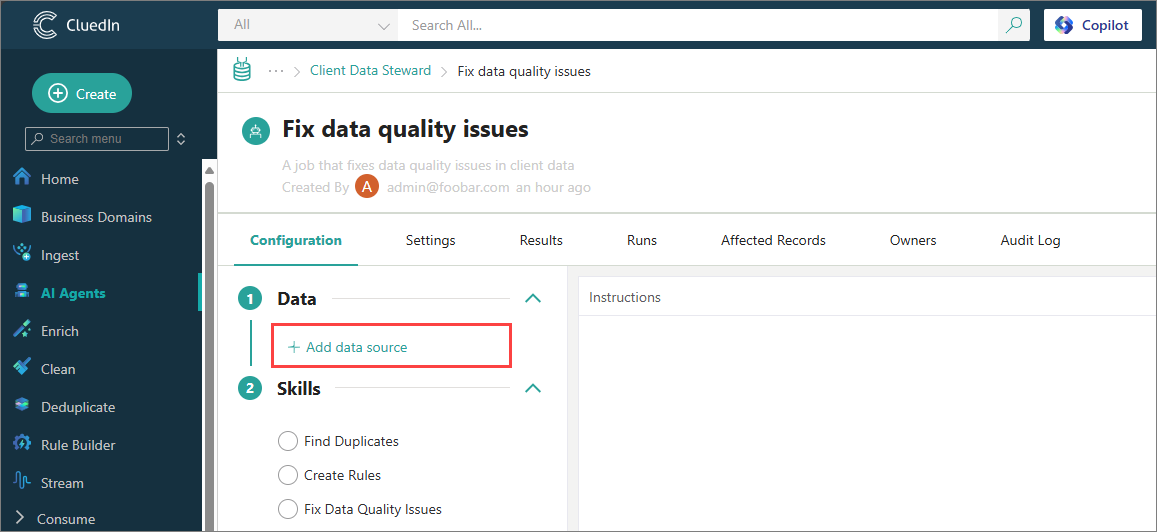
On the Configuration tab of the job page, in the Data section, select Add data source.
-
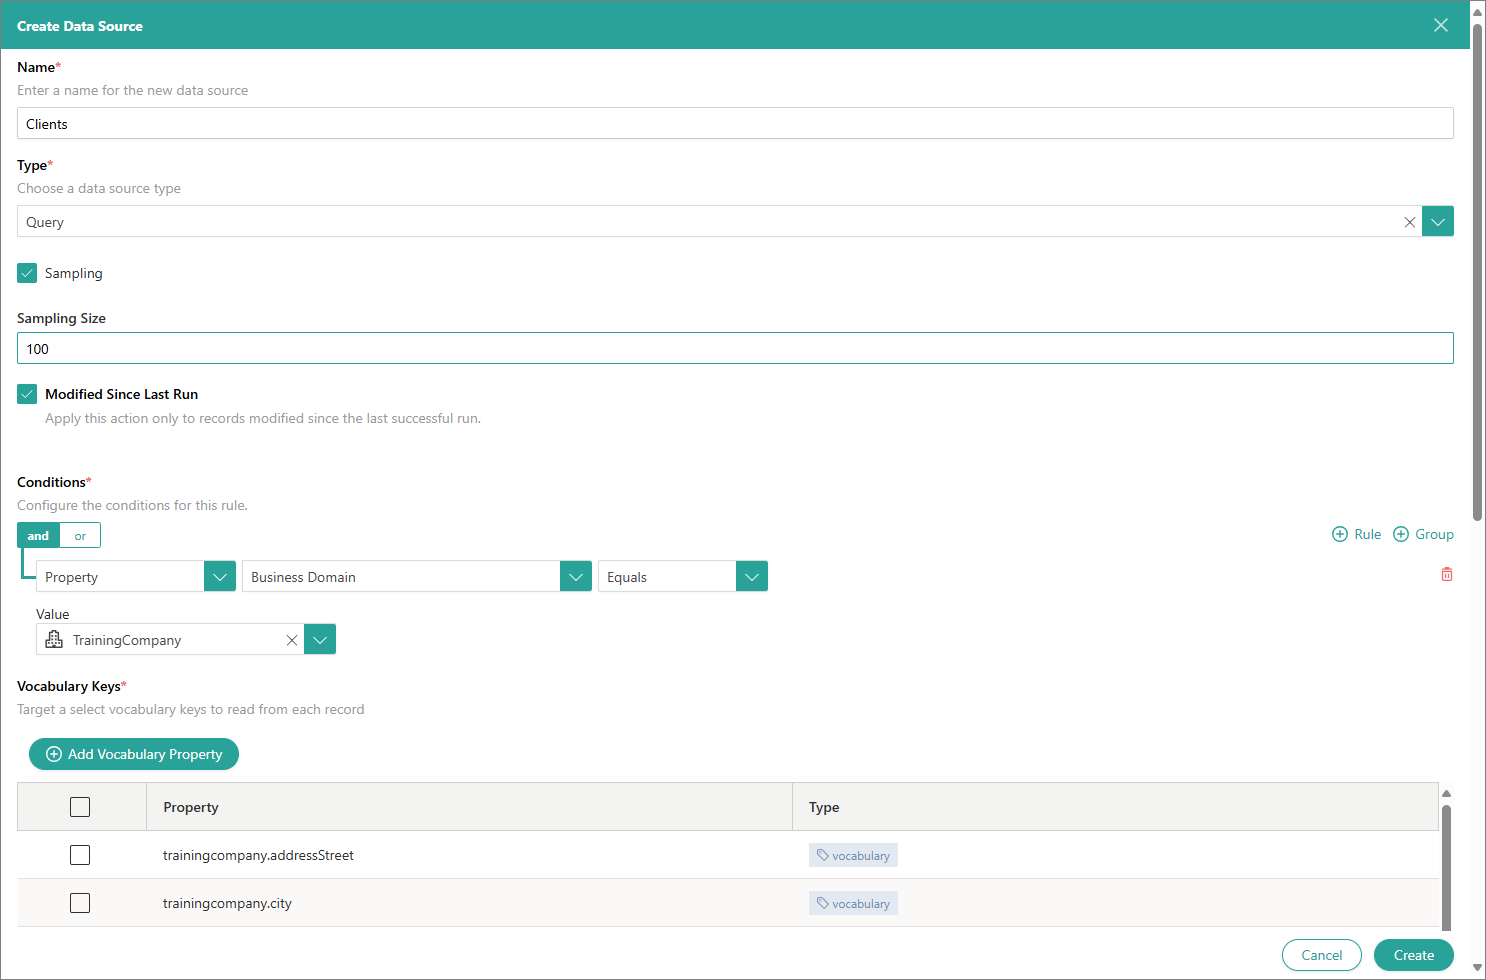
On the Create Data Source pane, do the following:
-
Enter a user-friendly Name of the data source.
-
If you want to limit the number of golden records in the data source, select the Sampling checkbox. Then, in Sampling Size, enter the desired number of records that you want to use.
-
Use the Modified Since Last Run option to define if the AI agent job should consider only updated records. When the option is enabled, the AI agent job will process only the records that were modified since the last successful job run. Otherwise, the job will process all records.
-
In the Conditions section, add a filter to define which golden records should be included in the data source.
-
In the Vocabulary Keys section, select one or more vocabulary keys that the job will analyze and process.
-
Select Create.
Once you added the needed data source, proceed to configure the prompt that the job should follow to complete the task.
-
Configure a prompt
A prompt in an AI agent job is a set of instructions or natural language input that tells the AI agent what task to perform and how to perform it on the selected data source. It acts as the core logic of the job, guiding the AI agent’s behavior based on your business goals.
To configure a prompt
-
On the navigation pane, go to AI Agents (or, Management > AI Agents).
-
Select the AI agent for which you added the job. Then, select the job.
-
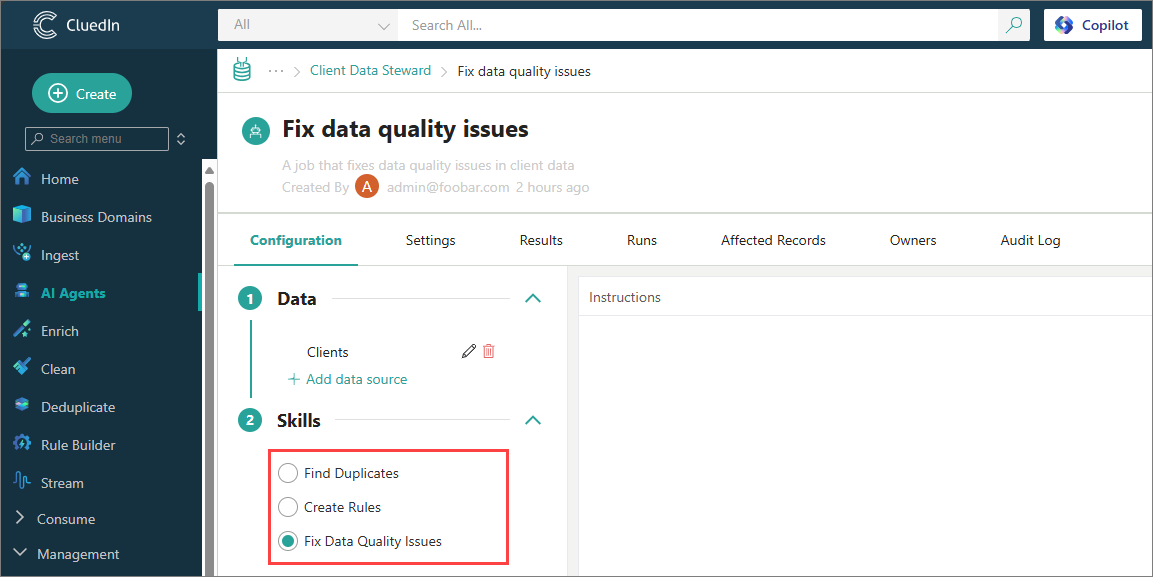
On the Configuration tab of the job page, in the Skills section, select the skill that the agent should use to perform the job.
-
In the Instructions section, enter a prompt instructing the agent what task it must perform.
Then, select the data source on which the job should run. To do this, drag the needed data source from the Data section onto the Instructions section.
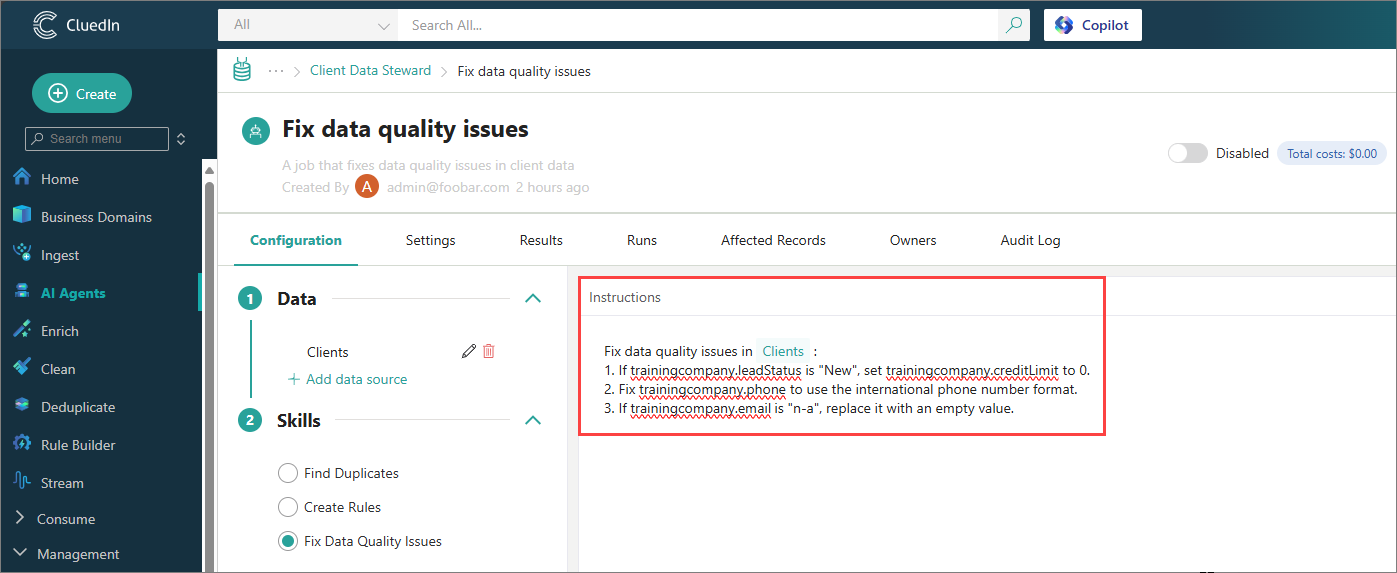
Once you configured the prompt, test the job configuration to make sure that the results meet your expectations and the task is performed correctly.
Test the job
Testing a job is an important step because it helps achieve the following:
-
Ensure the agent performs accurately on a smaller subset of golden records, helping to catch errors early and prevent costly mistakes before processing the full data source.
-
Validate that the job configuration and instructions align with the expected outcomes.
When you test the job, no changes are made to the your golden records. The purpose of testing is solely to provide a preview of the results that will be generated when the job is run.
To test the job
-
On the navigation pane, go to AI Agents (or, Management > AI Agents).
-
Select the AI agent for which you added the job. Then, select the job.
-
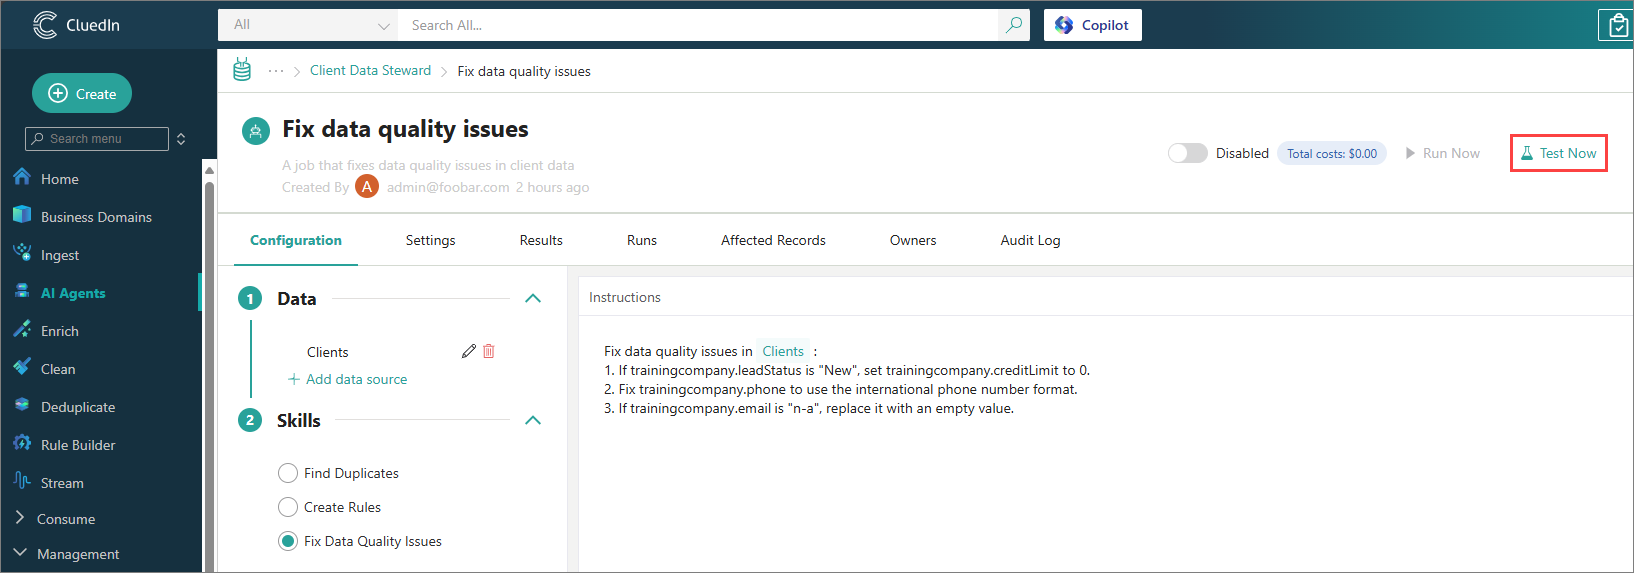
In the upper-right corner of the job page, select Test Now. The testing process may take some time depending on the amount of data to be processed.
-
When testing is completed, review the testing results:
-
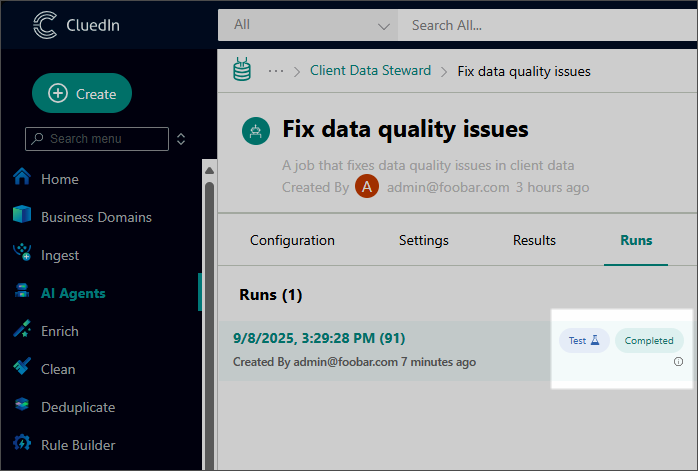
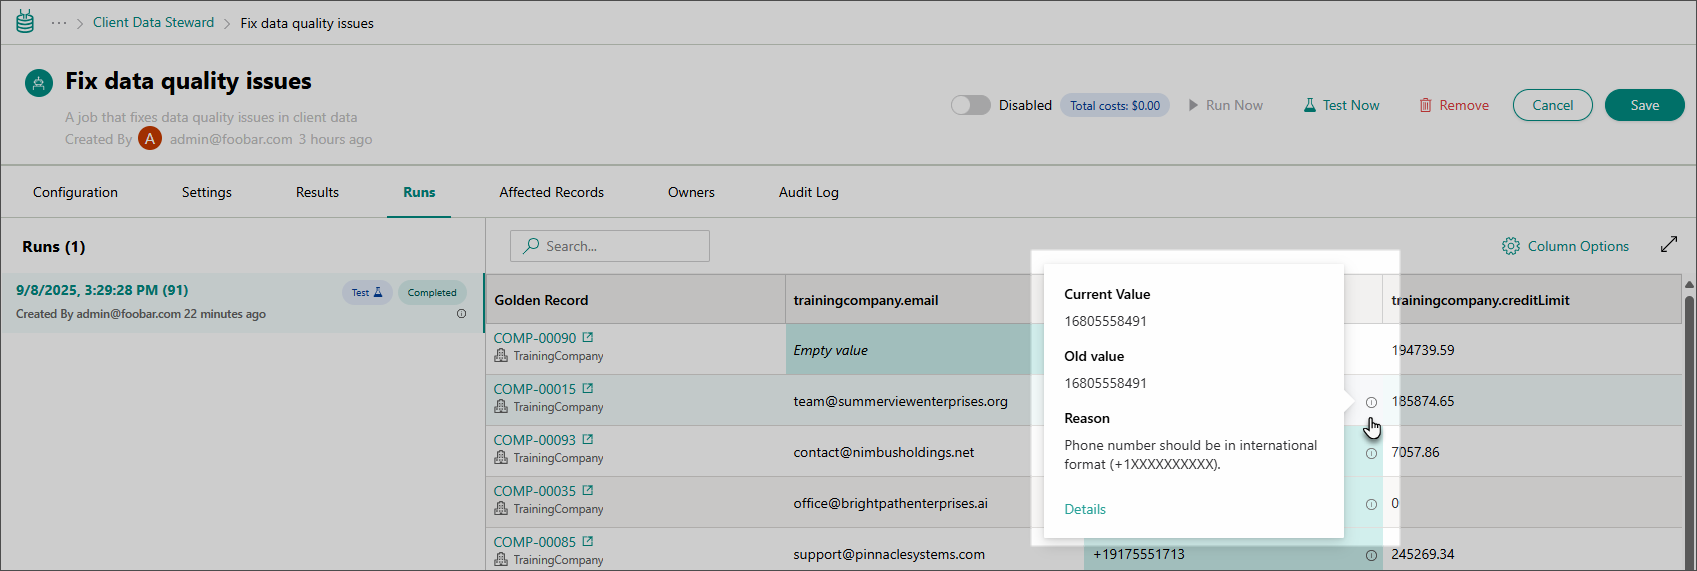
Go to the Runs tab. Locate the job run with the Test label and the time corresponding to when you did the test run. Wait until the test run status is Completed.
The layout of the Runs tab changes depending on the skill selected when configuring the prompt. In this example, the images are for the Fix Data Quality Issues skill.
-
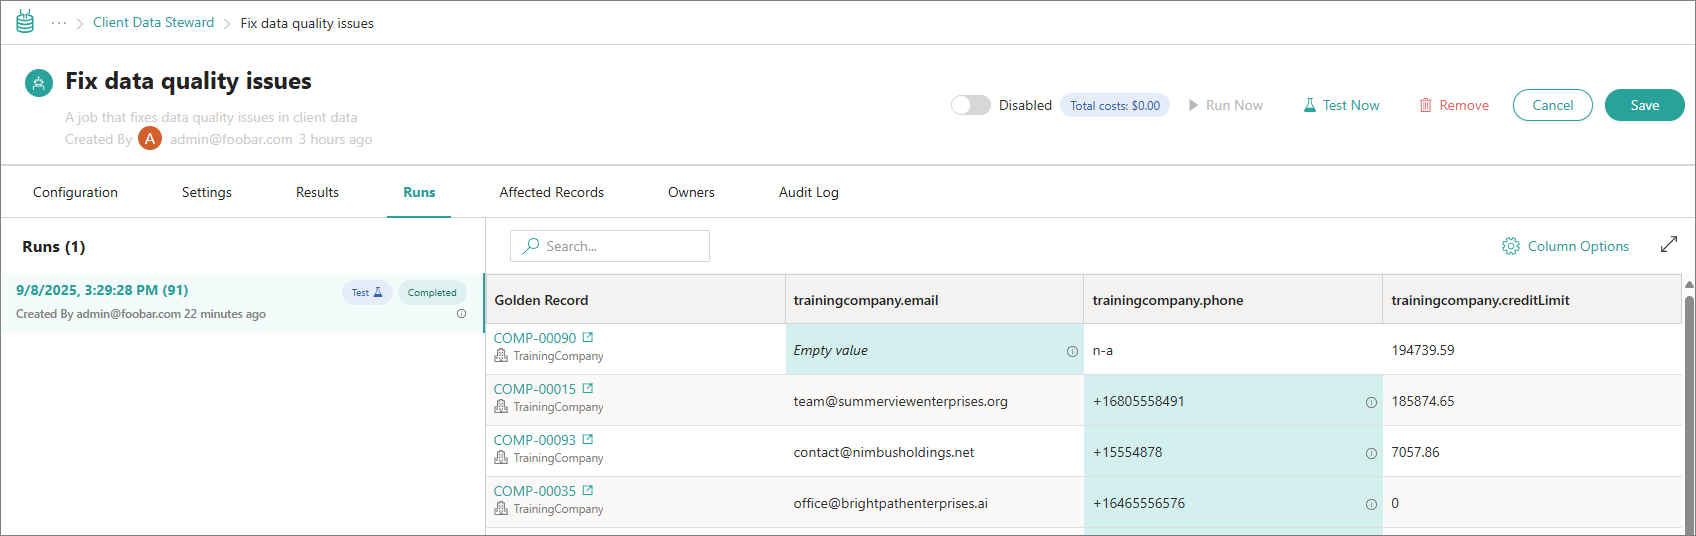
Select the test run. You can now review the preliminary suggestions generated during the test run. The values that the AI agent suggested to change are highlighted in green.
If the test run returns no results, try adjusting the job settings as described in Troubleshoot an AI agent job.
-
To view the AI agent suggestions, locate a cell highlighted in green. Then, hover over the information icon in that cell to view the current golden record value and how the AI agent suggests to change it.
-
-
To view input and output data exchanged between CluedIn and the large language model (LLM), go to the Configuration tab of the job. Then, expand the Logs section.
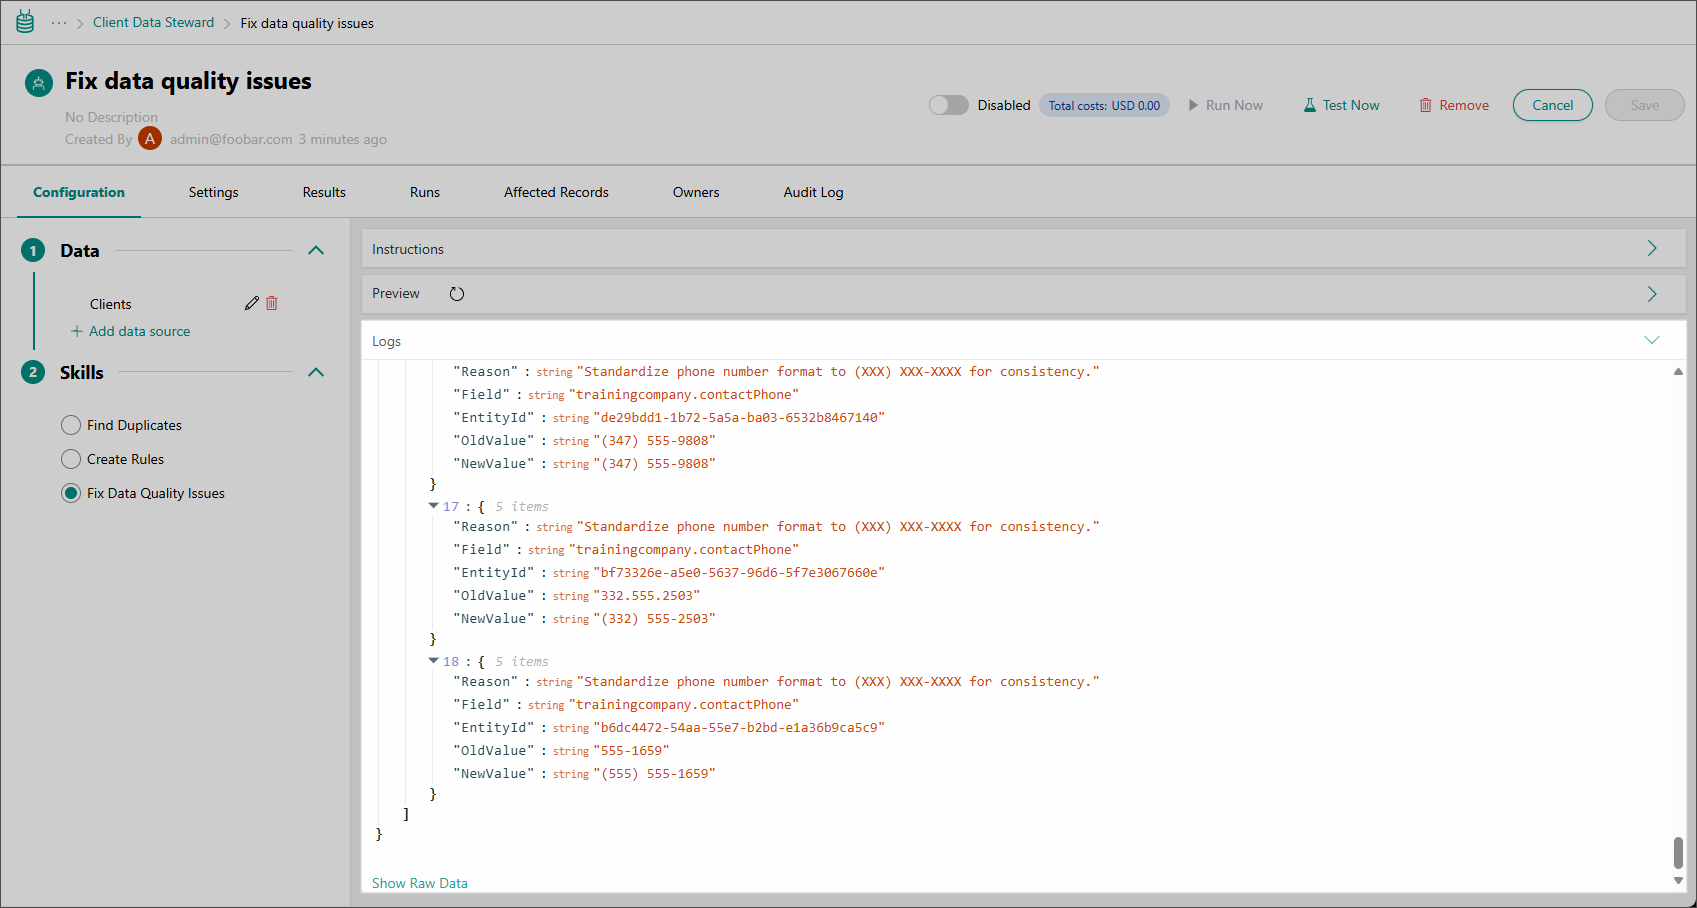
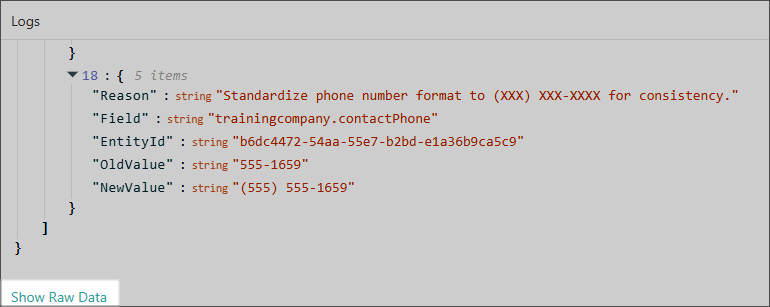
If the corresponding setting is enabled, the Logs sections will include the Show Raw Data button. The button reveals the raw JSON data for requests and responses exchanged between CluedIn and the LLM. This feature is useful for fine-tuning prompts but is best suited for users with a strong technical background in LLMs and JSON.
Once you’re satisfied with the job configuration and preliminary suggestions generated by the AI agent, proceed to run the job.
Run the job
Running a job is how you put your AI agent configuration into action, allowing you to generate tangible results that you can validate and apply. When you run the job, it processes the entire set of golden records defined in the job’s data source configuration. Depending on the size of the data and the AI model’s performance, the job can take anywhere from a few seconds to several hours to several days to complete.
You can run the job:
-
Manually now.
-
Automatically on a specific schedule. You can have the job running once every N hours, days, or minutes.
To run a job
-
On the navigation pane, go to AI Agents (or, Management > AI Agents).
-
Select the AI agent for which you added the job. Then, select the job.
-
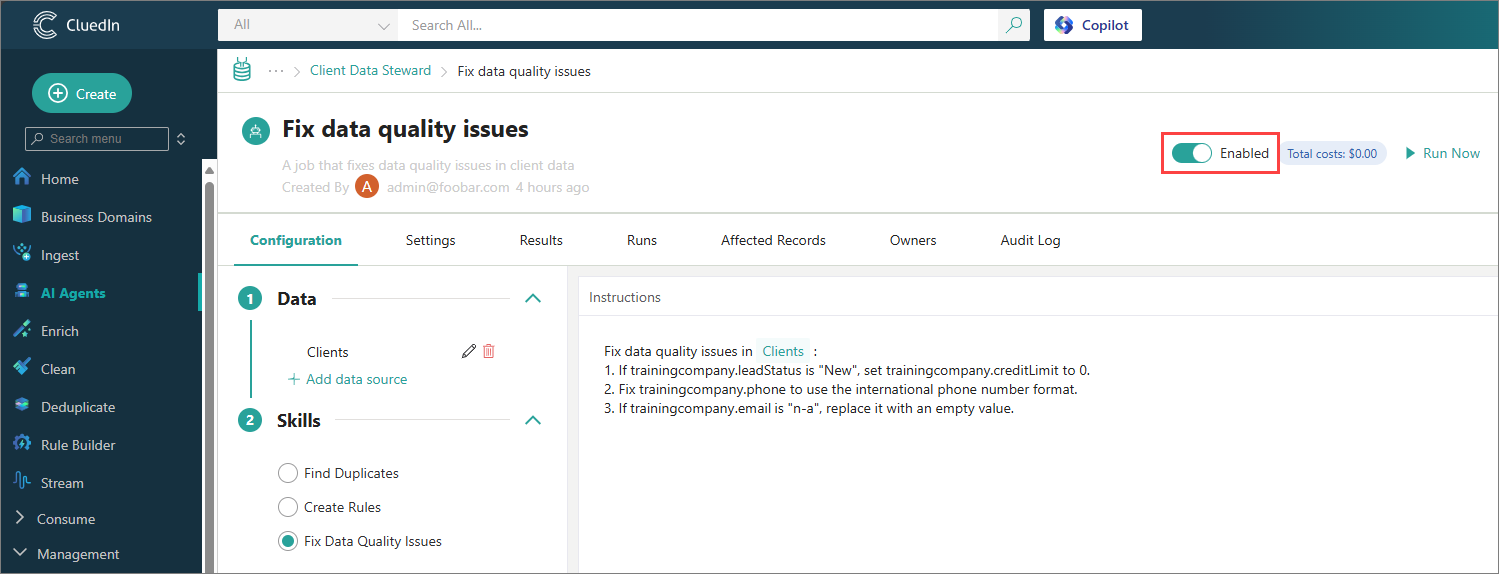
On the job page, turn on the status toggle to enable the job.
-
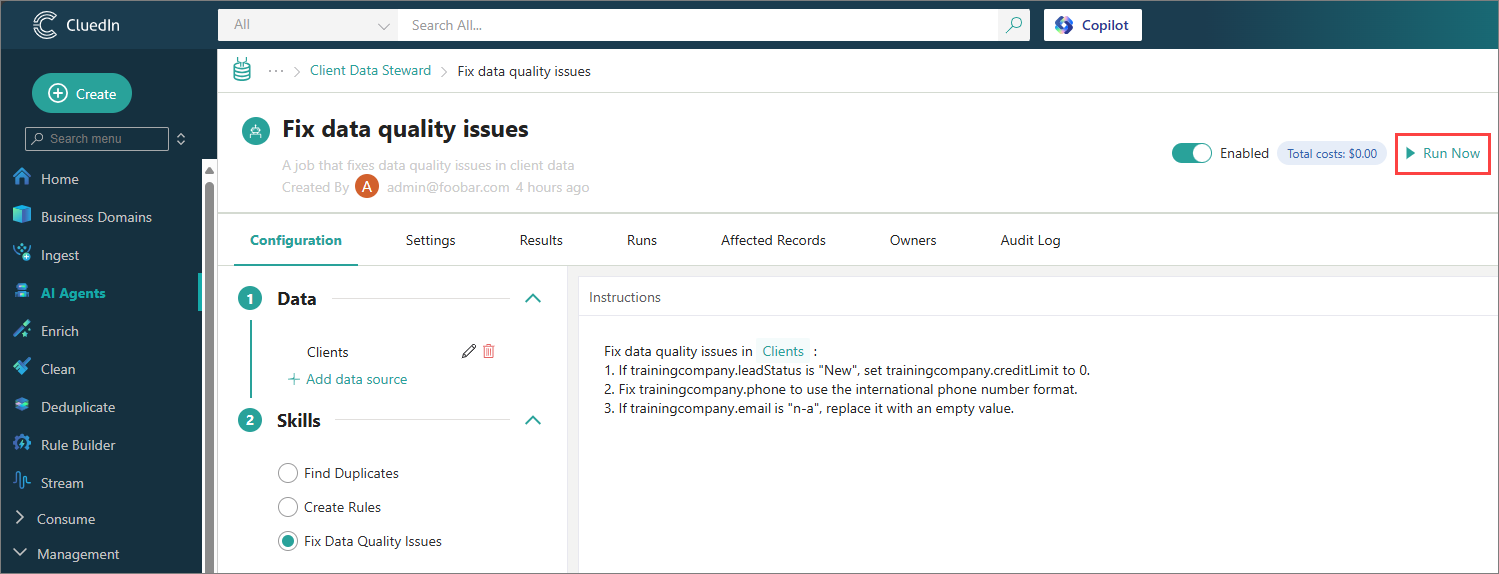
To run the job now, in the upper-right corner of the job page, select Run Now.
-
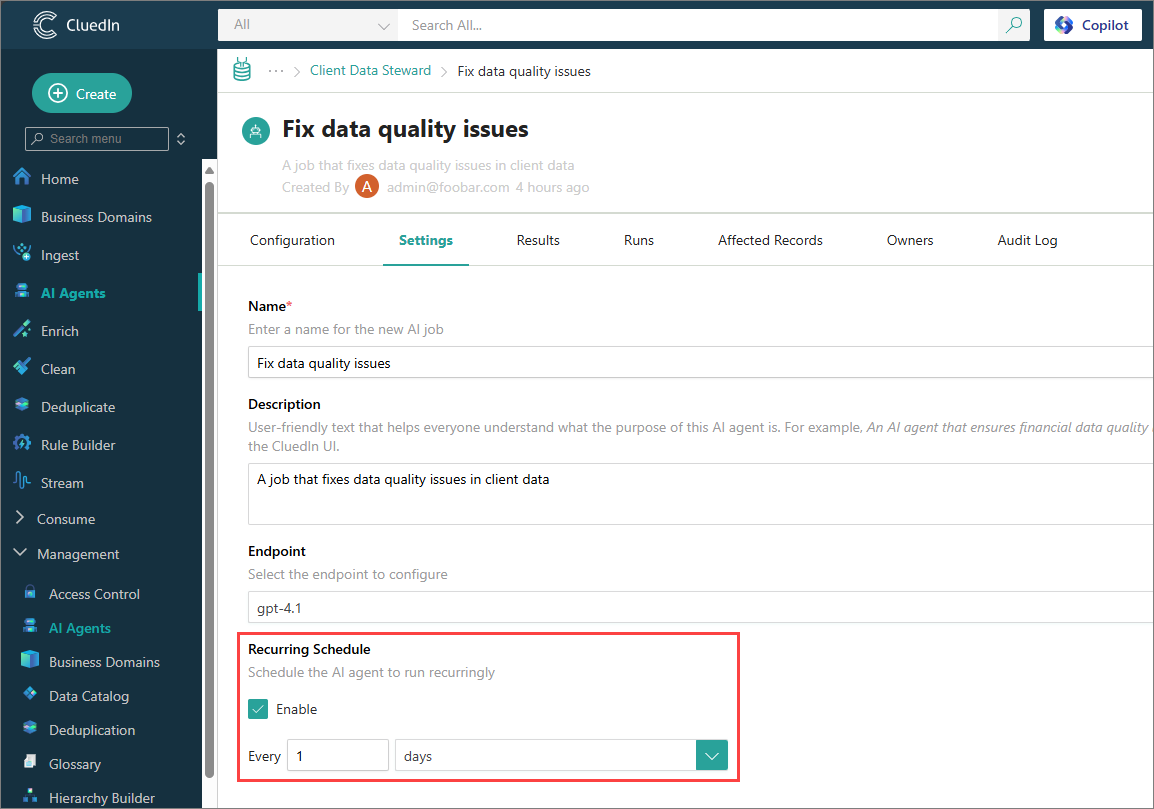
To run the job on a schedule, do the following:
-
On the job page, go to the Settings tab.
-
In the Recurring Schedule section, select Enable.
-
Specify the schedule for job. You can have the job running once every N hours, days, or minutes.
-
-
In the upper-right corner of the job page, select Save.
-
When the job completes, proceed to review the results returned by the AI agent.
The recommended approach is to work iteratively – run the job, review the results, then run the job and review the results again. Repeat this process until the AI agent produces all expected suggestions.
-
To view input and output data exchanged between CluedIn and the large language model (LLM), go to the Configuration tab of the job. Then, expand the Logs section.
If the corresponding setting is enabled, the Logs sections will include the Show Raw Data button. The button reveals the raw JSON data for requests and responses exchanged between CluedIn and the LLM. This feature is useful for fine-tuning prompts but is best suited for users with a strong technical background in LLMs and JSON.
Troubleshoot an AI agent job
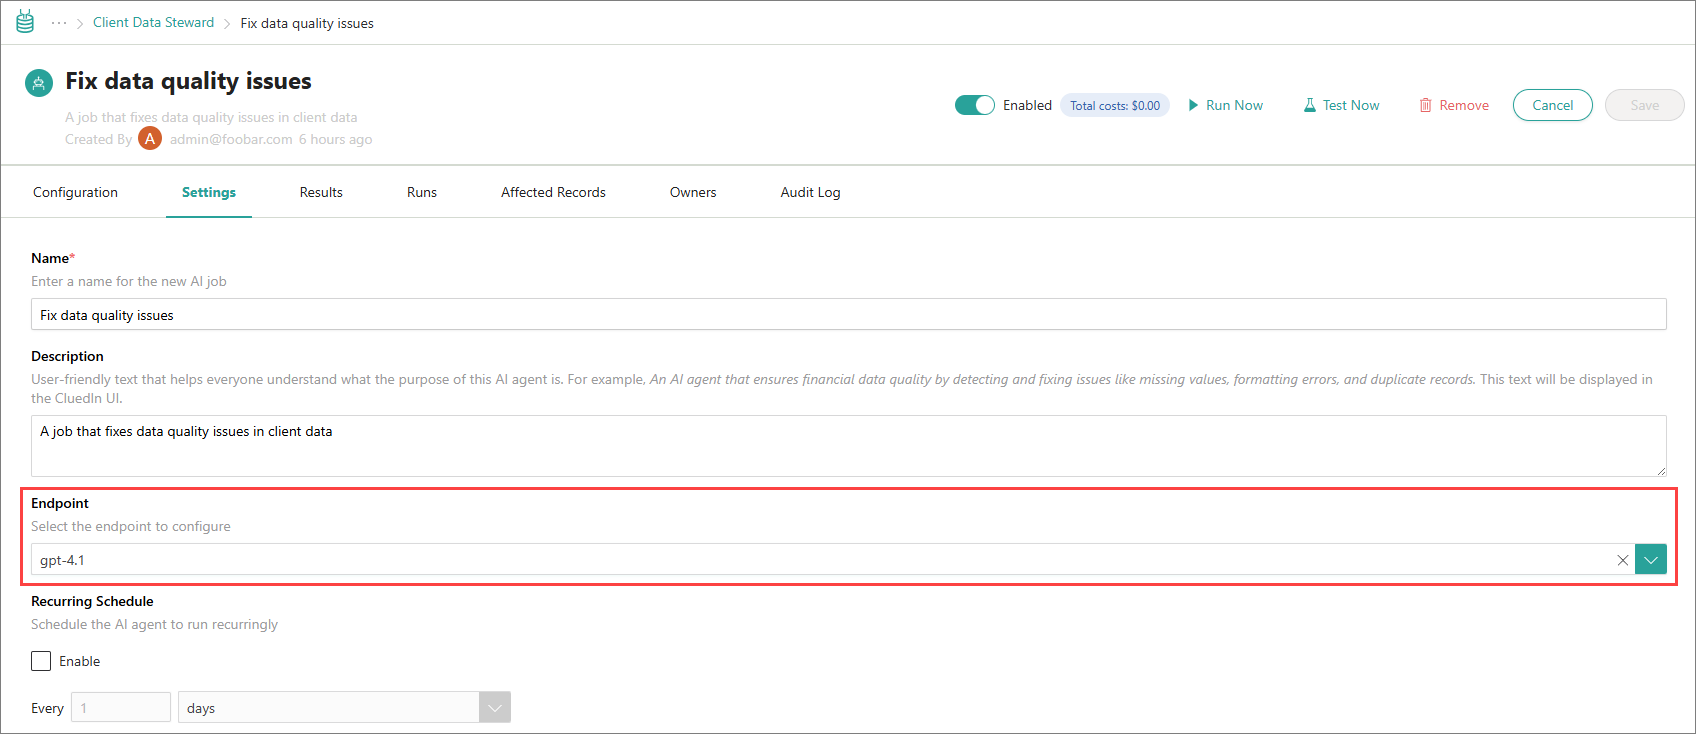
If, after configuring and testing the prompt, the Test History pane doesn’t display any suggestions, the AI agent might be using an incorrect endpoint to communicate with the deployed AI model on the platform. You can fix this by selecting another endpoint for the AI agent configuration.
To troubleshoot an AI agent job
-
On the navigation pane, go to AI Agents (or, Management > AI Agents).
-
Select the AI agent for which you added the job. Then, select the job.
-
On the job page, go to the Settings tab.
-
In the Endpoint list, select the endpoint that you want to use for the AI agent.
-
In the upper-right corner of the job page, select Save.
You can now retest and rerun the job.
Verify the result
- AI agent created: the agent appears in the list of AI agents, in the folder you assigned, if any.
- Data source and skill configured: on the job’s Configuration tab, the data source is listed in the Data section, and the selected skill is marked in the Skills section.
- Test finished: on the Runs tab, the run with the Test label has the Completed status. Its preliminary suggestions are shown on that run. A test makes no changes to golden records.
- Run in progress: a progress bar is shown at the top of the job page. If the Show “Started Job” notification setting is on, you also receive a notification when the job starts.
- Run finished: on the Runs tab, there is a run with the Completed status and without the Test label. Its suggestions are listed on the Results tab, where you review them.
- Schedule set: on the Settings tab, Recurring Schedule is enabled with the interval you chose.
What this changes
- Creating an agent, a job, a data source and a prompt only saves configuration.
- Testing a job makes no changes to golden records. It only previews the suggestions.
- Running a job sends the selected golden record values and your instructions to the model endpoint, and produces suggestions. You can see what was exchanged in the job’s Logs section. Model usage is billed at the token costs set on the deployment.
- Suggestions are not applied automatically, with two exceptions:
- For the Find Duplicates skill, suggestions are approved automatically, because the resulting matches in a deduplication project still require approval.
- If the Auto-approve AI suggestions setting is on, all suggestions are approved as soon as the agent provides them.
- An approved suggestion changes the golden record. The change is recorded in the golden record history as AI Agent Job Source - Agent name - Job name, and the record is listed on the job’s Affected Records tab.
- Changes can be reverted, for a whole job or for a single golden record. See View and revert changes made by an AI agent.
- A recurring schedule runs the job again at the interval you set. With Modified Since Last Run on, each run processes only the golden records modified since the last successful run.
If something goes wrong
- The test run returns no suggestions. The job might be using an incorrect endpoint. Select another endpoint as described in Troubleshoot an AI agent job, and then test again.
- Run Now is not available. The job is disabled. Turn on the status toggle on the job page.
- The Results tab is empty after a run. The suggestions may have been approved automatically, they may already have been approved or rejected, or the job may still be running or never have been run. See Review the results returned by an AI agent.
- A run takes a long time. Depending on the size of the data and the model’s performance, a run can take from a few seconds to several days. Use Sampling to limit the number of golden records while you refine the job.
- The AI agent does not produce all expected suggestions. Run the job and review the results again. Repeat until the agent produces all expected suggestions.
- An approved change is wrong. Revert the changes made by the AI agent.