
Create a service principal
how-to Steps to accomplish one task
This article outlines how to register an application and create a service principal.
When you register a new application in Microsoft Entra ID, a service principal is automatically created for the app registration. Following the steps in this article will provide you with the Client ID, Tenant ID, and Client Secret required to configure integration with CluedIn.
Prerequisites: Make sure you have access to Microsoft Azure and Microsoft Entra ID.
To register and application and create a service principal
-
Go to the Azure portal.
-
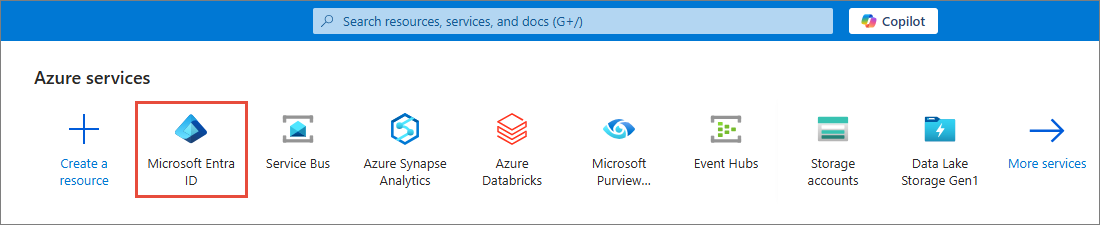
Select Microsoft Entra ID.
-
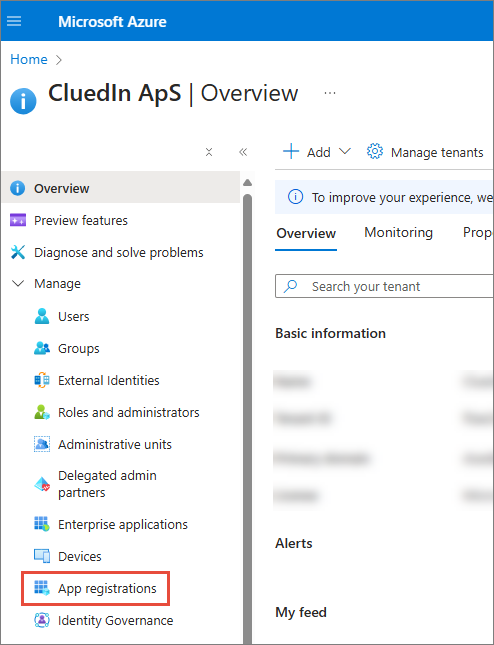
On the left-hand navigation pane, under Manage, select App registrations.
-
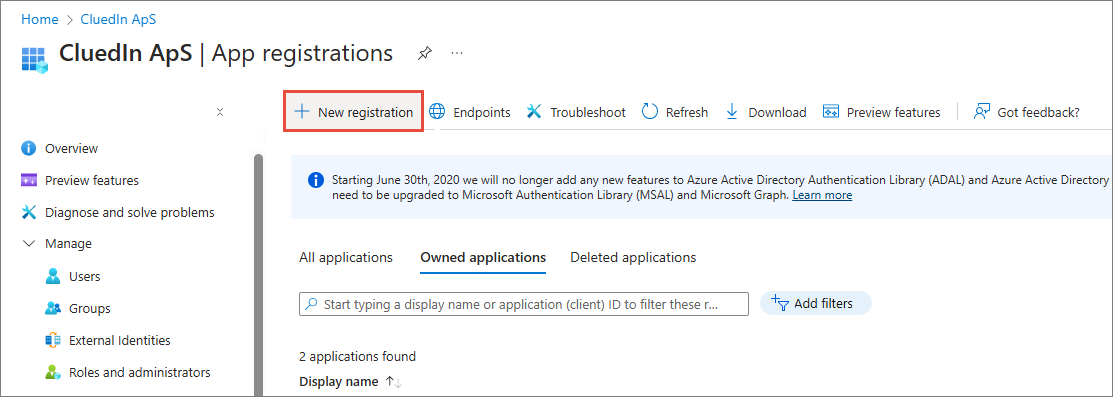
Select New registration.
-
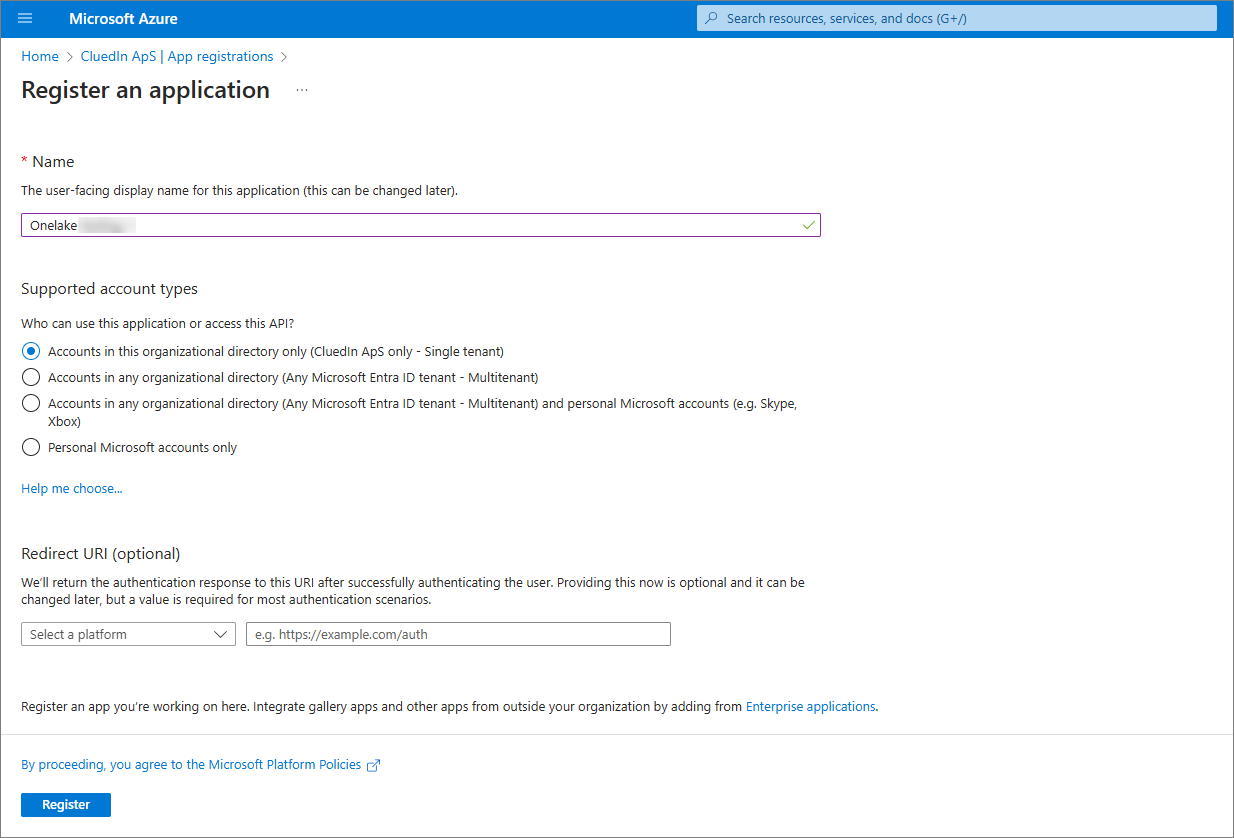
Enter the Name of service principal, select Supported account types, and then select Register.
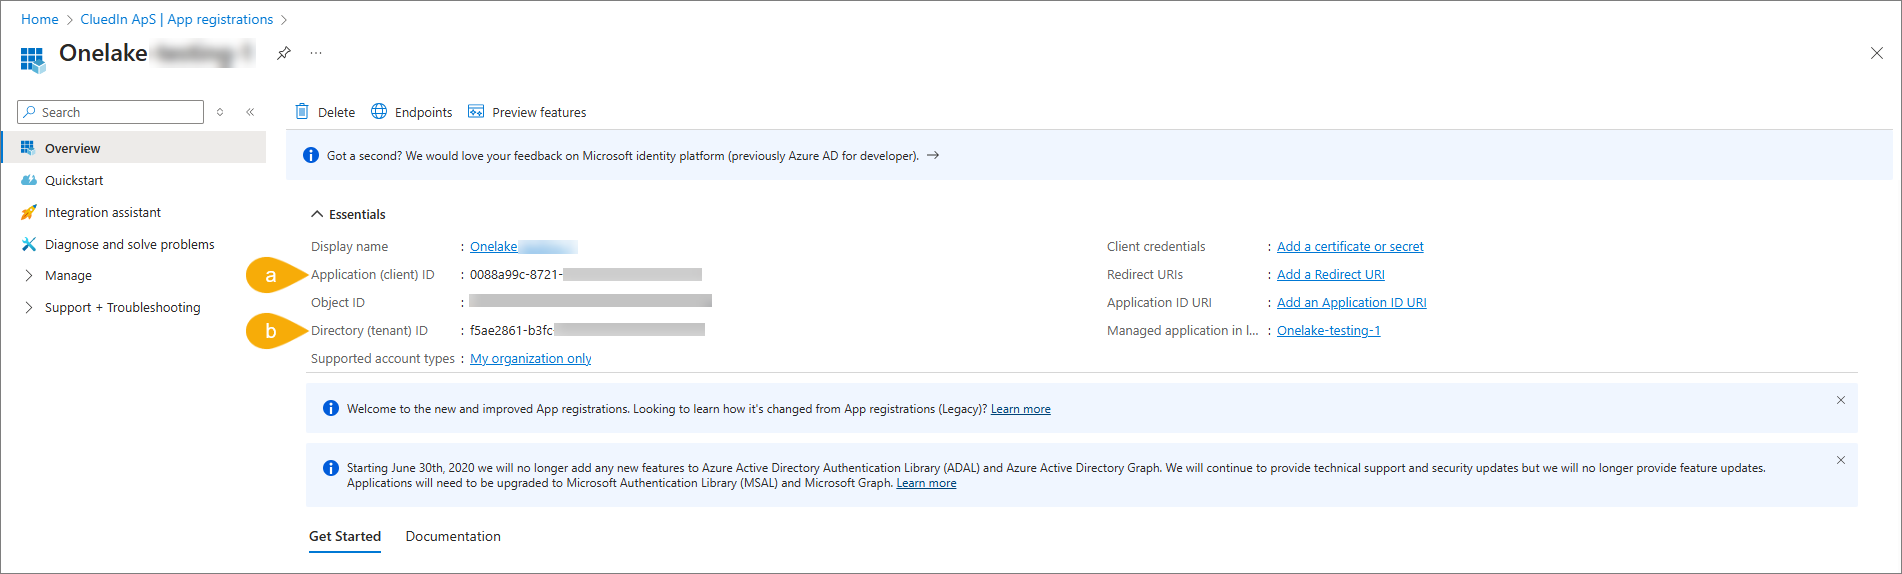
After successful registration, you can find Client ID (a) and Tenant ID (b) on the overview page of your service principal (app registration).
-
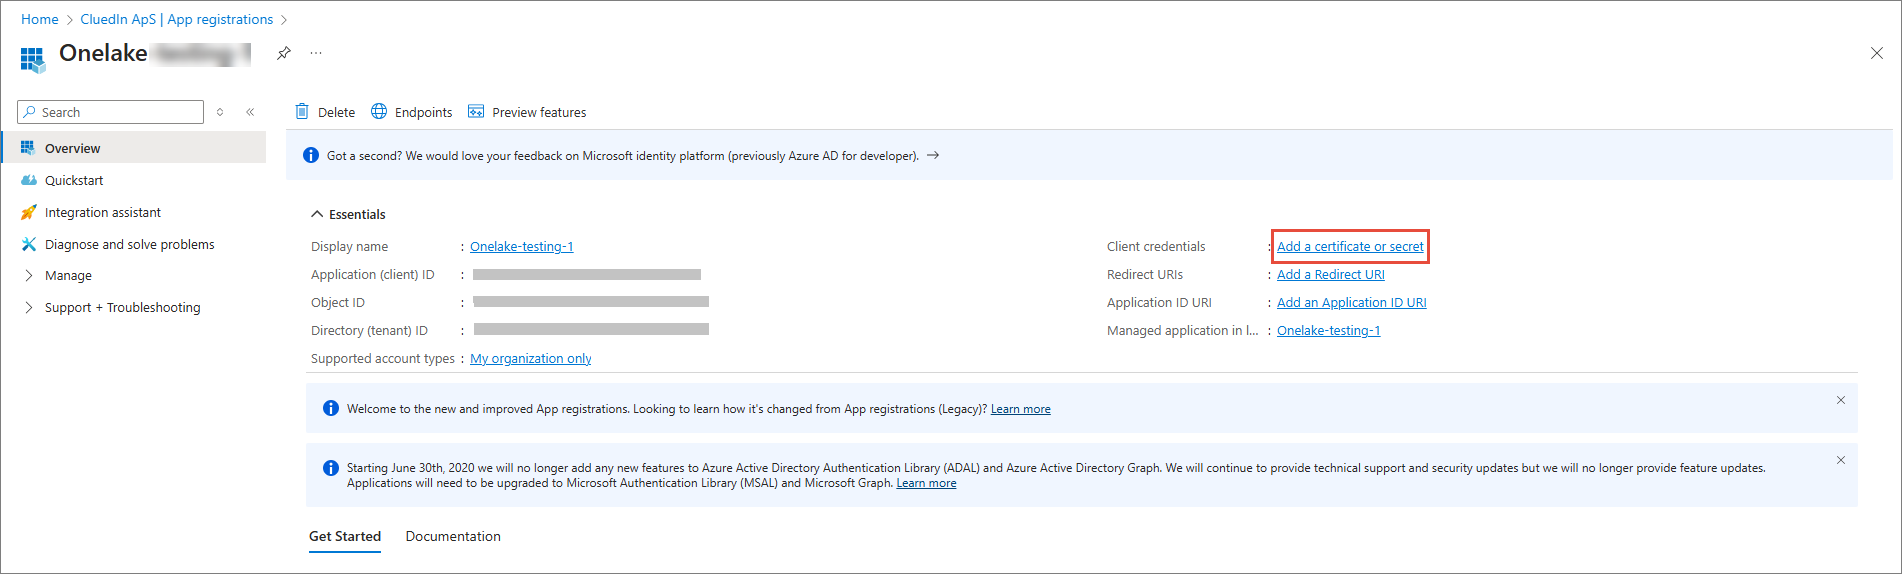
To create Client Secret, select the Add a certificate or secret link on the overview page of your service principal (app registration).
-
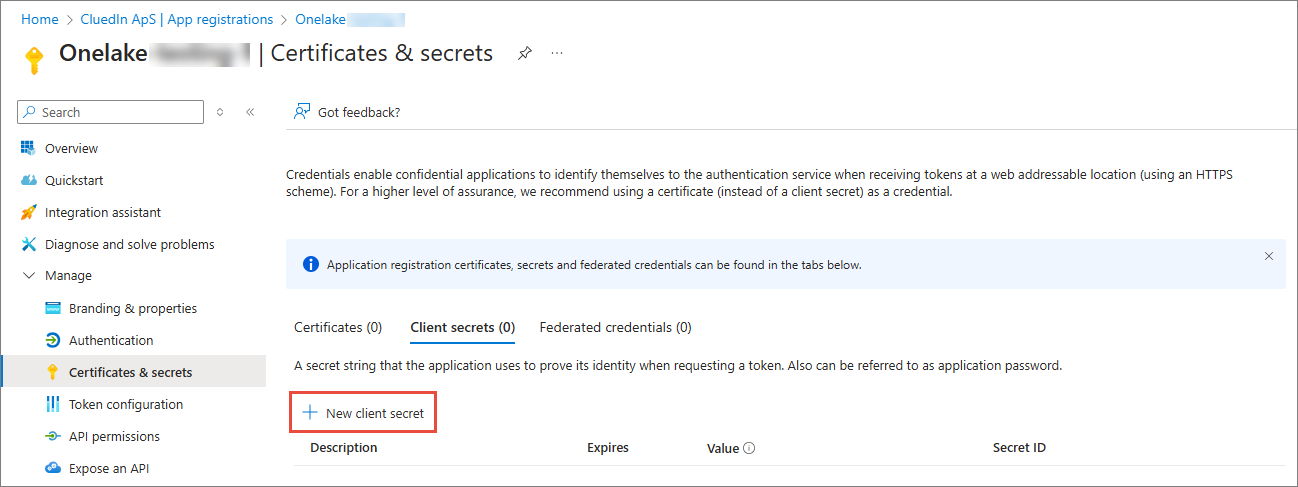
Select New client secret.
-
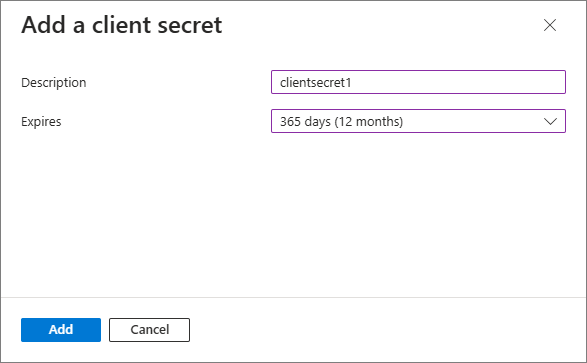
In the Description field, enter the name of the client secret. In the Expires field, select an expiration for the secret. Finally, select Add.
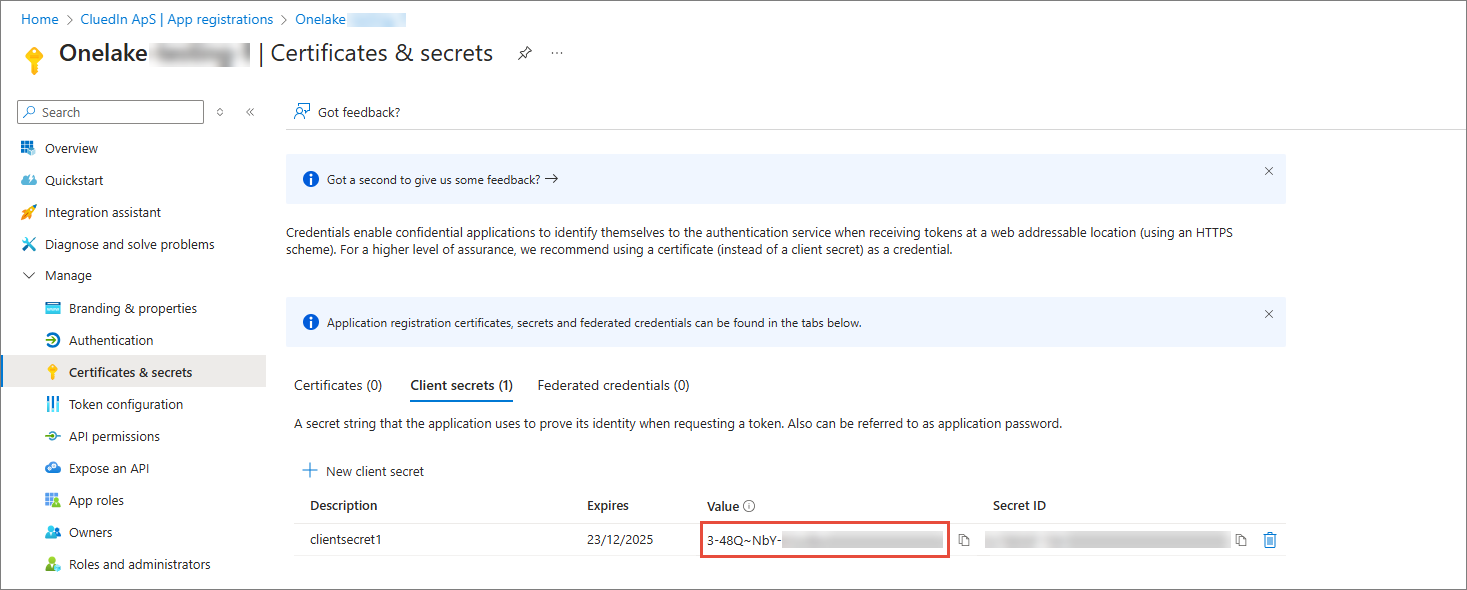
Now, you can find the client secret value under Certificates & secrets.