
Manage hierarchies
how-to Steps to accomplish one task
On this page
- Organize hierarchies into folders
- Clone a hierarchy
- Export a hierarchy
- Delete a hierarchy
- Using Created Hierarchy in your BI Reports
In this article, you will learn how to manage hierarchies in order to keep them well-organized.
Organize hierarchies into folders
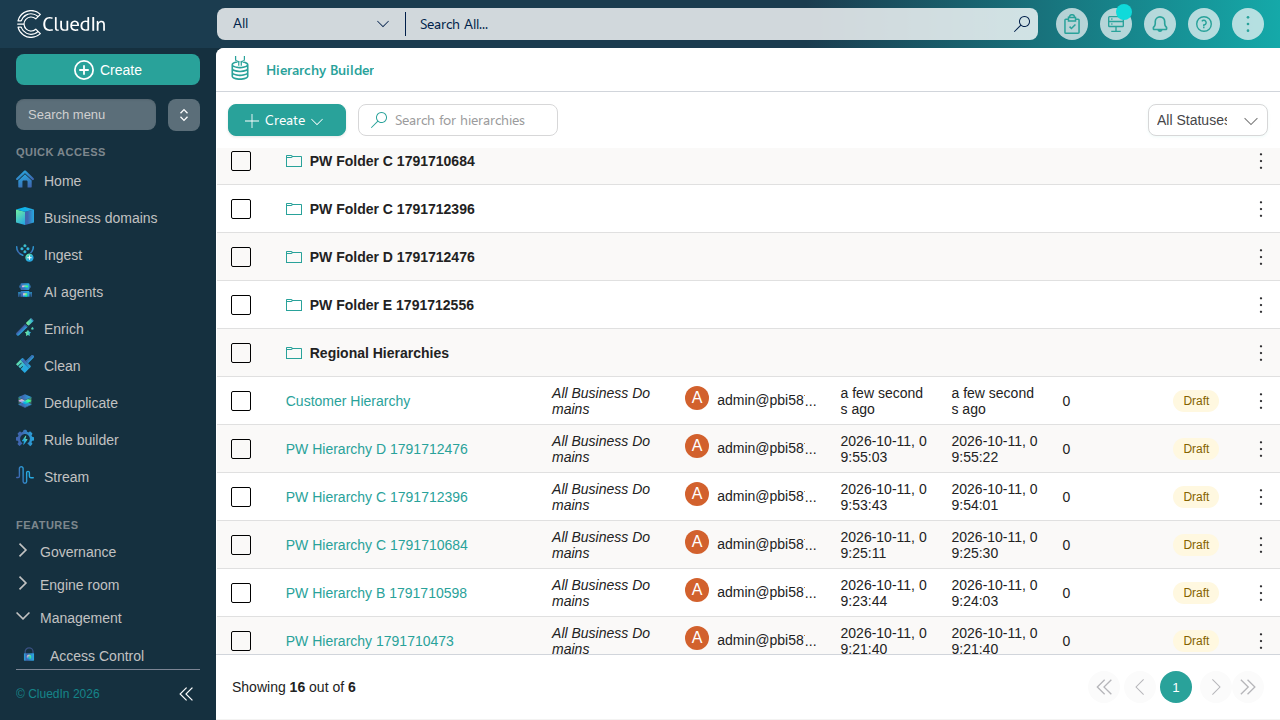
You can use folders to organize hierarchies—for example, by business domain or by the team that owns them. Folders and hierarchies appear together in the same list, similar to files and folders in a file explorer. Hierarchies that aren’t assigned to a folder appear in the root list, alongside any folders.
To create a folder
-
On the navigation pane, go to Management > Hierarchy Builder.
-
Select Create > Add folder.
-
Enter a folder name, and then select Save.
The new folder appears as a row in the list.
To assign a hierarchy to a folder
-
Drag the hierarchy row and drop it onto the folder row.
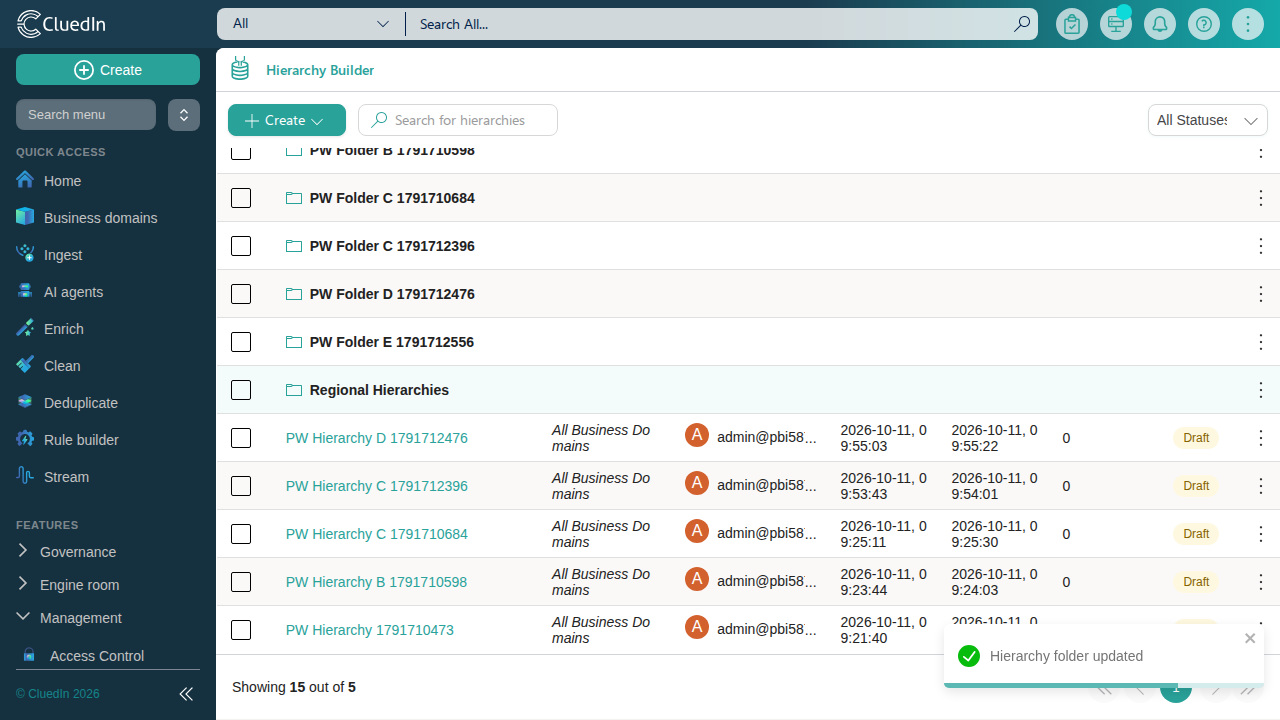
You can also assign a folder from the hierarchy’s Hierarchy Properties panel: in Folder, select an existing folder, or type a new folder name to create one, and then select Save. This field is also available on the General step of the create-hierarchy panel when you create the hierarchy.
To view the hierarchies in a folder
-
In the list of hierarchies, select the folder that you want to view.
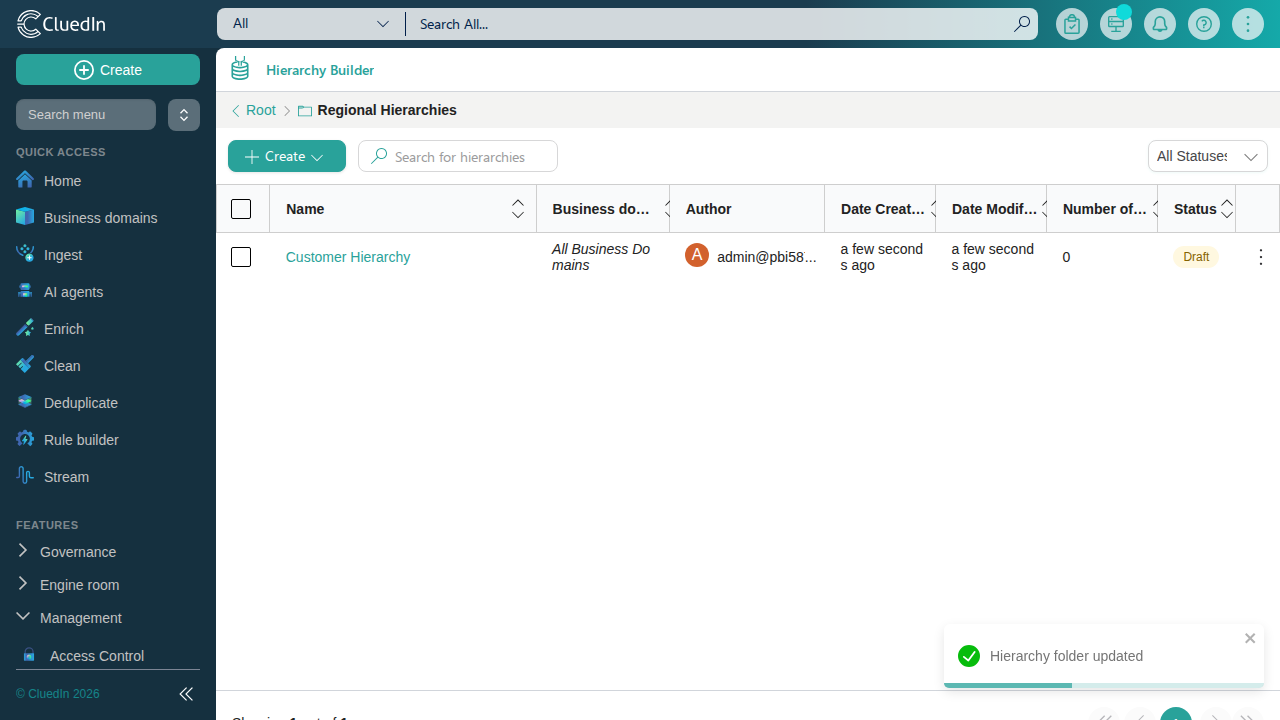
The breadcrumb at the top of the list shows Root >
<folder name>. Select Root in the breadcrumb to return to the merged list of folders and unfoldered hierarchies.
To remove a hierarchy from its folder
- While viewing the folder’s contents, drag the hierarchy row and drop it onto Root in the breadcrumb. The hierarchy returns to the root list. You can also remove the hierarchy from the folder from its Hierarchy Properties panel by clearing the Folder field and selecting Save.
Clone a hierarchy
If you want to reuse the configuration of an existing hierarchy project, you can clone it.
To clone a hierarchy
-
On the navigation pane, go to Management > Hierarchy Builder.
-
Find the hierarchy that you want to clone. In the right corner of the row, open the three-dot menu, and then select Clone.
-
Enter the name of the new hierarchy project.
-
Select Clone.
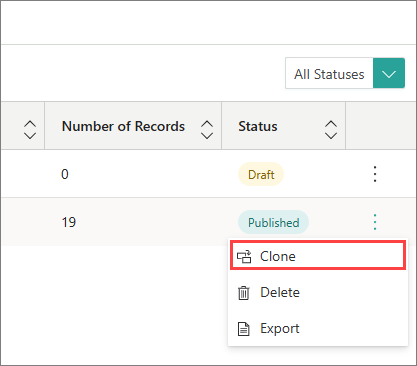
Now, you can edit the cloned hierarchy project.
Export a hierarchy
If you want to validate leaf nodes, you can export the hierarchy to a comma-separated values (CSV) file. The file will contain the following columns:
-
Id – node ID.
-
Name – node name.
-
ParentId – ID of the parent node.
-
Level – node level in the hierarchy.
-
IsLeaf – false if the node has child nodes; true if the node does not have child nodes.
To export a hierarchy
-
On the navigation pane, go to Management > Hierarchy Builder.
-
Find the hierarchy that you want to export. In the right corner of the row, open the three-dot menu, and then select Export.
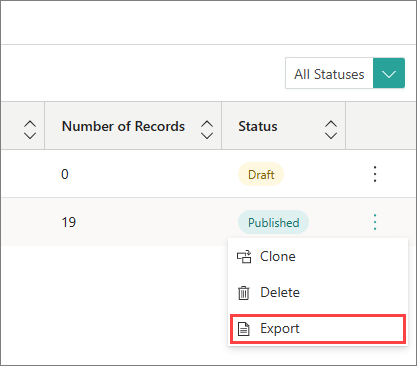
The hierarchy in the CSV format is downloaded to your computer.
Delete a hierarchy
If you no longer need a hierarchy, you can delete it. The hierarchy is also deleted from the golden record page.
To delete a hierarchy
-
On the navigation pane, go to Management > Hierarchy Builder.
-
Find the hierarchy that you want to delete, and then do one of the following:
-
In the right corner of the row, open the three-dot menu, and then select Delete.
-
Select the checkbox next to the hierarchy, and then select Delete.

-
-
Confirm that you want to delete the hierarchy.
Alternatively, you can open the hierarchy project, and then select Delete.
Using Created Hierarchy in your BI Reports
Since you made the hierarchy of your choosing (also multi-domain), you are asking yourself a question: How can I use it to build my drill-down reports?
Well, let’s imagine a scenario. In this picture below, we have built the hierarchy involve Business Domain /Region, and the business Domain /Company, attached this each of the regions.
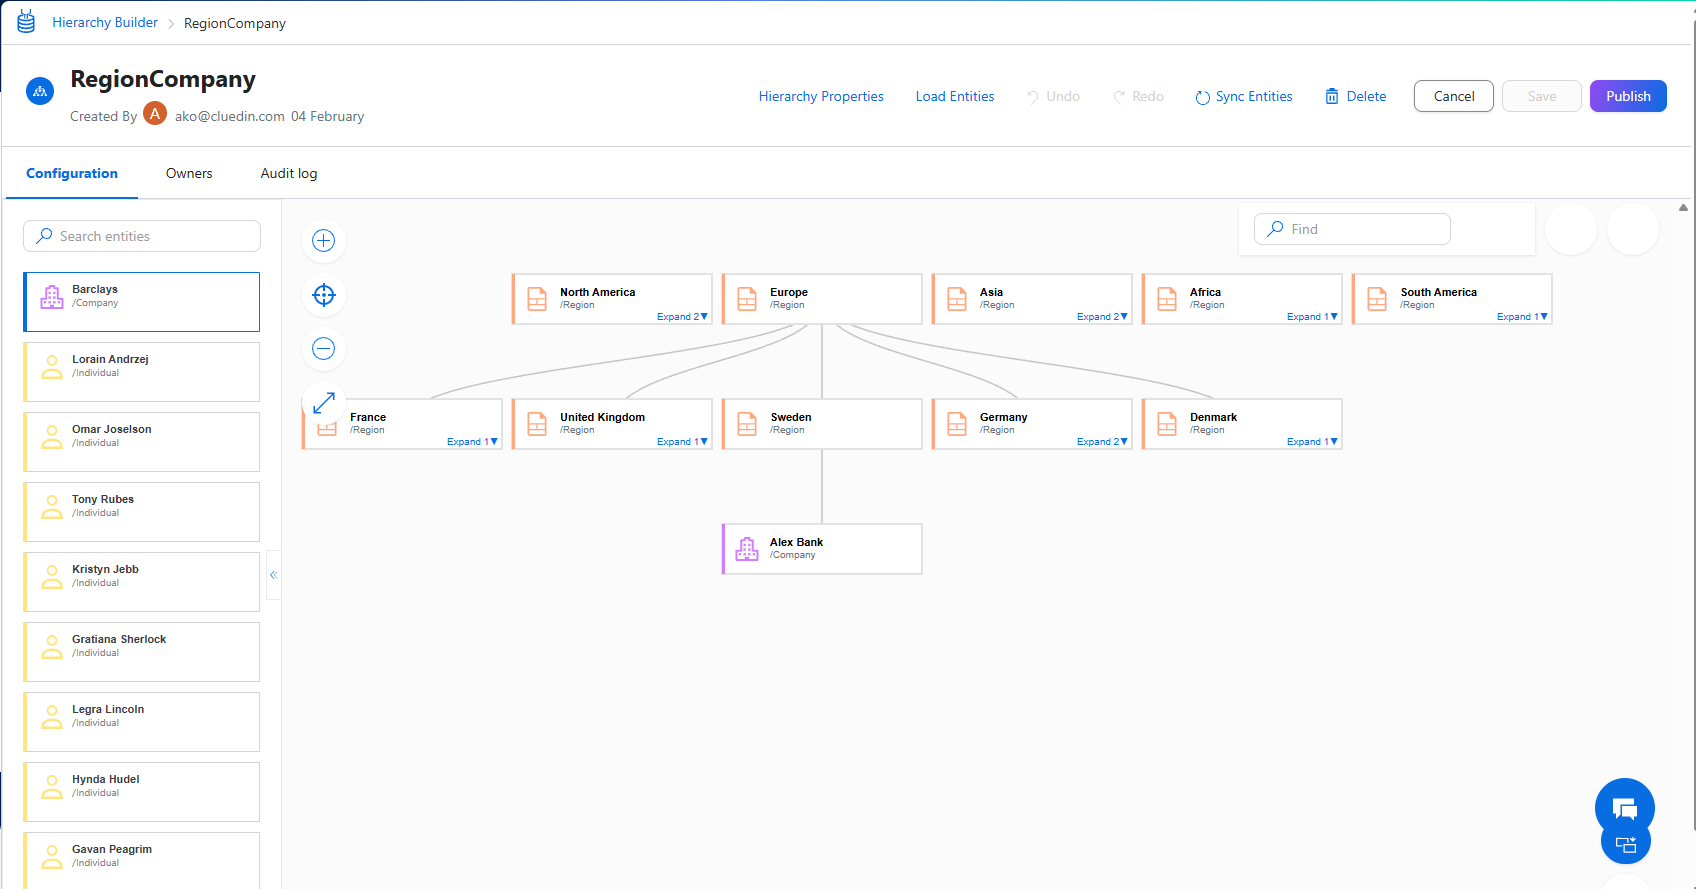
Note: This hierarchy would need to be published in order to expose the relationships as we usually expect, in format of /HRCHY_<hierarchyName> (example: /HRCHY_RegionCompany)
The next step would be to export the data related to the hierarchy using the CluedIn Stream in a configuration similar to the following:
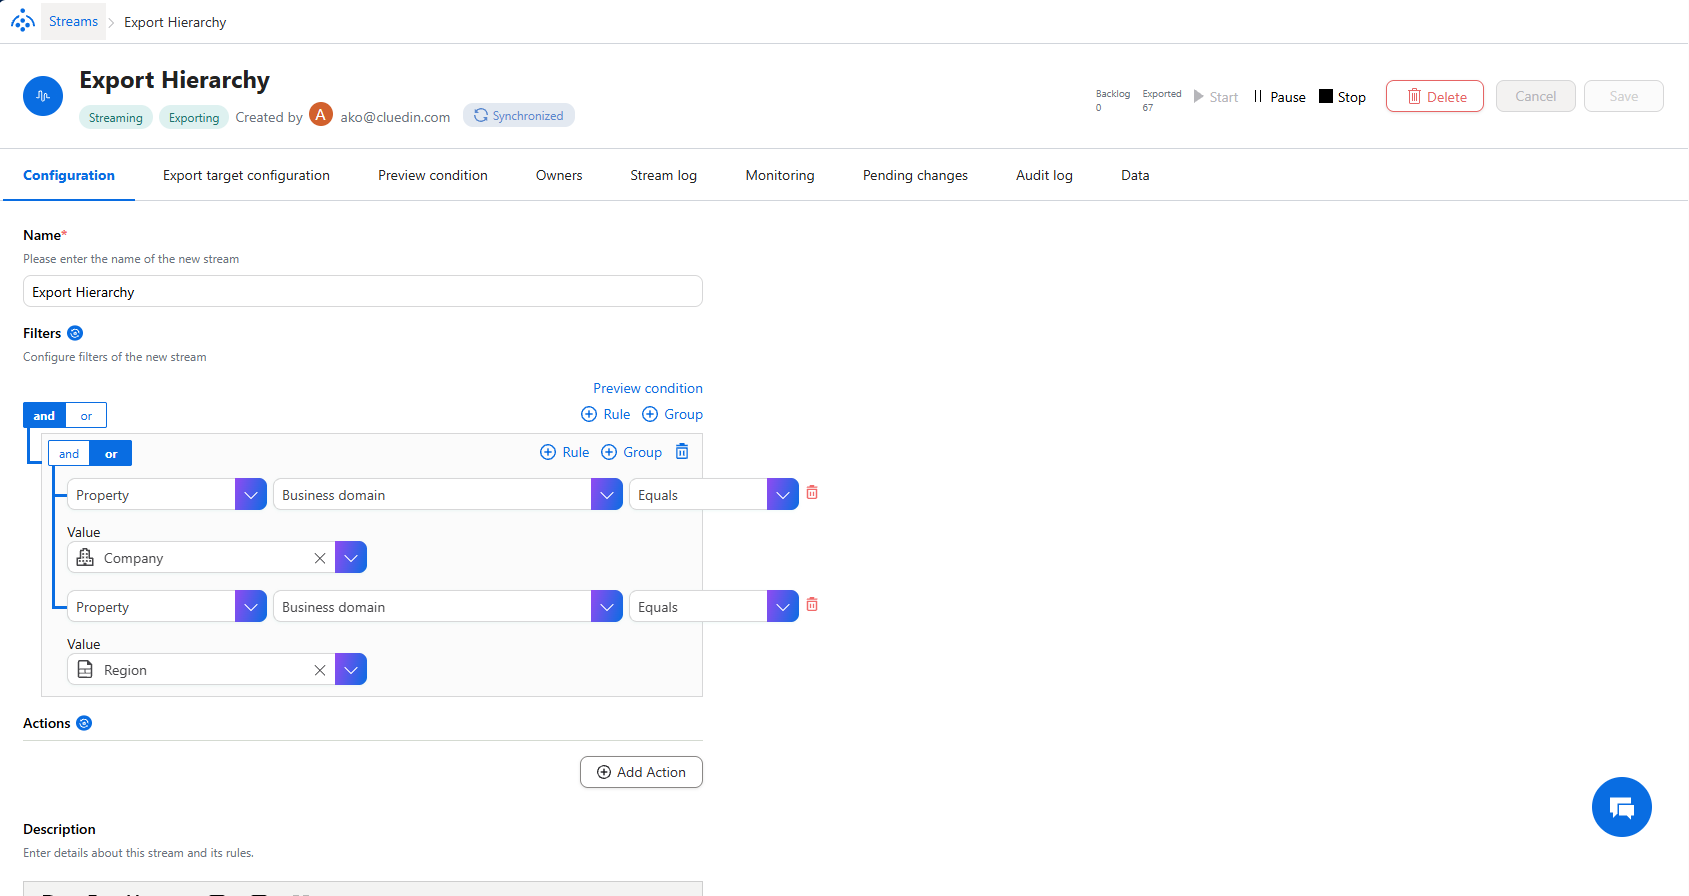
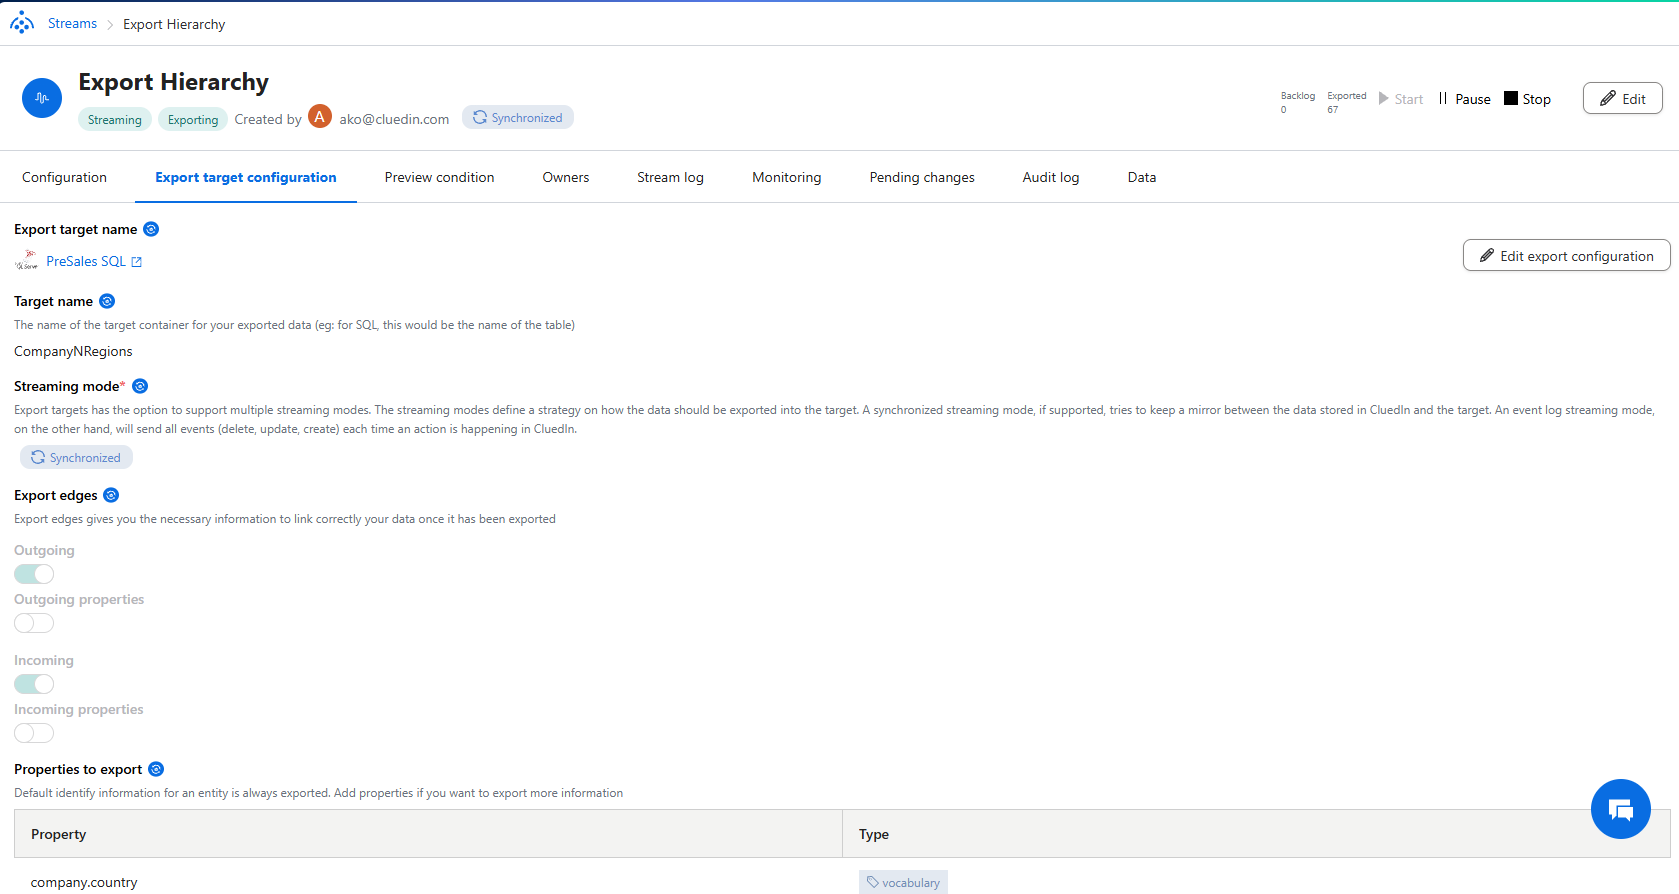
Note: It is not important which properties you are exporting, as the following script is working with auto-generated columns. It is crucial that you export Outgoing Edges, Incoming Edges are optional.
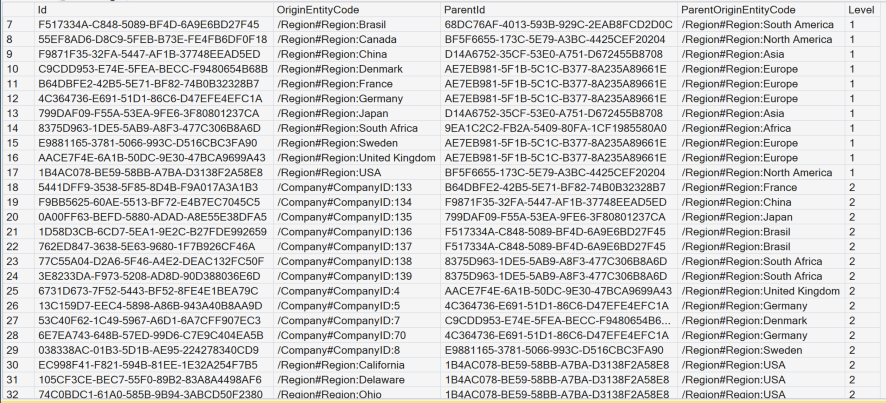
When the data is being exported, depending on how you defined the target table, you will get the 3 tables in the following format:
<TargetTable><TargetTable>Codes<TargetTable>OutgoingEdges
Now the SQL script to get the parent/child/level format of the table, it would look like this:
;WITH ParentChild AS
(
    SELECT
        Child.Id                AS Id,
        Child.OriginEntityCode  AS OriginEntityCode,
        Parent.Id               AS ParentId,
        Parent.OriginEntityCode AS ParentOriginEntityCode
    FROM dbo.CompanyNRegionsOutgoingEdges E
    JOIN dbo.CompanyNRegions Parent
        ON Parent.Id = E.EntityId
    JOIN dbo.CompanyNRegionsCodes CC
        ON CC.Code = E.ToCode
    JOIN dbo.CompanyNRegions Child
        ON Child.Id = CC.EntityId
    WHERE E.EdgeType = '/HRCHY_RegionCompany'
),
Roots AS
(
    SELECT N.Id, N.OriginEntityCode
    FROM dbo.CompanyNRegions N
    WHERE NOT EXISTS (SELECT 1 FROM ParentChild pc WHERE pc.Id = N.Id)
),
CTE AS
(
    SELECT
        R.Id,
        R.OriginEntityCode,
        NULLIF(R.Id, R.Id) AS ParentId,                         -- typed NULL
        NULLIF(R.OriginEntityCode, R.OriginEntityCode) AS ParentOriginEntityCode, -- typed NULL
        0 AS [Level],
        CAST('|' + CONVERT(varchar(36), R.Id) + '|' AS varchar(max)) AS [Path]
    FROM Roots R

    UNION ALL

    SELECT
        pc.Id,
        pc.OriginEntityCode,
        pc.ParentId,
        pc.ParentOriginEntityCode,
        c.[Level] + 1,
        c.[Path] + CONVERT(varchar(36), pc.Id) + '|'
    FROM CTE c
    JOIN ParentChild pc
        ON pc.ParentId = c.Id
    WHERE CHARINDEX('|' + CONVERT(varchar(36), pc.Id) + '|', c.[Path]) = 0  -- cycle guard
)
SELECT
    Id, OriginEntityCode, ParentId, ParentOriginEntityCode, [Level]
FROM CTE
ORDER BY [Level], OriginEntityCode
OPTION (MAXRECURSION 32767);
In your case, you would need to replace any occurence of CompanyNRegions with your <TargetTable> and /HRCHY_RegionCompany with your /HRCHY_<HierarchyName>