

Manage streams
how-to Steps to accomplish one task
On this page
- Start, pause, and stop a stream
- Stream actions
- Edit a stream
- Manage field mappings
- View stream details
- Organize streams into folders
- Duplicate a stream
In this article, you will learn how to manage streams to keep the entire process of delivering data to external systems efficient, well-organized, and aligned with your data management objectives.
Start, pause, and stop a stream
Stream controls allows you to manage the process of sending records to the export target.
-
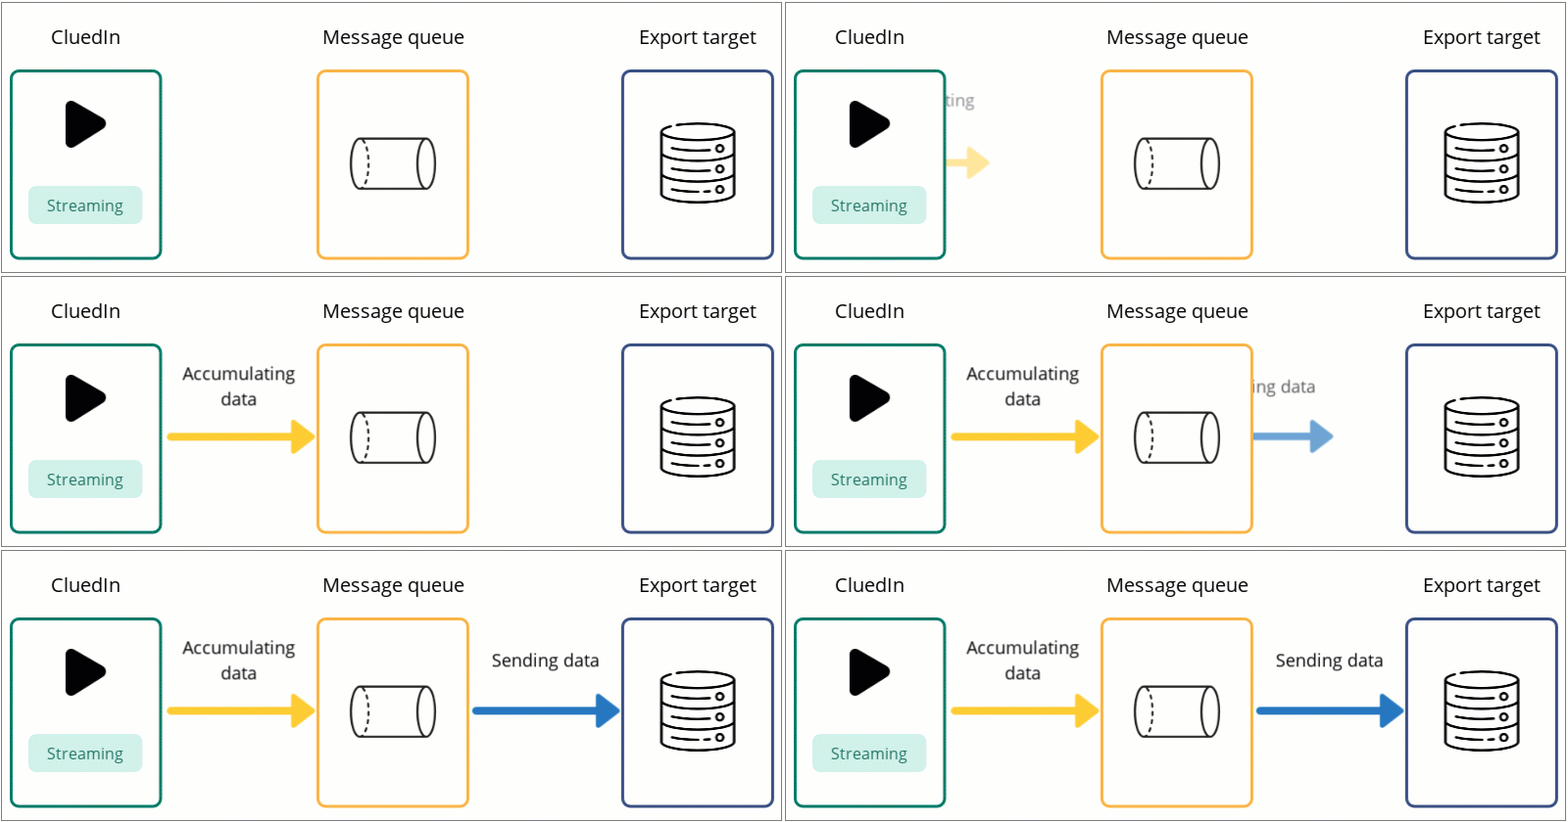
Start – the stream will start accumulating records in the queue and sending them to the export target.
-
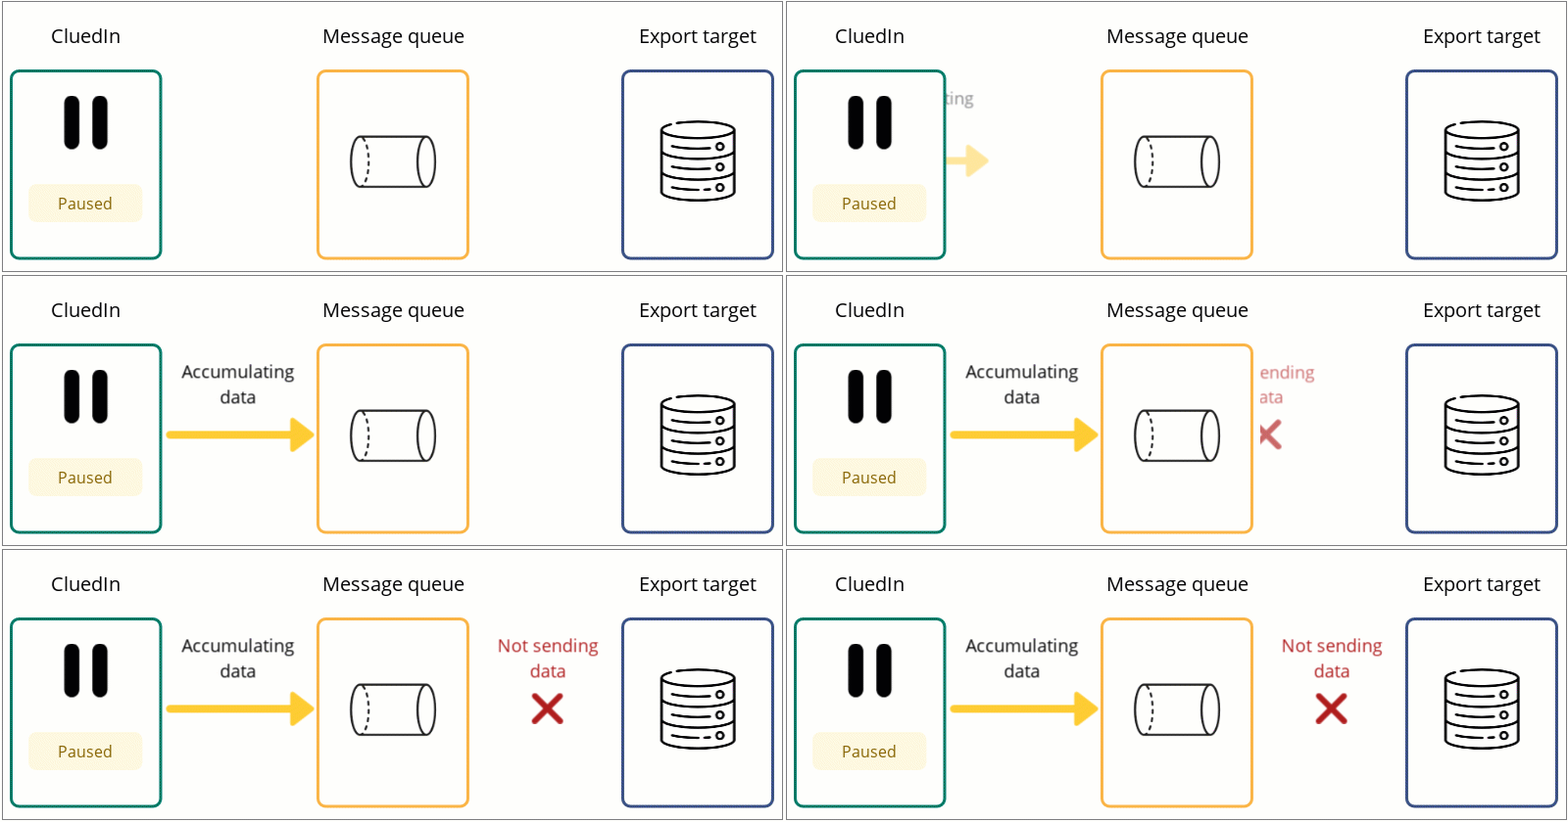
Pause – the stream will stop sending records to the export target, but it will still continue accumulating records in the queue.
-
Stop – the stream will stop sending records to the export target and accumulating records in the queue.
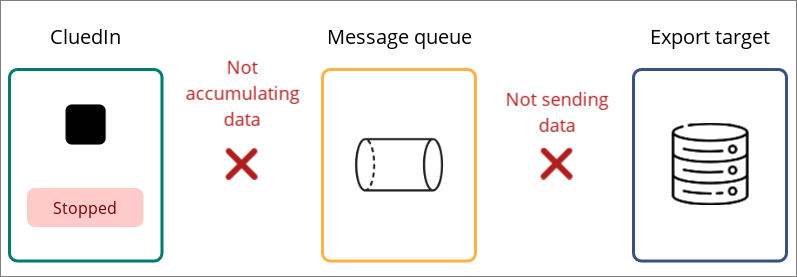
Think of these stream controls as similar to the controls on a video player. When you select Pause, the stream halts temporarily, remembering your playback position and storing records in the queue. This way, when you resume the stream, it continues from where you left off, maintaining your progress. On the other hand, Stop leads to a complete termination of the streaming process and clearing of the queue. If you start the stream after it had been stopped, it will start sending records to the export target from the beginning, not from the point at which you stopped the stream.
Start or stop multiple streams at once
From the list of streams, you can select multiple streams and start or stop them all at once, instead of controlling each stream individually from its details page.
To start or stop multiple streams
-
On the navigation pane, go to Consume > Streams.
-
In the list of streams, select the checkbox next to each stream that you want to start or stop. You can also select the checkbox in the header row to select all streams on the page.
-
Near the upper-right corner of the list of streams, select Start or Stop.
Each selected stream is started or stopped independently; if the action fails for one stream, the rest of the selected streams are not affected.
Stream actions
In addition to the standard stream controls, a stream can provide stream actions that perform operations specific to its configured export target.
The actions available on a stream depend on the export target itself. This means that two streams can expose different actions even when their stream configuration is otherwise similar.
To view the actions available for a stream, open the stream details page and select More. If the configured export target provides additional actions, they appear in this menu.
Run an export immediately
File-based export targets can provide a Run Export action. This allows you to trigger an export immediately instead of waiting for the next configured export schedule.
For example, Run Export can be available for export targets such as:
To run an export manually:
-
Open the stream.
-
On the stream details page, select More.
-
Select Run Export.
CluedIn starts an export using the stream’s current configuration and export target settings.
Running an export manually does not replace or disable the configured export schedule. The stream continues to run according to its existing schedule after the manual export has been triggered.
Stream actions are defined by the export target. Run Export is therefore not available for every stream, and other export targets can expose different actions.
Edit a stream
You can edit the stream configuration and the export target configuration regardless of the stream status.
If you change filters or actions in the stream configuration or if you make any changes in the export target configuration, saving these changes will trigger stream reprocessing. It means that all records existing in the export target will be deleted, and the stream will start sending records to the export target again.
To edit the stream configuration
- On the Configuration tab, edit the needed items. You can edit any field or section. Then, select Save and confirm your choice.
To edit the export target configuration
-
On the Export Target Configuration tab, select Edit Export Configuration, and then confirm your choice.
-
Make the needed changes, select Save, and then confirm your choice.
Manage field mappings
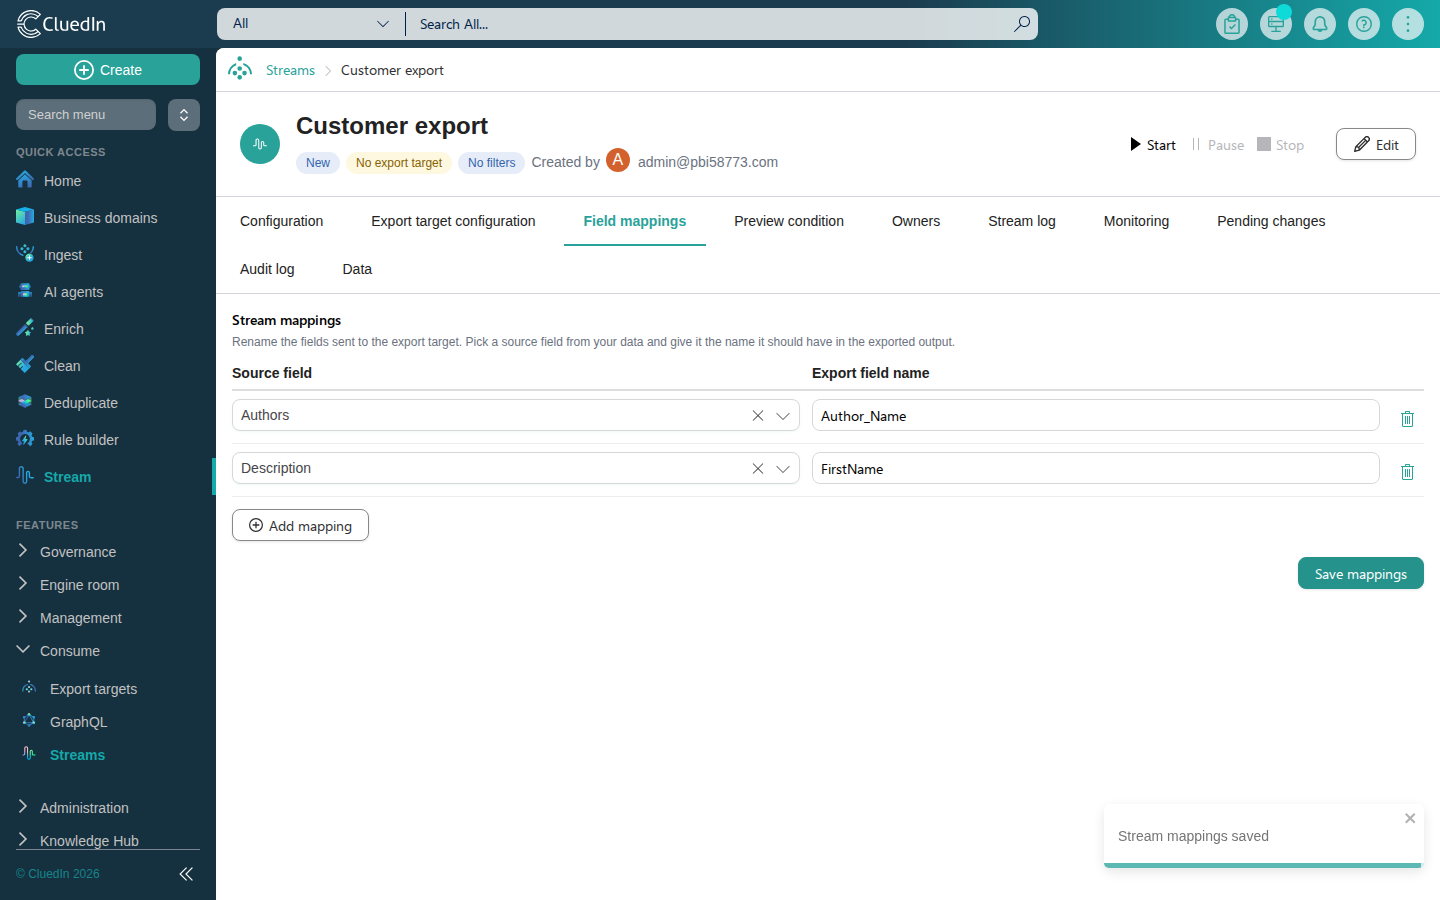
Stream mappings control the name that each field has in the data sent to the export target. For example, you can map customer.firstName to FirstName or First_Name, so the field appears under a different name in the exported output than it has in CluedIn.
You can view and manage field mappings on the Field mappings tab of the stream details page. Every field mapping also determines whether that field is sent to the export target: removing a mapping stops that field from being exported, and the fields you select on the Properties to export tab when you configure the export target are reflected here as field mappings too.
To add a field mapping
-
On the stream details page, select the Field mappings tab.
-
Select Add mapping.
-
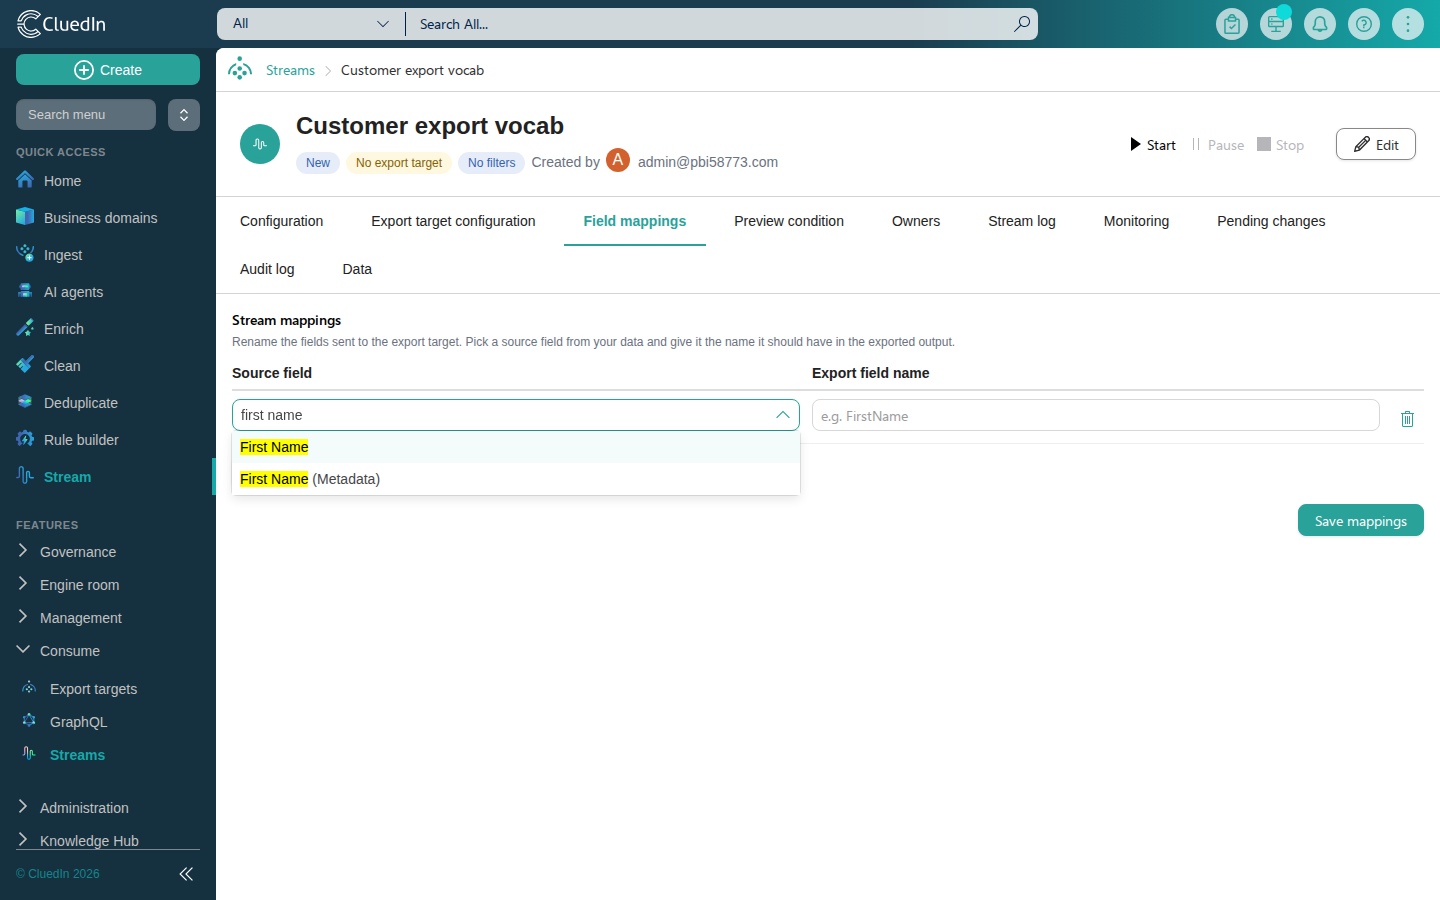
In Source field, search for and select the field from your data that you want to export. You can pick an entity property (for example, Description) or a vocabulary key (for example, a customer’s first name). If more than one field shares the same name, CluedIn shows the vocabulary it belongs to next to it so you can tell them apart.
-
In Export field name, enter the name that the field should have in the exported output. If you keep this the same as the source field, the field keeps its original name on export.
-
Select Save mappings.
To edit or remove a field mapping
-
To rename a field in the exported output, update its Export field name, and then select Save mappings.
-
To stop exporting a field, select the delete icon next to its mapping, and then select Save mappings.
If a mapping is missing a source field or an export field name, CluedIn blocks saving and shows a validation message until you fix or remove the incomplete mapping.
View stream details
On the stream details page, there are several tabs where you can view stream-related information:
-
Preview Condition – you can view the records that match the filters from the Configuration tab.
-
Data – you can view the records that will be sent to the export target. These records match the filters from the Configuration tab and contain the properties you selected on the Export Target Configuration tab.
-
Monitoring – you can view real-time data on ingestion, processing, and publishing of records, as well as any exceptions.
Organize streams into folders
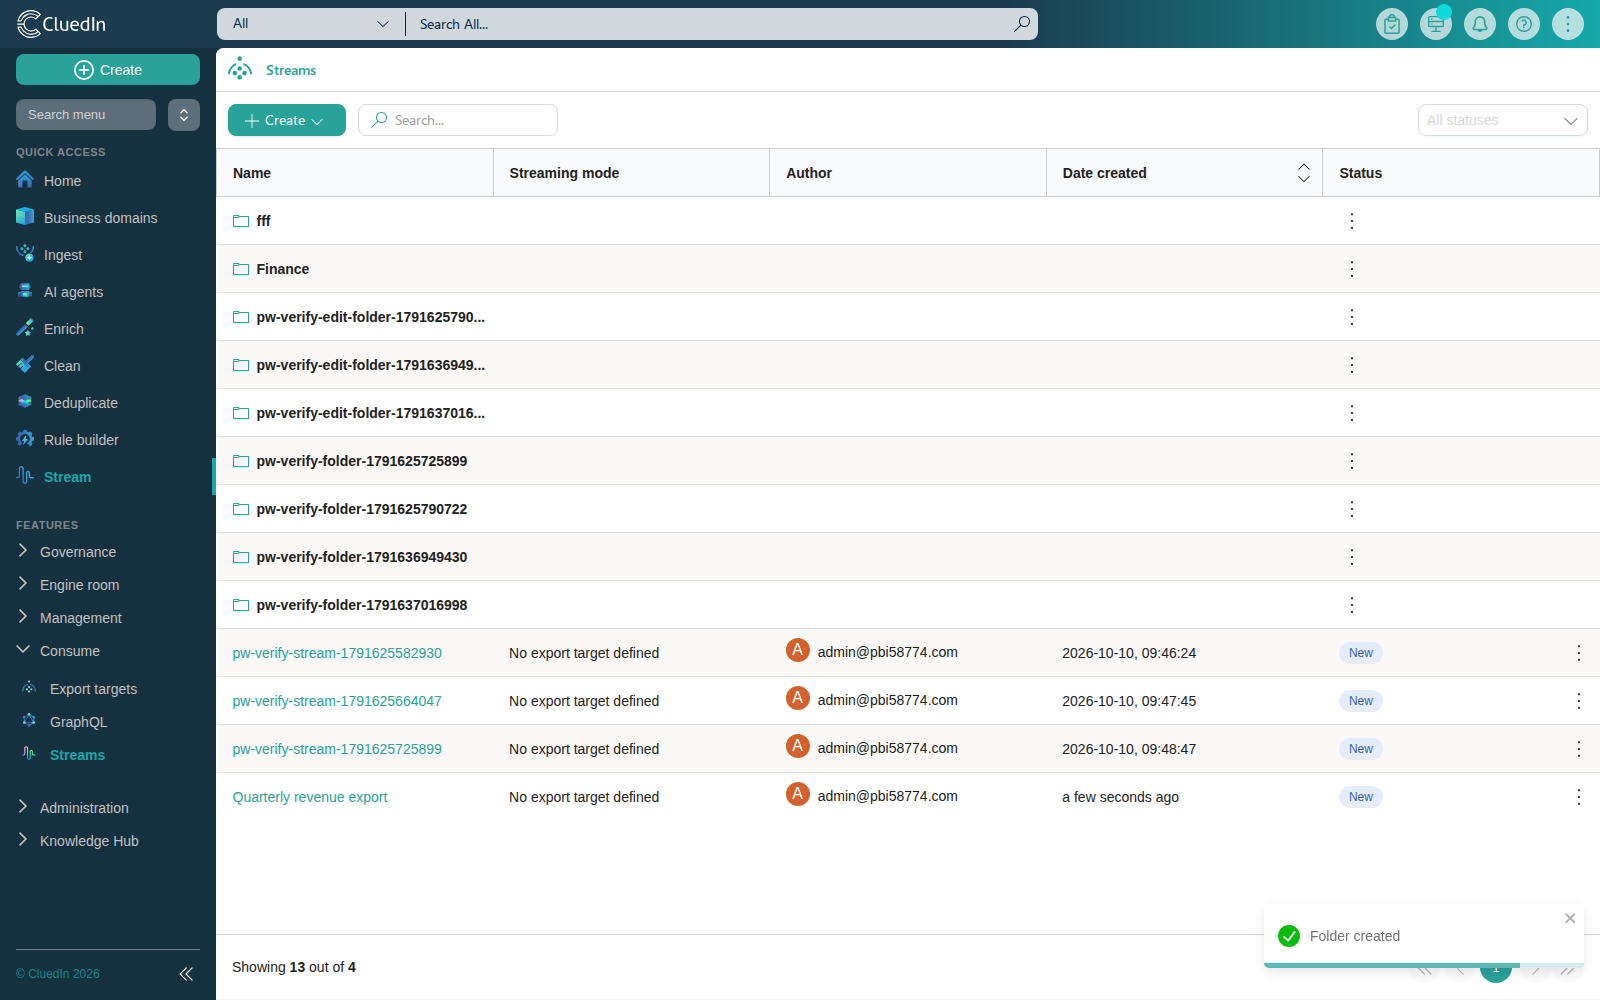
You can use folders to organize streams—for example, by export target or by team. Folders and streams appear together in the same list, similar to files and folders in a file explorer. Streams that aren’t assigned to a folder appear in the root list, alongside any folders.
To create a folder
-
In the list of streams, select Create > Add folder.
-
Enter a folder name, and then select Save.
The new folder appears as a row in the list.
To assign a stream to a folder
-
Drag the stream row and drop it onto the folder row.
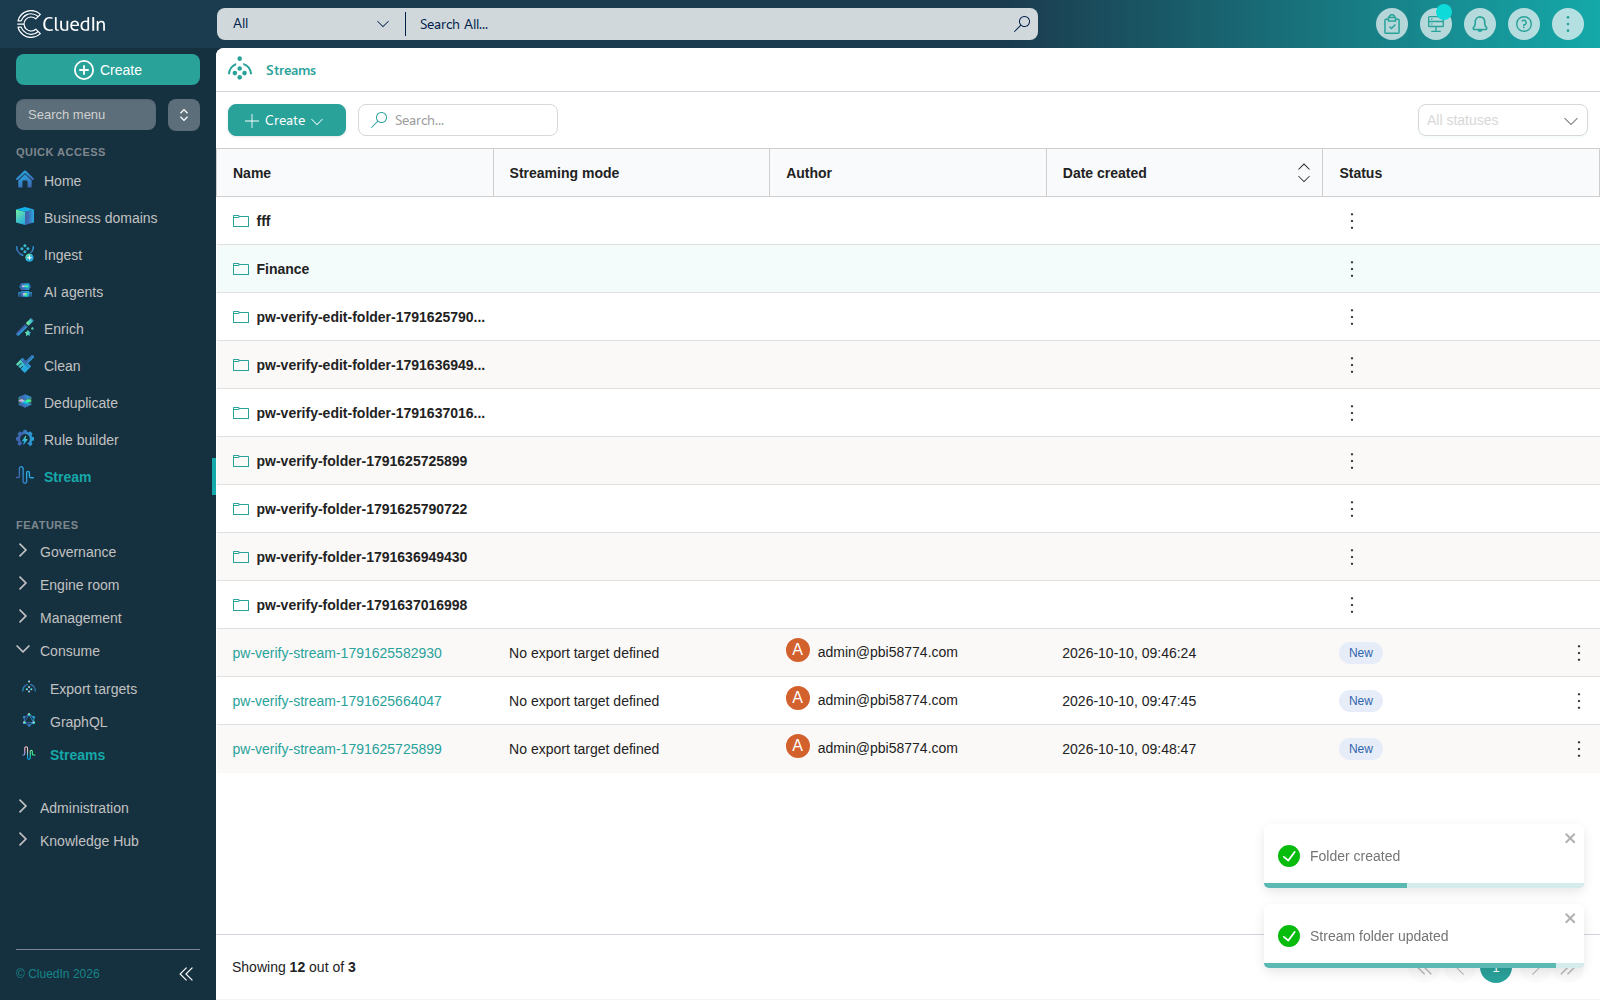
You can also assign a folder from the stream’s Configuration tab: in Folder, select an existing folder, or type a new folder name to create one, and then select Save. This field is also available when you create a stream.
To view the streams in a folder
-
In the list of streams, select the folder that you want to view.
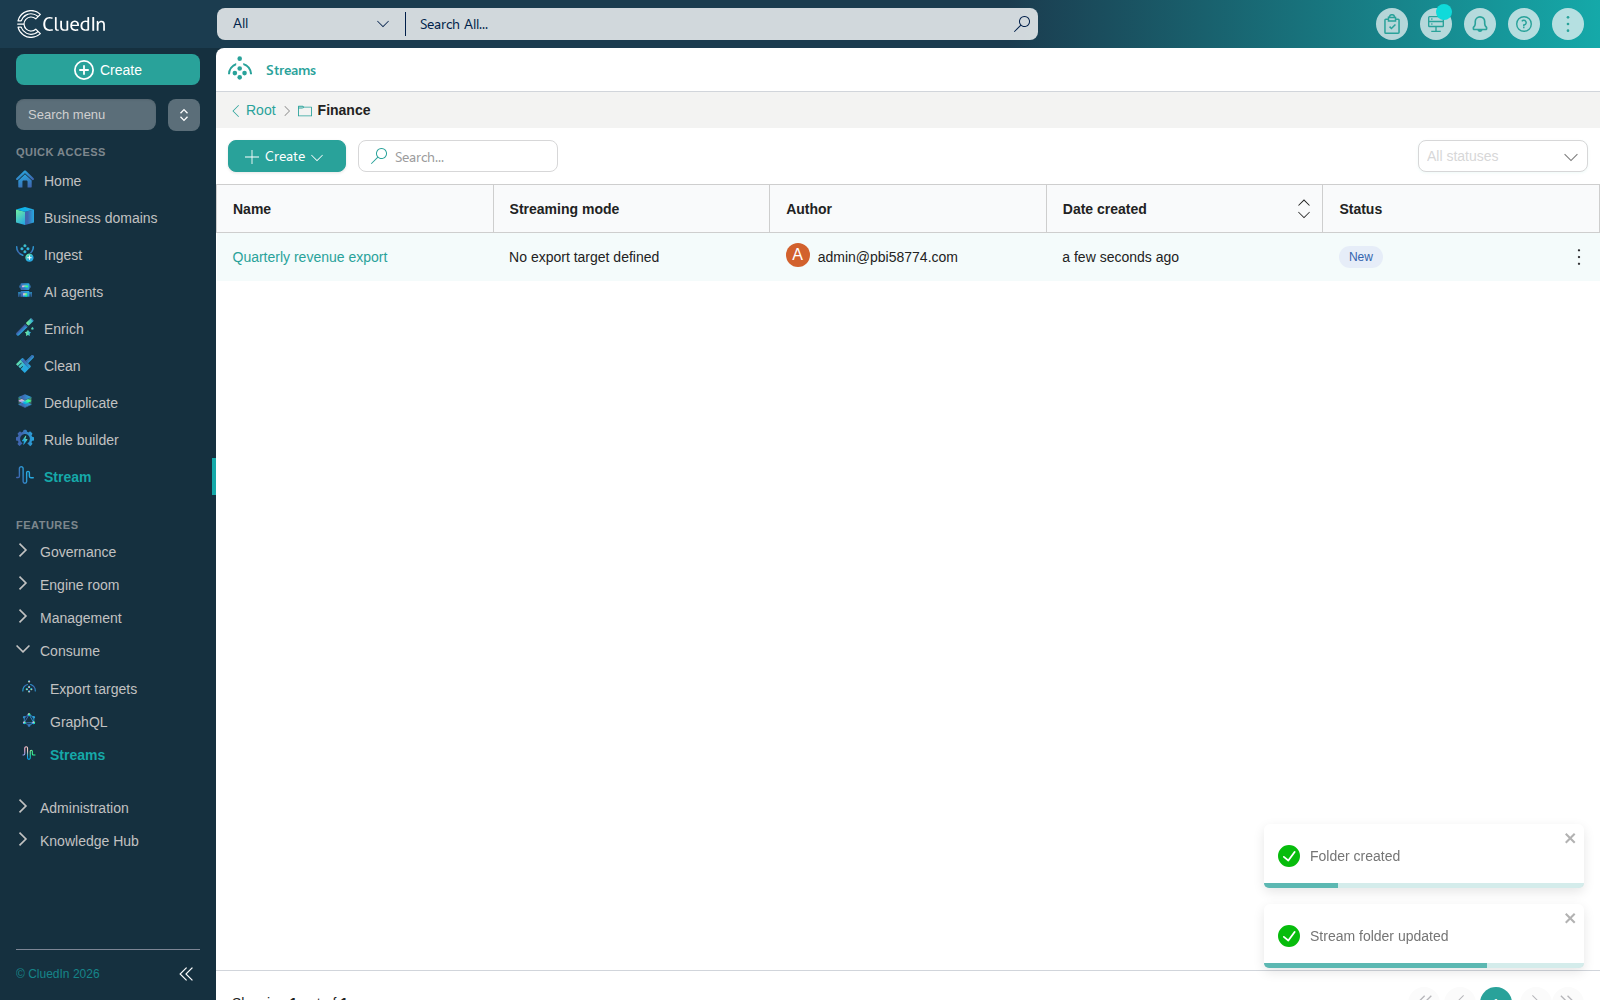
The breadcrumb at the top of the list shows **Root >
**. Select **Root** in the breadcrumb to return to the merged list of folders and unfoldered streams.
To remove a stream from its folder
- While viewing the folder’s contents, drag the stream row and drop it onto Root in the breadcrumb. The stream returns to the root list. You can also remove the stream from the folder from its Configuration tab by clearing the Folder field and selecting Save.
Duplicate a stream
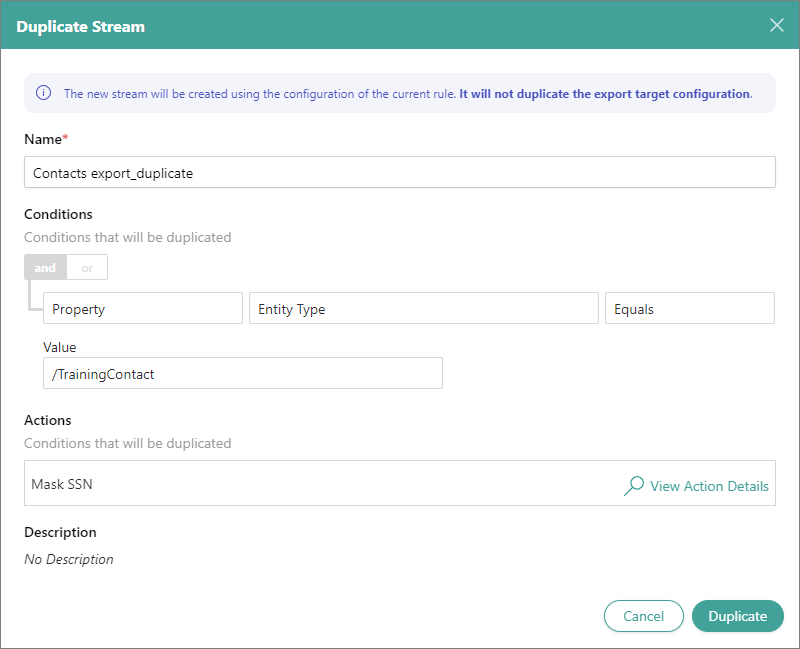
Duplicating a stream means creating a new stream with the configuration of the existing stream. This configuration includes filters and actions but does not include the export target configuration. This means that you need to select and configure the export target and choose the properties for export from scratch for the duplicated stream.
You can duplicate a stream if you want to send the same selection of golden records to another export target.
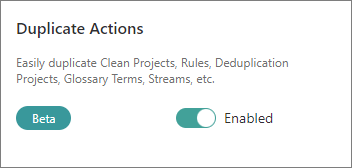
Duplication is a beta feature. To access it, go to Administration > Feature Flags, and enable the Duplicate Actions feature.
To duplicate a stream
-
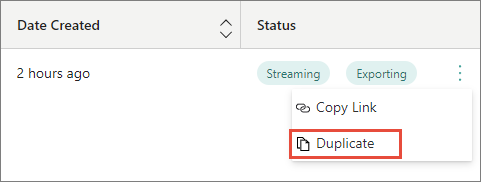
In the list of streams, find a stream that you want to duplicate. Then, open the three-dot menu for the stream, and select Duplicate.
-
In Name, review the default name of the new stream and modify it if needed. The default name is created by adding _duplicate to the name of the stream that you’re duplicating.
-
In Conditions, review the filters that will be duplicated for the new stream.
-
In Actions, review the list of actions that will be duplicated for the new stream. To view the details of a specific action, select View Action Details.
-
Select Duplicate.
The new stream is created. By default, the export target for the stream is not configured. Now, you can modify the stream configuration if needed and configure the export target. When you reach the desired configuration, start the stream.