

Dataverse connector (legacy)
reference Facts, options, APIs
On this page
Note: This is the legacy Dataverse connector (V1). It is only available for CluedIn installations that have been upgraded and were previously using the Dataverse connector. This connector has been superseded by the new Dataverse connector (V2), which is not backwards compatible. There is no automated migration path from V1 to V2, as customers may have built apps on top of the V1 tables. For new installations, use the Dataverse connector (V2).
The legacy connector is visually indicated by a greyscale icon with a “legacy” pill tag.
This article outlines how to configure the Dataverse connector to publish data from CluedIn to Microsoft Dataverse.
Configure Dataverse connector
Before you begin, make sure you have completed the prerequisites, including creating a security role and creating an application user.
-
On the navigation pane, go to Consume > Export Targets. Then, select Add Export Target.
-
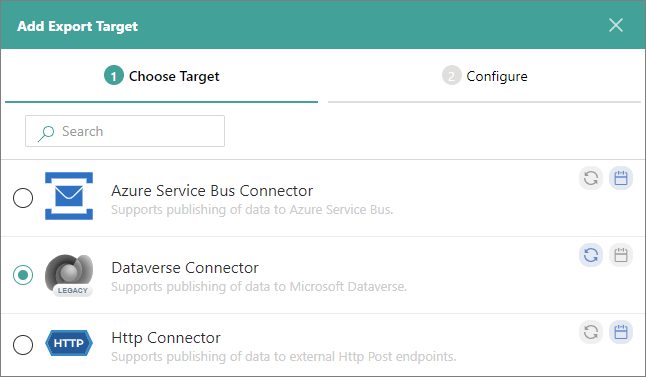
On the Choose Target tab, select Dataverse Connector. Then, select Next.
-
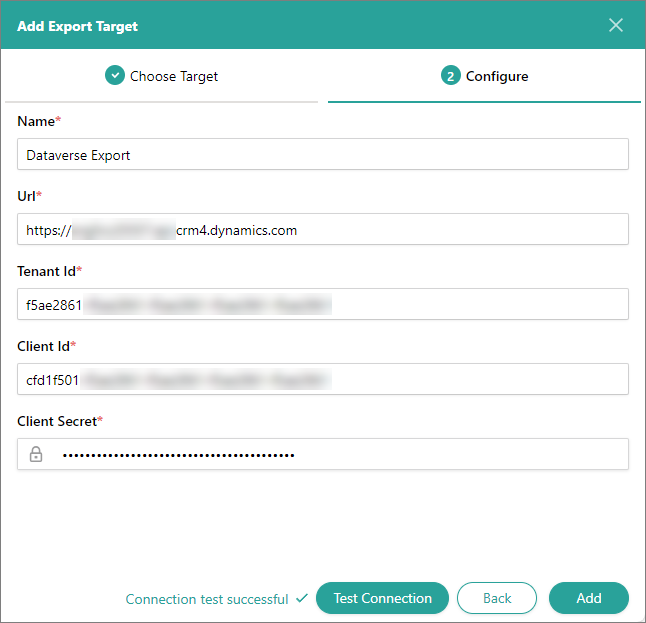
On the Configure tab, enter the connection details:
-
Name – user-friendly name of the export target that will be displayed on the Export Target page in CluedIn.
-
URL – you can find this value in Power Apps, in the environment that contains your Dataverse instance. In the upper-right corner of the Power Apps page, select the settings icon, and then select Developer Resources. Copy the value in Web API endpoint and paste it to the URL field in CluedIn. You do not need to copy the version of the API (
/api/data/v9.2).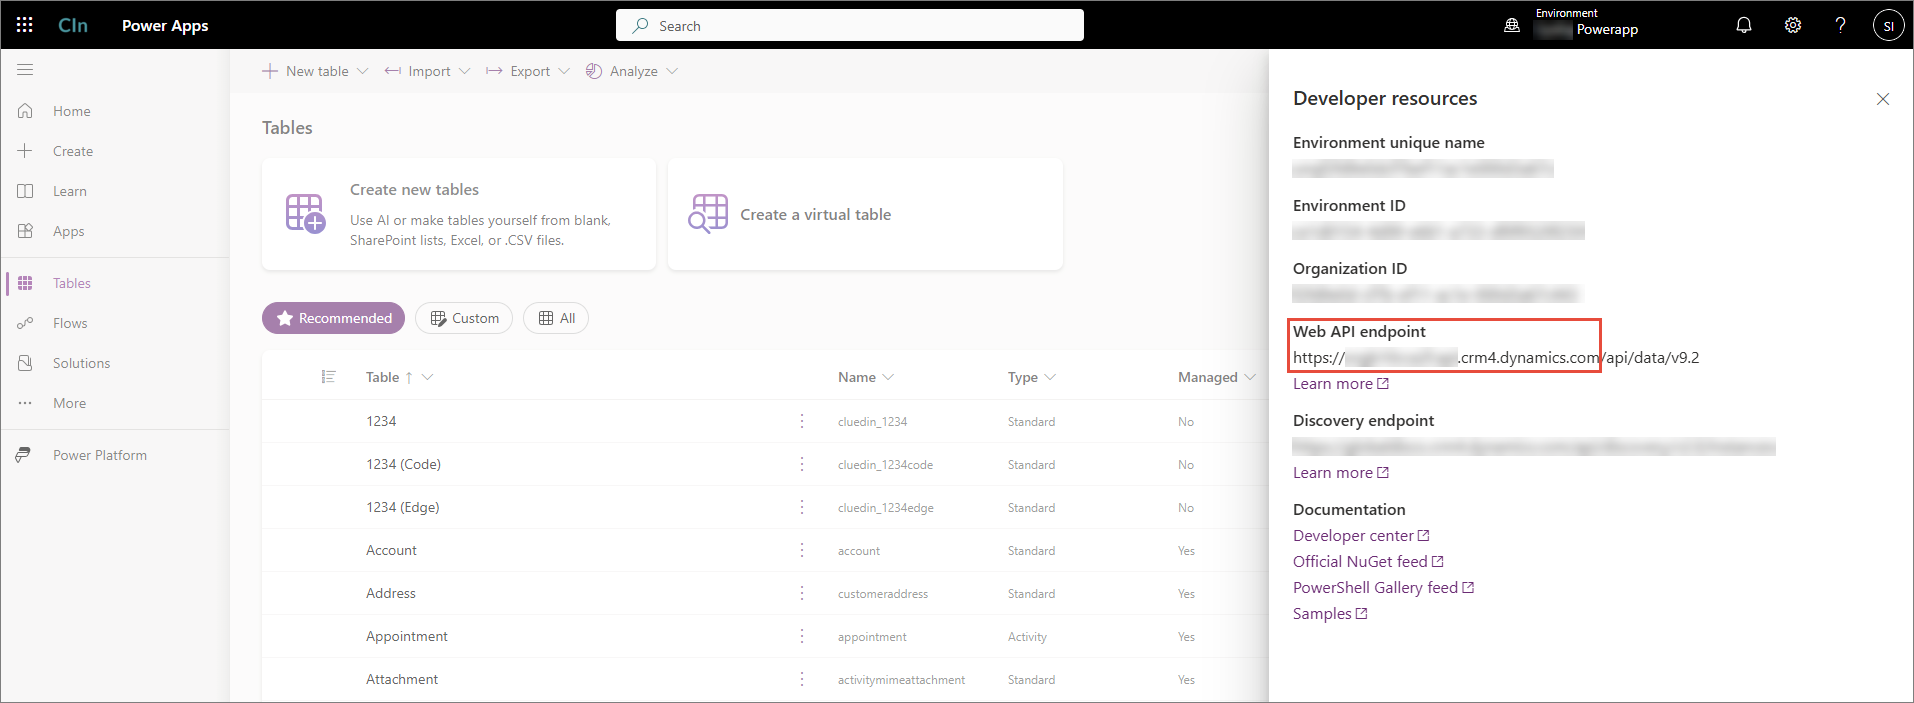
-
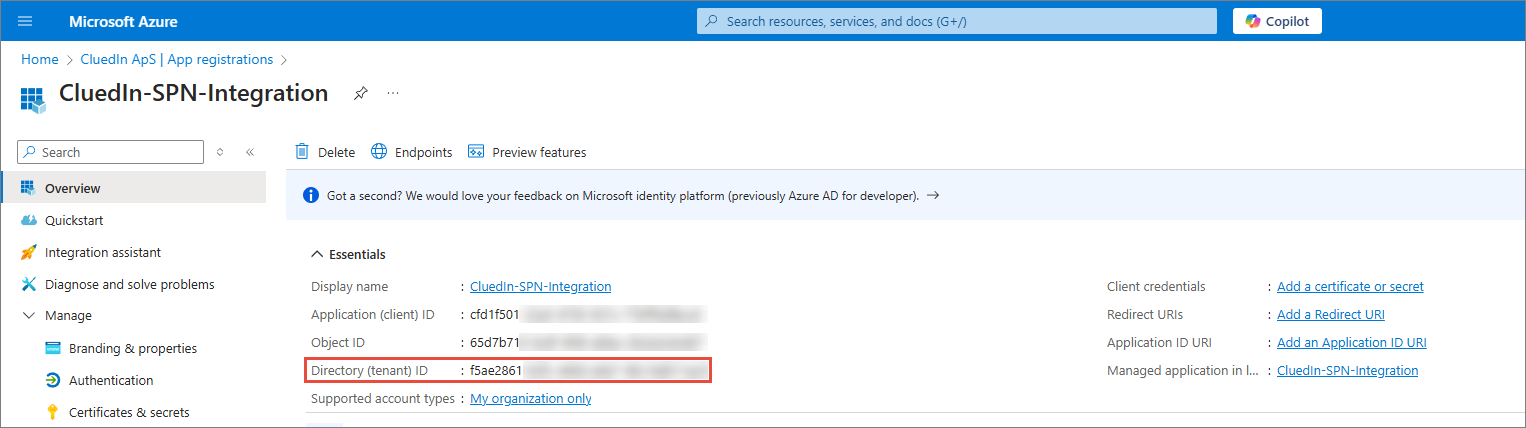
TenantID – unique identifier for your Microsoft Entra tenant. You can find this value in the Overview section of app registration.
-
ClientID – unique identifier assigned to the Dataverse app when it was registered in the Microsoft identity platform. You can find this value in the Overview section of app registration.
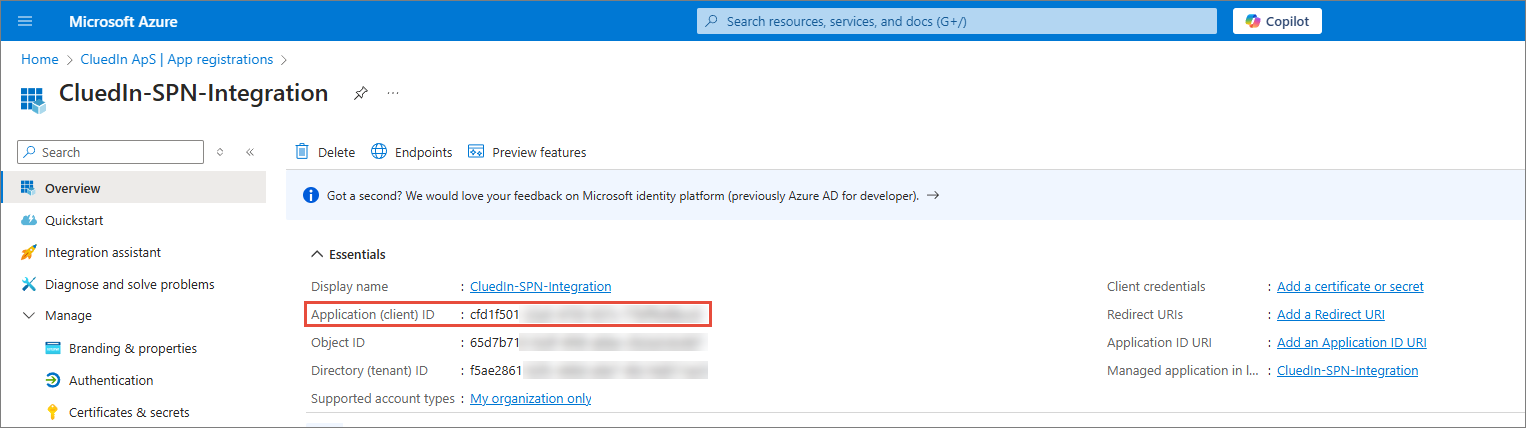
-
ClientSecret – confidential string used by your Dataverse app to authenticate itself to the Microsoft identity platform. You can find this value in the Certificates & secrets section of app registration.
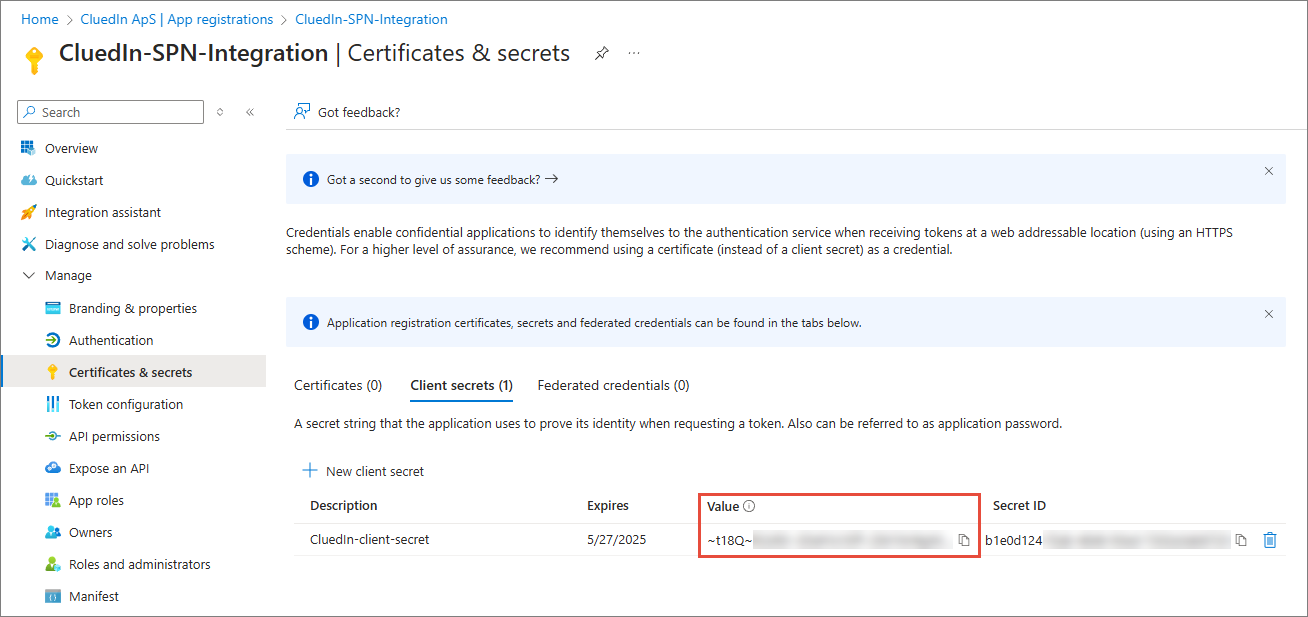
-
-
Test the connection to make sure it works, and then select Add.
Prerequisites
-
Create a service principal (app registration) by following the instructions in this article. This step is needed to get Client ID, Tenant ID, and Client Secret for connector configuration.
-
Make sure you use a service principal to authenticate and access Dataverse.
-
Make sure you have a Power Apps account. For more information on how to sign up for Power Apps, see Microsoft documentation.
-
Create a security role in Power Platform Admin Center by following the instructions in the Create a security role section.
-
Create an application user and tag it with 2 security roles—the role you created in the previous step and the System Administrator role—by following the instructions in the Create an application user section.
Create a security role
This section outlines how to create a security role in Power Apps in order to use it for the Dataverse connector.
-
Sign in to your Power Apps account and make sure you are in the intended environment.
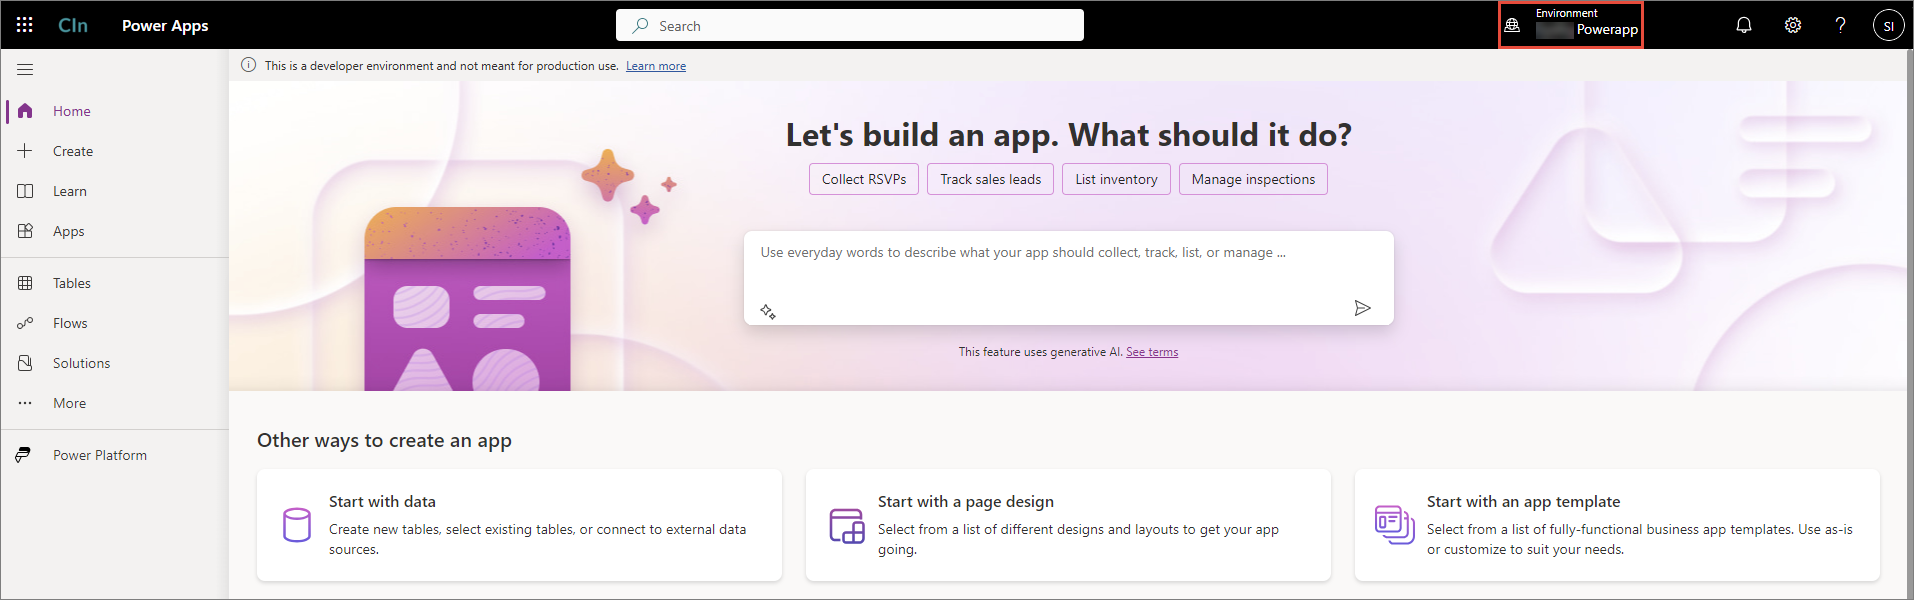
-
Select Power Platform > Power Platform Admin Center.
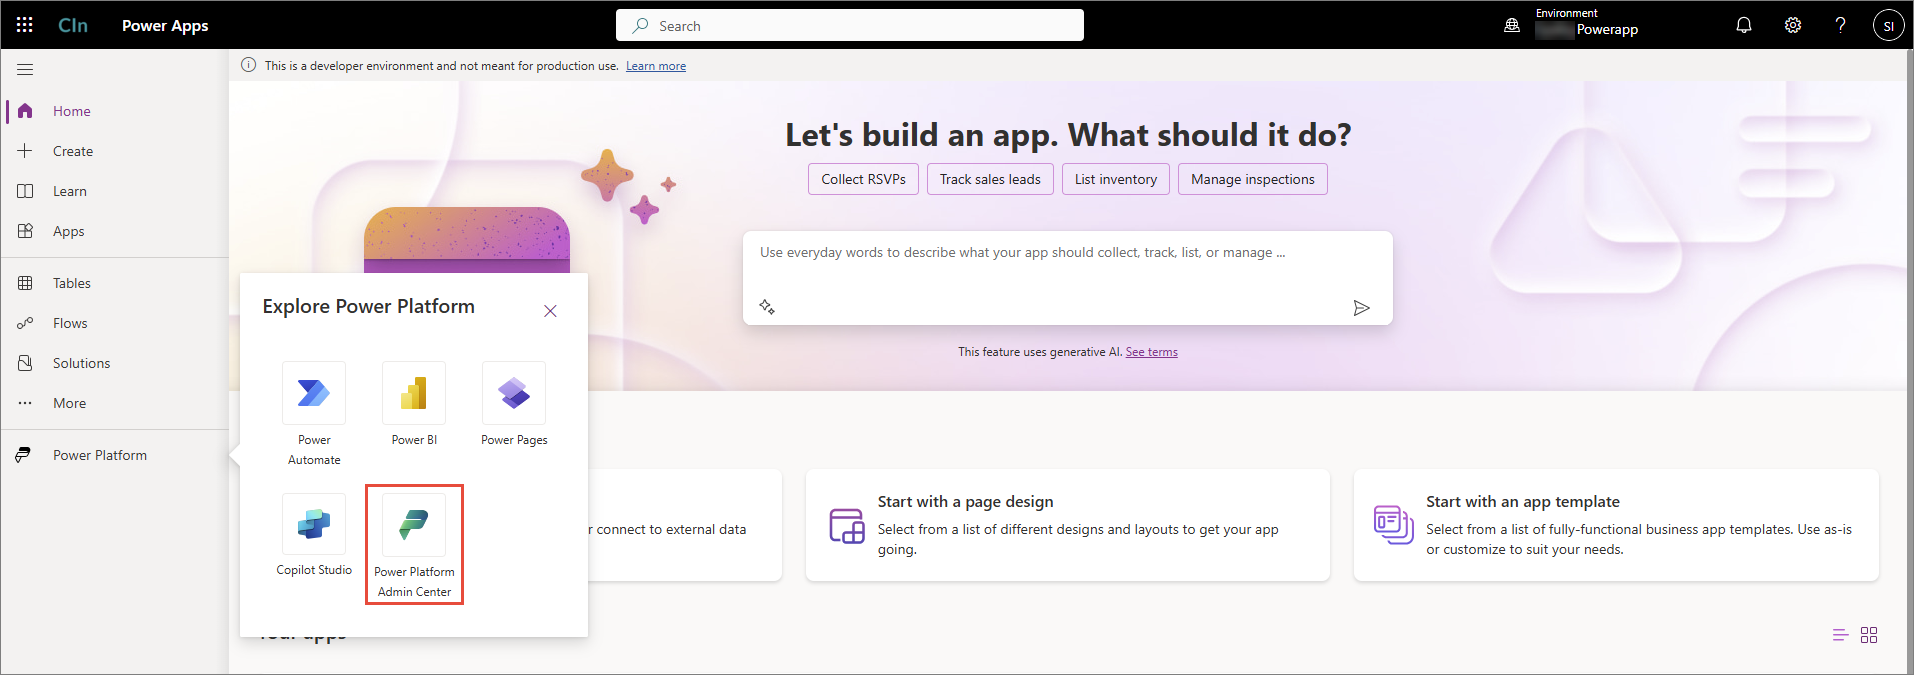
-
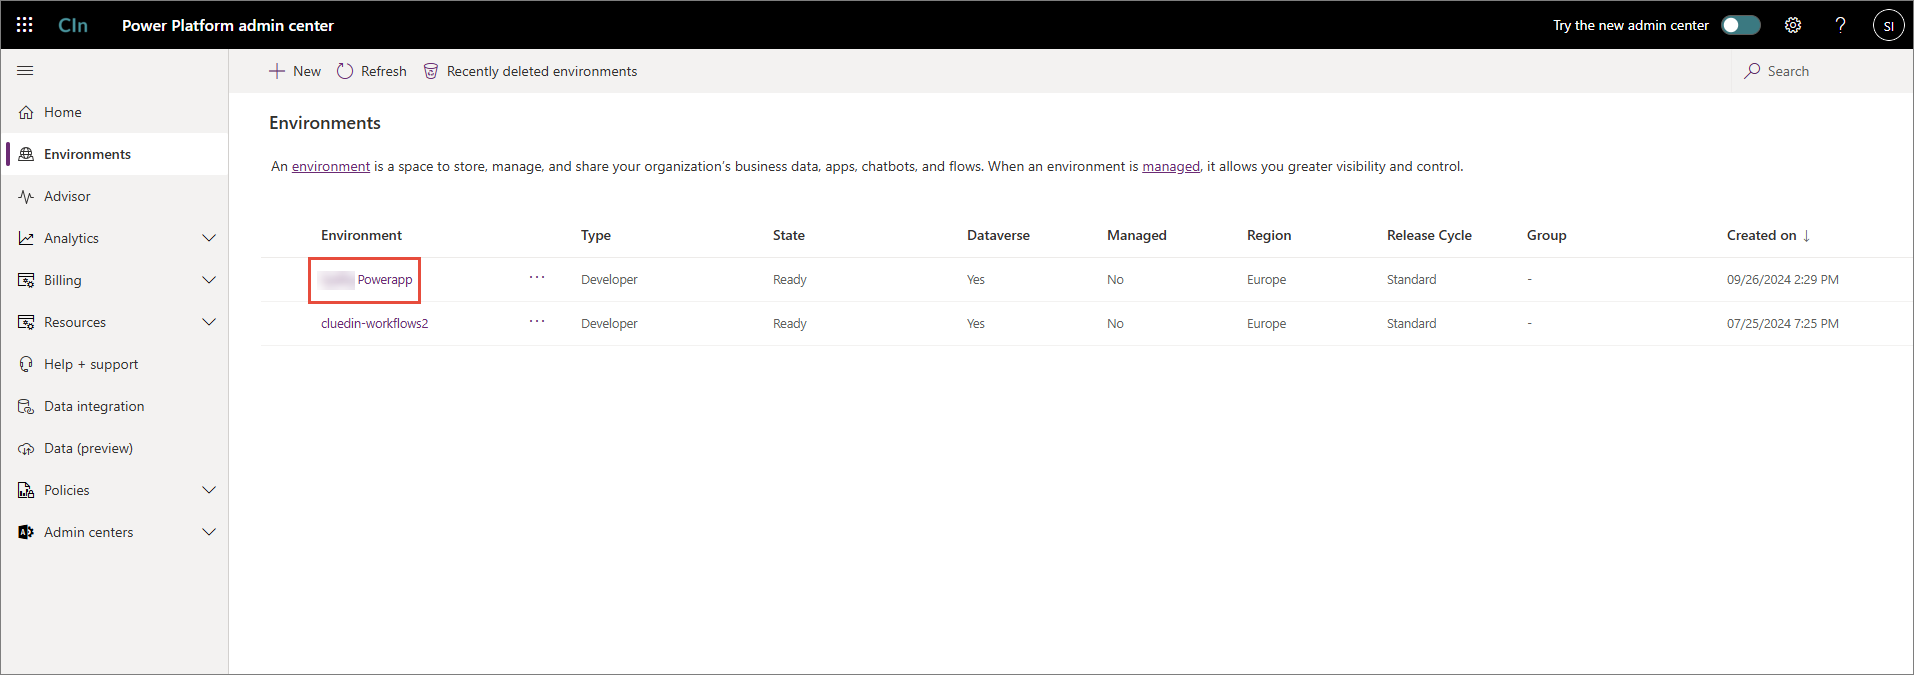
Select Environments, and then select your intended environment.
-
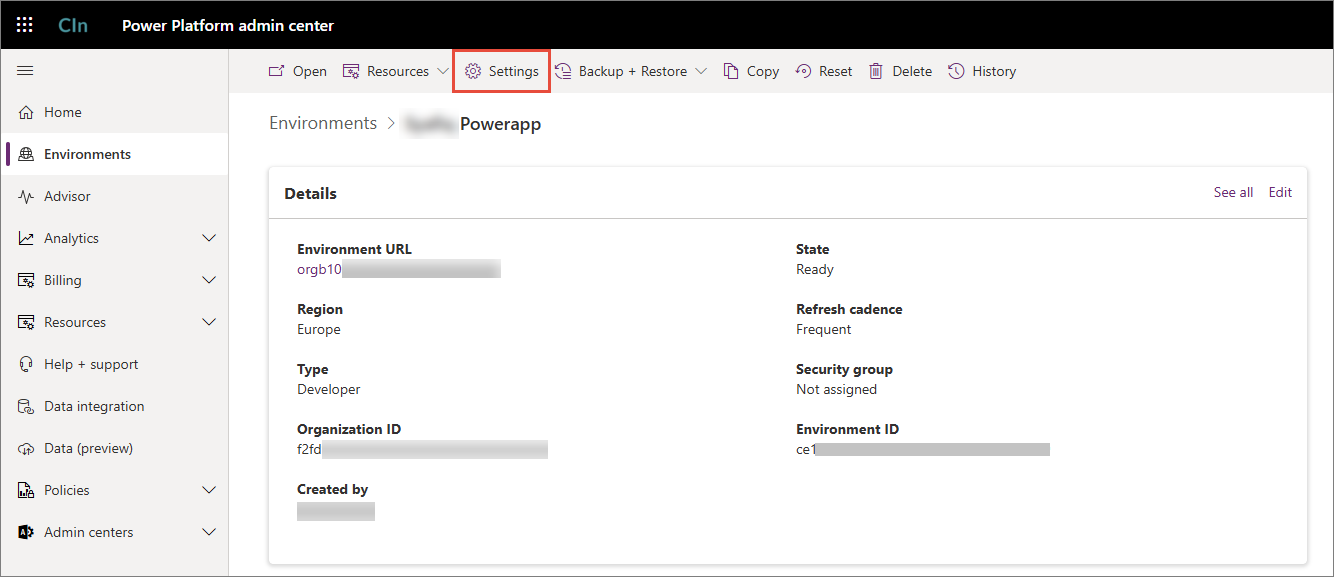
At the top of the page, select Settings.
-
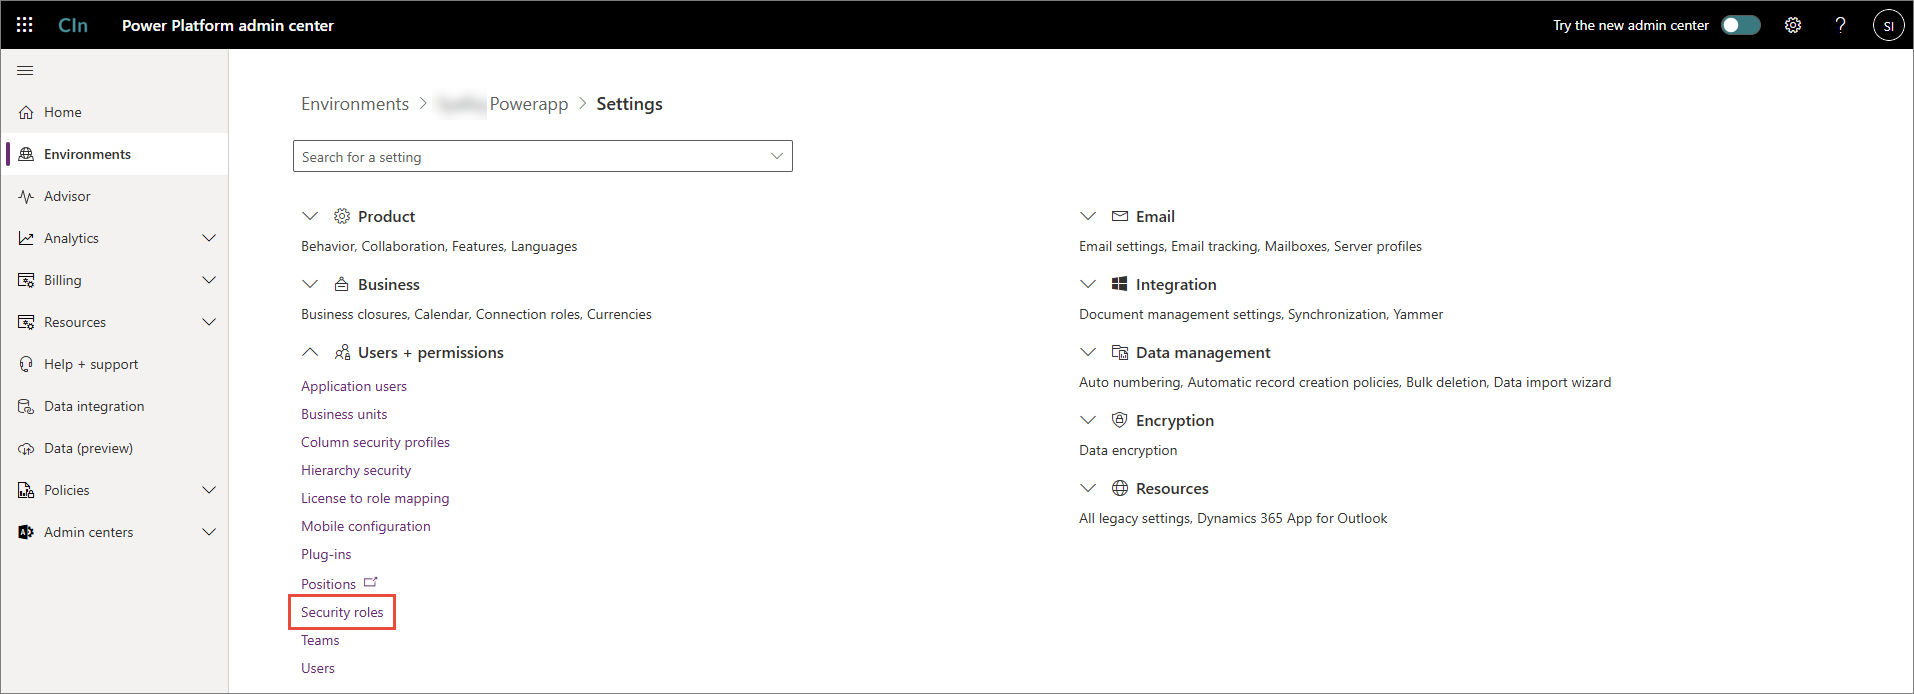
Expand the Users + permissions dropdown, and then select Security roles.
-
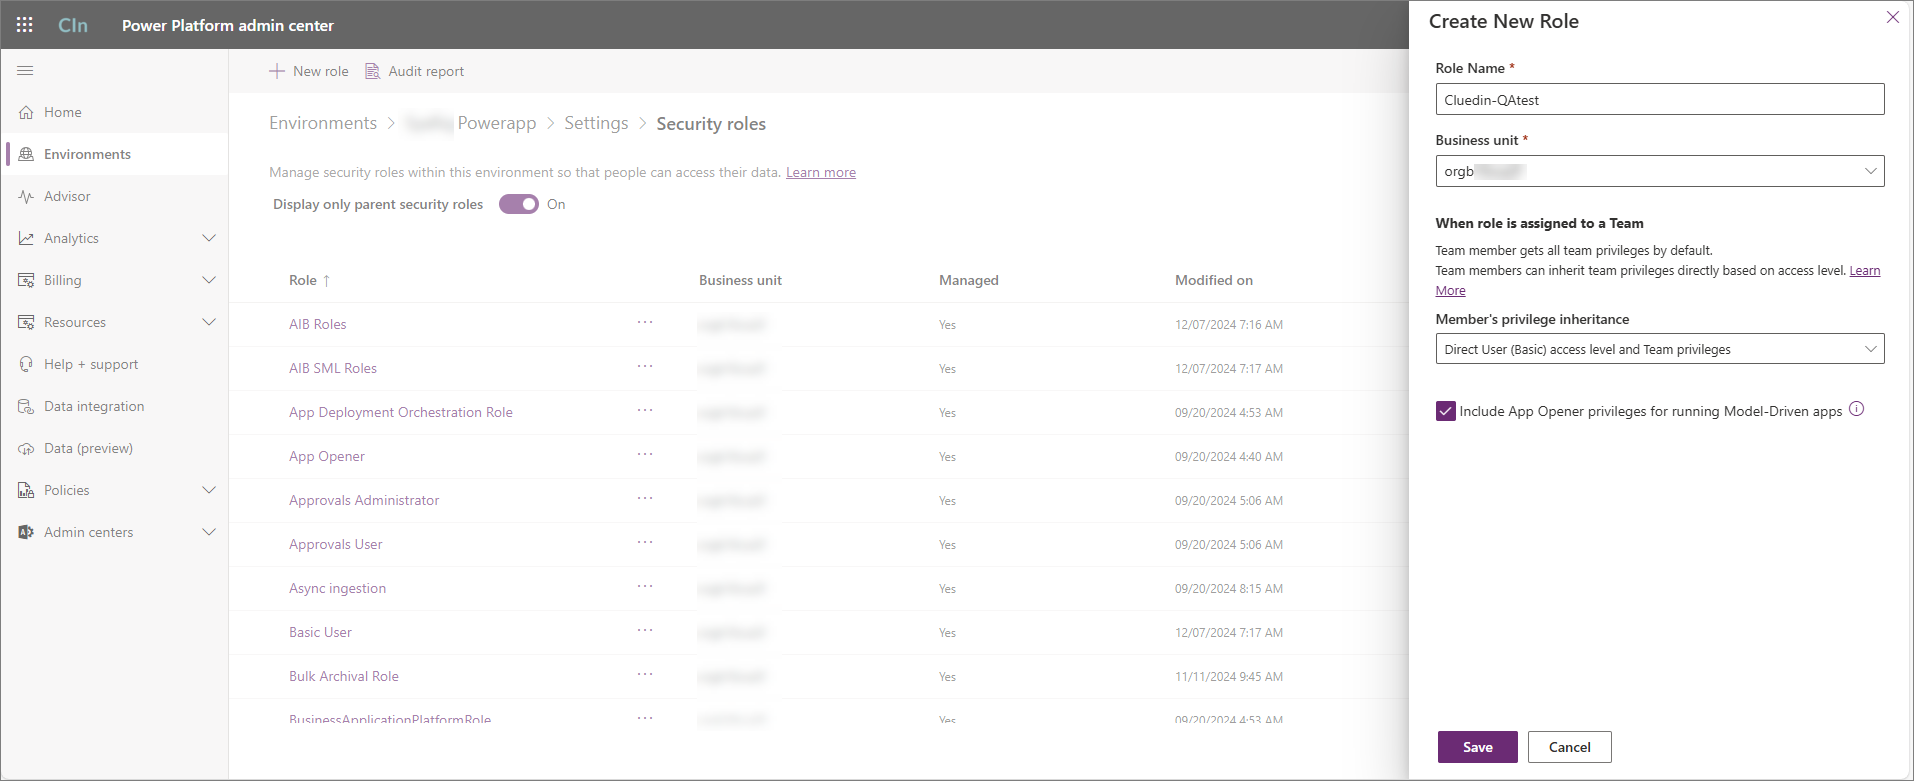
At the top of the page, select New role. Enter the Role Name and select the Business unit of your organization. If needed, change the Member’s privilege inheritance according to your preference. Finally, select Create.
-
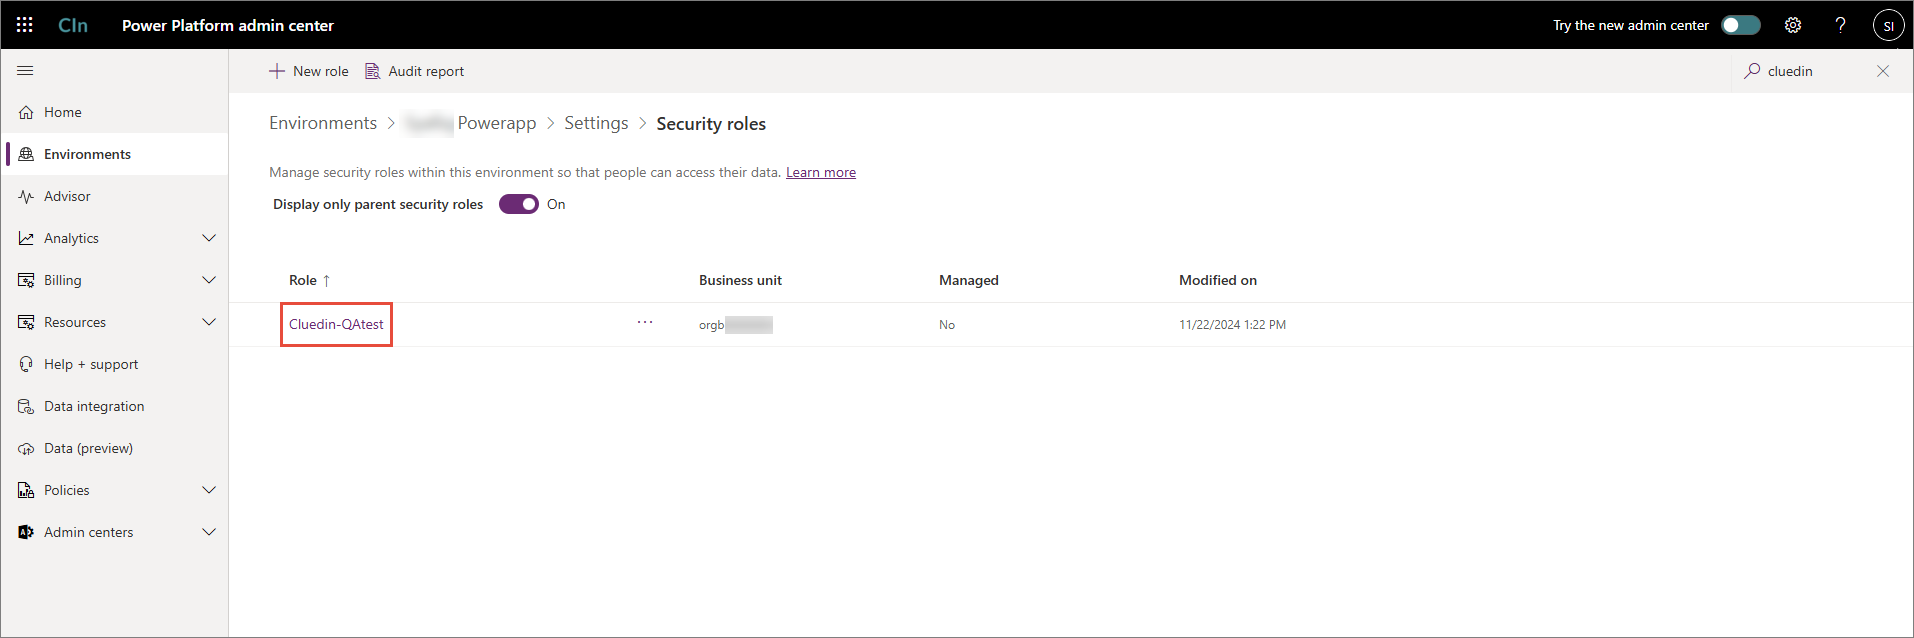
In the list of all security roles, find and select the role that you’ve just created.
-
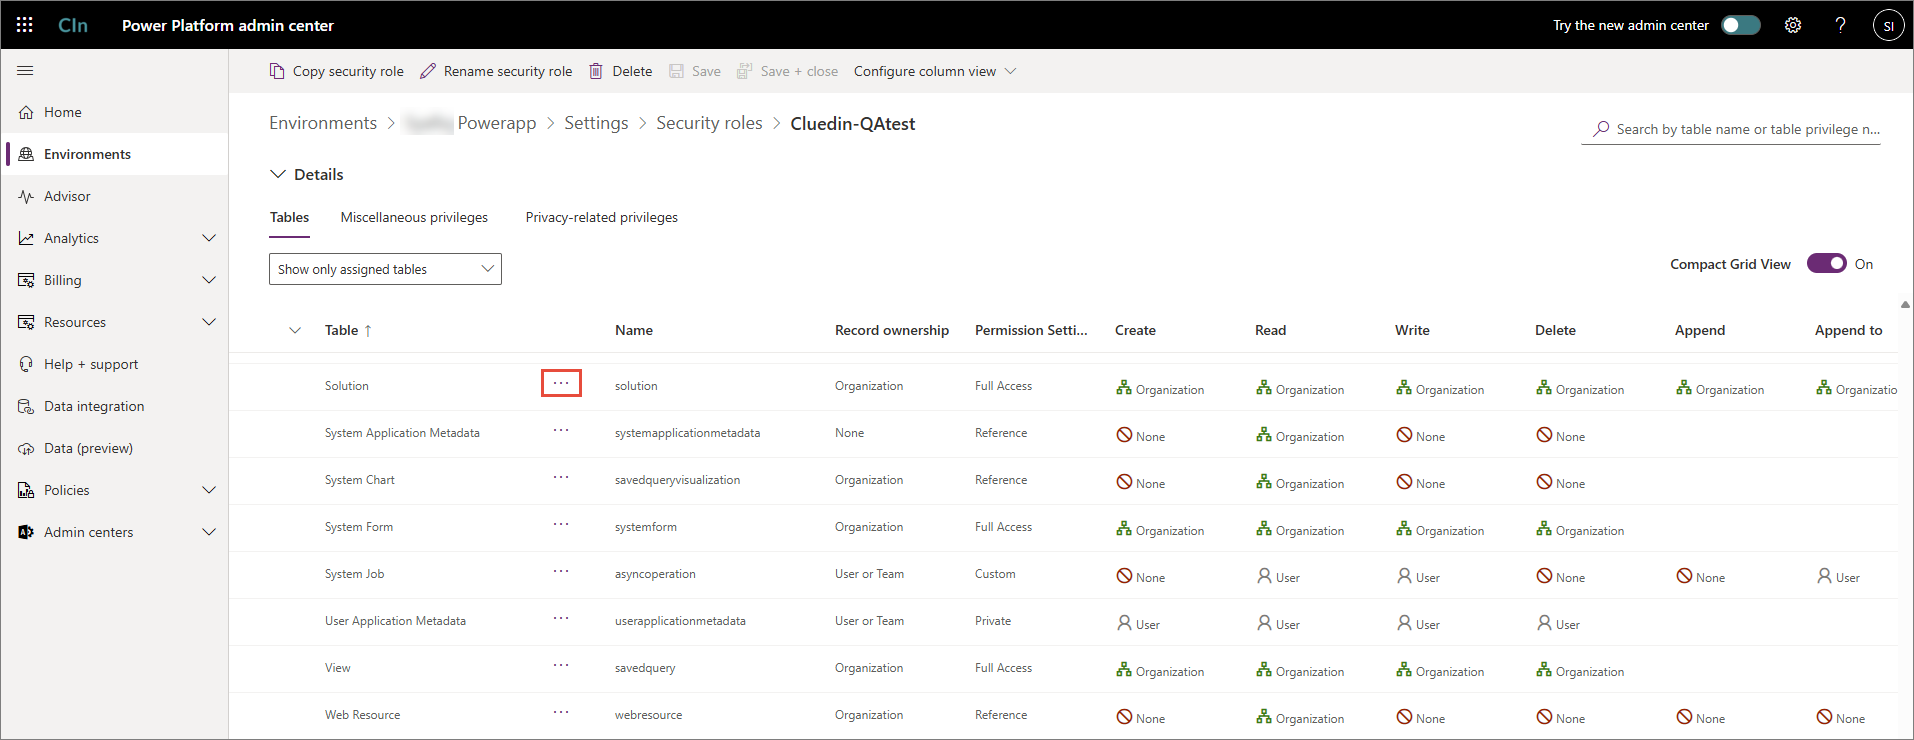
Edit the security role’s privileges according to the reference table. To open the edit mode, select the three-dot button next to the table that you want to edit.
-
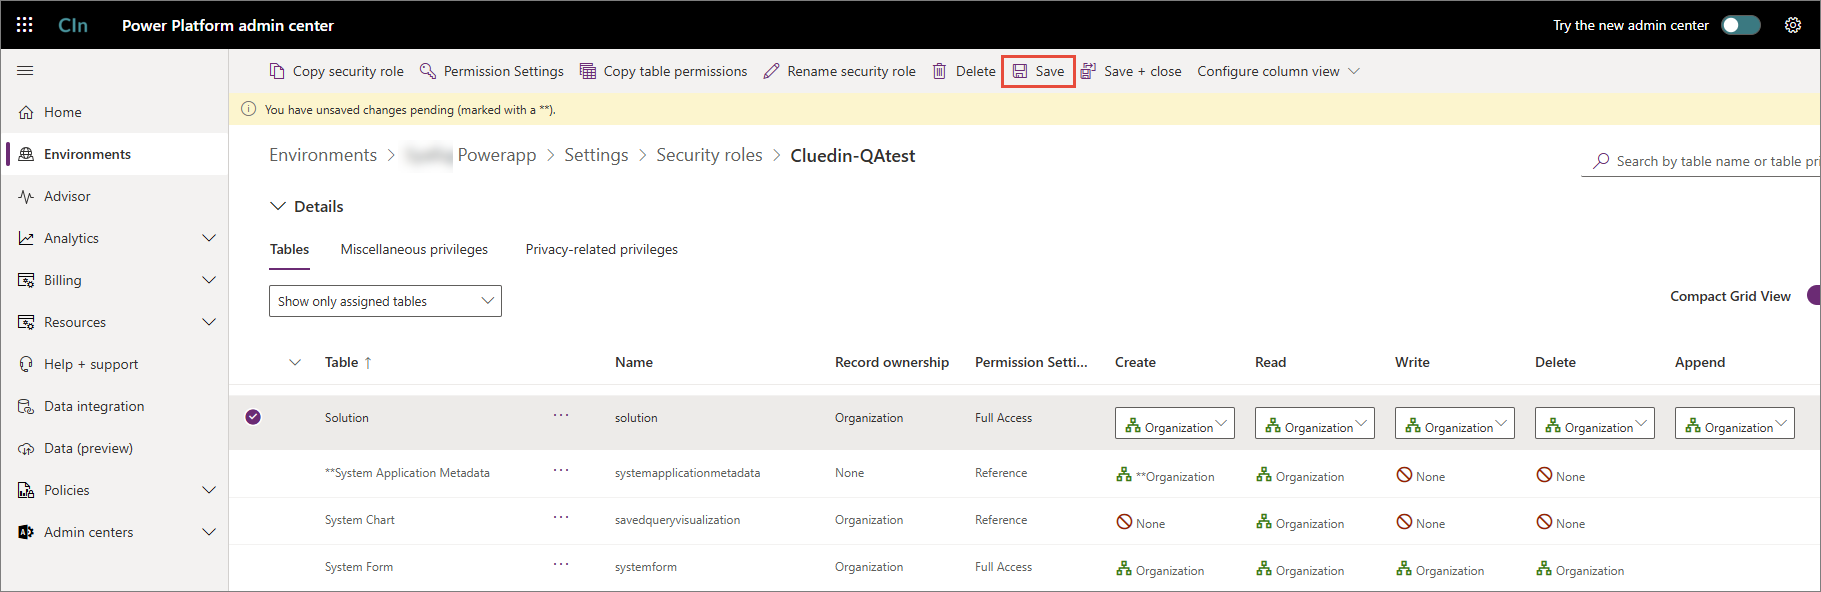
Once you’ve updated the security role’s privileges according to the reference table, select Save.
Reference table
| Table | Create | Read | Write | Delete |
|---|---|---|---|---|
| Customization | ||||
| Solution | Organization | Organization | Organization | Organization |
| Publisher | Organization | Organization | Organization | Organization |
| Entity | Organization | Organization | Organization | Organization |
| Entity Key | Organization | Organization | Organization | |
| Attribute | Organization | Organization | Organization | Organization |
| System Form | Organization | Organization | Organization | Organization |
| View | Organization | Organization | Organization | Organization |
| Custom Control Default Config | Organization | Organization | Organization | |
| Process | Organization | Organization | Organization | Organization |
| Custom Tables | ||||
| Connection Reference | Organization | Organization | Organization | Organization |
| Connector | Organization | Organization | Organization | Organization |
| Dataflow | Organization | Organization | Organization | Organization |
Create an application user
This section outlines how to create an application user in Power Apps in order to use it for the Dataverse connector.
-
Sign in to your Power Apps account and make sure you are in the intended environment.
-
Select Power Platform > Power Platform Admin Center.
-
Select Environments, and then select your intended environment.
-
At the top of the page, select Settings.
-
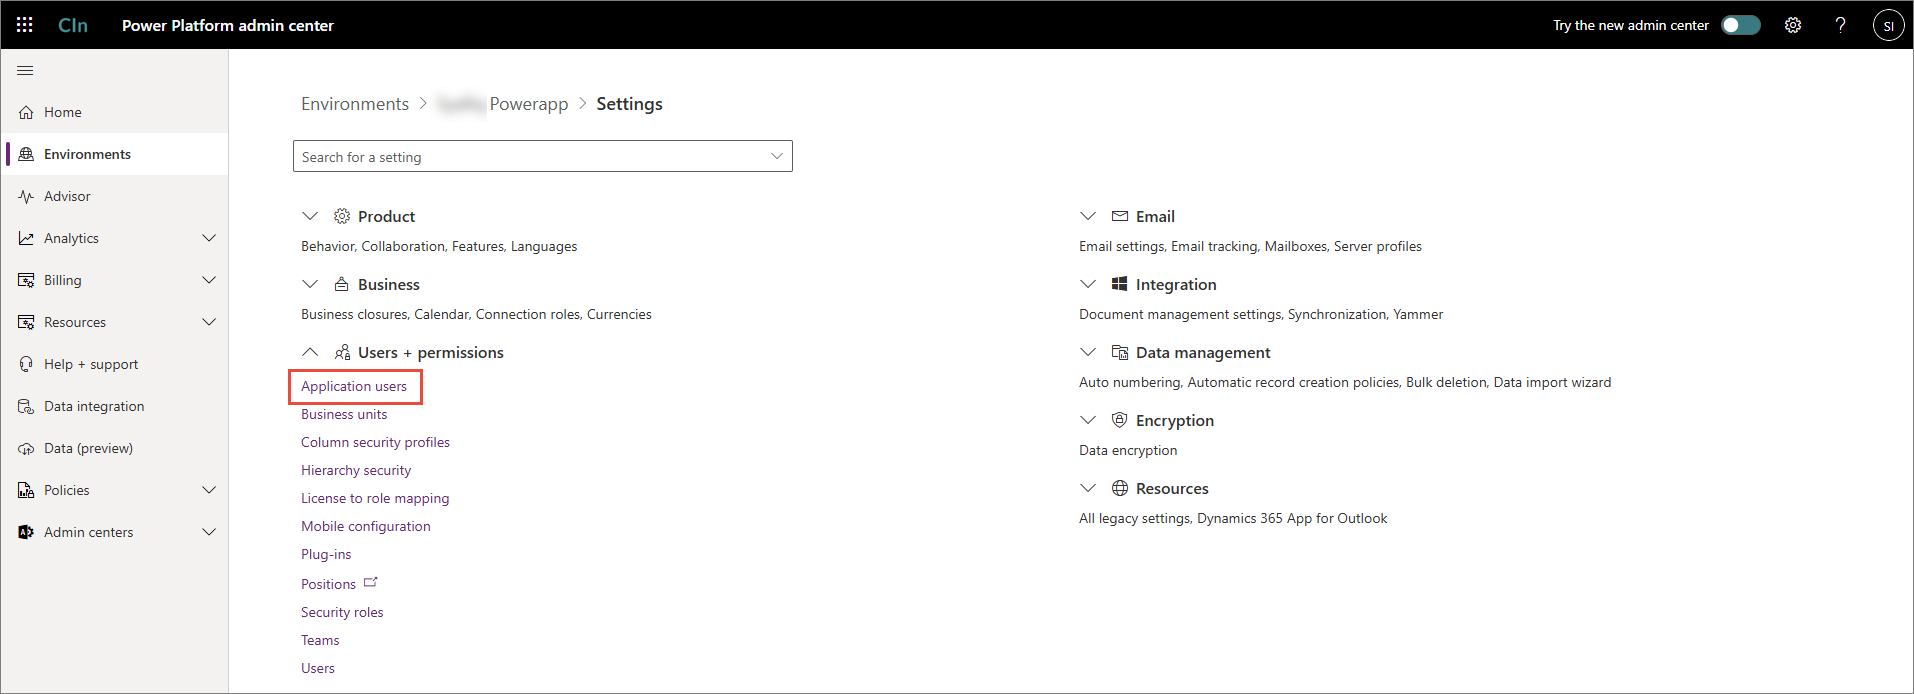
Expand the Users + permissions dropdown, and then select Application users.
-
At the top of the page, select New app user.
-
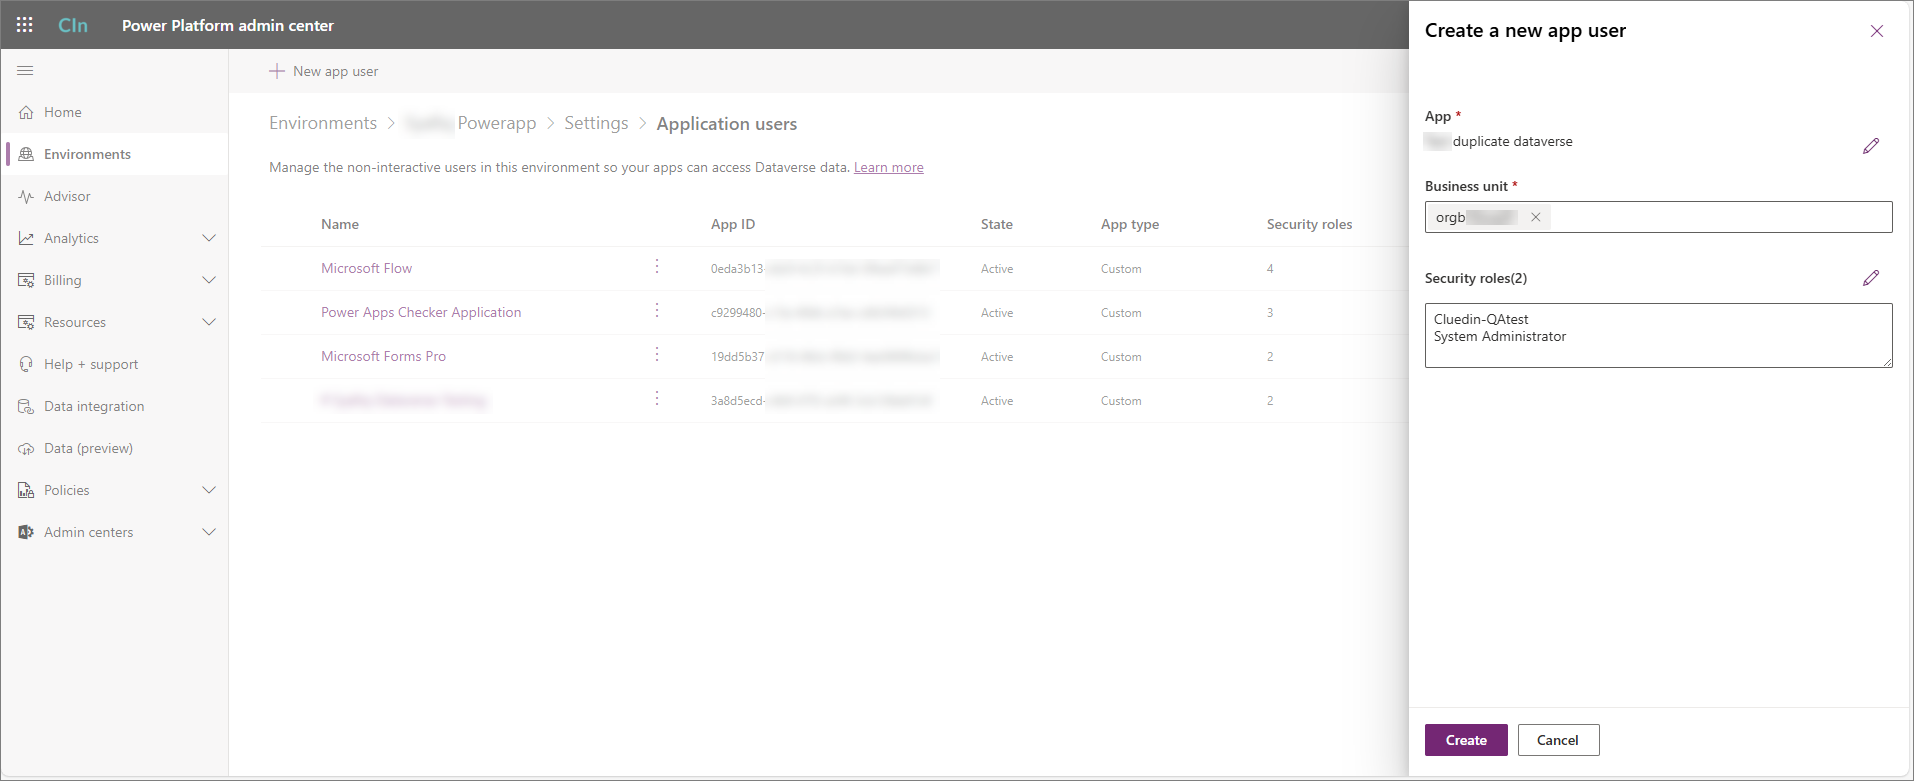
In the Create a new app user pane, do the following:
-
Select Add an app, and then select the app registration (service principal) created earlier. This must be the app registration that you use to get Client ID, Tenant ID, and Client Secret for Dataverse connector configuration.
-
Enter the Business unit.
-
In the Security roles field, select the pencil icon, and then enter the security role created earlier. Also, you need to enter the System Administrator role to the new app user. The Security roles field must contain two roles.
-
Select Create.
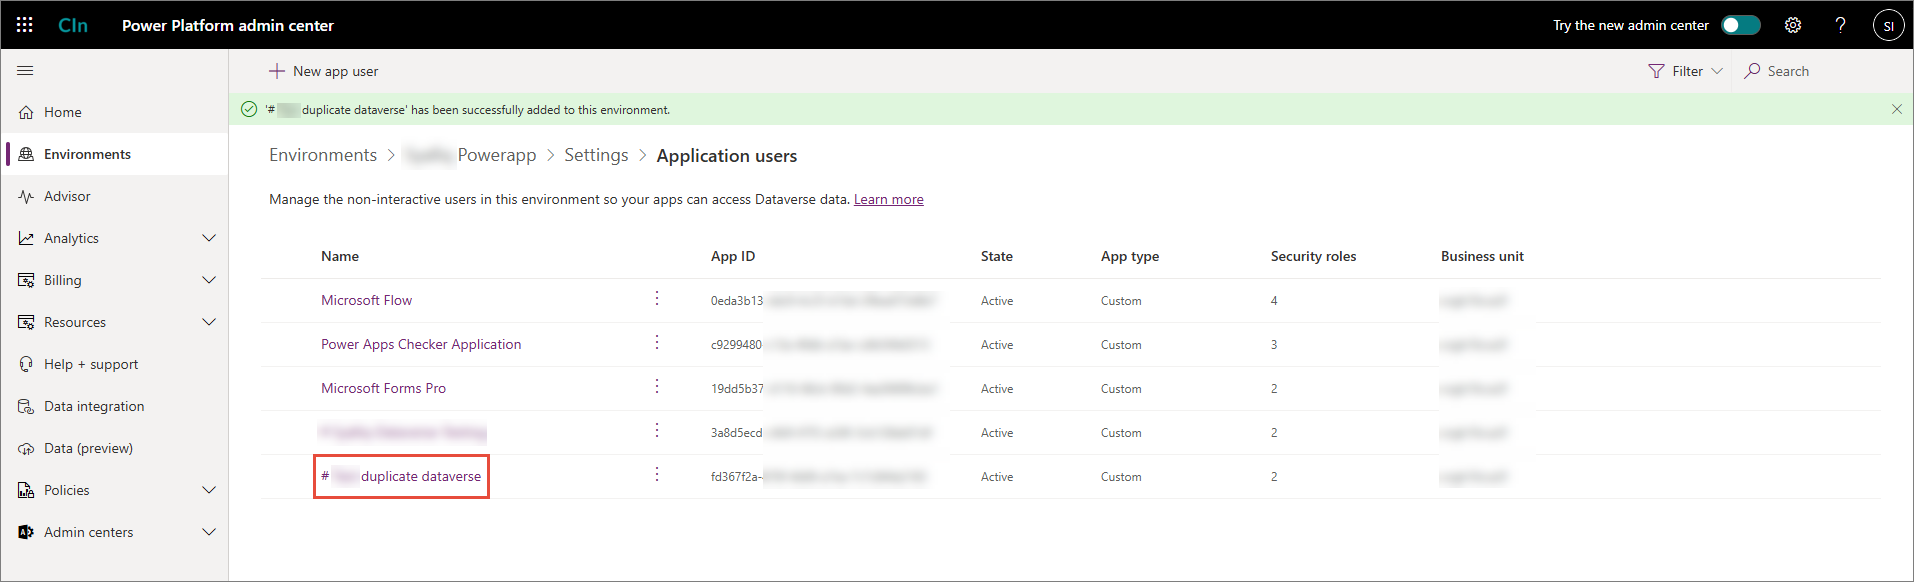
As a result, the new application user is created.
-