

OneLake connector
reference Facts, options, APIs
This article outlines how to configure the OneLake connector to push data from CluedIn to Microsoft’s OneLake.
Prerequisites
-
Make sure you have a service principal to authenticate and access OneLake.
-
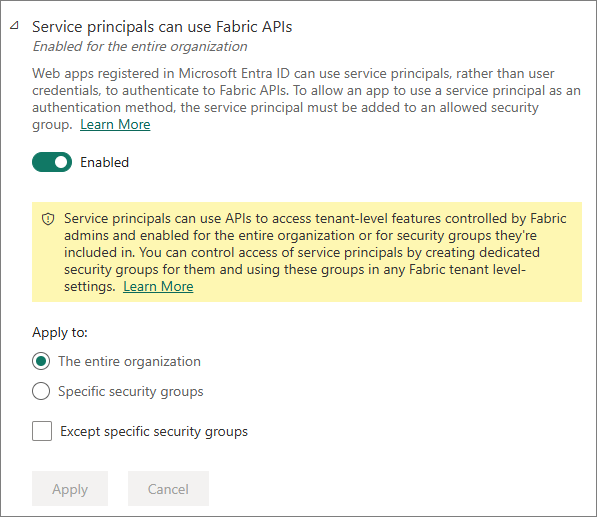
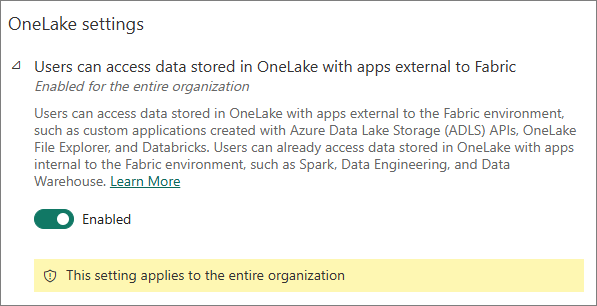
In PowerBI/Fabric, enable the following settings:
-
Service principals can use Fabric APIs
-
Users can access data stored in OneLake with apps external to Fabric
-
-
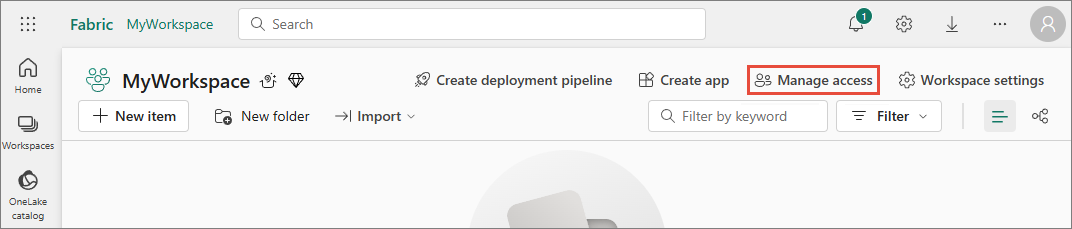
In the workspace that you want to use in OneLake connector, give at least Contributor access to the OneLake service principal. To do that, in the workspace, select Manage access.
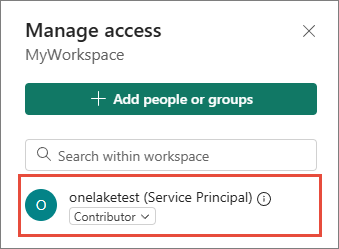
Then, add the OneLake service principal and assign it the Contributor role to the workspace.
To configure OneLake connector
-
On the navigation pane, go to Consume > Export Targets. Then, select Add Export Target.
-
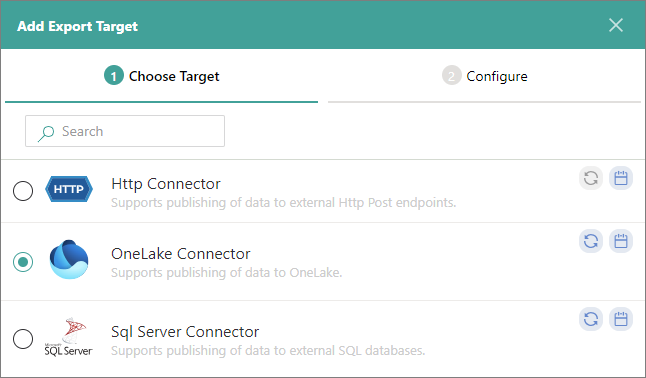
On the Choose Target tab, select OneLake Connector. Then, select Next.
-
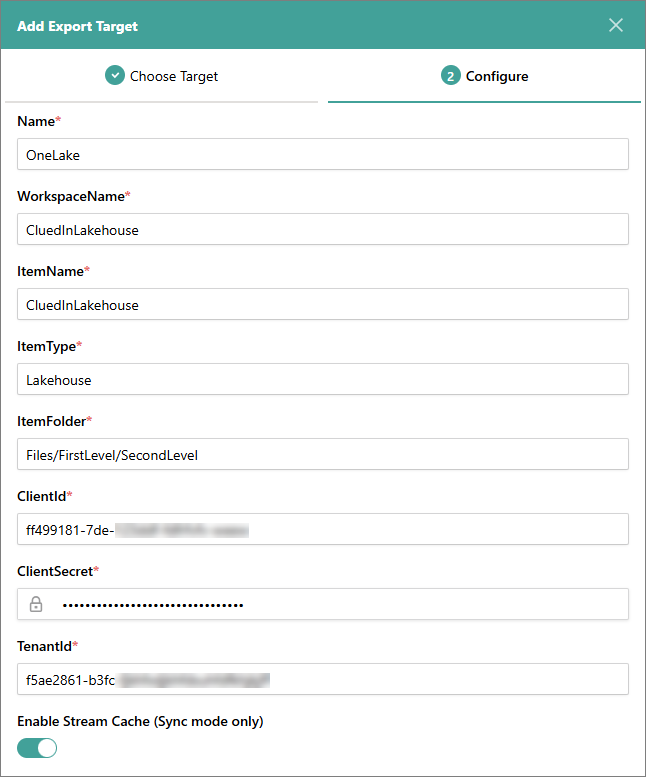
On the Configure tab, enter the connection details:
-
Name – user-friendly name of the export target that will be displayed on the Export Target page in CluedIn.
-
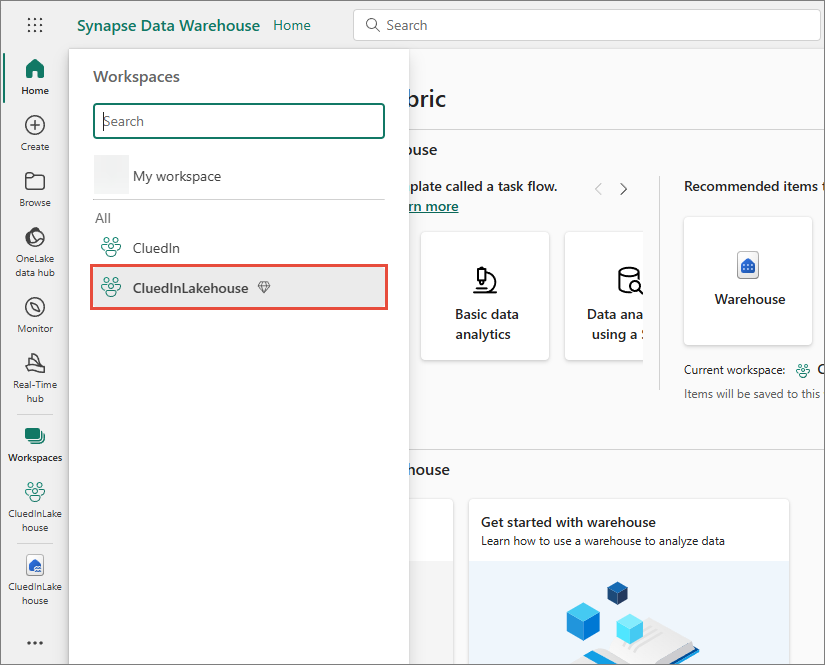
WorkspaceName – name of the workspace where you want to store the data from CluedIn.
To find the workspace, sign in to Microsoft Fabric, and then select Workspaces from the left-hand menu. In the list of workspaces, find the needed workspace and select it.
-
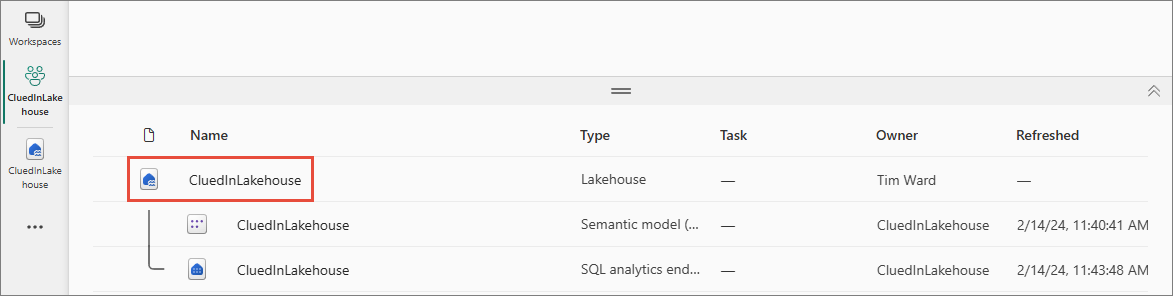
ItemName – name of the data item within the workspace where you want to store the data from CluedIn.
-
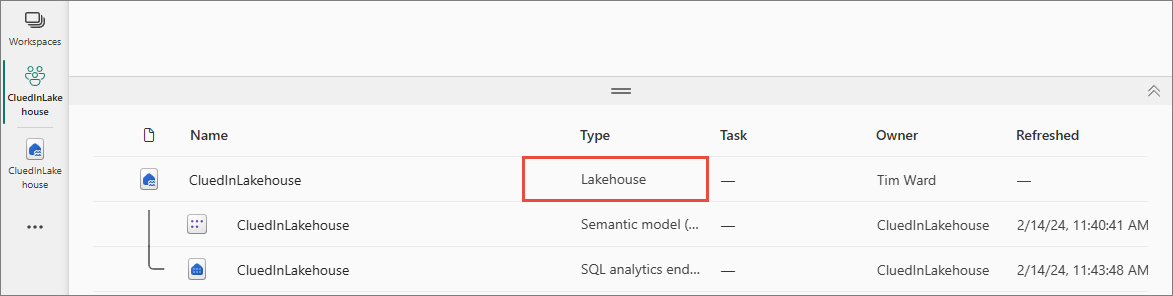
ItemType – type of the data item within the workspace where you want to store the data from CluedIn (for example, Lakehouse).
-
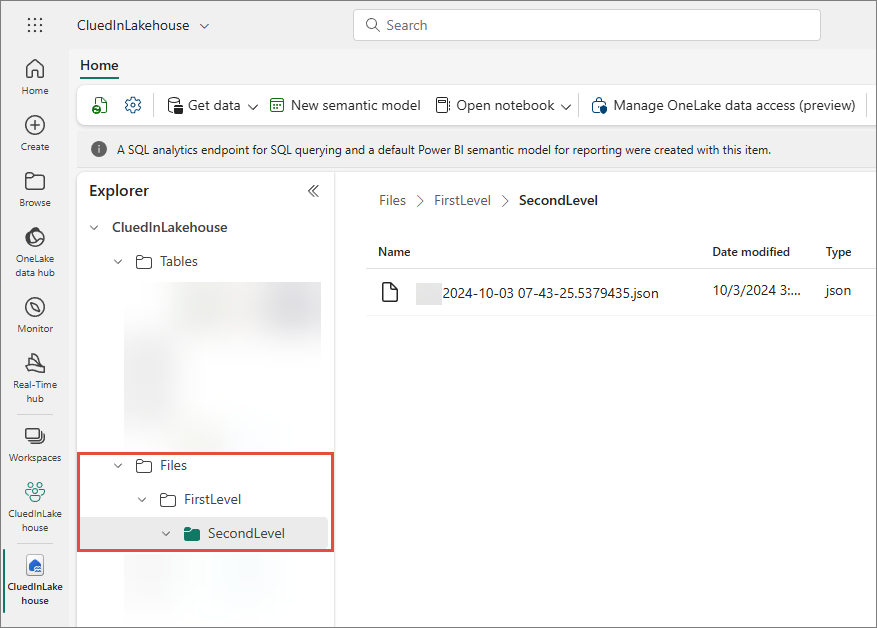
ItemFolder – directory within a data item where you want to store the data from CluedIn (for example, Files/FirstLevel/SecondLevel).
-
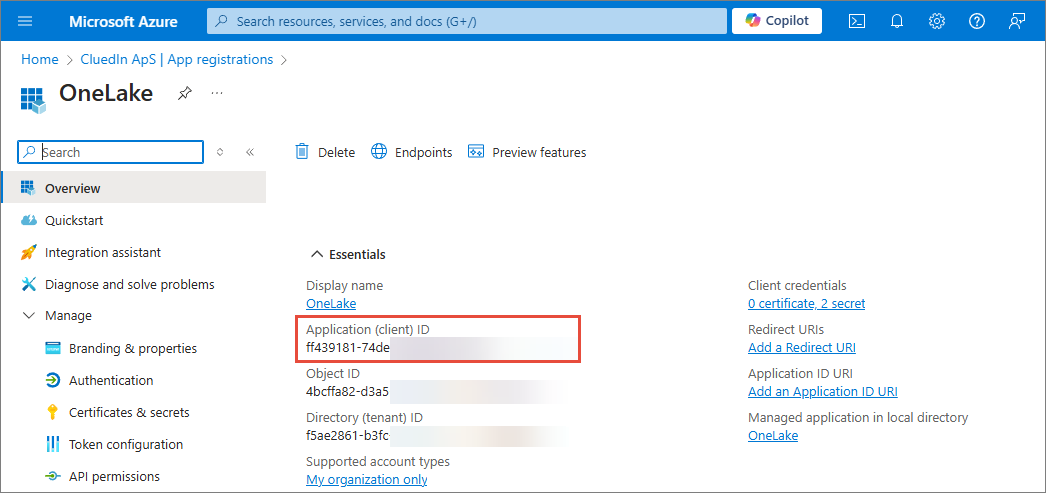
ClientID – unique identifier assigned to the OneLake app when it was registered in the Microsoft identity platform. You can find this value in the Overview section of app registration.
-
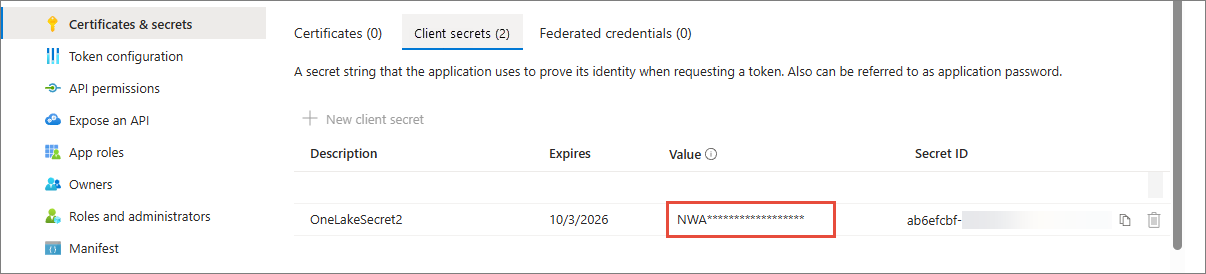
ClientSecret – confidential string used by your OneLake app to authenticate itself to the Microsoft identity platform. You can find this value in the Certificates & secrets section of app registration.
-
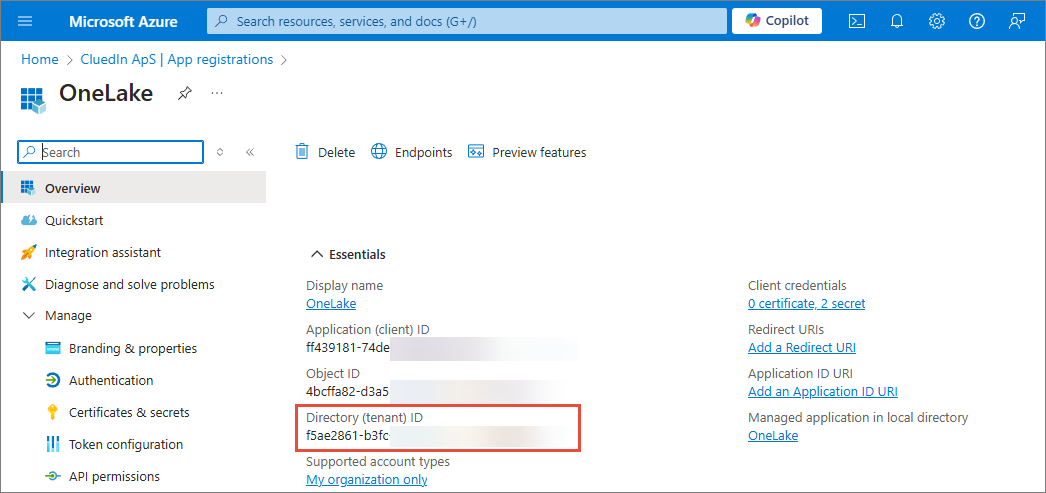
TenantID – unique identifier for your Microsoft Entra tenant. You can find this value in the Overview section of app registration.
-
Enable Stream Cache (Sync mode only) – when stream cache is enabled, CluedIn caches the golden records at intervals, and then writes out accumulated data to one file (JSON, Parquet, or CSV). When stream cache is not enabled, CluedIn streams out golden records one by one, each in a separate JSON file. Stream cache is available only for the synchronized stream mode.
-
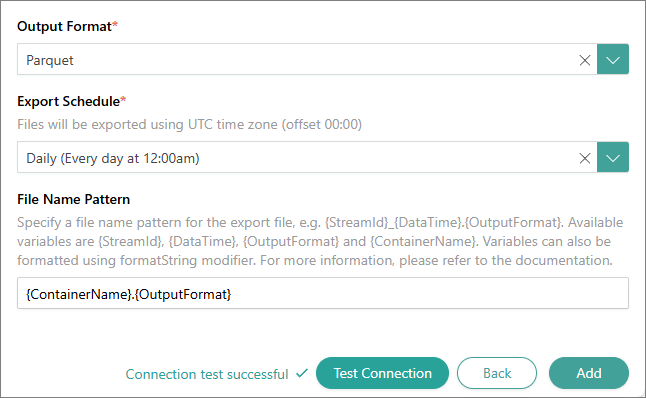
Output Format – file format for the exported data. You can choose between JSON, Parquet, and CSV. However, Parquet and CSV formats are available only if you enabled stream cache. If stream cache is not enabled, JSON is the default format.
-
Export Schedule – schedule for sending the files from CluedIn to the export target. The files will be exported based on Coordinated Universal Time (UTC), which has an offset of 00:00. You can choose between the following options:
-
Hourly – files will be exported every hour (for example, at 1:00 AM, at 2:00 AM, and so on).
-
Daily – files will be exported every day at 12:00 AM.
-
Weekly – files will be exported every Monday at 12:00 AM.
-
Custom Cron – you can create a specific schedule for exporting files by entering the cron expression in the Custom Cron field. For example, the cron expression
0 18 * * *means that the files will be exported every day at 6:00 PM.
-
-
(Optional) File Name Pattern – a file name pattern for the export file. For more information, see File name patterns.
For example, in the
{ContainerName}.{OutputFormat}pattern,{ContainerName}is the Target Name in the stream, and{OutputFormat}is the output format that you select in step 3j. In this case, every time the scheduled export occurs, it will generate the same file name, replacing the previously exported file.If you do not specify the file name pattern, CluedIn will use the default file name pattern:
{StreamId:N}_{DataTime:yyyyMMddHHmmss}.{OutputFormat}.
-
-
Test the connection to make sure it works, and then select Add.
Now, you can select the OneLake connector in a stream and start exporting golden records.