
Configure ADF pipeline with Data flow activity
how-to Steps to accomplish one task
On this page
- Create a new pipeline
- Configure source
- Configure sink
- Debug pipeline in ADF
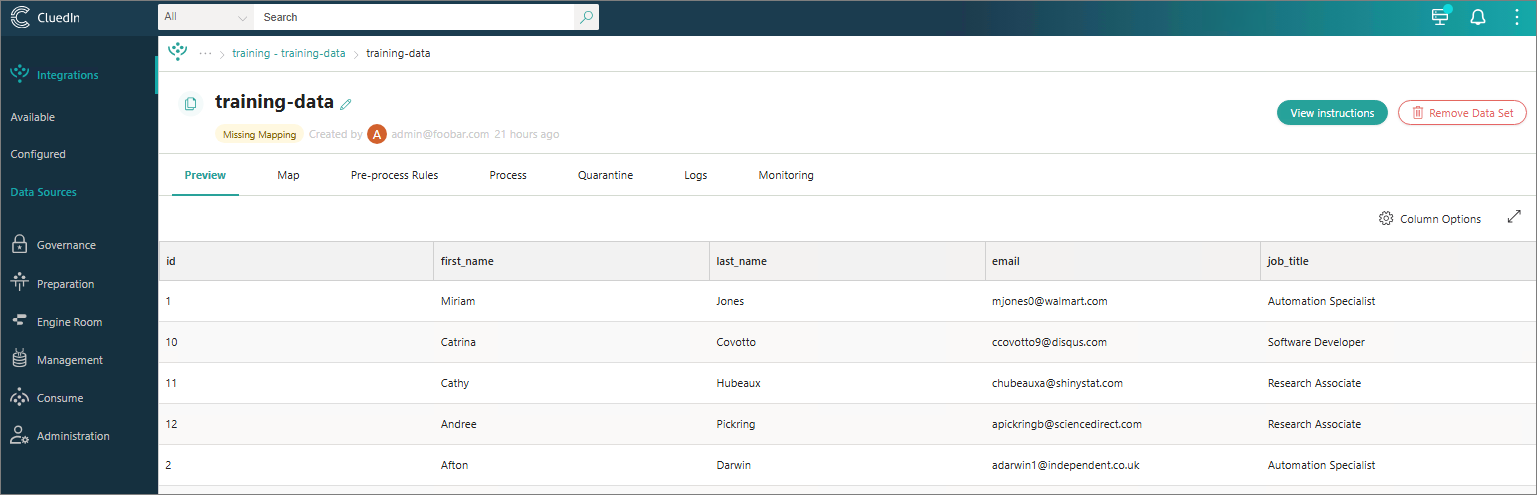
- Validate result in CluedIn
This guide provides step-by-step instructions for configuring an Azure Data Factory (ADF) Data flow activity to send data to CluedIn. This integration enables seamless data transfer from your Azure Data Lake (or other sources) to CluedIn using a private endpoint.
The Data flow activity in ADF is ideal when data transformations such as aggregation, filtering, or applying complex business logic are required before sending data to CluedIn. If no transformations are needed, use the Copy data activity instead.
Prerequisites
-
Configure a private link service between ADF and CluedIn as described in Configure ADF with private link.
-
Ensure your data is available within Azure, commonly stored in Azure Data Lake or Blob Storage.
-
Create an ingestion endpoint and authorization token in CluedIn as described in Add ingestion endpoint.
Configuring an ADF pipeline with the Data flow activity consists of 4 steps:
Create a new pipeline
-
On the Azure Data Factory home page, select New > Pipeline.
-
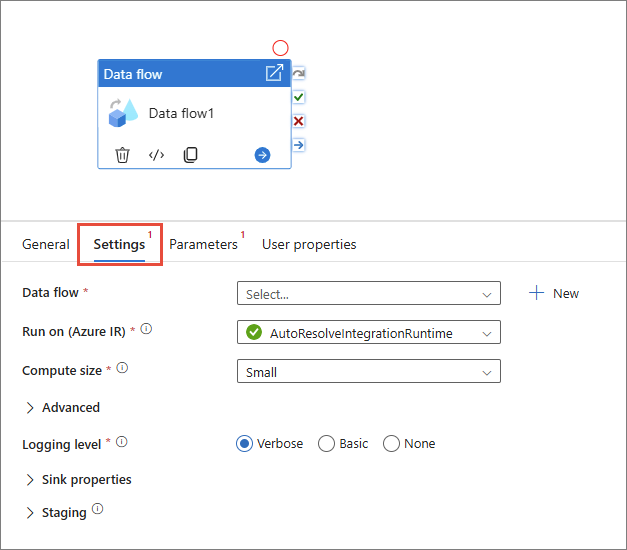
In the Activities pane, expand the Move and transform category, and then drag the Data flow activity to the pipeline canvas.
-
Select the new Data flow activity on the canvas, and then go to the Settings tab to edit its details.
Configure source
-
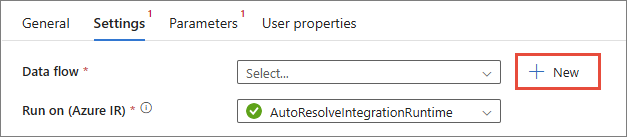
Next to the Data flow field, select + New.
-
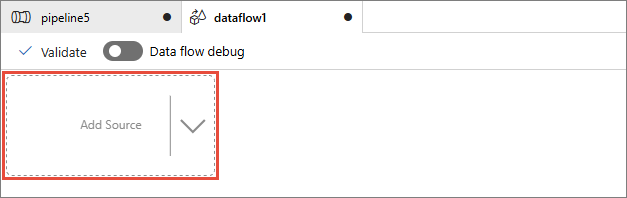
Select Add Source.
-
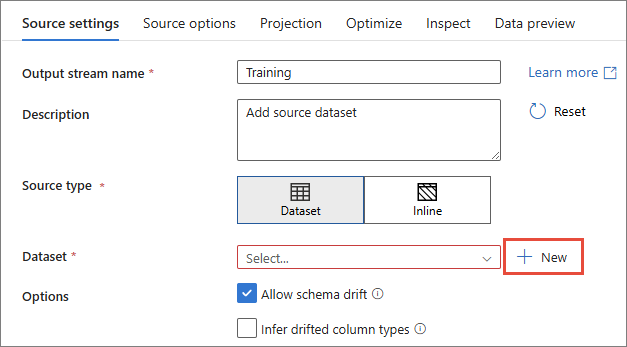
On the Source Settings tab, do the following:
-
Enter the Output stream name.
-
In Source type, select Dataset.
-
Next to the Dataset dropdown list, select + New.
-
-
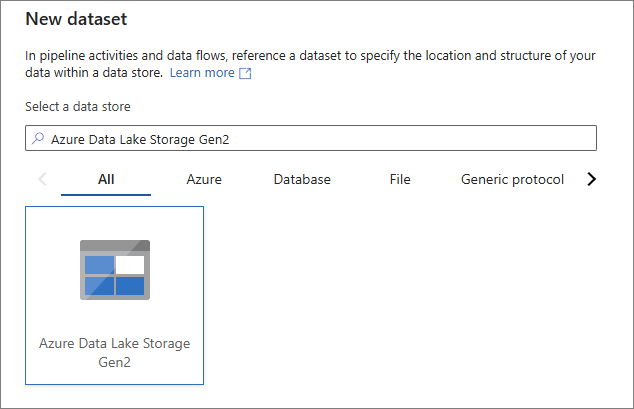
In the New dataset pane, select your data stored within an Azure storage account (for example, Azure Data Lake Storage Gen2). Then, select Continue.
-
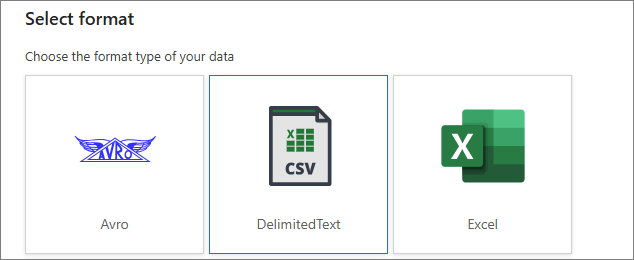
In the Select format pane, select DelimitedText, and then select Continue.
-
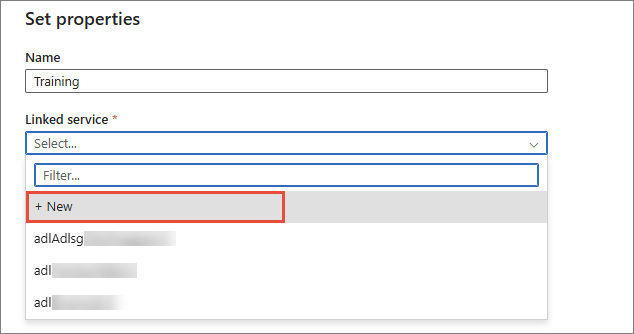
In the Set properties pane, enter the name for the dataset. Then, expand the Linked service dropdown list, and select + New.
-
Configure the service details:
-
Name – enter the name for your linked service.
-
Account selection method – select From Azure subscription.
-
Azure subscription – select the subscription of your Azure Data Lake.
-
Storage account name – select the name of your Azure Data Lake storage account.
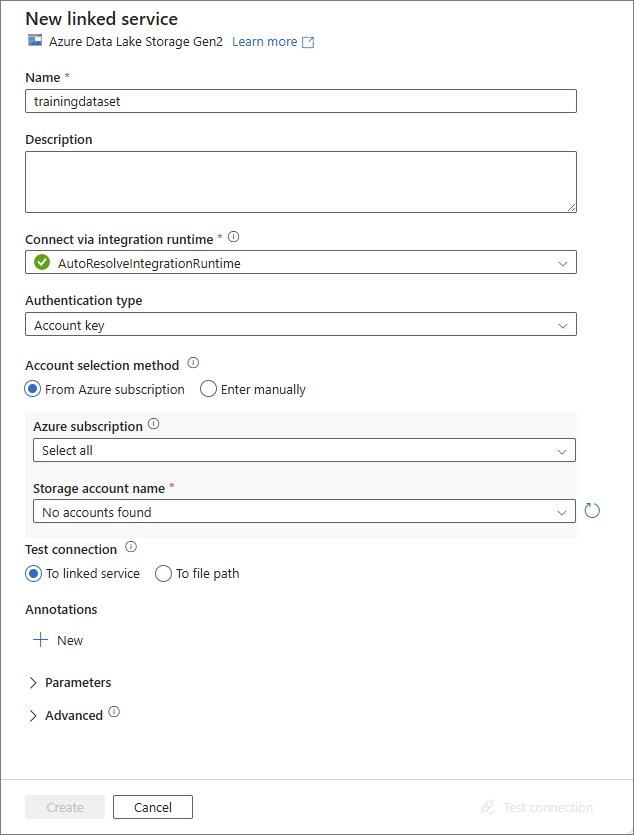
-
-
Test the connection and then create the new linked service.
-
On the Set properties pane, in the File path section, add the path to the appropriate folder/file within your Azure Data Lake.
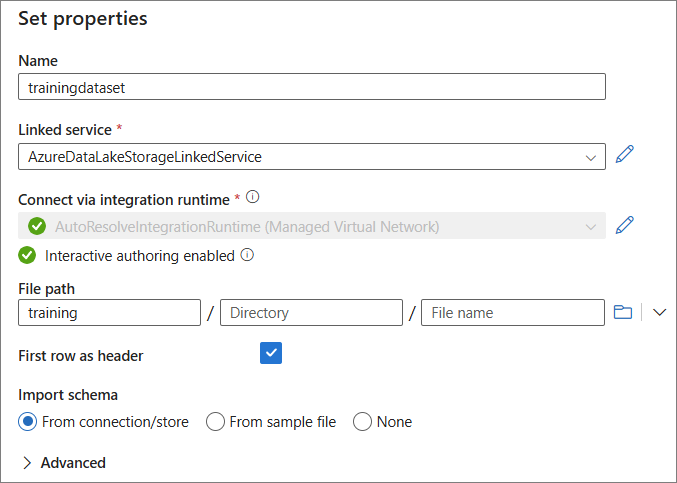
-
Select OK.
Configure sink
-
Next to the data source, select the plus icon, and then find and select Sink.
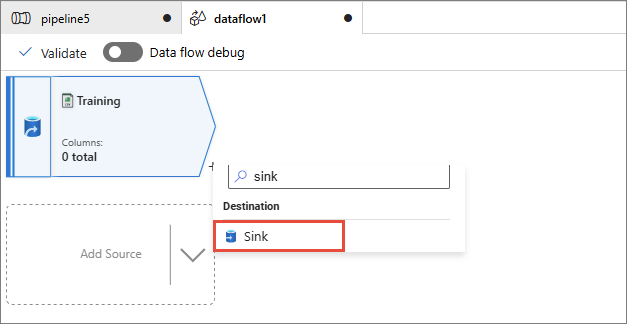
-
On the Sink tab, do the following:
-
Enter the Output stream name.
-
In Incoming stream, make sure the data source created in the previous step is selected.
-
In Sink type, select Dataset.
-
Next to the Dataset dropdown list, select + New.
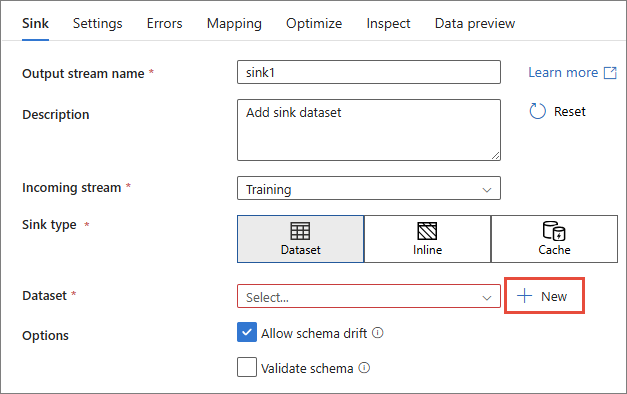
-
-
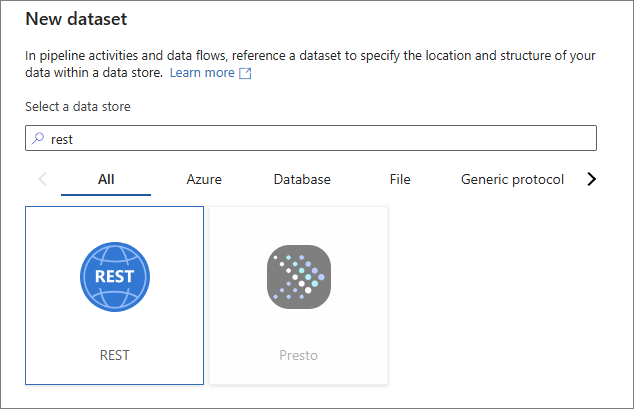
In the New dataset pane, find and select REST, and then select Continue.
-
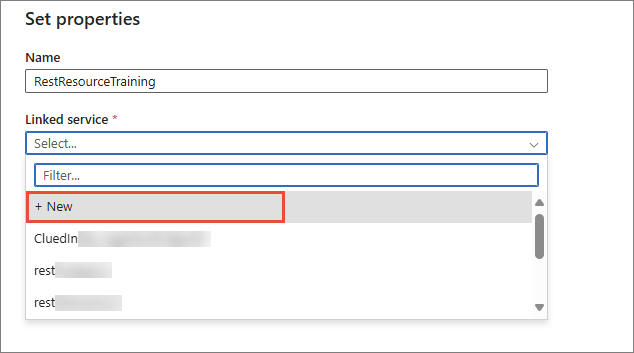
In the Set properties pane, enter the name for the dataset. Then, expand the Linked service dropdown list and select + New.
-
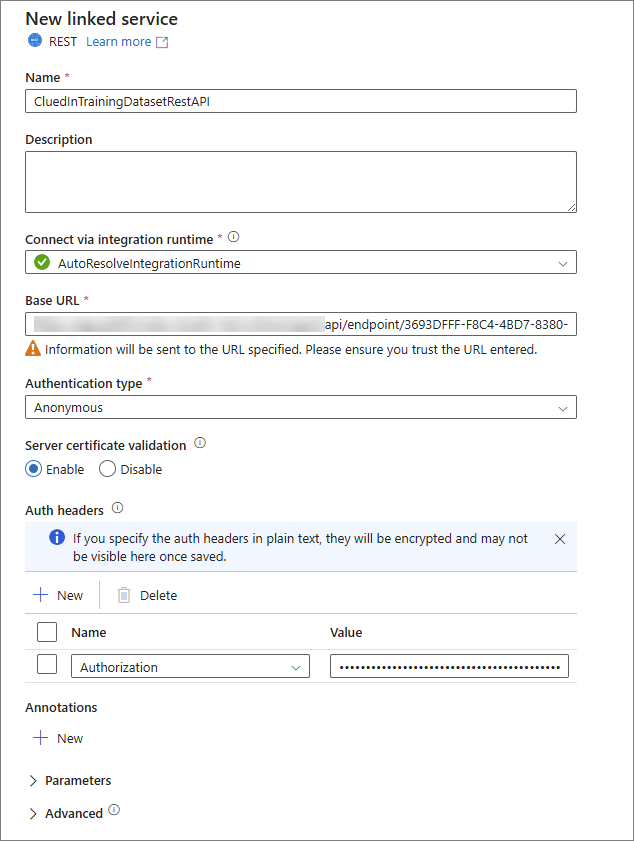
Configure the service details:
-
Name – enter the name for your linked service.
-
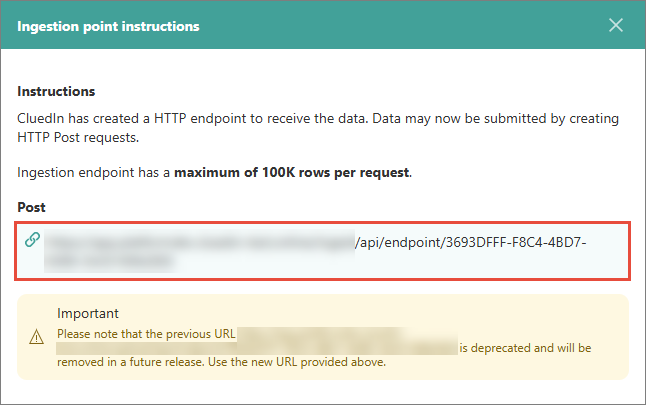
Base URL – enter the URL of the ingestion endpoint in CluedIn. You can find this URL in the data set that you created for ingesting data into CluedIn. For more information, see Send data.
-
Authentication type – select Anonymous.
-
Auth headers – add a new header with the following details:
-
Name – enter Authorization.
-
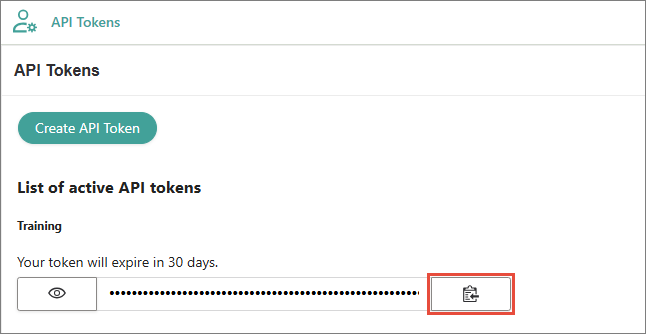
Value – enter Bearer, add a space, and then paste the token from CluedIn. You can find the token in CluedIn by going to Administration > API Tokens. For more information, see Send data.
As a result, the new linked service should be configured similar to the following.
-
-
-
Test connection, and then select Create.
-
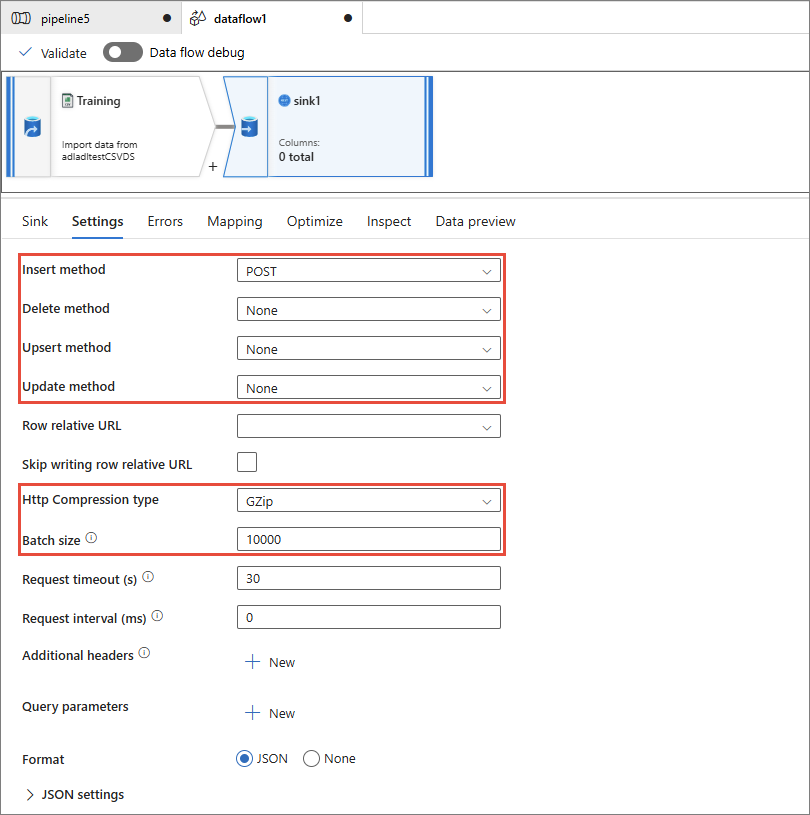
After the sink is configured, go to the Settings tab, and then do the following:
-
Ensure the Insert method is set to POST.
-
Change the Delete method, Upsert method, and Update method to None.
-
Set the Http Compression type to GZip.
If you do not set the HTTP Compression type to GZip, you might encounter an error when starting the pipeline.
-
Set the Batch size to 10,000 to ensure smoother transfer.
-
Debug pipeline in ADF
Once the source and sink are configured, you can debug the pipeline to ensure it works correctly.
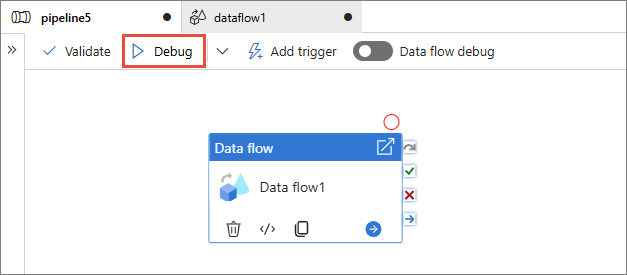
To debug the pipeline
-
On the toolbar, select Debug.
-
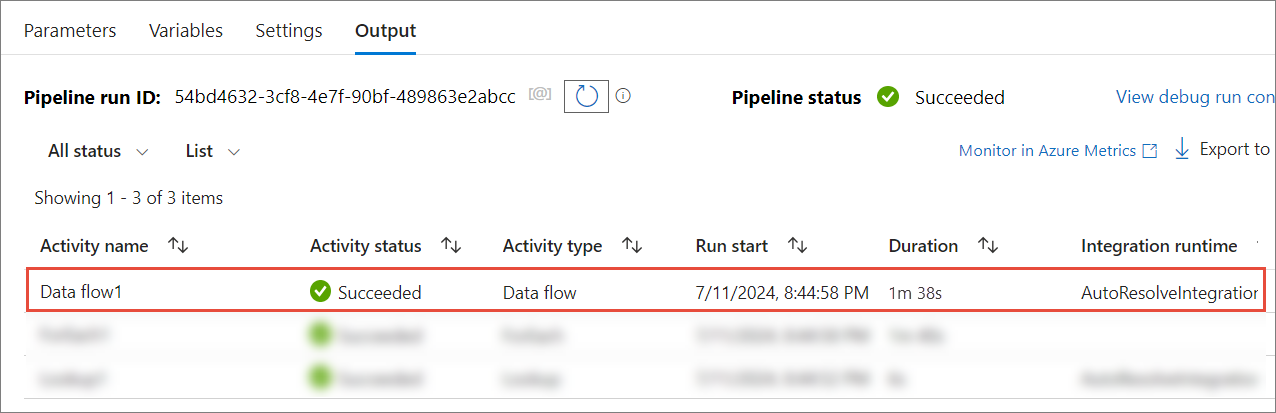
In the Output tab at the bottom of the window, monitor the pipeline run status.
Validate result in CluedIn
Once the ADF pipeline is triggered successfully, you should see the data flowing into CluedIn. You can view the incoming records on the Preview tab of the data set.