Endpoint
On this page
- Overview of data ingestion using an endpoint
- Processing options for data received via an endpoint
- Add ingestion endpoint
- Send data
- Schema protection
In this article, you will learn how to ingest data into CluedIn using an endpoint. This method is a default solution to push your data easily into CluedIn, especially if you are using tools like Azure Data Factory, Databricks, or Apache NiFi.
The process of ingesting data using an endpoint involves two steps:
The maximum number of columns accepted for data ingestion is 490.
Before loading data into CluedIn, ensure that it does not contain unsupported characters. Refer to our knowledge base article for information about supported and unsupported characters.
Overview of data ingestion using an endpoint
When you need to push a large set of records into CluedIn, we recommend that you start by pushing a small, representative subset of your data. As with files, this approach allows you to verify the accuracy of mapping and relations before pushing a large set of records. Once the golden records generated from this subset align with your expectations, you can safely remove those records from the system, while keeping the mapping configuration intact. After that you can push a large set of records and use the existing mapping to generate golden records in an efficient way.
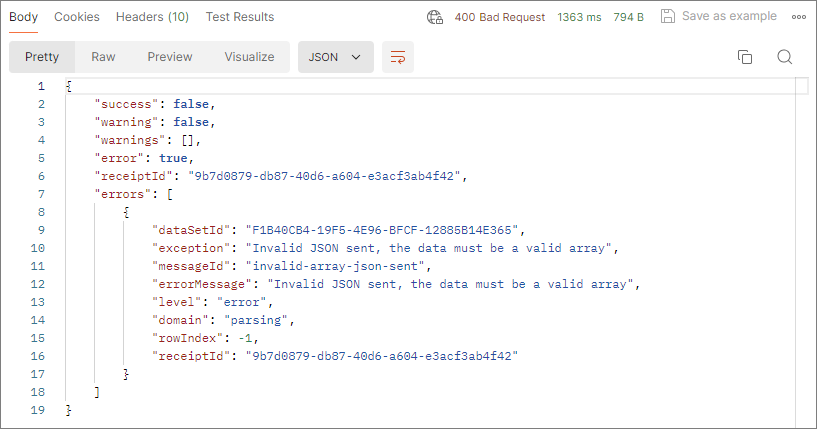
After you send an HTTP POST request, CluedIn checks if it is correct based on the built-in logic and limitations. If your JSON is completely invalid, CluedIn won’t start ingesting the data, and you’ll receive a response with the status “400 Bad Request”. The response body will include an array of errors that provide context for fixing them. Once you correct the request, you can try sending it again.
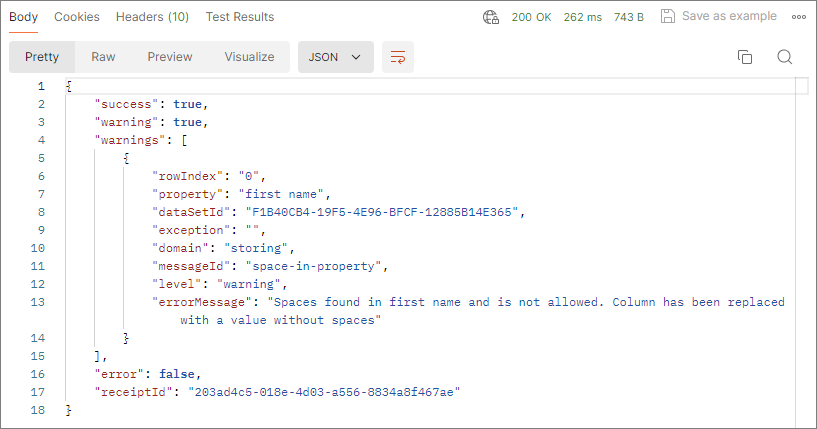
If your JSON contains issues, such as spaces or dots in property names, CluedIn tries to fix them and store the data. These issues are treated as warnings and they are recorded on the Logs tab of the data set. You’ll receive a response with the status “200 OK”, which means that the data has been successfully sent to CluedIn. However, the response body will include an array of warnings explaining how the issues were fixed.
Once CluedIn receives the data, it initially stores it in a temporary storage, accessible through the Preview tab. To turn the received data into golden records, you need to map it to the semantic model and then process it.
(For advanced users) To ensure the creation of the expected golden records, you can generate a sample clue and verify its accuracy before processing. This step helps confirm that the resulting golden record aligns with your expectations. For more information, see Clue.
Processing options for data received via an endpoint
CluedIn provides the following processing options for turning your data into golden records:
-
Manual processing – when CluedIn receives the data from the endpoint, you are required to process the data manually. You can view the received data in the temporary storage at any time, and you can process the data set as many times as you need. In CluedIn, once a record has been processed, it won’t undergo processing again. When you trigger processing, CluedIn will check for identical records. If identical records are found, they won’t be processed again. However, if you change the origin code for the previously processed records, CluedIn will treat these record as new and process them.
-
Automatic processing – when CluedIn receives the data from the endpoint, this data is processed automatically. You can view the received data in the temporary storage at any time.
-
Bridge mode – all your JSON records will be transformed into golden records directly, without being stored in the temporary storage. However, you can rely on rely on data set logs for debugging purposes.
Bridge mode allows you to use less storage and memory, resulting in increased performance. Use this mode when your mapping will not change over time and you want to use the ingestion endpoint only as a mapper.
When you send the data to CluedIn via ingestion endpoint, a separate data set is created. If you want to send more data, add a new ingestion endpoint instead of reusing the existing one.
Add ingestion endpoint
An ingestion endpoint is a channel through which CluedIn can receive data from external sources.
To add an ingestion endpoint
-
On CluedIn home page, in the Integrations section, select Import from ingestion endpoint.
The Import from ingestion endpoint pane opens, where you can choose the group for storing the data source and define preliminary mapping configuration.
-
On the Configure tab, do the following:
-
Enter the Name of the data source.
-
Specify the Group where the data source will be stored. You can choose the existing group or create a new group.
-
In the lower-right corner, select Next.
-
-
On Add ingestion endpoint tab, do the following:
-
Enter the Endpoint name that will be used as the name of the data set.
-
Select the Mapping configuration option:
-
New mapping – you can create a new mapping for the data set. If you choose this option, you need to select the existing business domain or create a new one. If you create a new business domain, select an icon to visually represent the business domain.
-
Existing mapping – you can reuse the mapping from the data set that has the same structure. If you choose this option, you need to indicate the data set with the required mapping configuration. To do that, choose the following items one by one: a data source group, a data source, and a data set.
-
-
In the lower-right corner, select Add.
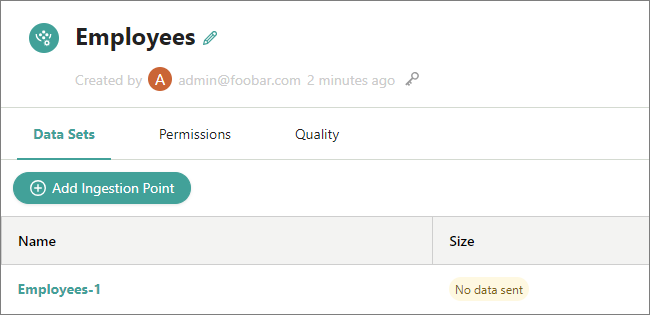
The ingestion endpoint is added to CluedIn. It has a label No data sent, which indicates that CluedIn has not received data for this ingestion endpoint.
Now, you can send data to CluedIn by creating HTTP POST requests.
-
Send data
In this section, Postman is used as a tool to demonstrate how to send an HTTP POST request to CluedIn.
Prerequisites
To be accepted by CluedIn, your HTTP POST request should meet the following prerequisites:
-
The request’s header must contain Authorization key with the value set to
Bearer <Your API token>. It is very important to include the word Bearer followed by a space before pasting the API token. You can find the API token in CluedIn in Administration > API Tokens.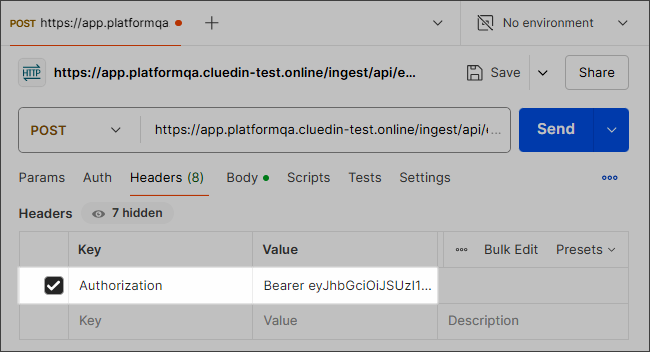
-
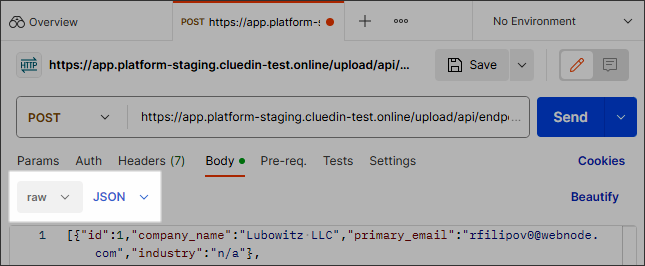
The request’s body should contain raw data in JSON format.
-
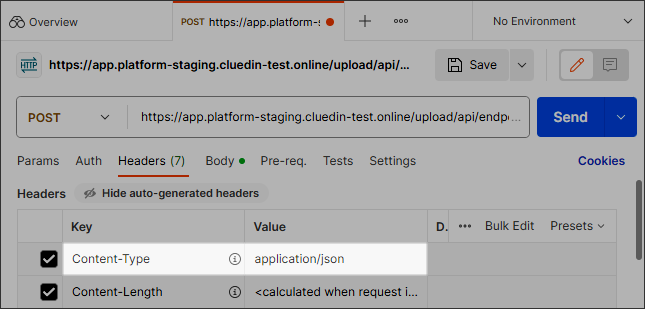
The content-type in the request’s header should be set to application/json.
To send data to CluedIn
-
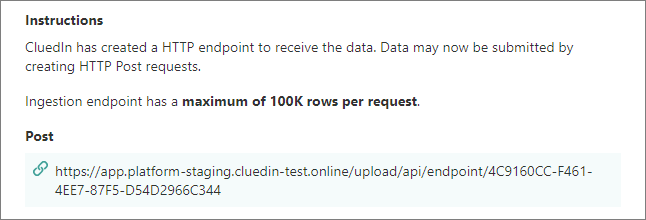
In CluedIn, open the data set that was created in the previous procedure, and then select View instructions.
On the Ingestion endpoint instructions pane, find and copy the POST URL that you can use to send data to CluedIn.
-
In Postman, paste the URL that you copied to the URL input field of your request. Then, send the request.
The data has been sent to CluedIn. You can now view it on the Preview tab of the data set. The next steps involve creating a mapping and processing the data.
Schema protection
By default, CluedIn processes incoming data without checking if it matches a specific format (schema). The data is processed and turned into golden records, even if it contains new, unmapped fields.
If you expect an endpoint to receive data in a specific format and want to block data that does not match, you can enable the Schema Protection feature.
How schema protection works
The Schema Protection feature as follows:
-
When the feature us enabled, CluedIn uses the mapping that is currently defined for the dataset as the standard, expected schema.
-
Every time new data arrives through the endpoint, CluedIn checks whether it matches the expected mapping:
-
As usual, the incoming data appears in temporary storage on the Preview tab.
-
If the data contains new fields (outside of the current mapping), these fields appear on the Map tab. They are marked with a Warning label and remain unmapped.
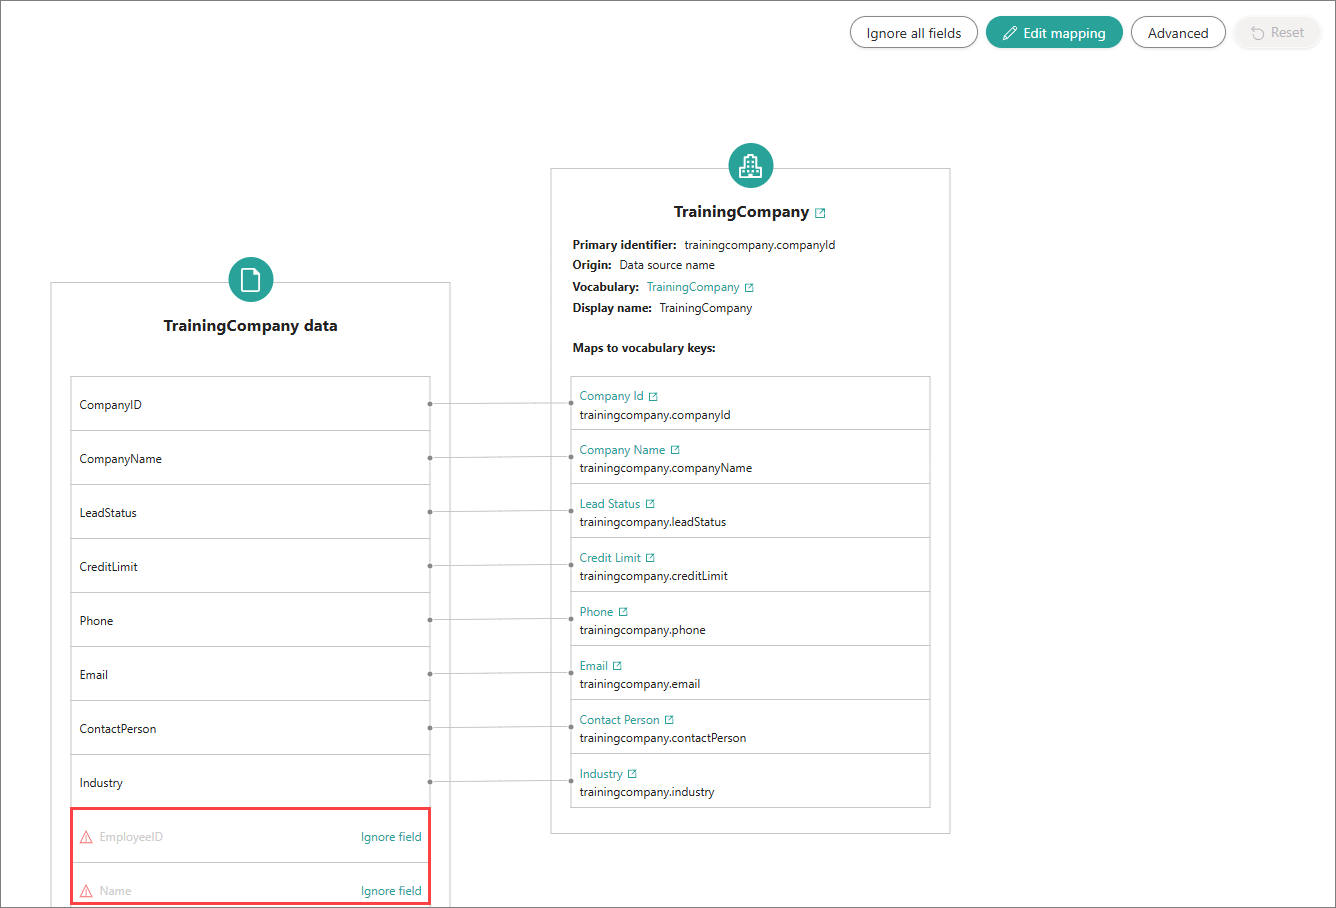
You can choose to ignore these new fields in the mapping. When ignored, the fields are skipped during processing and do not appear in the resulting golden records. Ignoring fields is useful to prevent records with new, unmapped fields from being quarantined.

-
-
When you process the data, the following takes place:
-
Records that contain new, unmapped fields (that were not ignored) are moved to quarantine.
-
Ignored fields are skipped and do not appear in the resulting golden records.
-
Other fields are processed normally.
-
Enable Schema Protection
Schema protection is not enabled by default. You must turn it on before using it.
Prerequisites
-
An ingestion endpoint was added.
-
The endpoint received data that matches the expected format for this endpoint.
-
A mapping was created. When schema protection is enabled, CluedIn will catch all incoming fields outside of this mapping.
To include a new field in the mapping (and have this field processed), first disable schema protection for the endpoint. Then, map the field on the Map tab and re-enable schema protection.
To enable schema protection for an ingestion endpoint
-
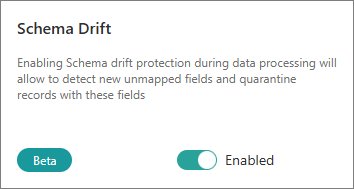
On the navigation pane, go to Administration > Feature flags. Then, locate and enable the Schema Drift feature.
-
On the navigation pane, go to Ingest > Endpoints.
-
Select the needed endpoint in the list. Then, select the needed dataset.
-
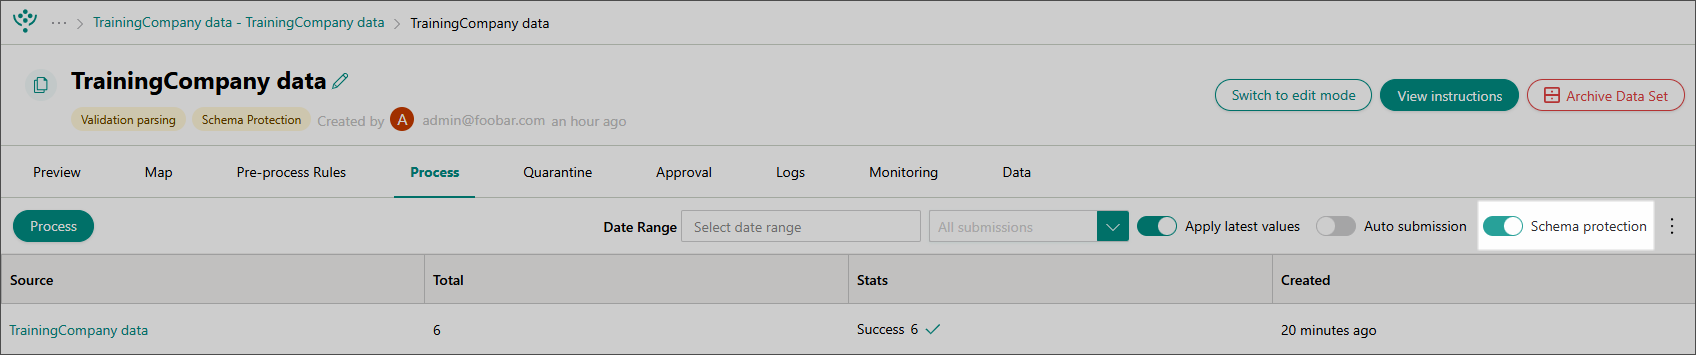
On the Process tab of the dataset, turn on the Schema protection toggle.
-
Confirm that you want to enable schema protection.
Now, when the endpoint receives fields that are outside of the defined mapping, these fields will appear on the Map tab, marked with a Warning label. If needed, proceed to ignore these fields.