Azure Data Lake connector
This article outlines how to configure the Azure Data Lake connector to publish data from CluedIn to Azure Data Lake Storage Gen2.
Prerequisites: Make sure you use a service principal to authenticate and access Azure Data Lake.
To configure Azure Data Lake connector
-
On the navigation pane, go to Consume > Export Targets. Then, select Add Export Target.
-
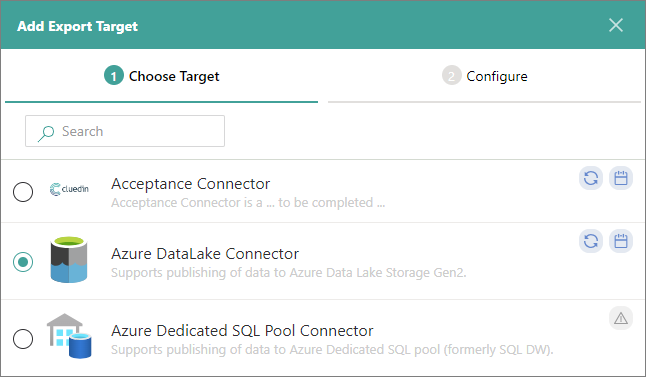
On the Choose Target tab, select Azure Data Lake Connector. Then, select Next.
-
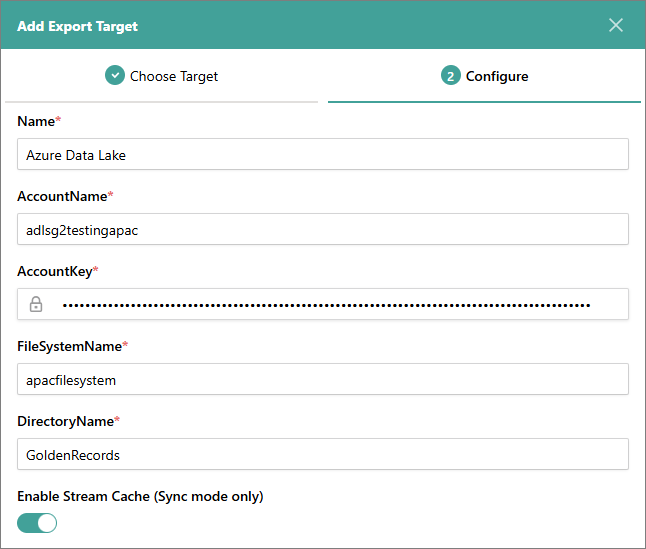
On the Configure tab, enter the connection details:
-
Name – user-friendly name of the export target that will be displayed on the Export Target page in CluedIn.
-
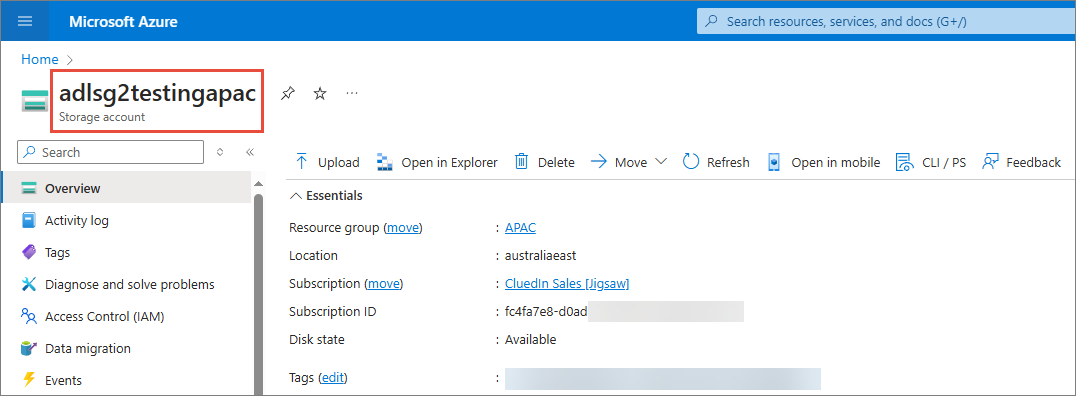
Account Name – name of the Azure Data Lake storage account where you want to store the data from CluedIn.
-
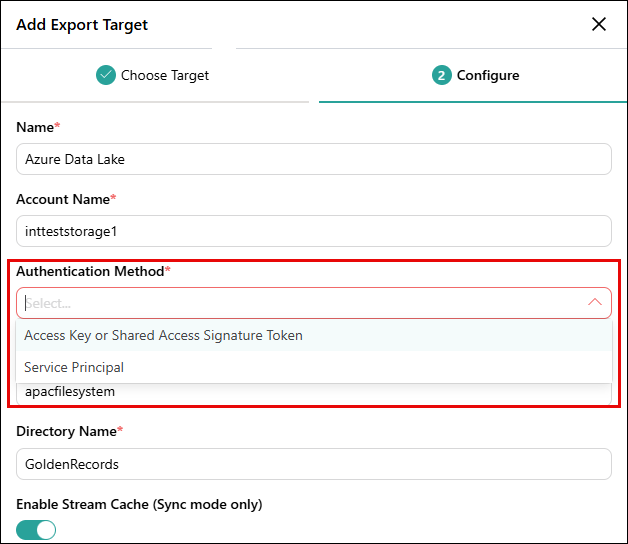
Authentication Method – Choose the desired authentication method. In older versions of the connector, this option is not available and you must use Account Key to connect to the Azure Data Lake.
-
Access Key or Shared Access Signature Token – you can use either the storage account’s Access Key or Shared Access Signature Token for authenticating requests to the Azure Data Lake storage account.
-
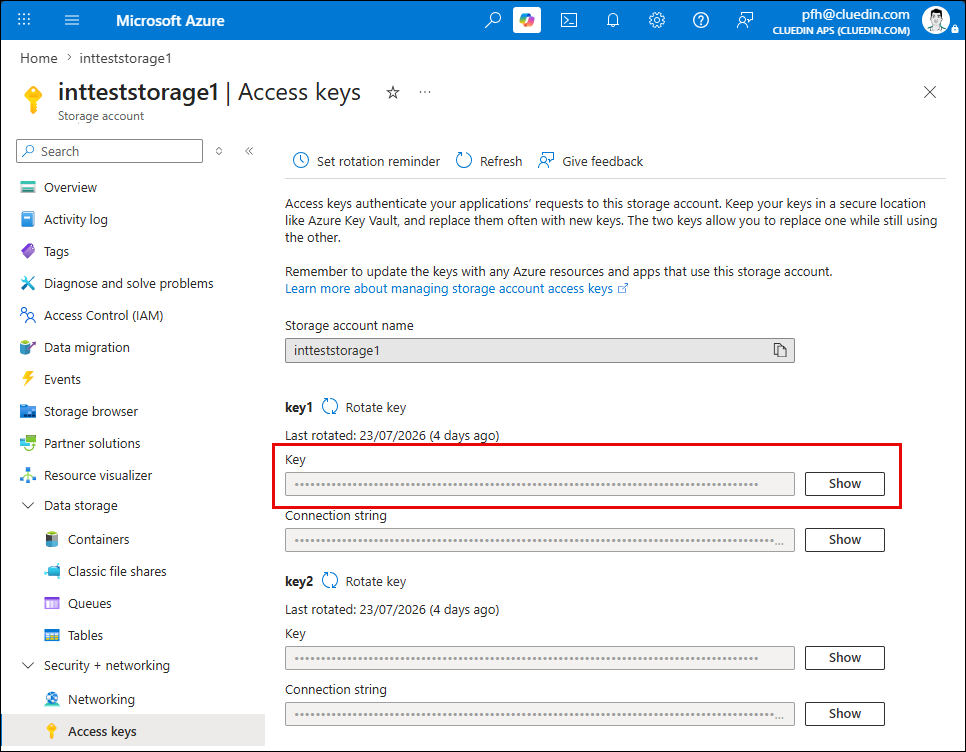
Access Key – Access Key can be obtained from the following location
-
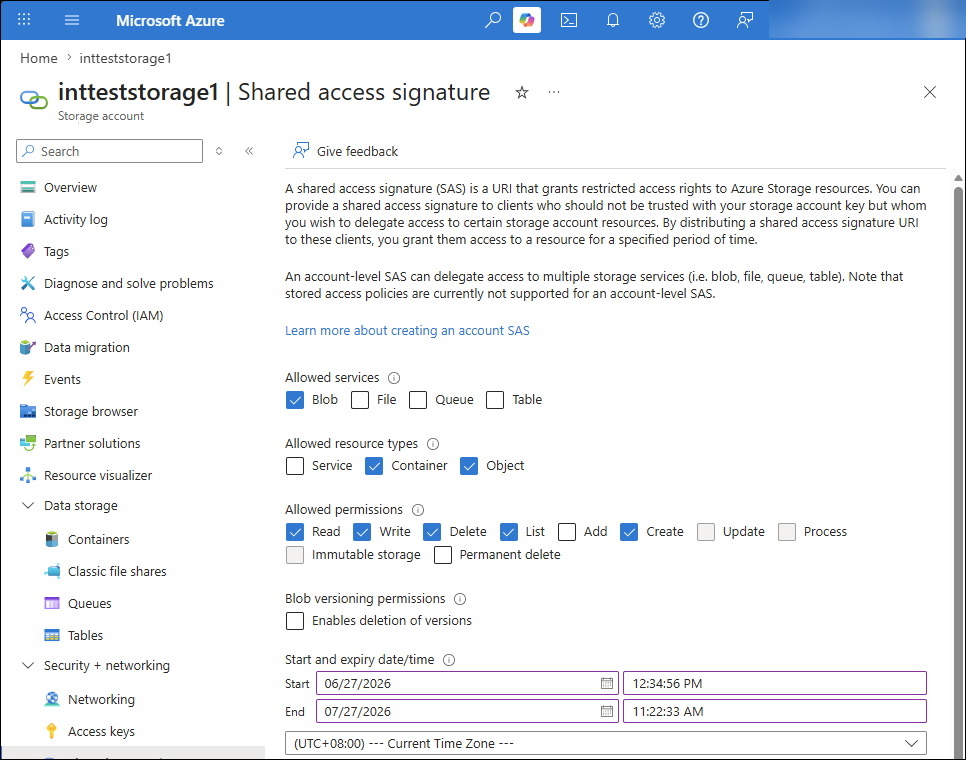
Shared Access Signature Token – Shared Access signature must be created with at least the following permissions
-
-
Service Principal – please enter the following items. The Service principal must have Blob Storage Data Contributor or higher role on the storage account if the Service Principal is to be used to directly access the storage account. If the Service Principal is to be used to access an Azure Key Vault (explained below), then the Service Principal must have Key Vault Secrets User or higher role on the Azure Key Vault.
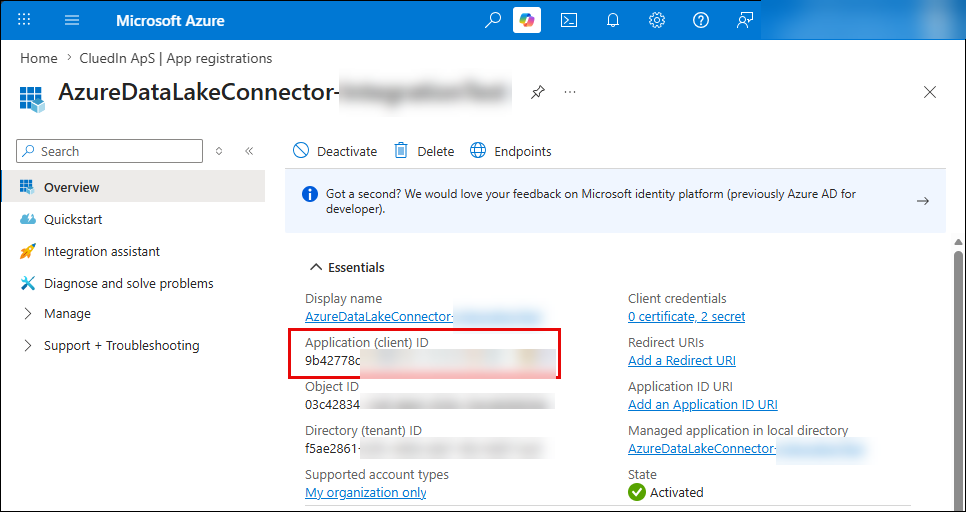
- Client Id – unique identifier assigned to the Service Principal it was registered in the Microsoft identity platform. You can find this value in the Overview section of app registration.
-
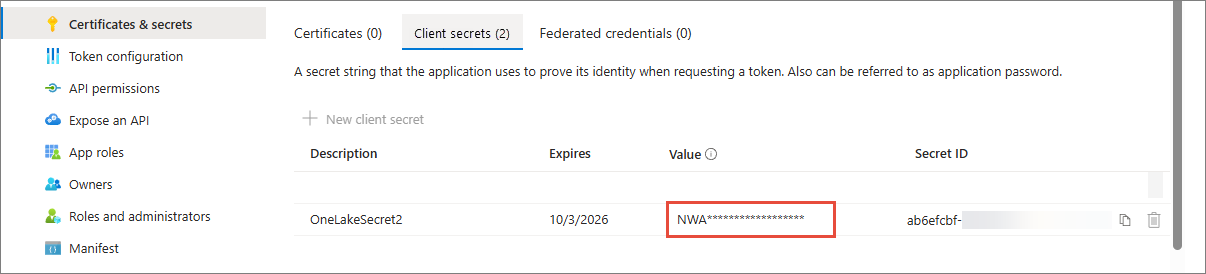
Client Secret – confidential string used by your OneLake app to authenticate itself to the Microsoft identity platform. You can find this value in the Certificates & secrets section of app registration.
-
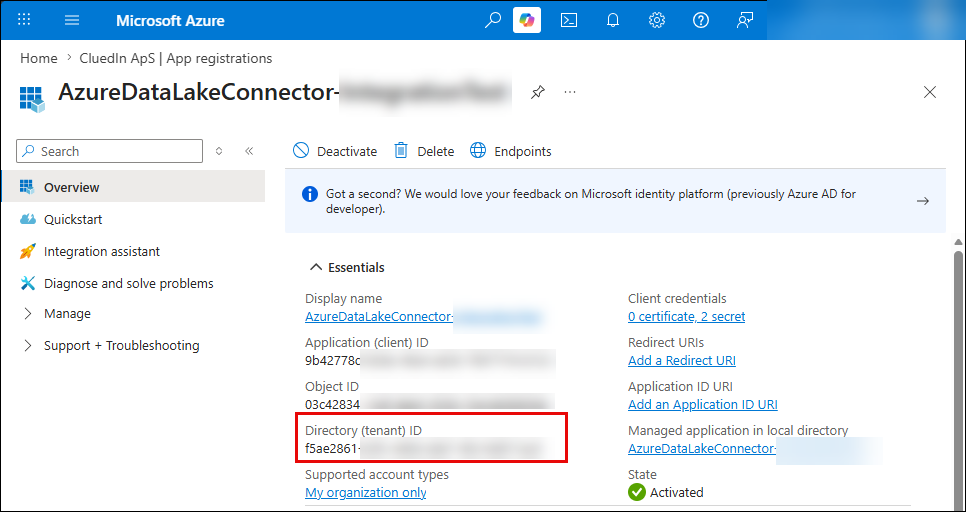
Tenant Id – unique identifier for your Microsoft Entra tenant. You can find this value in the Overview section of app registration.
-
(Optional) Load Access Key or Shared Access Signature Token from Azure Key Vault Secret – When this is selected, the service principal will be used to access an Azure Key Vault instead of being used to access the storage account directly.
- Azure Key Vault URI URI of the Azure Key Vault.
- Azure Key Vault Secret Name Secret Name that contains the Account Key or Shared Access Signature Token.
-
-
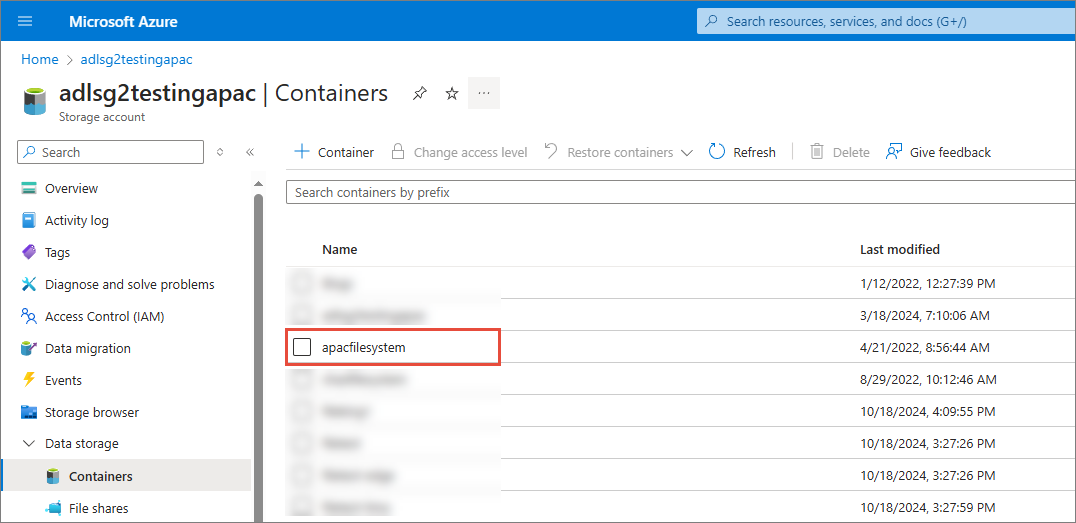
File System Name – name of a container in Azure Data Lake.
-
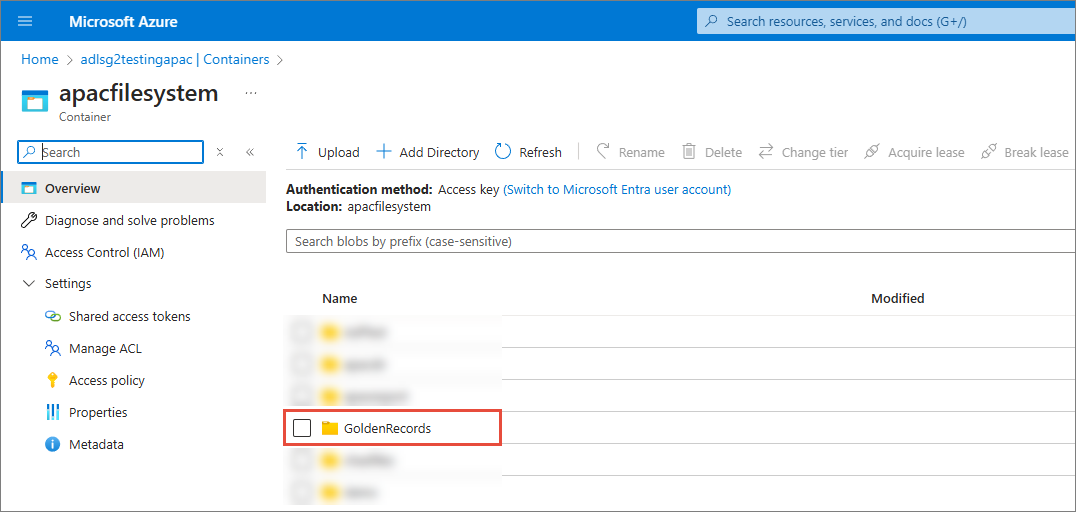
Directory Name – name of a directory inside the container in Azure Data Lake.
-
Enable Stream Cache (Sync mode only) – when stream cache is enabled, CluedIn caches the golden records at intervals, and then writes out accumulated data to one file (JSON, Parquet, or CSV). When stream cache is not enabled, CluedIn streams out golden records one by one, each in a separate JSON file. Stream cache is available only for the synchronized stream mode.
-
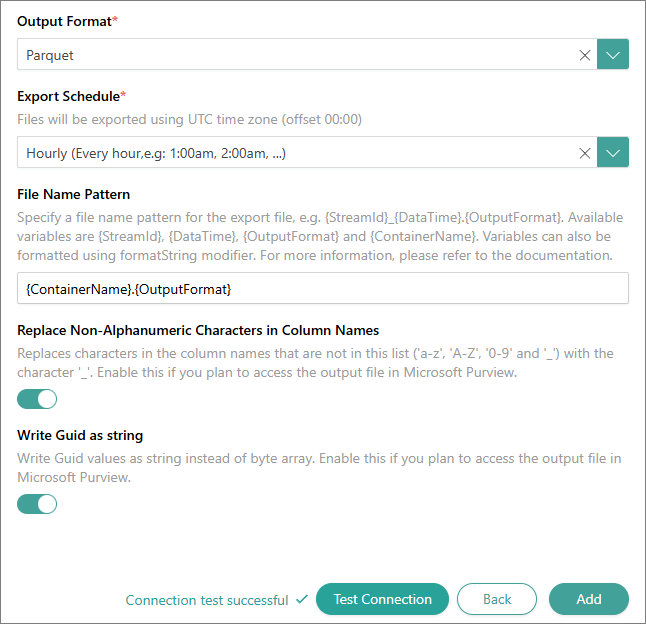
Output Format – file format for the exported data. You can choose between JSON, Parquet, and CSV. However, Parquet and CSV formats are available only if you enable stream cache. If stream cache is not enabled, JSON is the default format.
-
Export Schedule – schedule for sending the files from CluedIn to the export target. The files will be exported based on Coordinated Universal Time (UTC), which has an offset of 00:00. You can choose between the following options:
-
Hourly – files will be exported every hour (for example, at 1:00 AM, at 2:00 AM, and so on).
-
Daily – files will be exported every day at 12:00 AM.
-
Weekly – files will be exported every Monday at 12:00 AM.
-
Custom Cron – you can create a specific schedule for exporting files by entering the cron expression in the Custom Cron field. For example, the cron expression
0 18 * * *means that the files will be exported every day at 6:00 PM.
-
-
(Optional) File Name Pattern – a file name pattern for the export file. For more information, see File name patterns.
For example, in the
{ContainerName}.{OutputFormat}pattern,{ContainerName}is the Target Name in the stream, and{OutputFormat}is the output format that you select in step 3g. In this case, every time the scheduled export occurs, it will generate the same file name, replacing the previously exported file.If you do not specify the file name pattern, CluedIn will use the default file name pattern:
{StreamId:D}_{DataTime:yyyyMMddHHmmss}.{OutputFormat}. -
(Optional, for Parquet output format only) Exports Codes and Edges in array format – enable this option if you plan to export the codes and edges in parquet array. Only enable this feature if your Parquet reader supports it
-
(Optional, for Parquet output format only) Replace Non-Alphanumeric Characters in Column Names – enable this option if you plan to access the output file in Microsoft Purview. When this option is enabled, CluedIn replaces non-alphanumeric characters in the column names (those not in a-z, A-Z, 0-9, and underscore) with the underscore character ( _ ).
-
(Optional, for Parquet output format only) Write Guid as String – enable this option if you plan to access the output file in Microsoft Purview. When this option is enabled, CluedIn writes GUID values as string instead of a byte array.
-
-
Test the connection to make sure it works, and then select Add.
Now, you can select the Azure Data Lake connector in a stream and start exporting golden records.