Features
On this page
- Sync business domains to Dataverse tables
- Sync Dataverse table to Cluedin business domains/vocabularies
- Create ingestion endpoint workflow
- Create streams
Sync business domains to Dataverse tables
This feature allows you to sync CluedIn business domains, vocabularies, and vocabulary keys with Dataverse table and columns.
There are several ways how you can perform the sync:
-
From CluedIn settings – This option is convenient if you want to sync multiple business domains at once.
-
From the Business Domains module – This option is convenient if you want to sync one business domain at a time.
To sync CluedIn business domains with Dataverse table (from CluedIn settings)
-
On the navigation pane, go to Administration > Azure Integration > Power Apps.
-
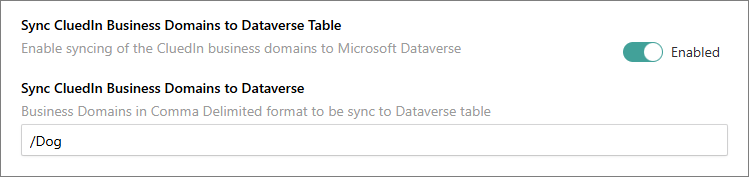
In Sync CluedIn Business Domains to Dataverse Table, turn on the toggle, and then enter the business domain that you want to sync. If you want to sync multiple business domains, separate them with a comma (for example, /_Type1,/Type2,/Type3).
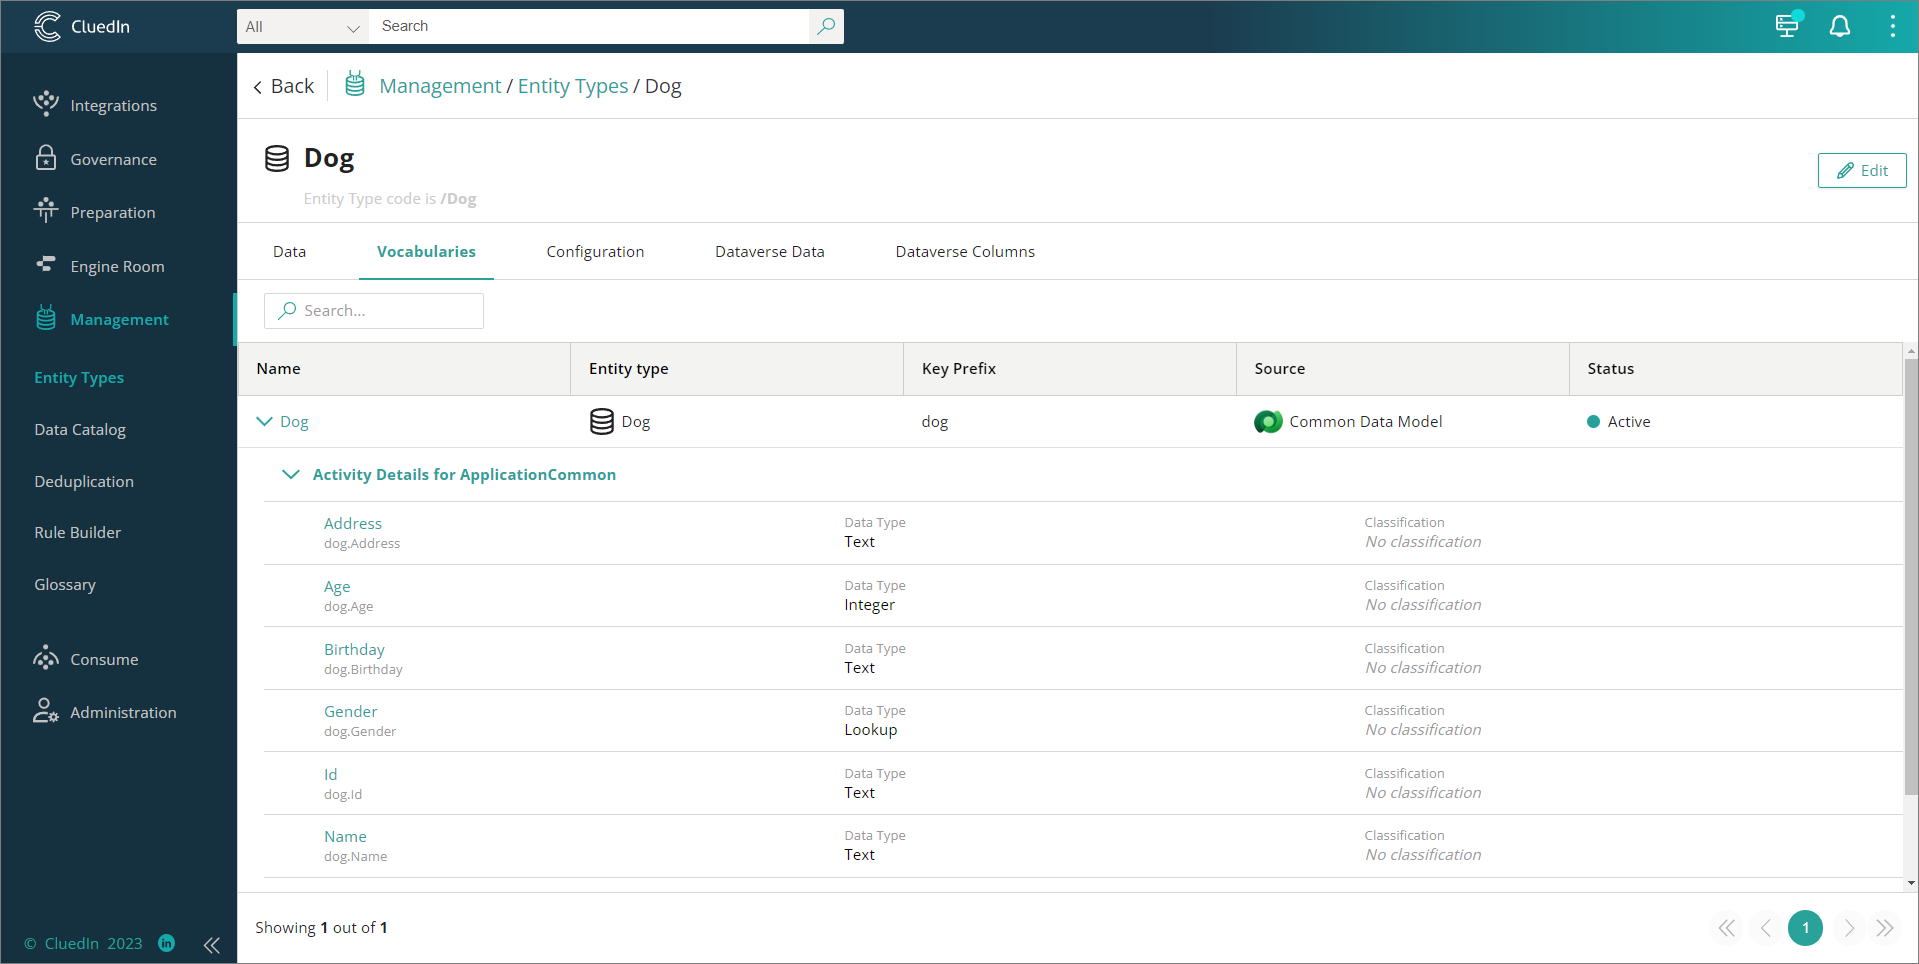
All the vocabulary keys below will be created as columns in the Dataverse table.
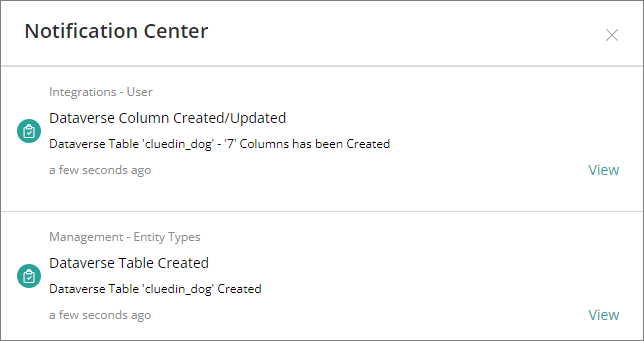
Once the synchronization has been completed, you’ll receive two notifications: Dataverse Table Created and Dataverse Column Created/Updated.
-
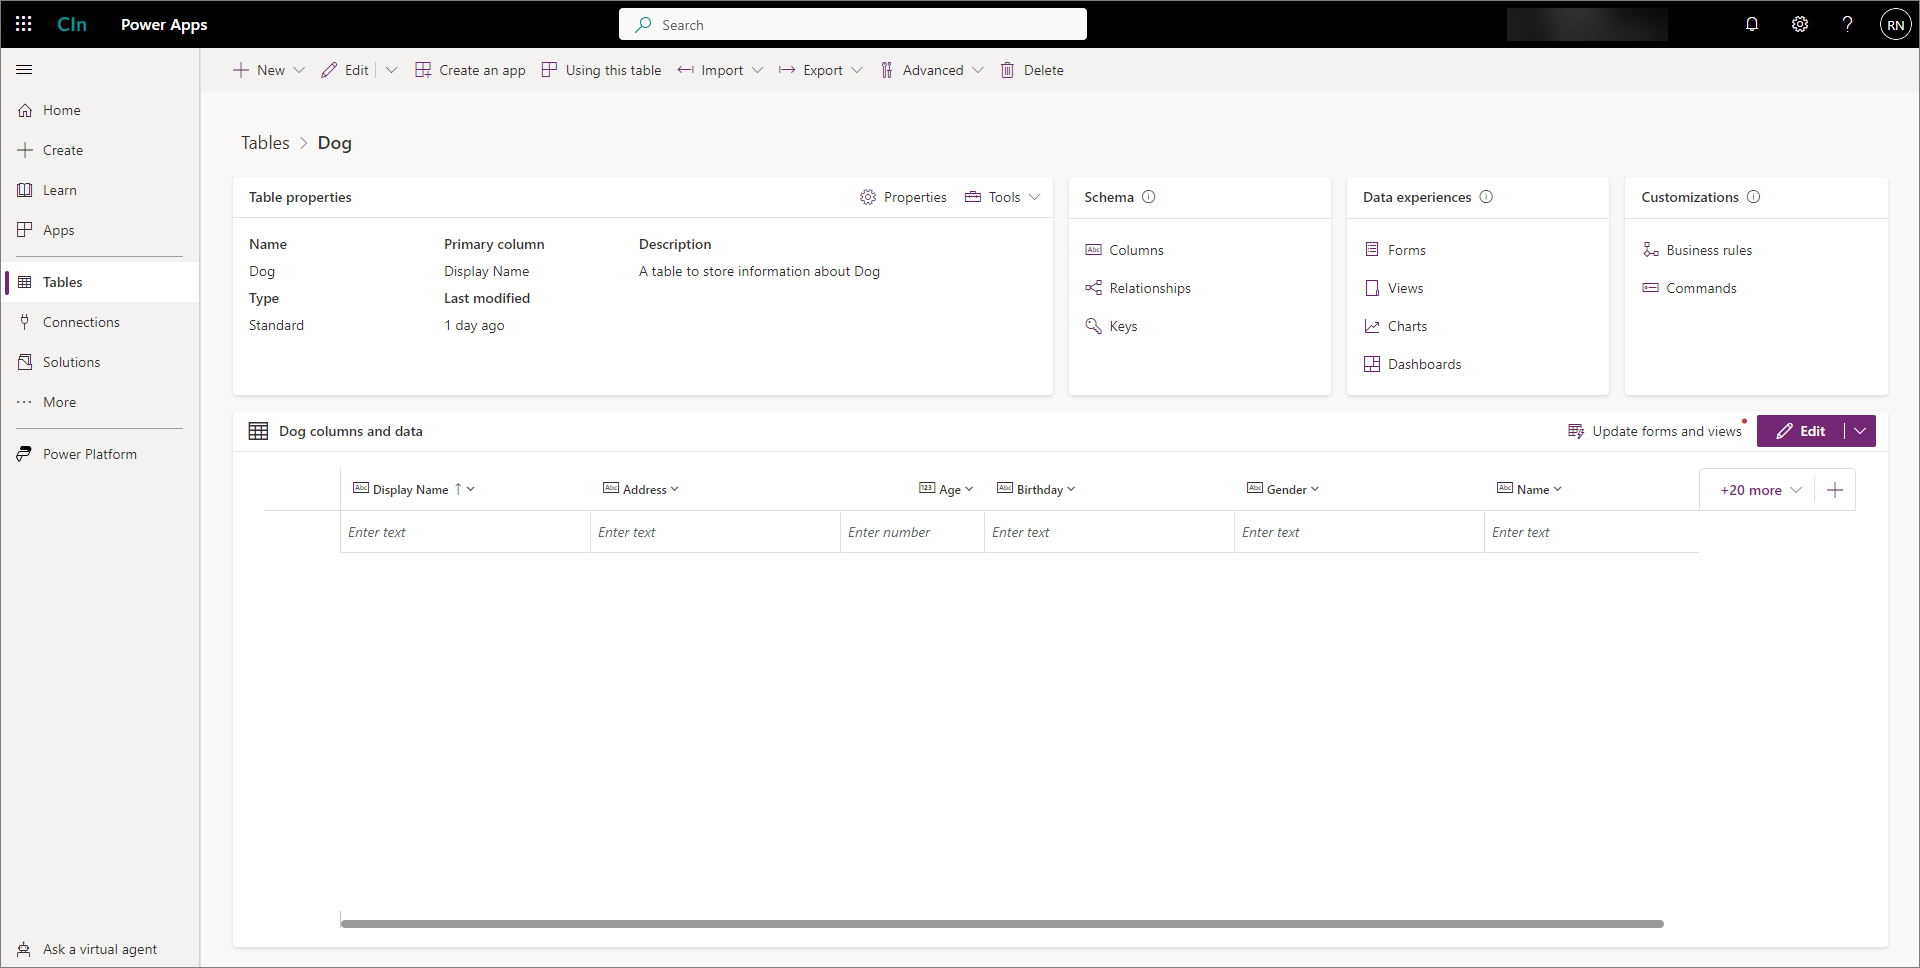
Verify the table and columns created in Dataverse.
To sync CluedIn business domains with Dataverse table (from the Business Domains module)
-
On the navigation pane, go to Management > Business Domains.
-
Select the business domain that you want to sync.
-
In the upper-right corner of the business domain page, select Edit.
-
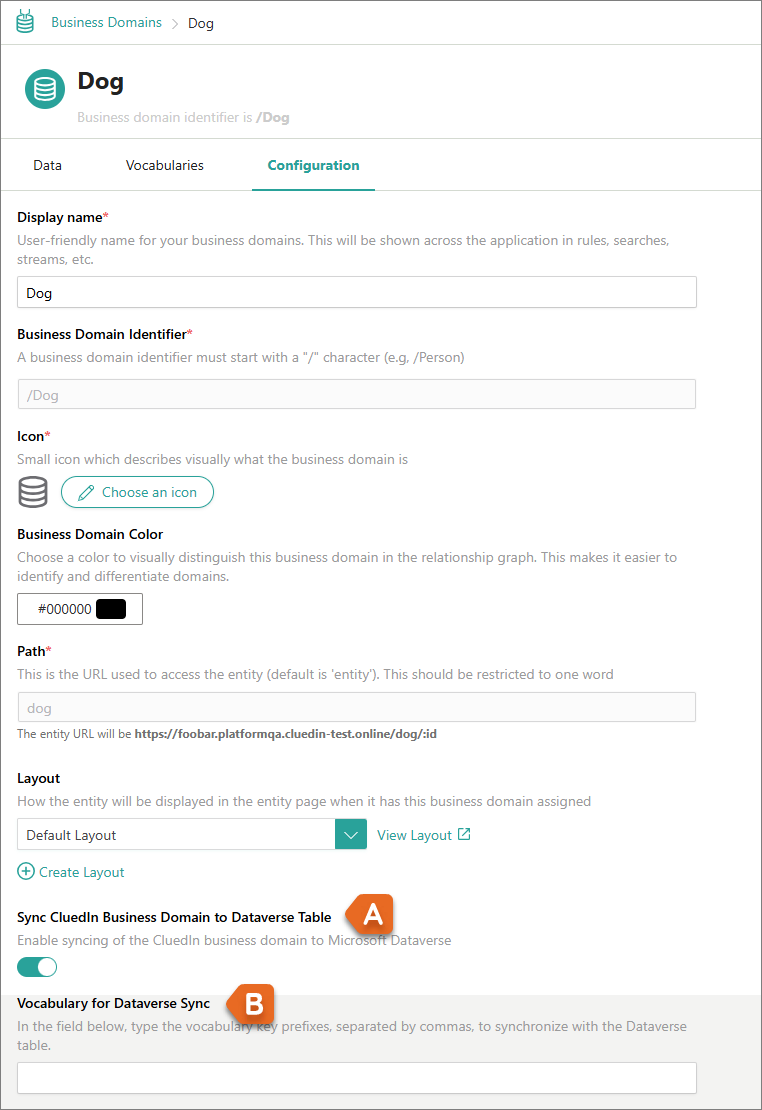
On the Configuration tab, do the following:
-
Turn on the Sync CluedIn Business Domain to Dataverse Table toggle.
-
In Vocabulary for Dataverse Sync, enter the names of vocabularies to include in the Dataverse sync. If you enter multiple names, they must be provided as a comma-separated list. To sync all vocabularies associated with this business domain, leave this field empty.
-
-
In the upper-right corner of the business domain page, select Save.
All the vocabulary keys below will be created as columns in the Dataverse table.
Once the synchronization has been completed, you’ll receive two notifications: Dataverse Table Created and Dataverse Column Created/Updated.
-
Verify the table and columns created in Dataverse.
Sync Dataverse table to Cluedin business domains/vocabularies
This feature allows you to sync Dataverse table and columns into CluedIn business domains, vocabulary, and vocabulary keys.
Prerequisites
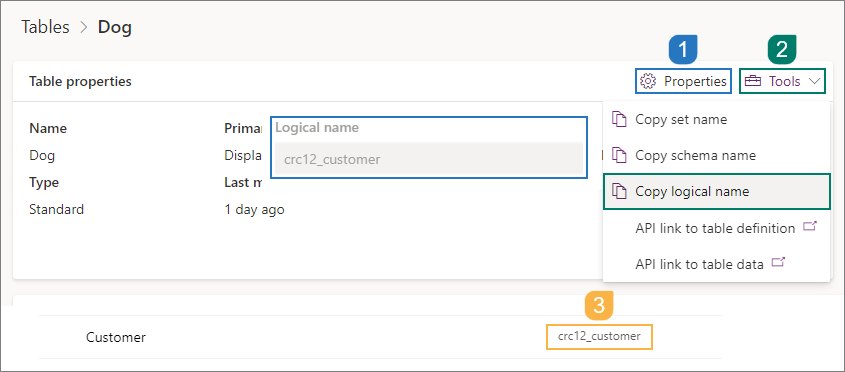
You’ll need to provide the logical name of the Dataverse table. There are the following ways to identify or get the logical name of the table:
-
Go to table Properties, and then copy the value from the Logical name field.
-
Go to Tools, and then select Copy logical name.
-
In the table list view, the logical name is right after the table name.
To sync Dataverse table and columns into CluedIn business domains and vocabulary
-
On the navigation pane, go to Administration > Azure Integration > Power Apps.
-
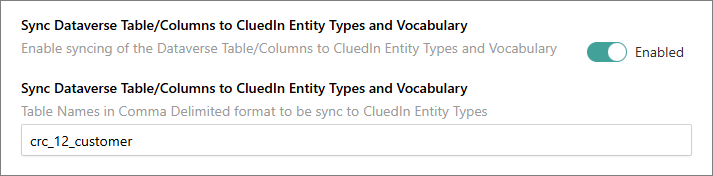
In Sync Dataverse Table/Columns to CluedIn Business Domains and Vocabulary, turn on the toggle, and then enter the Dataverse table name. The value should be the logical name of the table. If you want to sync multiple tables, separate them with a comma (for example, logical_name1,logical_name2,logical_name3_).
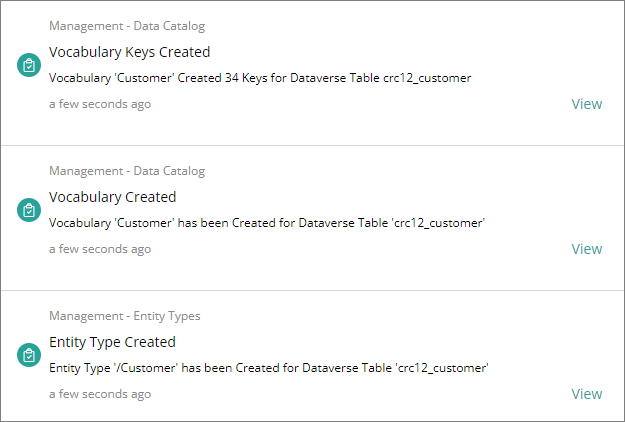
Once the synchronization has been successfully completed, you’ll receive three notifications: Entity Type Created, Vocabulary Created, and Vocabulary Keys Created.
-
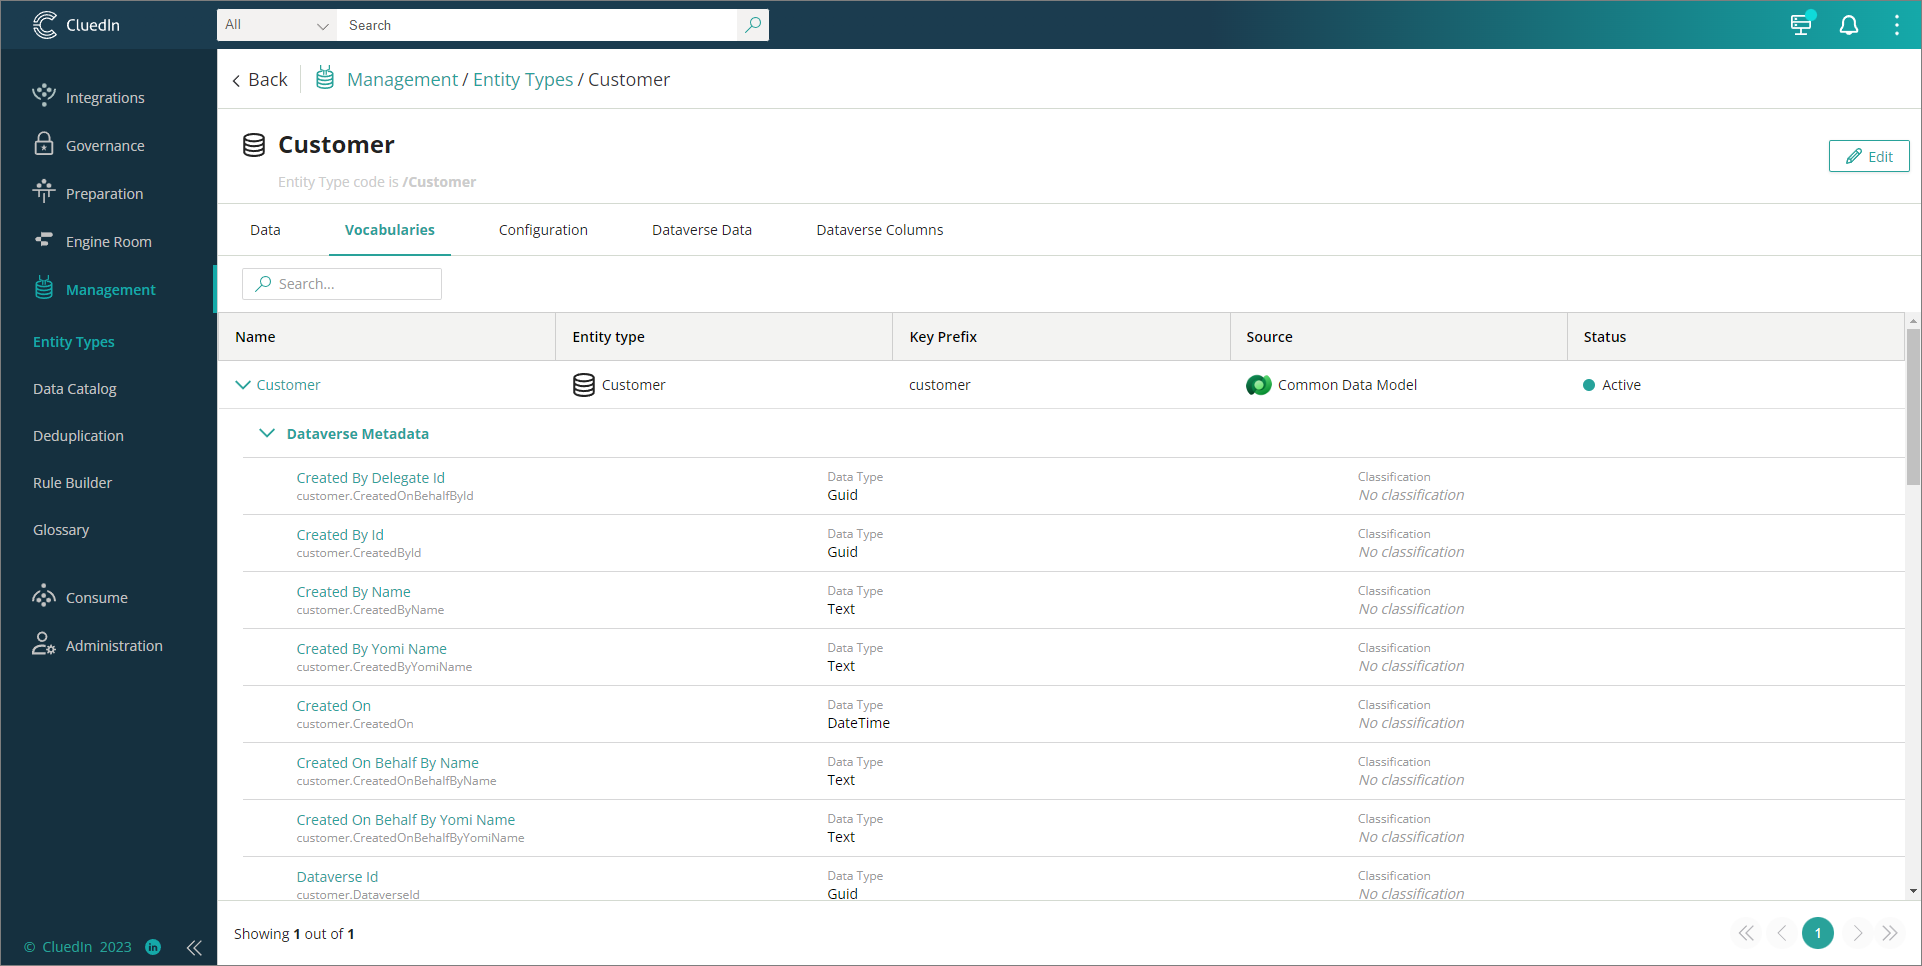
Verify the business domain, vocabulary, and vocabulary keys created in CluedIn.
Create ingestion endpoint workflow
This feature allows you to automate the creation of workflow that will send the data from Dataverse to CluedIn via ingestion endpoint.
Prerequisites
- Dataverse connection.
To automate the workflow creation
-
In CluedIn, on the navigation pane, go to Administration > Azure Integration > Power Apps.
-
In Create workflow to Ingest Data to CluedIn, turn on the toggle.

-
(Optional) In Workflow Access Users List, enter one or more email addresses in a comma-delimited format to grant access to the created workflow. All addresses must be registered in your Azure organization directory.

Ingestion endpoint
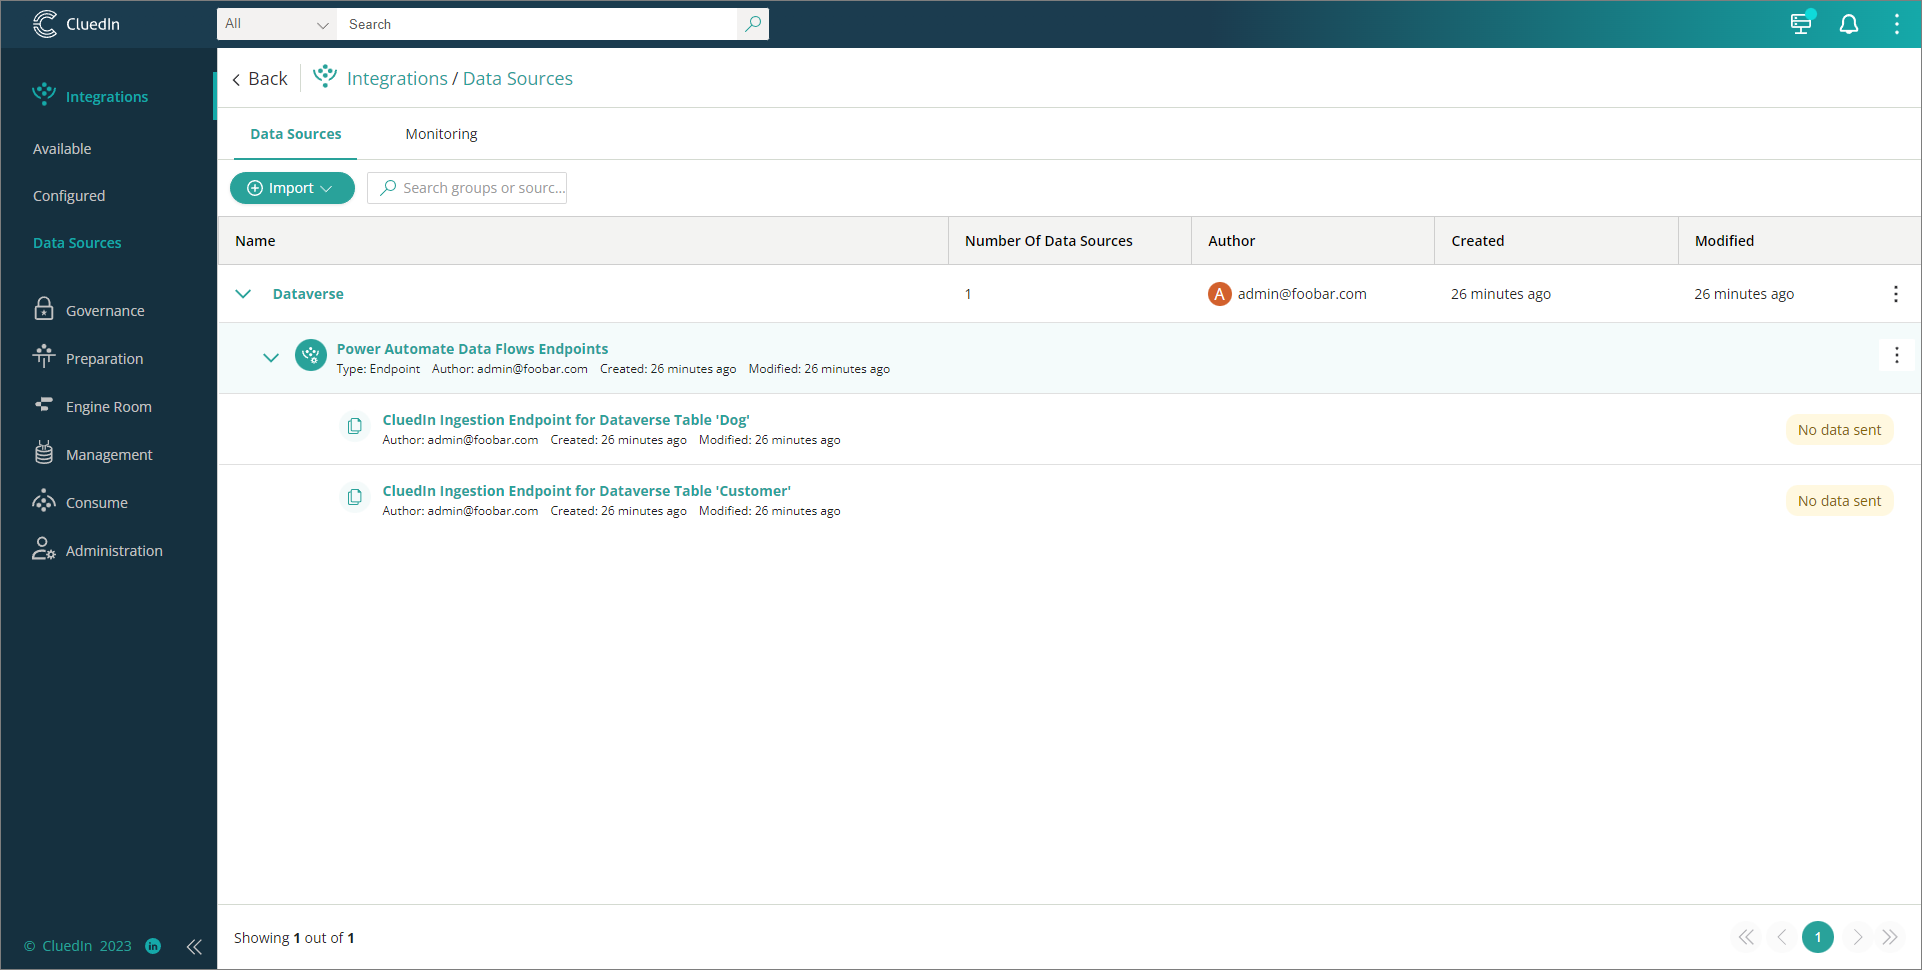
As part of workflow automation, the ingestion endpoint will be created as well. From our sample above, you can expect two ingestion endpoints to be created, one for each of the cluedin_dog and crc12_customer tables.
Workflow
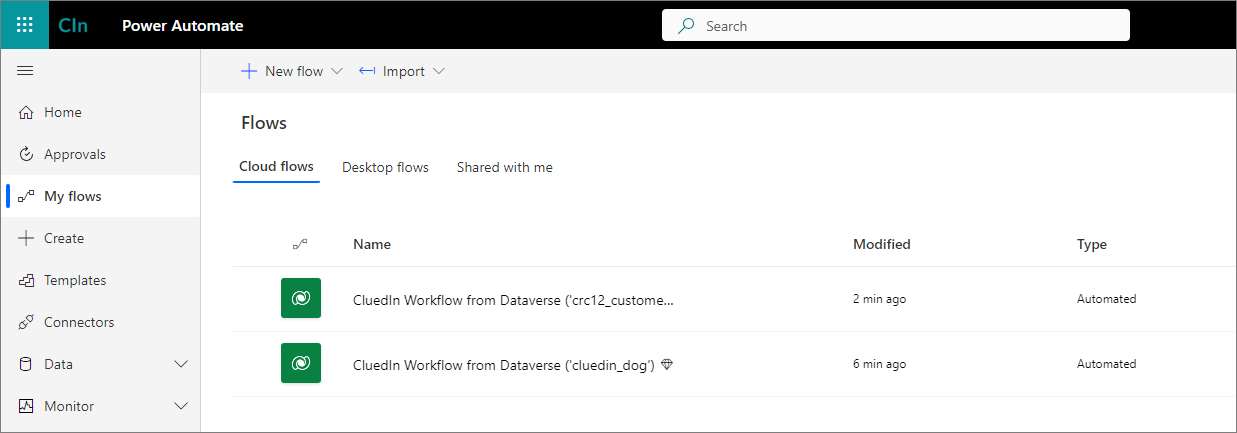
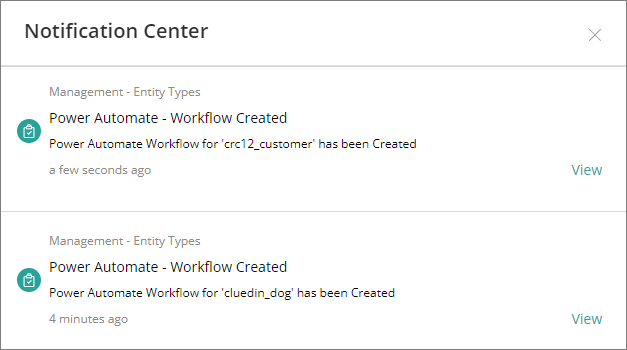
The creation of workflow will depend on the values of Sync Business Domains and Sync Dataverse Tables. Once the execution of the job is done, from the sample values above, you can expect two workflows to be created, one for each of the cluedin_dog and crc12_customer tables.
You can expect to see a notification when the creation is successful.
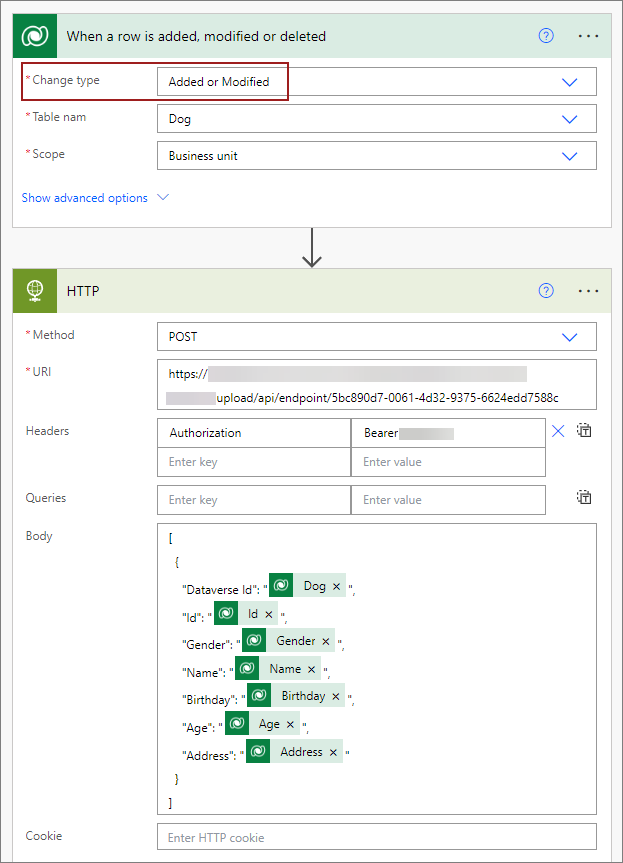
The content of the workflow will be composed of a Dataverse event named When a row is added, modified or delete (but mainly focused on Added and Modified) and an HTTP event that pushes the data into CluedIn ingestion endpoint. On the following screenshot, the token has been edited to show the full content of HTTP event.
Auto mapping and processing
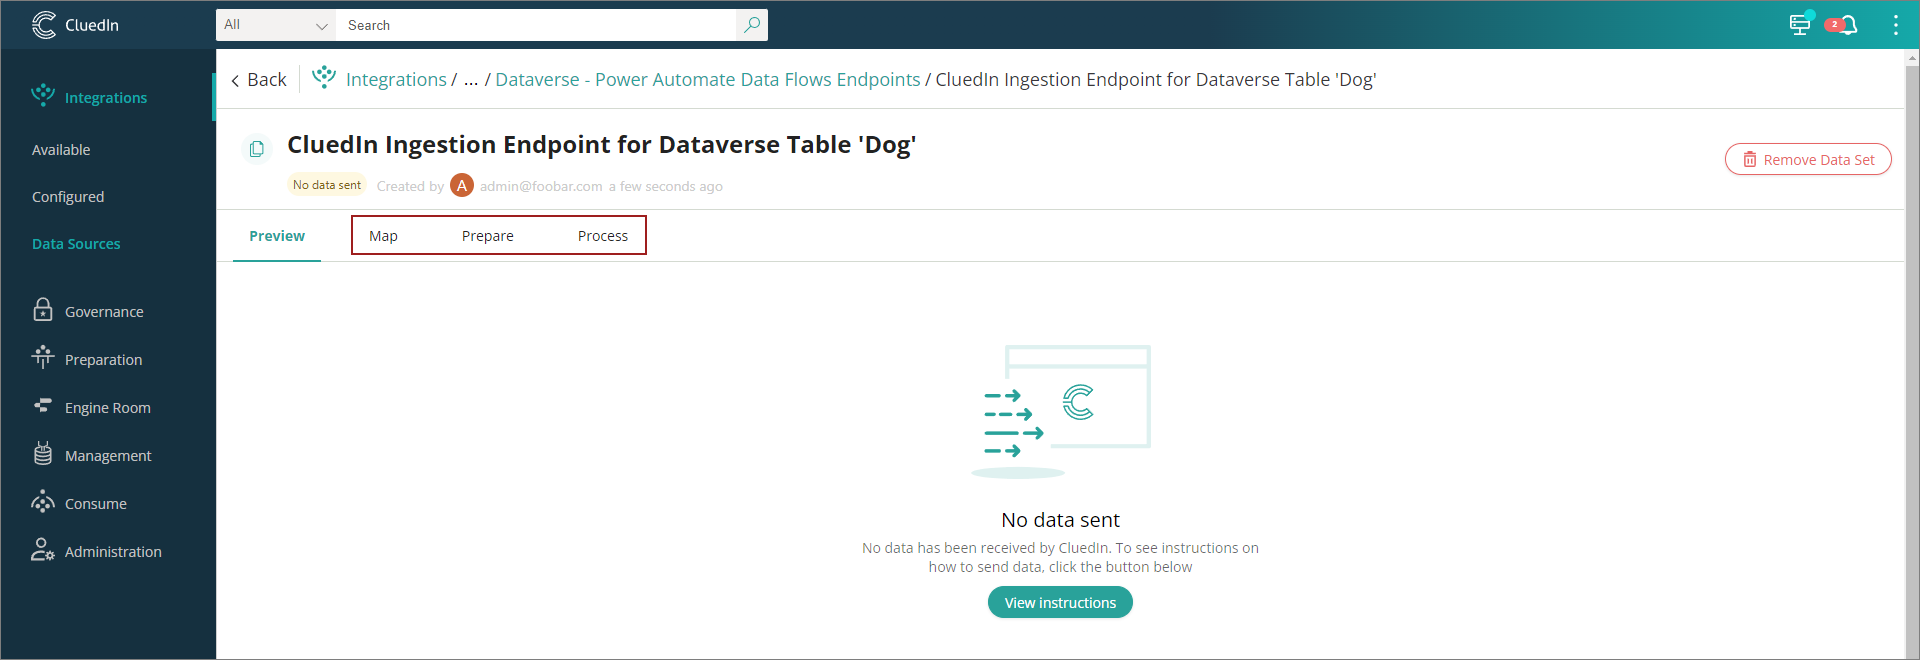
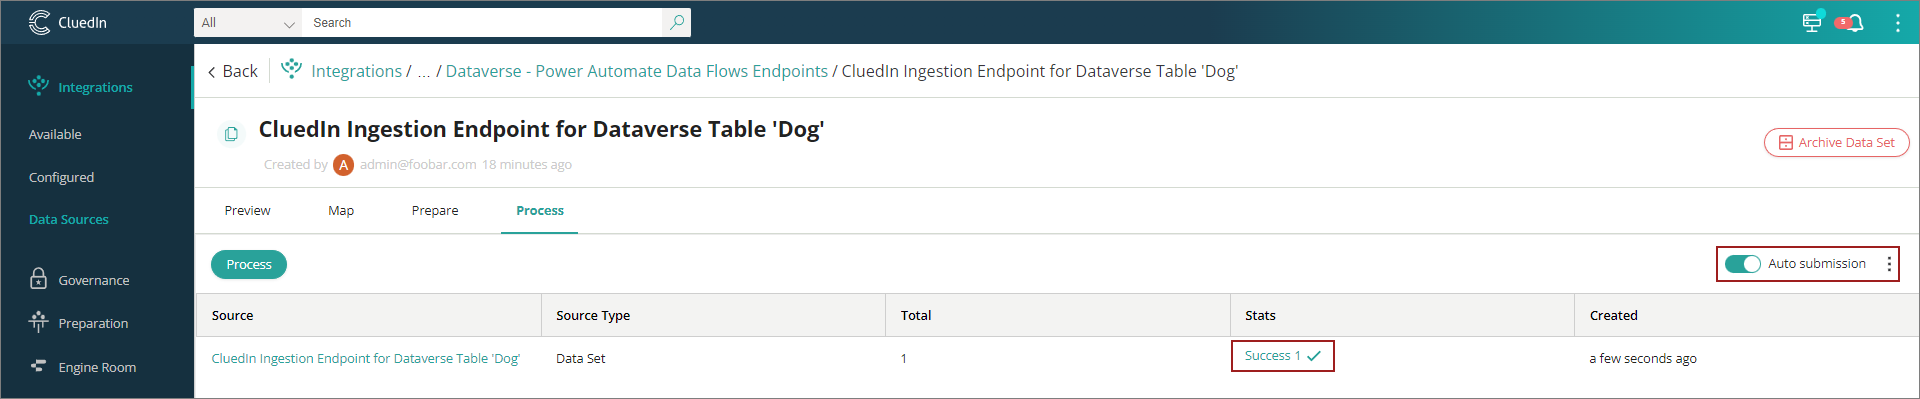
As we already know the structure of the table/vocabulary that we are working on, the system will automate the data mapping and processing. By navigating to the data set page, you can notice that the Map, Prepare, and Process tabs are now available as we already automated the creation of the data mapping into our vocabularies.
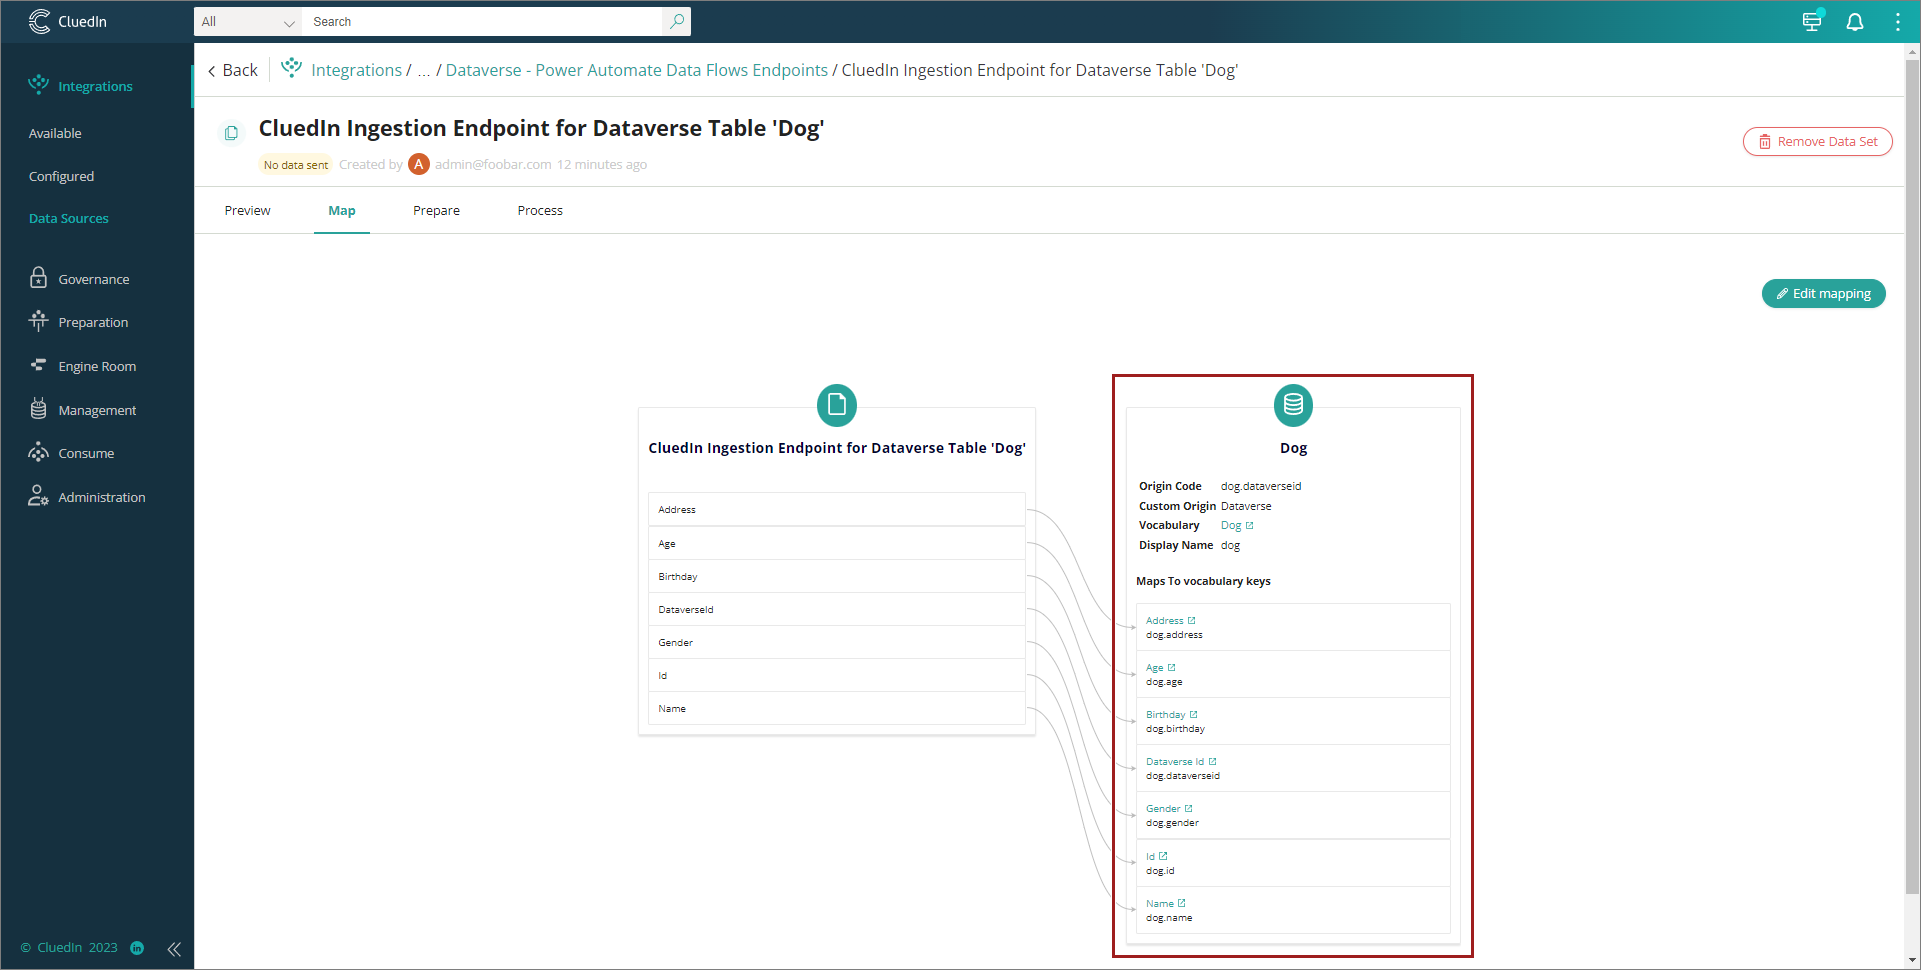
On the Map tab, you can find the the full view of all columns mapped to our vocabulary, including edges (relationships) and identifiers, if there are any.
On the Preview tab, you can find the data received from Dataverse.

Once the data is received, you can expect to see it processed because we have also enabled the Auto submission property of the ingestion endpoint.
Create streams
This feature allows you to automate the creation of export targets and streams.
Prerequisites
- CluedIn.Connector.Dataverse is installed.
To automate the creation of export targets and streams
-
On the navigation pane, go to Administration > Azure Integration > Power Apps.
-
In Create CluedIn Stream, turn on the toggle.

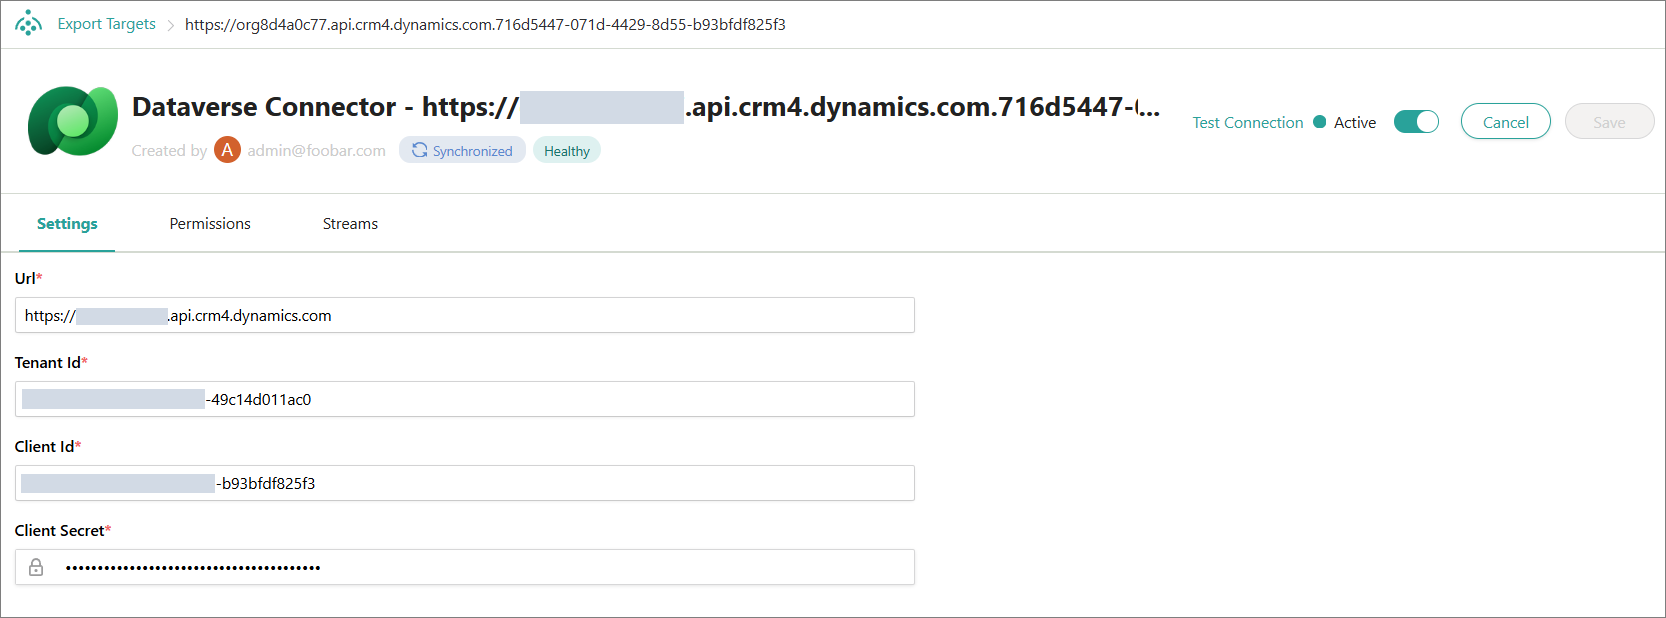
Export targets
Export target will be created automatically using the same credentials from Organization Settings.
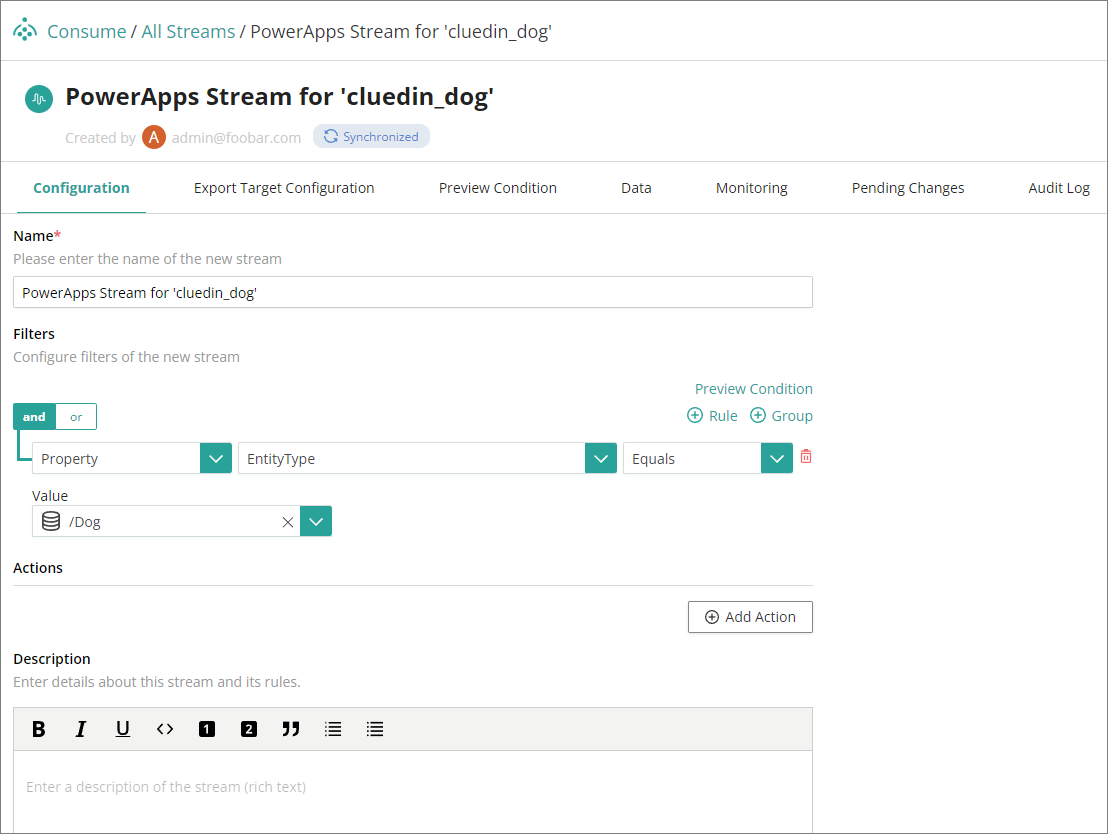
Streams
The creation of a stream will depend on the values of Sync Business Domains and Sync Dataverse Tables.
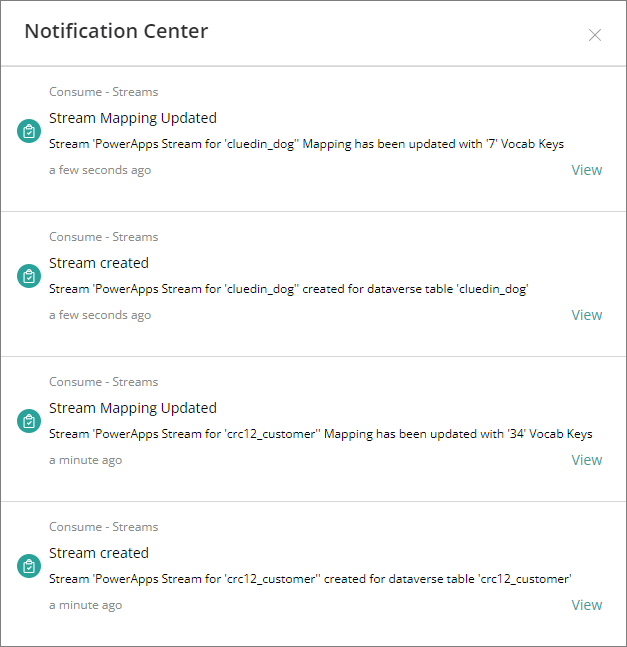
Once the execution of the job is done, from the sample values above, two streams should have been created, one for each of the cluedin_dog and crc12_customer tables.

Each stream will have a certain configuration filtered by business domain.
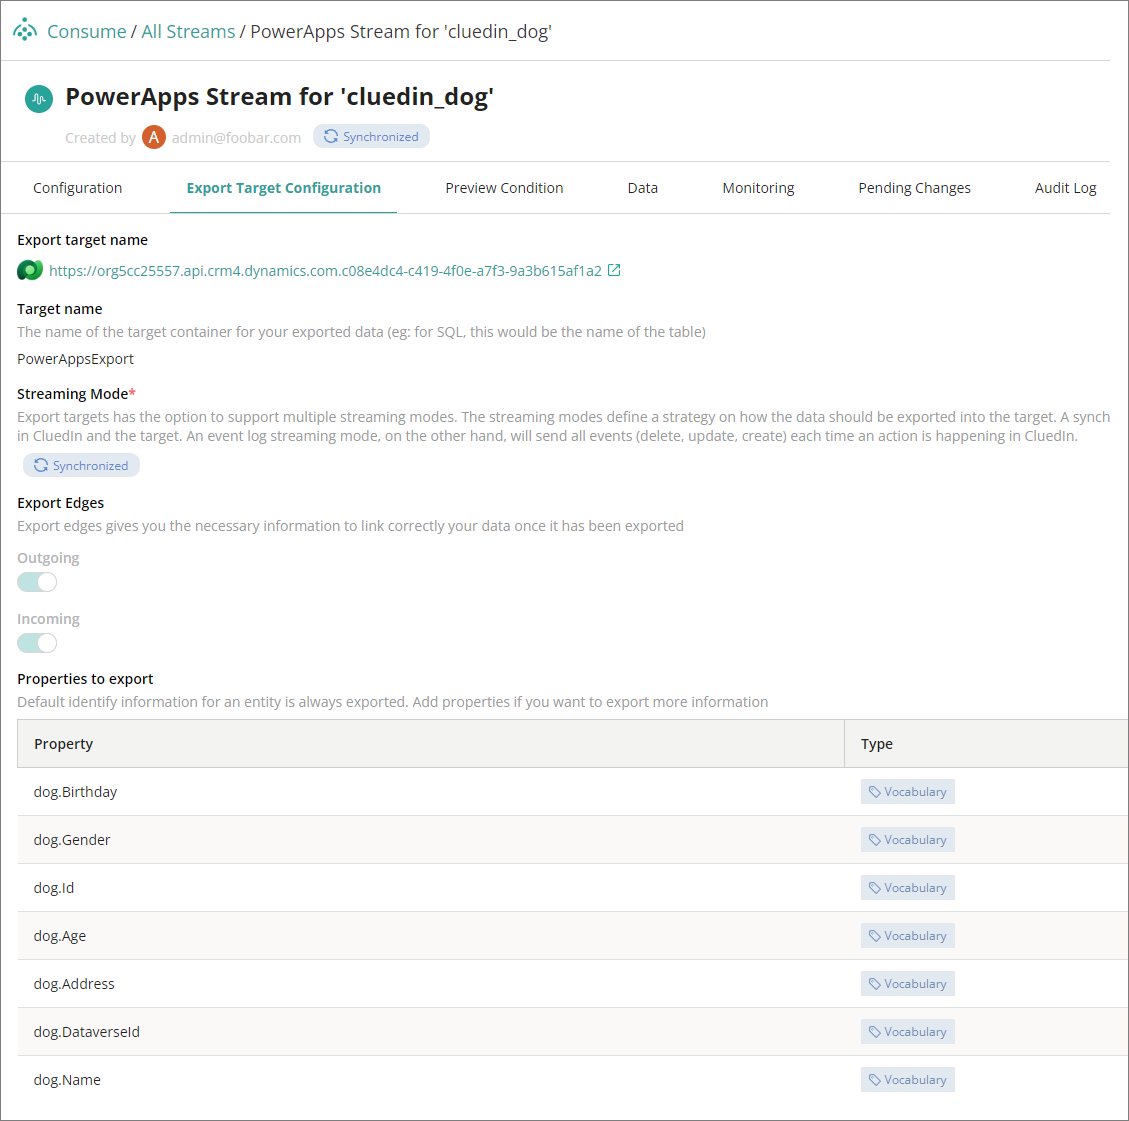
It will automatically assign the same export target that was created from the Dataverse connector. Incoming and outgoing edges are set to be exported. All the properties associated with it have been automatically added too.
Notifications
Two notifications can be expected in this job: Stream created and Stream mapping updated.