Power Apps pre-configuration guide
On this page
- Set up a firewall policy
- Pre-configuration steps in Microsoft Entra ID
- Pre-configuration steps in Power Apps
- Next steps
In this guide, you will learn how to prepare for configuring Power Apps integration in CluedIn. The instructions in this guide apply to both public and private CluedIn instances, as Power Apps is hosted in your environment.
Set up a firewall policy
To enable CluedIn to call Power Apps, you need to add specific rules to your Azure Firewall as described in the Firewall guide.
Power Apps integration also involves Power Automate, which is used for data ingestion workflow to push data from Dataverse to CluedIn. That’s why you need to add firewall rules both for Power Automate and Power Apps.
Pre-configuration steps in Microsoft Entra ID
To manage all transactions between CluedIn and Dataverse, you need to register a new application in Microsoft Entra ID. When you register a new application, a service principal is automatically created for the app registration. Following the steps in this section will provide you with the Client ID, Tenant ID, and Client Secret required to configure Power Apps integration in CluedIn.
For more information, see Register an application in Microsoft Entra ID.
Register a new application
-
Sign in to the Microsoft Entra admin center as at least an Application Developer role.
-
If you have access to multiple tenants, switch to the tenant in which you want to register the application.
-
Go to Identity > Applications > App registrations, and then select New registration.
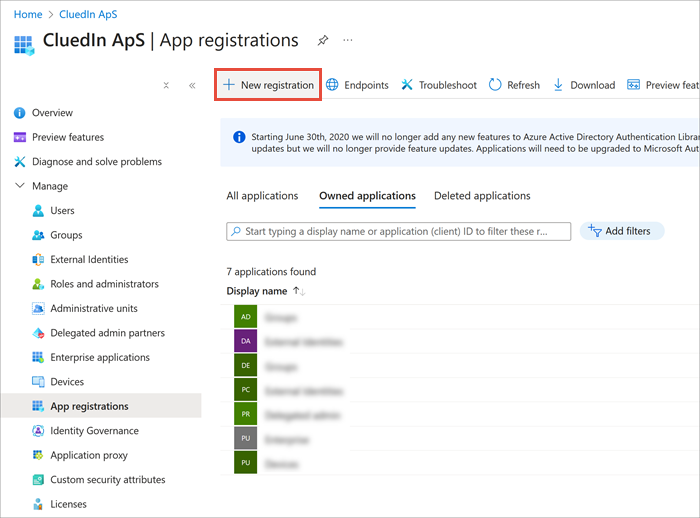
-
Enter a Name for your application.
-
Under Supported account types, specify who can use the application (Accounts in this organizational directory only).
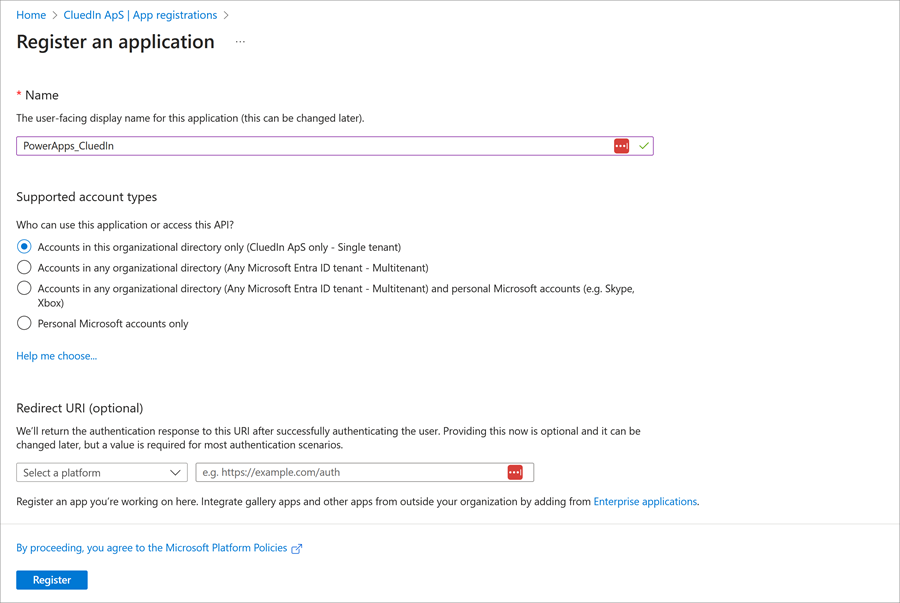
-
Select Register.
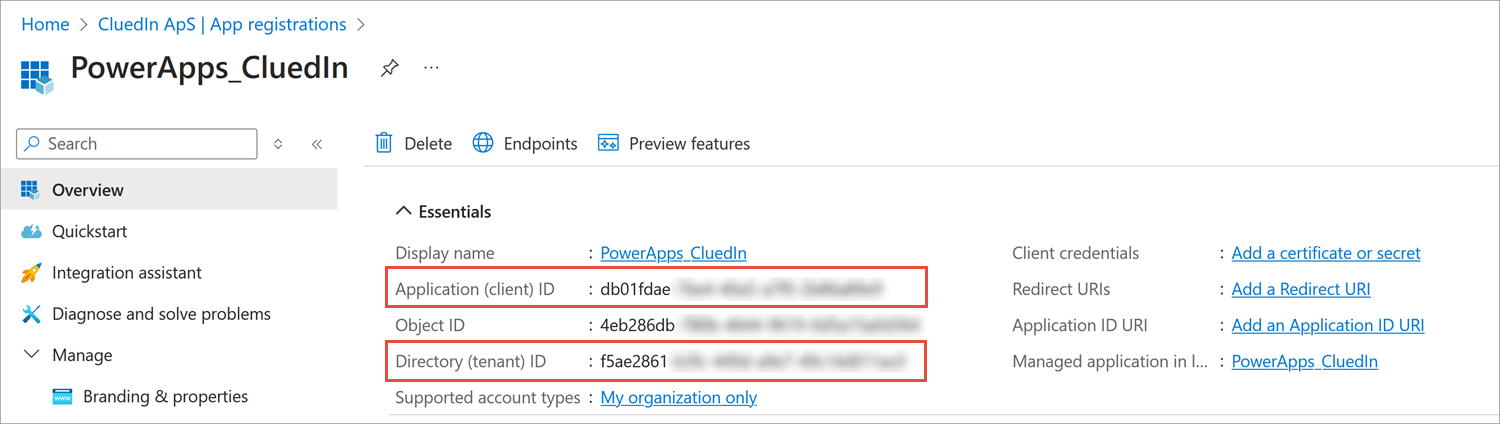
On the application’s Overview page, you can find the Application (client) ID and Directory (tenant) ID that you will need to configure Power Apps integration in CluedIn as described in Power Apps configuration guide.
Create a client secret
-
In the Microsoft Entra admin center, in App registrations, select your newly created application.
-
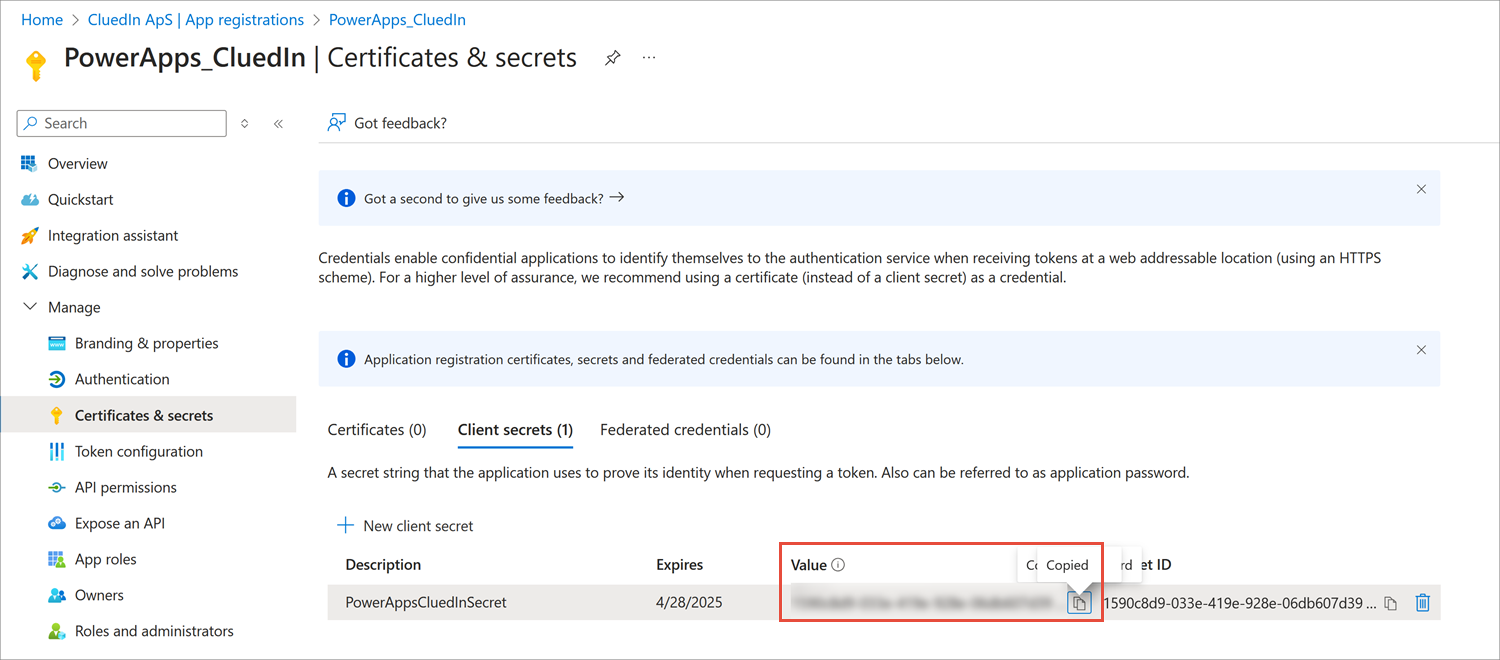
Go to Certificates & secrets > Client secrets > New client secret.
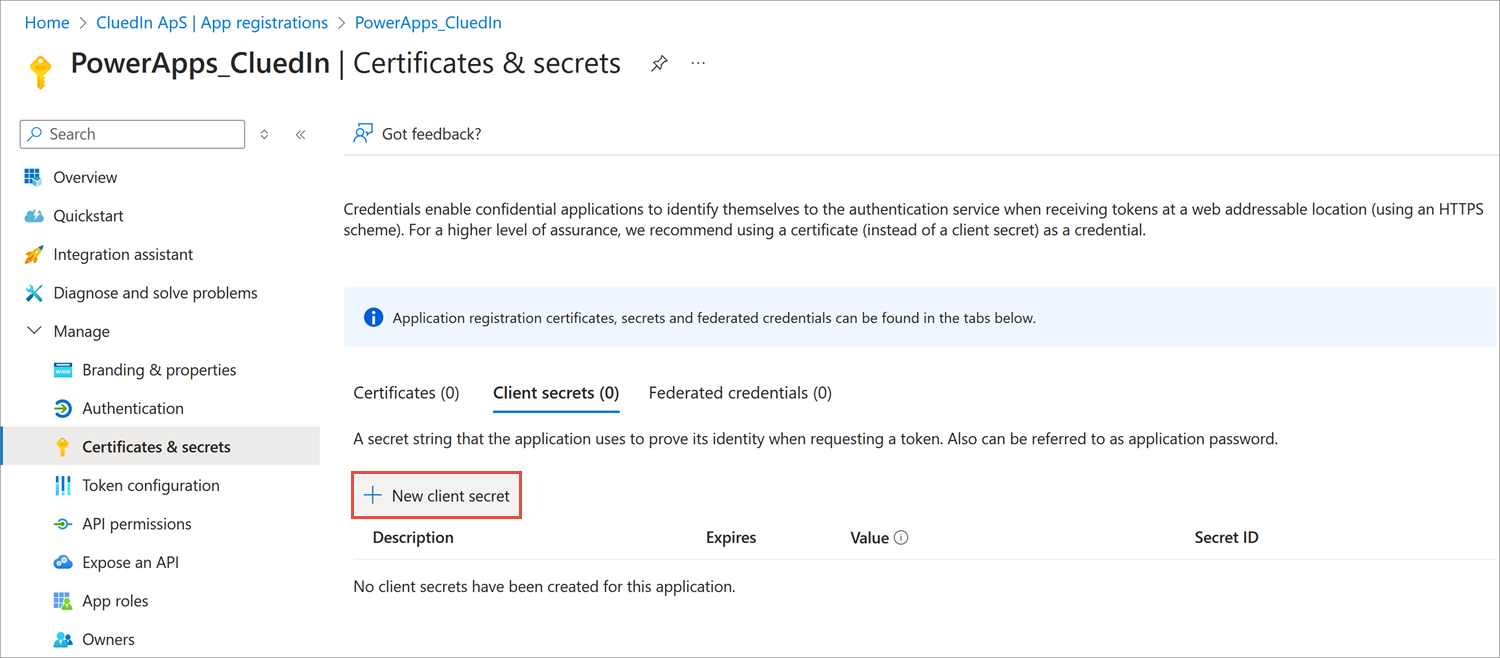
-
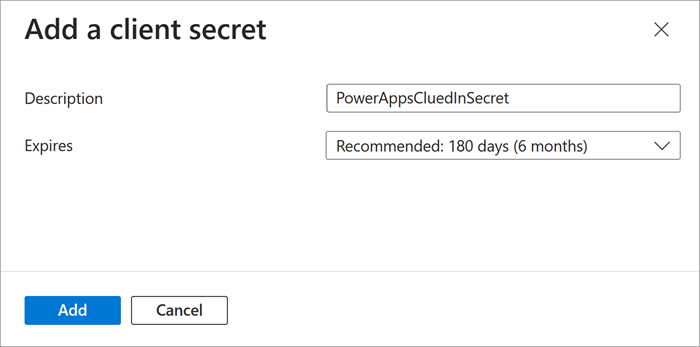
Add a description for your client secret. Select an expiration for the secret or specify a custom lifetime. Finally, select Add.
-
Record the Value of the client secret. You will need it to configure Power Apps integration in CluedIn as described in Power Apps configuration guide. This secret value is never displayed again after you leave this page.
Pre-configuration steps in Power Apps
In order to manage your master data from CluedIn directly in Power Apps Dataverse tables, you need to prepare a Power Apps environment. This involves creating a new security role and a new application user. These will be used to grant access to the Power Apps environment to the application that you created in Pre-configuration steps in Microsoft Entra ID.
Prerequisites
-
You need to have an environment in the Power Platform admin center with Dataverse as a data store.
-
You need to have the System Administrator access to the Power Platform of your organization.
Find your environment ID
-
Sign in to the Power Platform admin center.
-
On the navigation pane, select Environments, and then select your intended environment.
-
Find the environment ID in the Details section.
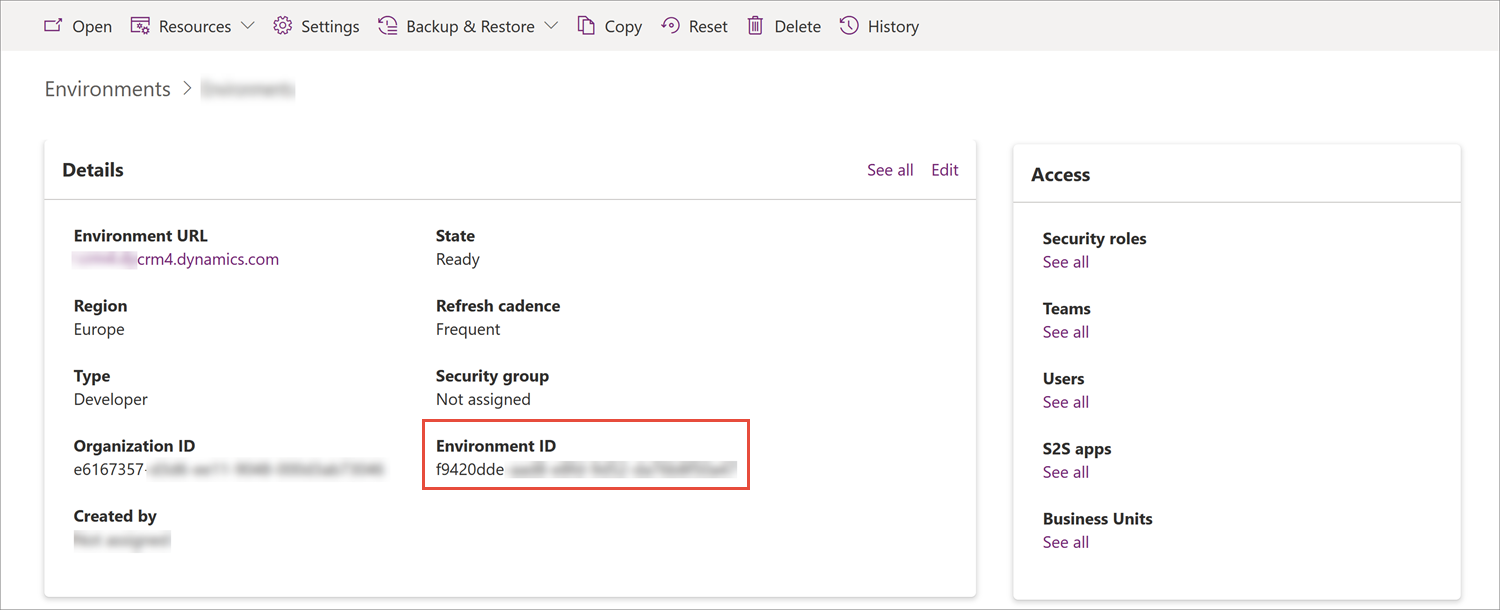
The environment ID is needed to configure Power Apps integration in CluedIn as described in Power Apps configuration guide.
Create a new security role
-
Sign in to the Power Platform admin center.
-
On the navigation pane, select Environments, and then select your intended environment.
-
Select Settings > Users + permissions > Security roles.
-
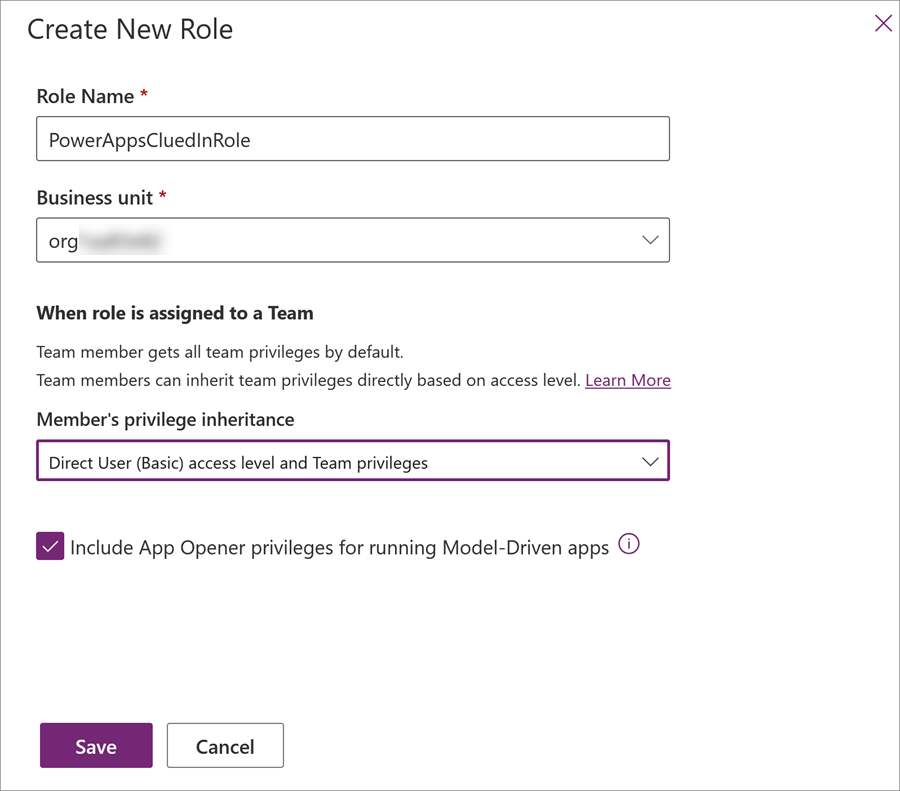
Select + New role.
-
Enter the role name and then select the business unit.
-
In Member’s privilege inheritance, select Direct User (Basic) access level and Team privileges.
You must add the System Customizer role to Service Principal. This role is required for the Service Principal to automatically access tables created by the PowerApps component or the Dataverse connector.
-
Select Save.
-
Grant your app’s table privileges to the newly created security role according to the reference table. To open the edit mode, select the three-dot button next to the table that you want to edit.
-
Once you’ve updated the security role’s privileges according to the reference table, select Save.
Security role reference table
| Table | Create | Read | Write | Delete | Append to |
|---|---|---|---|---|---|
| Customization | |||||
| Solution | Organization | Organization | Organization | Organization | |
| Publisher | Organization | Organization | Organization | Organization | |
| Entity | Organization | Organization | Organization | Organization | |
| Entity Key | Organization | Organization | Organization | ||
| Attribute | Organization | Organization | Organization | Organization | |
| System Form | Organization | Organization | Organization | Organization | |
| View | Organization | Organization | Organization | Organization | |
| Custom Control Default Config | Organization | Organization | Organization | ||
| Process | Organization | Organization | Organization | Organization | |
| Relationship Entity | Organization | Organization | Organization | Organization | |
| Custom tables | |||||
| Connection Reference | Organization | Organization | Organization | Organization | |
| Connector | Organization | Organization | Organization | Organization | |
| Dataflow | Organization | Organization | Organization | Organization | |
| OptionSet | Organization | Organization | Organization | Organization | Organization |
Create a new application user
-
Sign in to the Power Platform admin center.
-
On the navigation pane, select Environments, and then select your intended environment.
-
Select Settings > Users + permissions > Application users.
-
Select + New app user.
-
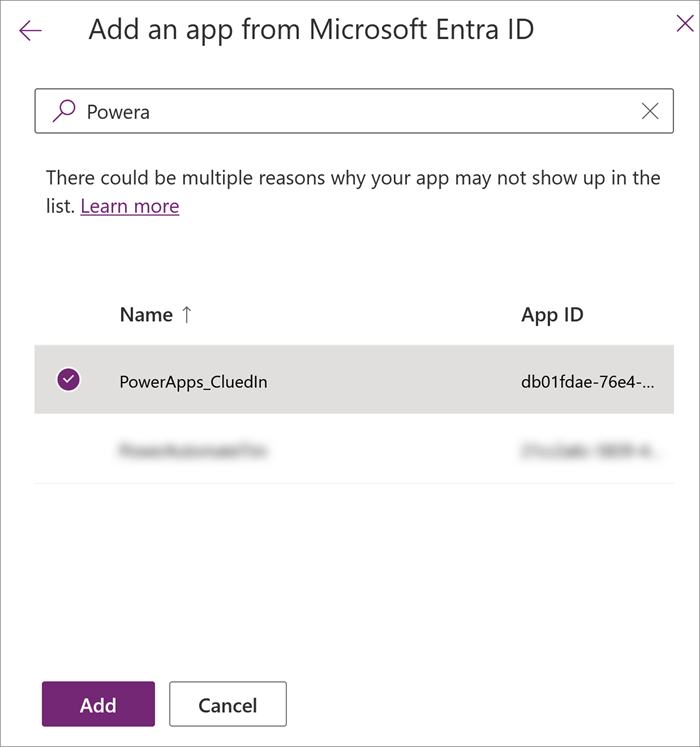
In the App field, select Add an app, and then find and select the application that you created before in Register a new application.
-
Enter the Business unit.
-
In the Security roles field, select the pencil icon, and then enter the security role that you created before in Create a new security role.
-
Select Create.

Create a Dataverse connection
To enable communication between Dataverse tables and CluedIn and to automate the creation of workflows for ingesting the data from Dataverse to CluedIn, you need to manually create a Dataverse connection and share it with the application user.
The workflows in Power Apps integration are different in terms of configuration from the Workflows module in CluedIn. For more information, see Power Automate integration.
To create a new connection
-
Sign in to make.powerapps.com.
-
On the left navigation pane, select Connections.
-
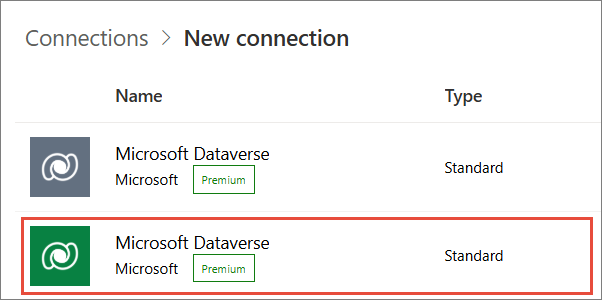
Select + New connection.
-
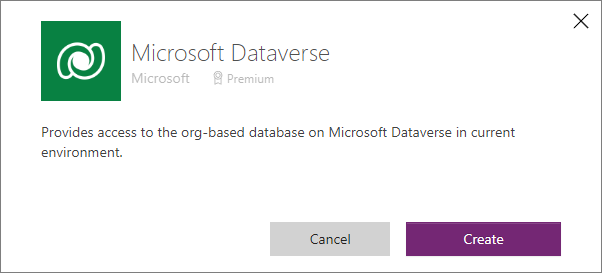
Find the Dataverse connection and select the one with the green icon.
-
Select Create.
The new connector appears under Connections.
-
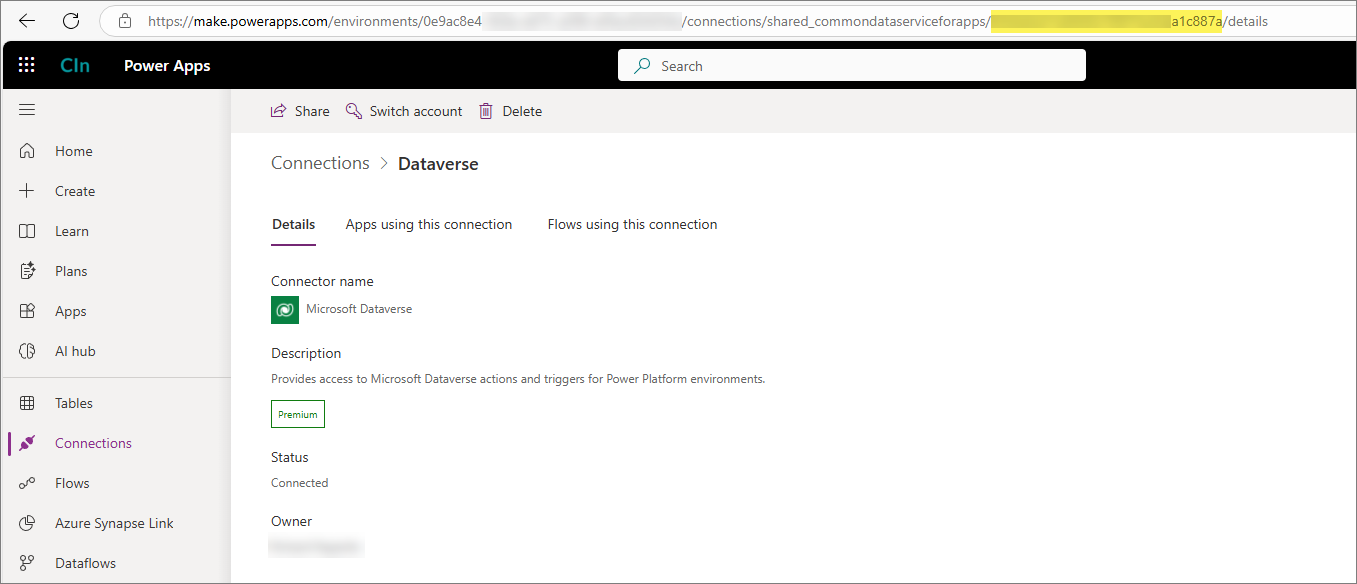
Open the newly added Dataverse connection, and then select Share.
-
Find and select the application user that you created in Create a new application user. Grant the following permissions to the application user: Can use or Can edit. Then, select Save.
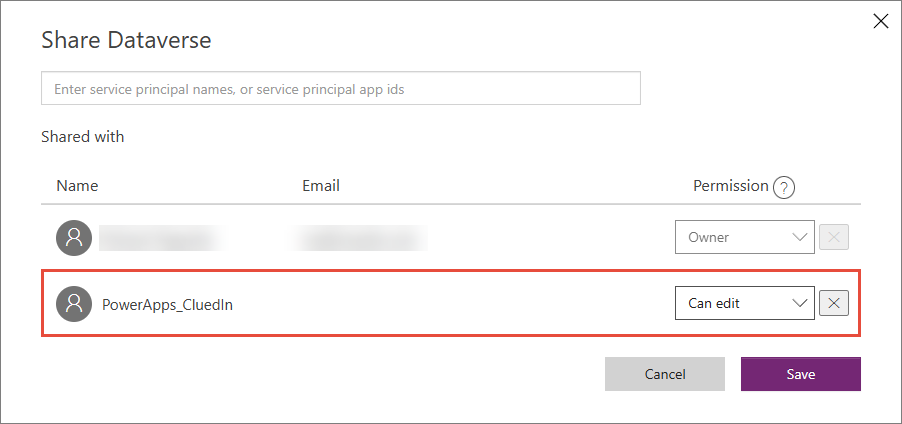
You will need the ID of Dataverse connection to configure Power Apps integration in CluedIn as described in Power Apps configuration guide. To find the connection ID, open the connection and look for ID in the URL field.
Next steps
Now that you have completed all pre-configuration steps, start the configuration of Power Apps in CluedIn using our Power Apps configuration guide.