Configure a manual data entry project
On this page
- Create a manual data entry project
- Create form fields
- Review and modify mapping configuration
- Define quality of manual data entry project source
In this article, you will learn how to create and configure a manual data entry project to be able to add the records manually directly in CluedIn.
A manual data entry project is an underlying component of manual data entry in CluedIn. It contains the configuration, mapping, and permissions for records created within the project. The process of creating a manual data entry project consists of 4 parts:
-
Creating a manual data entry project with basic configuration – defining the business domain and vocabulary for the golden records that will be produced, as well as setting up the option to send records for approval before processing.
-
Adding the form fields in a manual data entry project – defining the specific types of data that will be added manually in order to create a record. A field represents a property of a record.
-
Reviewing and modifying the mapping configuration – ensuring that the primary identifier as well as additional identifiers for records in manual data entry project are configured correctly.
-
Defining the quality of the manual data entry project source – defining quality is useful if you have survivorship rules that determine which value from multiple sources should be used in a golden record based on the quality of the source.
Create a manual data entry project
You can create as many manual data projects as you need. Consider having separate projects for different types of business data. For example, you can create a project for contact data, a project for product data, and a project for customer data. This way, you can better organize your manual records and ensure that each type of information is handled appropriately.
To create a manual data entry project
-
On the navigation pane, go to Ingestion > Manual Data Entry.
-
Select Create.
-
Enter the name of the manual data entry project.
-
Select the business domain for records that will be created in the manual data entry project.
-
Select the vocabulary that will be used in the manual data entry project. The vocabulary keys from this vocabulary will be available for selection when you create the form fields.
-
If you want to send the records created in the manual data entry project by non-owner users for approval, select the checkbox in Require records approval.
If you enable records approval, you, as the project owner, and any other owners will receive notifications when non-owner users try to add new records to the project. The owner needs to approve these records before they can be processed. For more information, see Approval.
-
(Optional) Enter the description of the manual data entry project.

-
Select Create.
The manual data entry project page opens where you can proceed to add the form fields.
Create form fields
A form field is an element in a manual data entry project that represents a property of a record. For example, if you created a manual data entry project for contact data, your form fields may include ID, First Name, Last Name, Email, and Phone Number. Essentially, the process of adding a manual record consists of entering values into the defined form fields.
To create a form field
-
In the manual data entry project, go to the Form Fields tab.
-
Select Create Form Field.
-
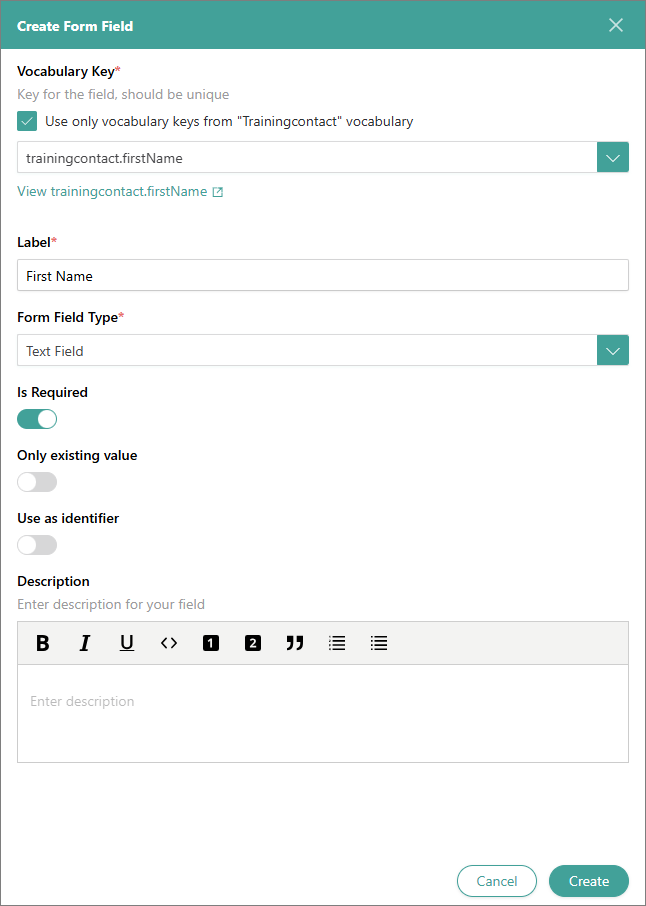
In the Vocabulary Key section, expand the dropdown list, and select the vocabulary key that will be used as a field for manual data entry.
By default, the list includes the vocabulary keys that belong to the vocabulary that you selected when creating the project. If you want to add a vocabulary key from another vocabulary, clear the checkmark and then find and select the needed vocabulary key.
-
Review the Label of the form field. This is the name of the field that will be displayed when adding a manual record.
The label is added automatically based on the vocabulary key selected in the previous step. You can modify the label if needed. If you modify the label, the changes will only be visible in the manual data entry project, not in the vocabulary key.
-
Select the Form Field Type:
-
Text Field – an input type where you can enter any text in the field.
-
Pick List – an input type where you can select an option from a predefined list. If you select this form field type, you need to add the options for the list.
-
Toggle – an input type where you can switch between two states—true or false.
-
-
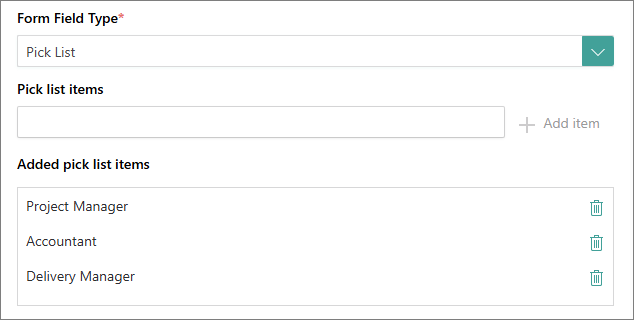
If you selected Pick List in the previous step, add the pick list items:
-
In the Pick list items field, enter an option for the list, and then select + Add item.
The pick list item appears in the Added pick list items section.
-
To add more pick list items, repeat step 6.1.
-
-
If the field is required in a record, turn on the toggle for Is Required.
-
If you want to restrict the input in the field to only existing values from the vocabulary key, turn on the toggle for Only Existing Values. This option is available only for the Text Field type only.
-
If you want to use the field for producing the identifier for a record, turn on the toggle for Use as identifier.
-
(Optional) Enter the description of the form field.
-
Select Create.
The form field is added to the Form Fields tab of the manual data entry project.
-
To add more form fields, repeat steps 1–11.
Once you have created all the form fields you need, review the mapping configuration for the records that will be created in a project and modify it as needed.
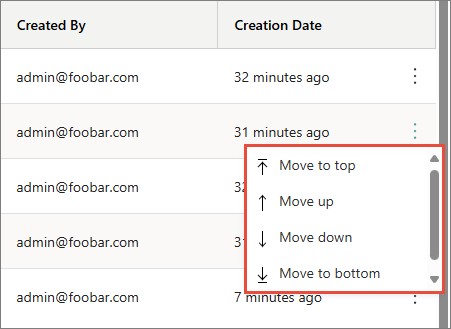
On the Form Fields tab, the fields are displayed in the order in which they appear when you add a record. You can change the order of the fields if needed. To do this, on the right side of the row, open the three-dot menu, and then select where you want to move the row.
Review and modify mapping configuration
The mapping configuration for records from the manual data entry project is created automatically based on the details you provide when adding form fields. By default, the primary identifier and the origin are auto-generated to ensure uniqueness of the records. Additionally, if you turned on the Use as identifier toggle for a form field, this field will be used to produce additional identifiers for the records.
Note that the default mapping configuration does not include the name for the records. This is the name that is displayed during search as well as on the golden record details page. If you do not select the field for producing the name, CluedIn will use automatically generated record ID.
To review and modify mapping configuration
-
In the manual data entry project, go to the Map tab. You will see the default mapping configuration.

-
Select Edit mapping.
-
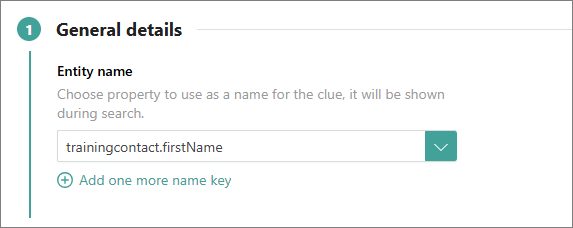
In the General details section, select the field that will be used to produce the name for a record once it has been processed. You can add multiple fields.
-
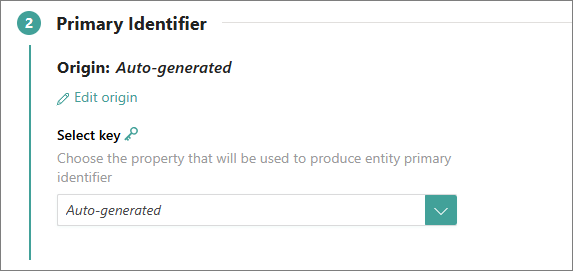
In the Primary identifier section, review the default configuration for producing a primary identifier: origin and property (field). You can select another origin and field if needed.
-
In the Identifiers section, review the default configuration for producing additional identifiers. You can edit or delete the default identifier as well as add new additional identifiers.

-
Select Finish.
Once you have reviewed and modified the mapping configuration as needed, you can proceed to define the quality of the manual data entry project source. This is only necessary if you use survivorship rules that determine the winning value based on the quality of the source. If you do not use such survivorship rules, you can proceed to add the records manually.
Define quality of manual data entry project source
If you have survivorship rules that determine which value from multiple sources should be used in a golden record based on the quality of the source, then you need to define the quality of the manual data entry project. If you believe that the values from the manual data entry project are of higher quality and more trustworthy than those from other sources, you can assign a higher quality rating for the manual data entry project. This way, in case of conflicting values between the manual data entry project and another source, CluedIn will prioritize the value from a manual data entry project.
To define quality of manual data entry project source
-
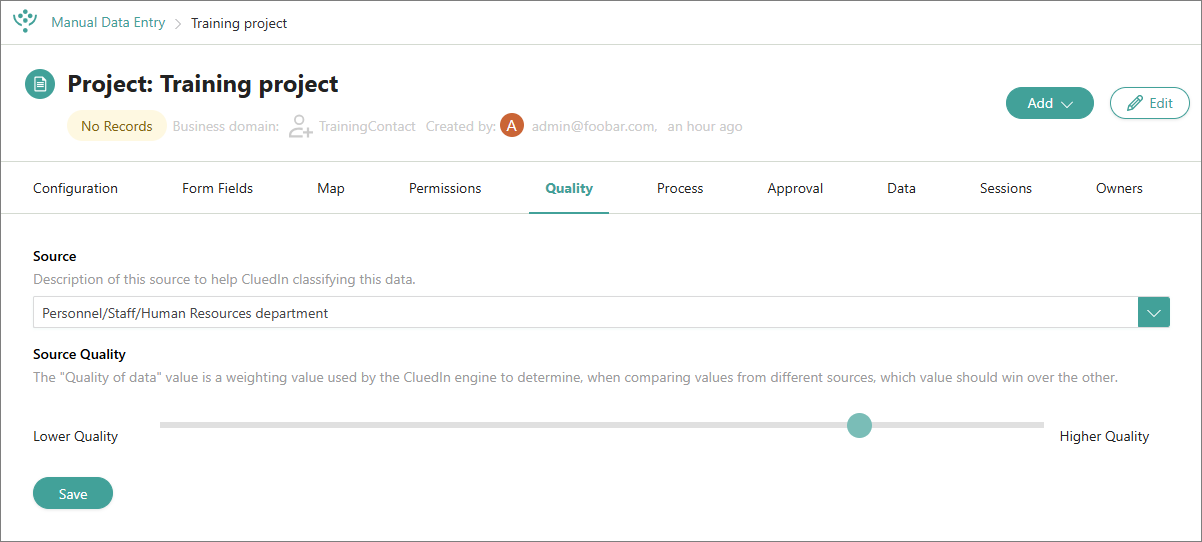
In the manual data entry project, go to the Quality tab.
-
In the Source section, select the category that best describes the manual data entry project.
-
In the Source Quality section, define the quality rating for the source by dragging the slider towards Lower Quality or Higher Quality.
-
Select Save.
The quality of the manual data entry project is updated. Next, you can proceed to add the records manually.