Add relations between records
On this page
- Understanding relations in CluedIn
- Add edge relations
- View relations between golden records
- Troubleshooting relations (edges not appearing)
- Results & next steps
Relations are built between source (“to”) and target (“from”) records by using edges of a certain type (for example, /WorksFor). You can create relations either before or after processing the data.
Note
In this context:
- From refers to the record in the current dataset
- To refers to the existing record you are linking to
In this article, you will learn how to add and view relations between golden records. Creating relations between golden records consists of editing the mapping of the data set that you will use as a source in order to add the edge that will link the source to the target.
Files for practice
-
File 1: training-company.csv
-
File 2: training-employee.csv
Prerequisites
Before proceeding with relations between golden records, ensure that you have completed the following tasks:
-
Ingested (uploaded, mapped, and processed) the data to which you will be linking the records. You can use file 1 above. See Ingest data guide.
-
Uploaded and mapped the data that you will be linking to already existing records. You can use file 2 above. See Import file and Create mapping.
Understanding relations in CluedIn
In CluedIn, relations are represented as edges in a graph, linking one record to another.
Each relation:
- Has a direction (from → to)
- Uses an edge type (for example,
/WorksFor) - Connects records across business domains
Relations enable:
- Navigation between related records
- Graph visualisation of connected data
- More meaningful insights across entities
Add edge relations
After you imported and mapped the data that you will be linking to already existing records, edit the mapping configuration.
Example
If your dataset contains employees and includes a company identifier, you can:
- Create an edge type
/WorksFor - Link each employee record to a company record
This allows you to:
- See which employees belong to which company
- Navigate between related records in CluedIn
To add edge relations
-
On the navigation pane, go to Ingestion > Sources.
-
Find and select the needed data set (for example, file 2 “training-employee.csv”).
-
Go to the Map tab, and then select Edit mapping.
-
Go to the Add edge relations tab, and then select Add relation.
The Add Edge pane opens on the right side of the page.
-
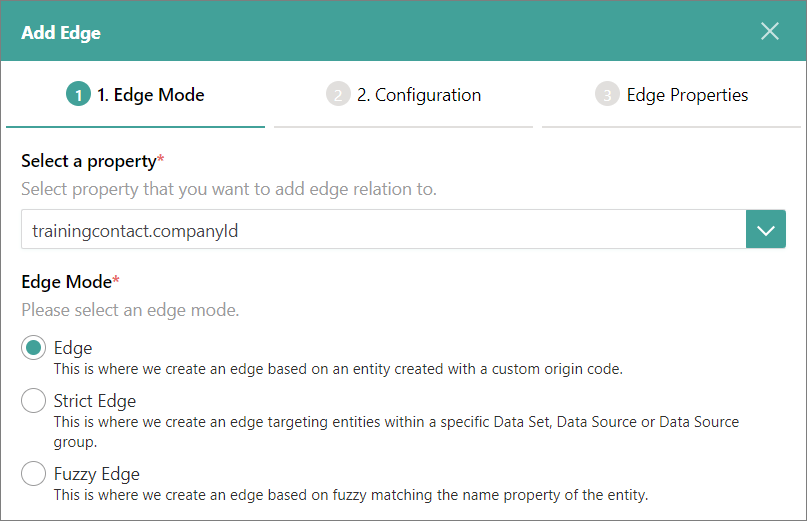
On the Edge Mode tab, do the following:
-
Select the property to which you want to add edge relation.
-
Select the edge mode.
-
In the lower-right corner, select Next.
-
-
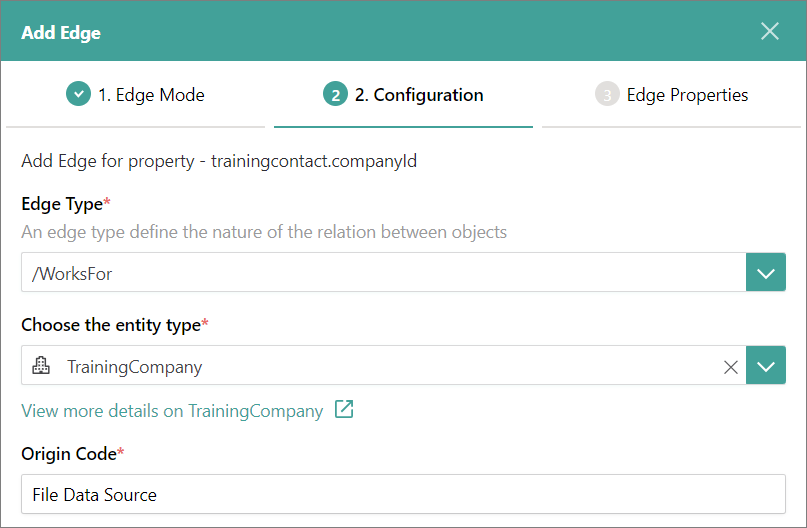
On the Configuration tab, do the following:
-
Specify the edge type to define the nature of relation between objects. You can select the existing edge type or create a new one. To create a new edge type, enter a slash (/) and then enter a name.
-
Find and select the target business domain to which you will link the records from the current data set.
-
Define the origin of the target data set. It will be displayed after the data has been processed.
-
In the lower-right corner, select Next.
-
-
On the Edge Properties tab, in the lower-right corner, select Add Edge.
-
Select Finish to save your changes.
You added edge relations. To view relations between golden records, process the data and stream the records.
View relations between golden records
After you processed the data and streamed the records, you can view the relations between golden records in the following places:
-
In CluedIn: on the Relations tab of the golden record details page.
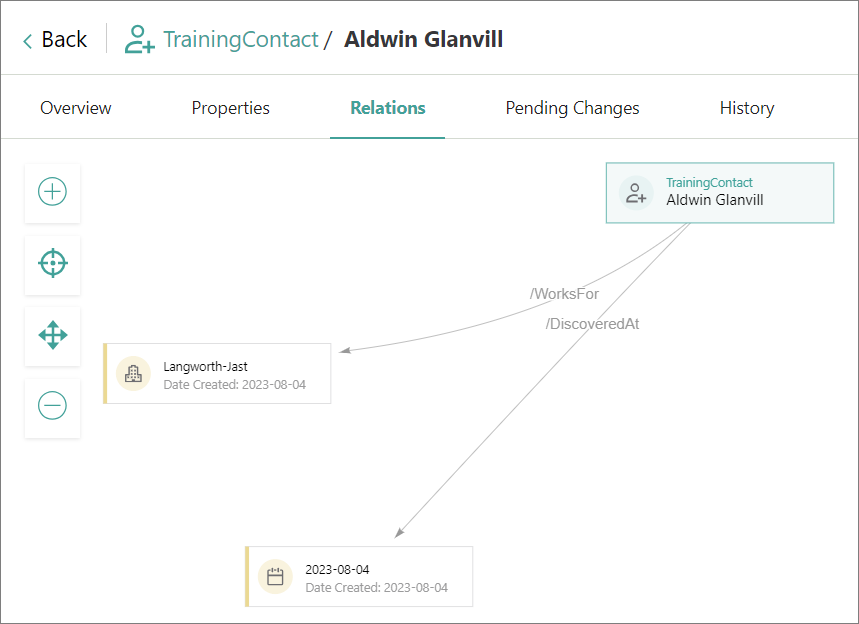
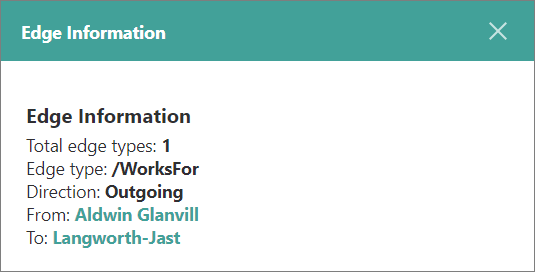
To view the edge relation details, select the arrow that connects the entities.
-
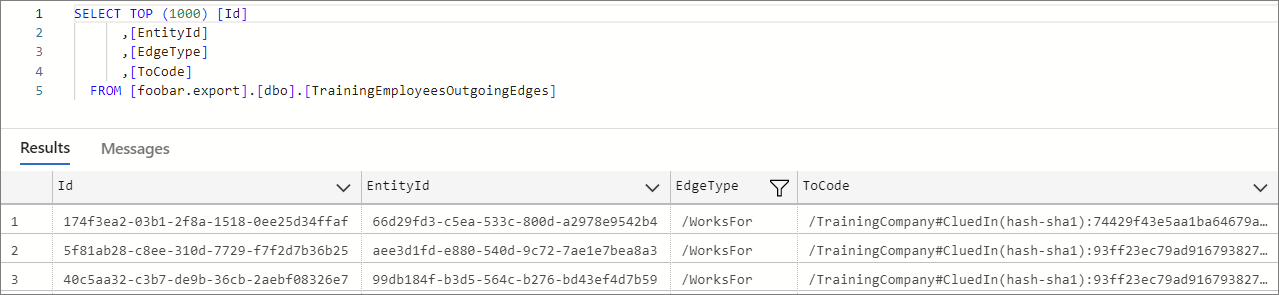
In the database: in the tables named dbo.xyzOutgoingEdges and dbo.xyzIncomingEdges, where xyz is the target name.
If you add more edge relations between the records, CluedIn will automatically identify the changes and update the stream with new edge relations.
Troubleshooting relations (edges not appearing)
In some cases, relations may appear correctly in the mapping preview but are not visible in the graph or entity view after processing.
This section outlines common causes and validation steps.
How relations are created
Relations are created when:
- A valid identifier reference is provided in mapping
- The referenced entity already exists in CluedIn
- The dataset has been processed (or reprocessed after changes)
Example identifier reference
/Organization#CRM:123
The reference must match an existing identifier on the target entity exactly.
Preview vs persisted relations
The mapping preview validates configuration only.
Relations are only persisted and visible in the graph after the dataset has been processed.
This means a relation shown in preview may not appear in the graph if the required conditions are not met.
Common configuration considerations
Identifier mismatch
The target reference must match an existing identifier exactly, including:
- Entity type
- Origin
- Value
If any part differs, the relation will not be created.
Target entity not available
If the referenced entity does not exist in CluedIn at the time of processing, the relation will not be created.
Ensure that:
- The target dataset has been ingested
- The data has been successfully processed
Origin misalignment
Relations rely on identifiers, which include origin as part of their structure.
If the origin used in the relation does not match the origin used when creating the target entity, the identifiers will not align and the relation will not be created.
Reprocessing requirement
Changes to mapping (including relations) require the dataset to be reprocessed.
Preview alone does not create relations in the graph.
Validation steps
To verify relations:
- Confirm the target entity exists and is searchable
- Verify the identifier format matches exactly
- Confirm the origin is consistent across datasets
- Reprocess the dataset after applying mapping changes
- Check the entity view for the relation
Summary
Relations in CluedIn depend on correct identifier alignment across datasets.
If identifiers do not match exactly, relations will not be created, even if the mapping appears correct in preview.
Results & next steps
After completing all steps outlined in this guide, you learned how to add edges to build relations between golden records in CluedIn. You’ve reached the final part of the Getting Started section. Now might be a great time to dive deeper into the key terms and features of CluedIn: