Licensing agent (PAAS)
On this page
The CluedIn licensing agent is delivered as an Azure Managed Application and is installed via the Azure Marketplace. It enables CluedIn to bill customers directly through the Marketplace.
The installation process is straightforward:
-
You complete a short form, which then provisions a Managed Application in the customer’s Azure subscription.
-
Once installed, any agreed CluedIn charges can be billed to that subscription.
Azure Policy Notice
The installation of the licensing agent may fail if your subscription includes an Azure Policy that blocks public storage accounts. To proceed, temporarily exclude this resource group from that policy before installation.
Prerequisites
-
Azure account. If you already have an Azure account, you can proceed to the next prerequisite. If you do not have an Azure account, create a pay-as-you-go account using a valid credit card.
-
Marketplace purchases and Contributor role. Make sure that you have enabled Marketplace purchases and configured the required user permissions (at least Contributor) for the subscription where you want to store the CluedIn SaaS application. For more information, see Enable marketplace purchases in Azure.
-
White list firewall for CluedIn’s webhook https://billing.cluedin.com port: 443.
-
If required - Request Azure Policy Exemption.
Installation steps
-
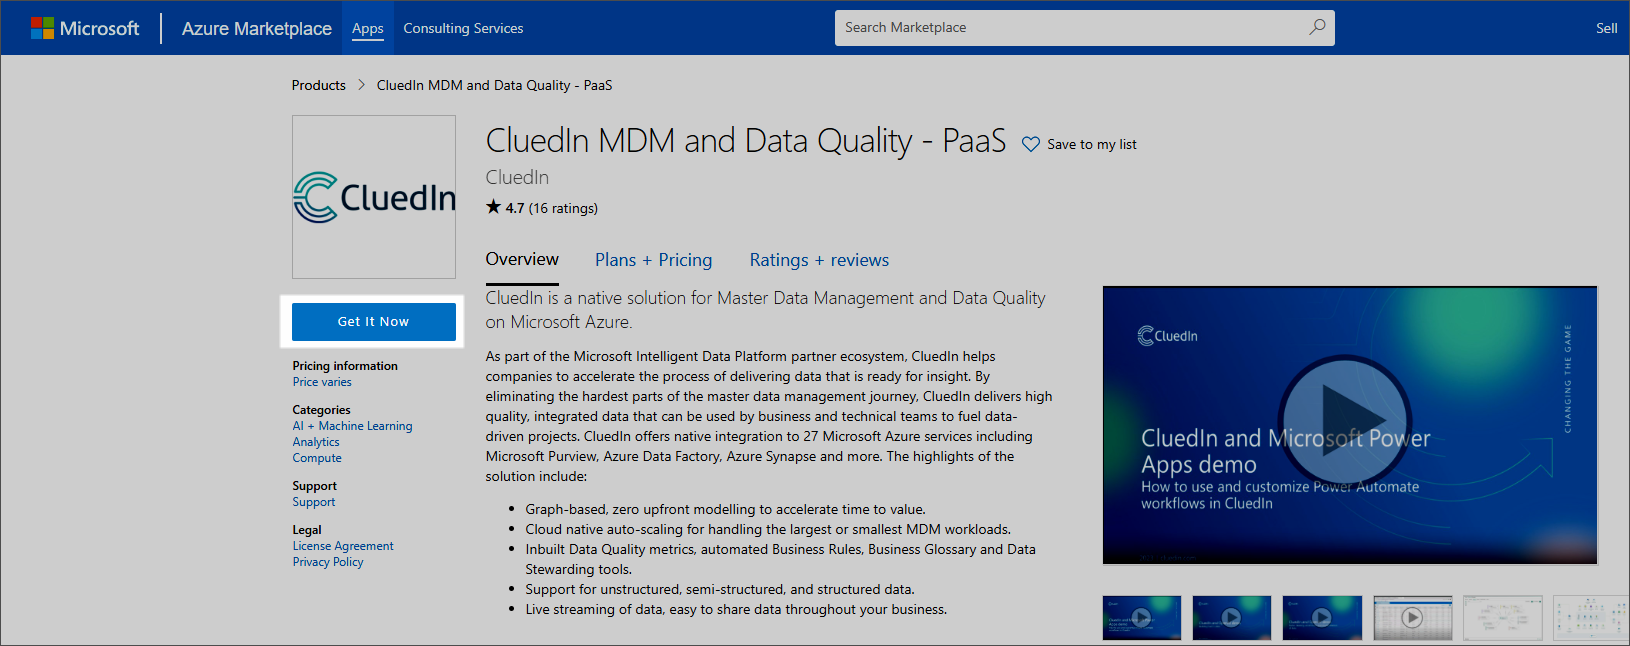
In Azure Marketplace, navigate to CluedIn PaaS offering.
-
Select Get It Now.
-
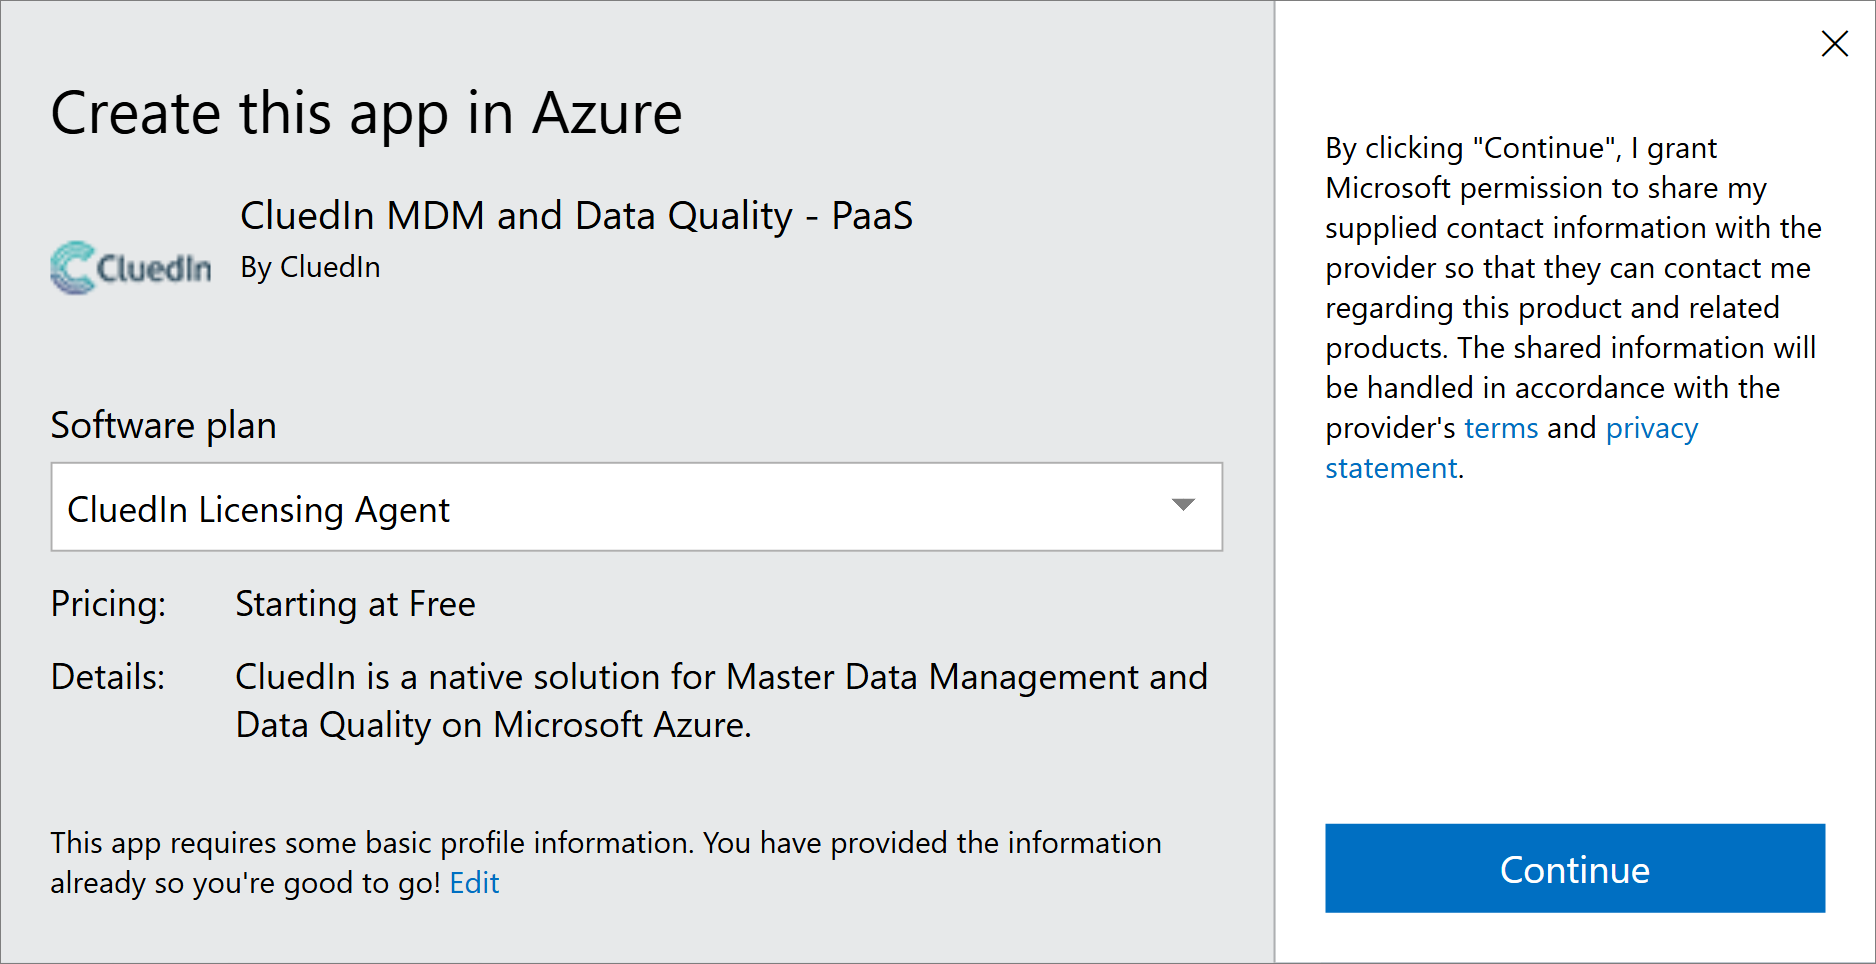
In the Create this app in Azure window, under Software plan, select CluedIn Licensing Agent.
-
Review your contact information, and then select Continue.
-
On the Basics tab, fill in the Project details section:
-
In Subscription, select the Azure subscription where you want to install CluedIn.
-
In Resource group, create a new resource group.
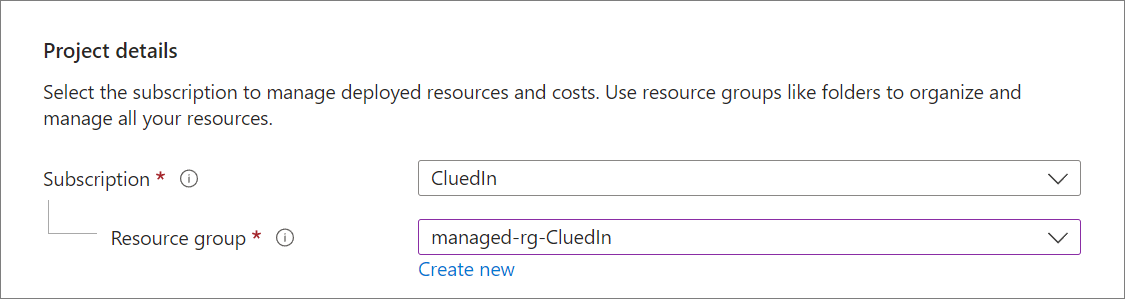
You may also select an existing resource group, but it must be empty. If the selected resource group contains other Azure resources, an error will occur.
-
-
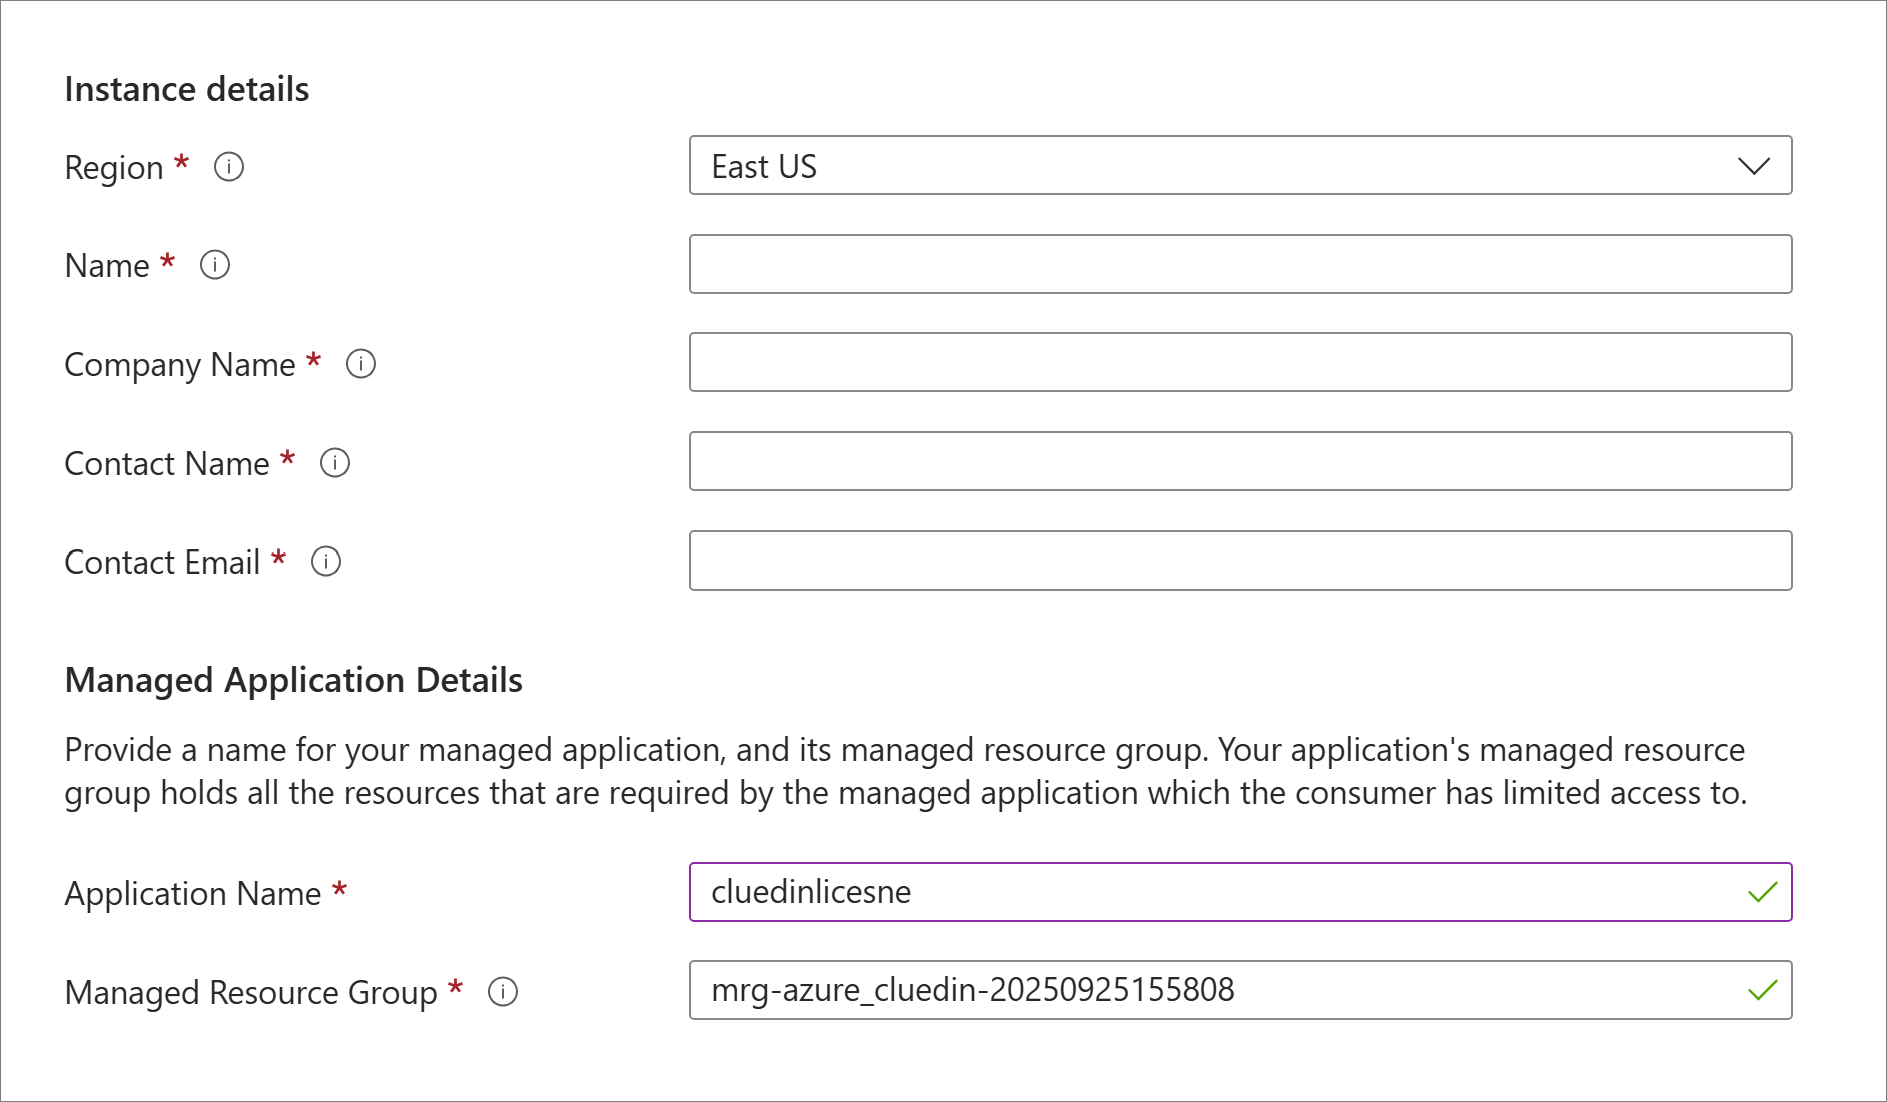
Fill in the instance details:
-
In Region, specify the Azure region where the resources will be created. Typically, this should match the region of your resource group.
-
Enter the following information:
-
Name
-
Company Name
-
Contact Name
-
Contact Email
-
-
Verify that the Managed Application Details section is filled in correctly:
-
Keep the application name as cluedinlicense.
-
The managed resource group is usually filled in by default, but you can make changes if needed.
-
-
-
On the License tab, keep the installation name as cluedinlicense.

-
On the Review + create tab, do the following:
-
Review all settings and accept the terms and conditions.
-
When you are ready to deploy to your cloud environment, select Create.
After a few minutes, the Azure portal will notify you once the installation is complete.
-
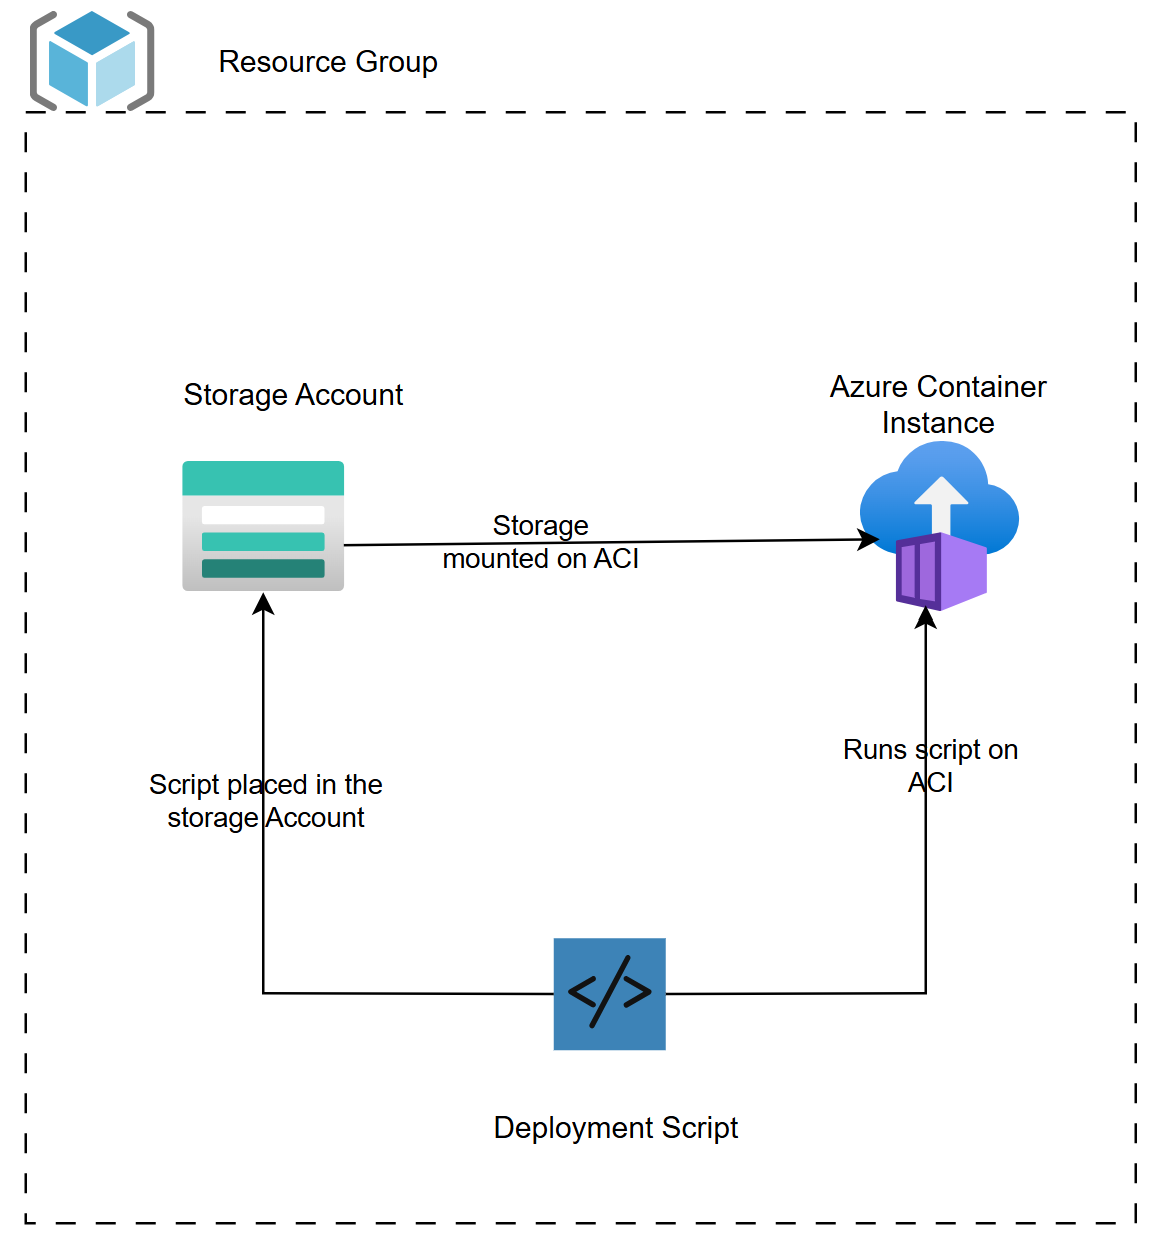
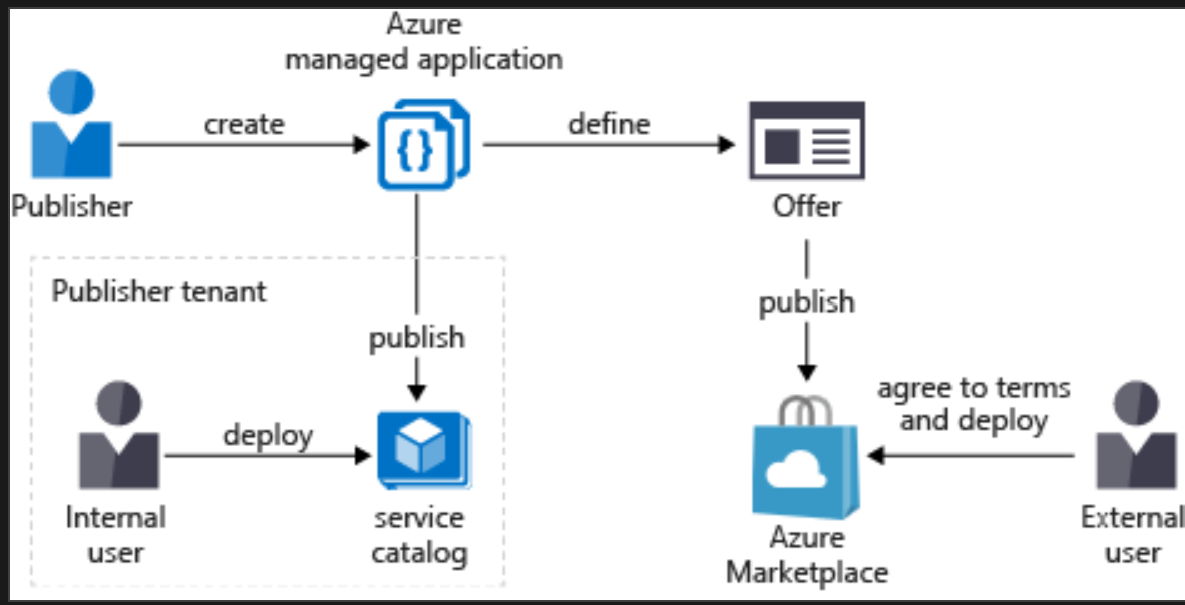
Azure Marketplace Application Internal Installation Flow
An Azure Managed Application enables publishers (such as solution providers) to deliver, deploy, and manage complete solutions for customers directly within their own Azure subscriptions — while maintaining a secure and controlled management experience.
When a consumer installs a Managed Application from the Azure Marketplace or via private offer, the solution’s infrastructure is provisioned into the customer’s subscription but remains managed and governed by the publisher through delegated access permissions.
Licensing agent AMA resources