Golden record relations
On this page
Relations connect golden records by linking a source record to a target record through a specific edge type (for example, /WorksFor or /FinancedBy). These relations can be created either before or after data is processed.
In this article, you will learn how to view and manage relations between golden records.
Manage relations between golden records
Golden Record relations capture real-world connections – for example, between customers and companies, products and vendors, or employees and organizations. In CluedIn, you can create these relations to link one golden record to another. This enriches the context of each record and makes it easier to navigate and analyze your data.
If a connection is no longer valid, you can delete the relation from CluedIn.
Add relations between golden records
You can add relations in CluedIn in several ways:
-
When ingesting data into CluedIn. This method is useful when adding relations for multiple records at once. For details, see Add relations between records.
-
From the golden record page. This method is useful when adding relations for the same record.
To add relations from the golden record page
-
Locate the golden record for which you want to add relations. Then, go to the Relations tab of the record.
-
On the left side of the page, at the top of the settings panel, select Add Relation.
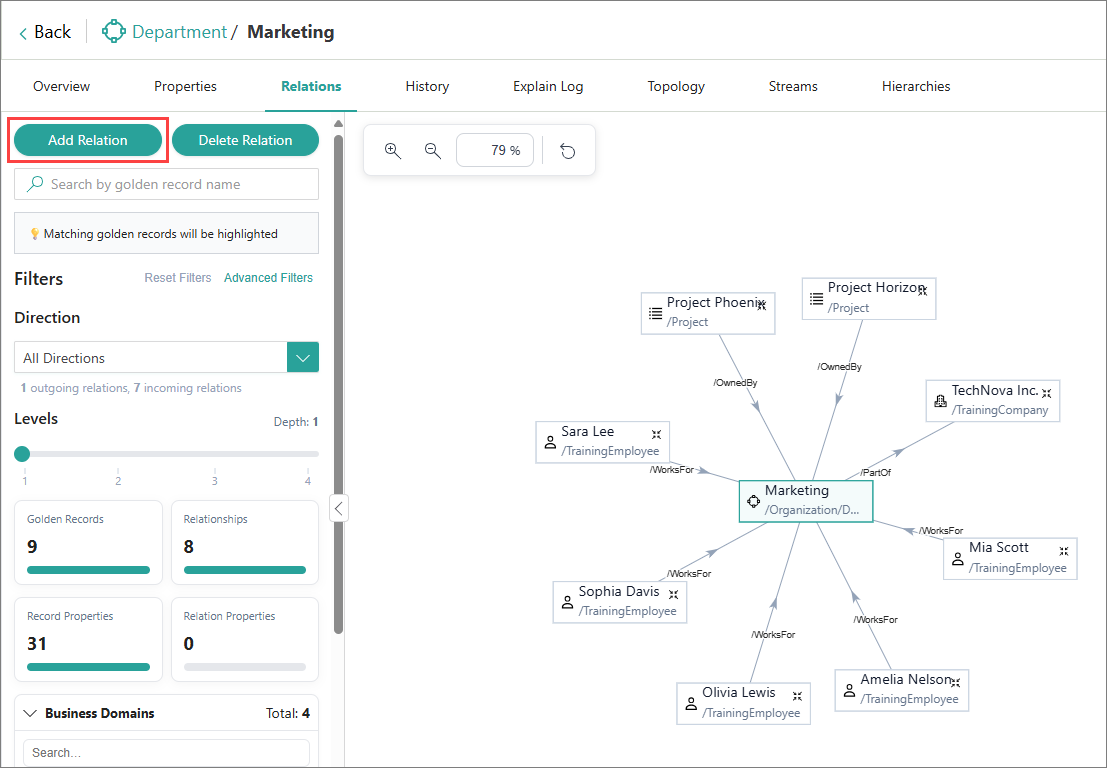
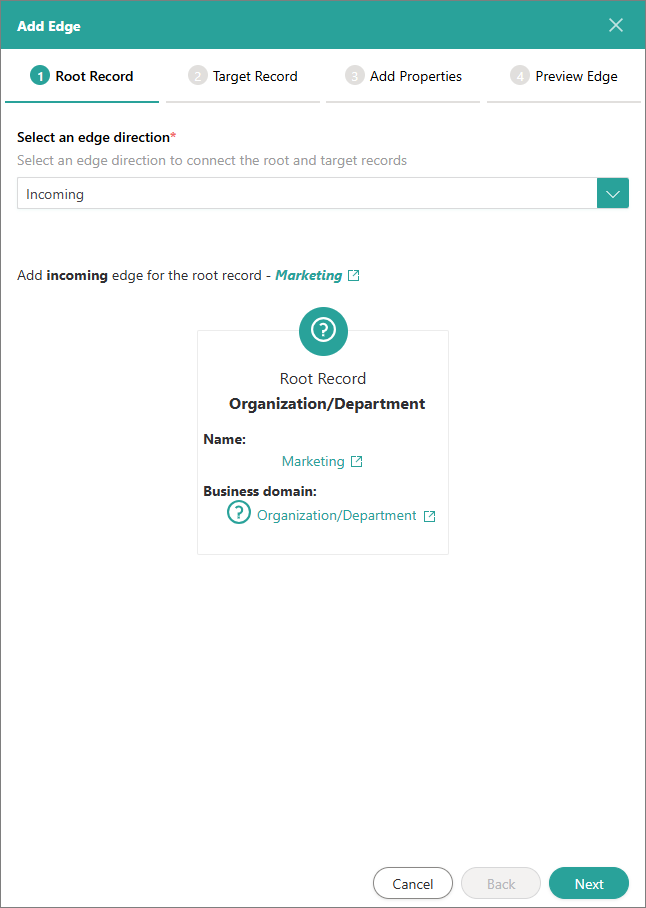
The Add Edge panel opens on the right side of the page.
-
On the Root Record tab, select whether the relation you want to add is incoming to the current record or outgoing from it. Then, at the bottom of the tab, select Next.
-
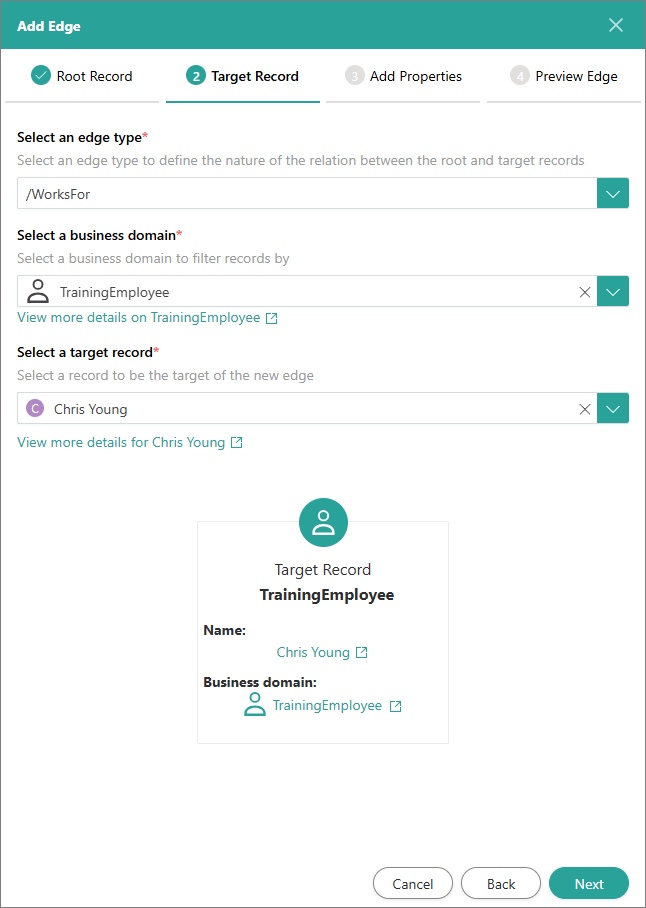
On the Target Record tab, do the following:
-
Specify the edge type to define the nature of relation between the current record and the record you want to link to it. You can select an existing edge type or create a new one. To create a new edge type, enter a slash (/) followed by a name.
-
Select the business domain of the record that you want to link to the current one.
-
Select the record that you want to link to the current one.
-
At the bottom of the tab, select Next.
-
-
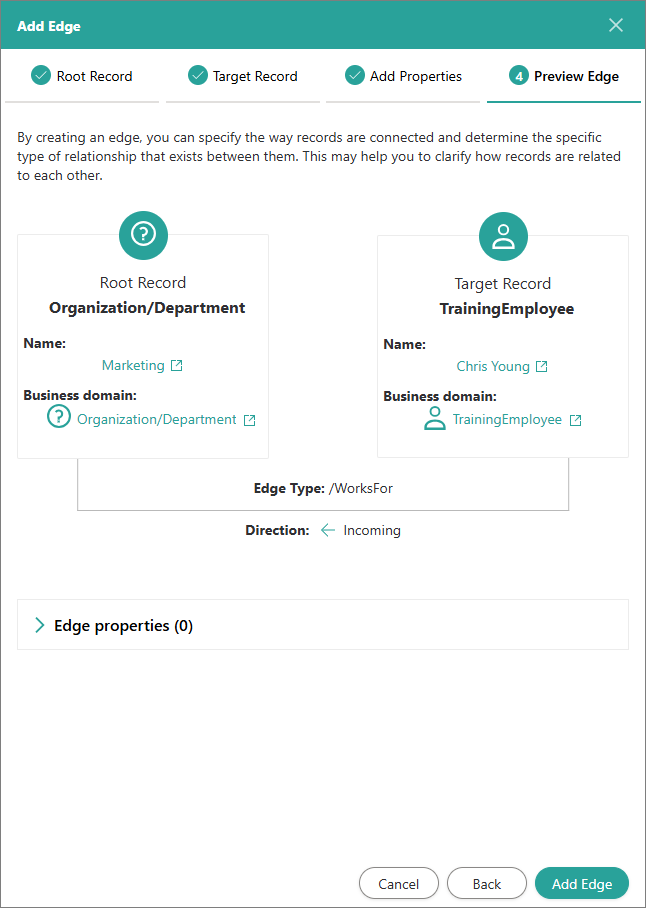
(Optional) On the Add Properties tab, add properties that define edge relations between the two records. Then, at the bottom of the tab, select Next.

-
On the Preview Edge tab, review the details of the relation that you are adding. Then, at the bottom of the tab, select Add Edge.
-
Confirm that you want to add the relation.
The relation is added and appears in the graph.
Delete relations between golden records
You can delete any direct relation of a golden record.
To delete relation from a golden record
-
Locate the golden record that contains the relation you want to remove. Then, go to the Relations tab of the record.
-
On the left side of the page, at the top of the settings panel, select Delete Relation.
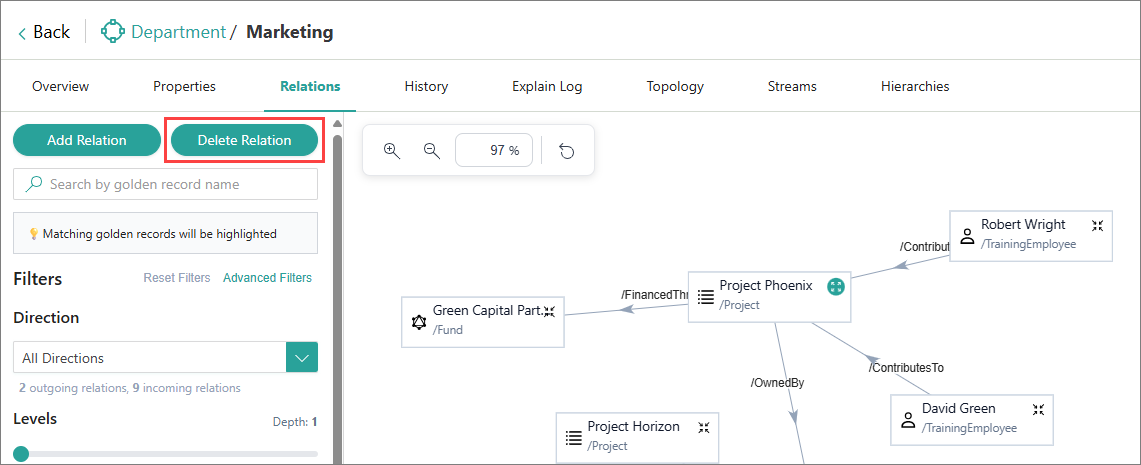
The Delete Edge panel opens on the right side of the page.
-
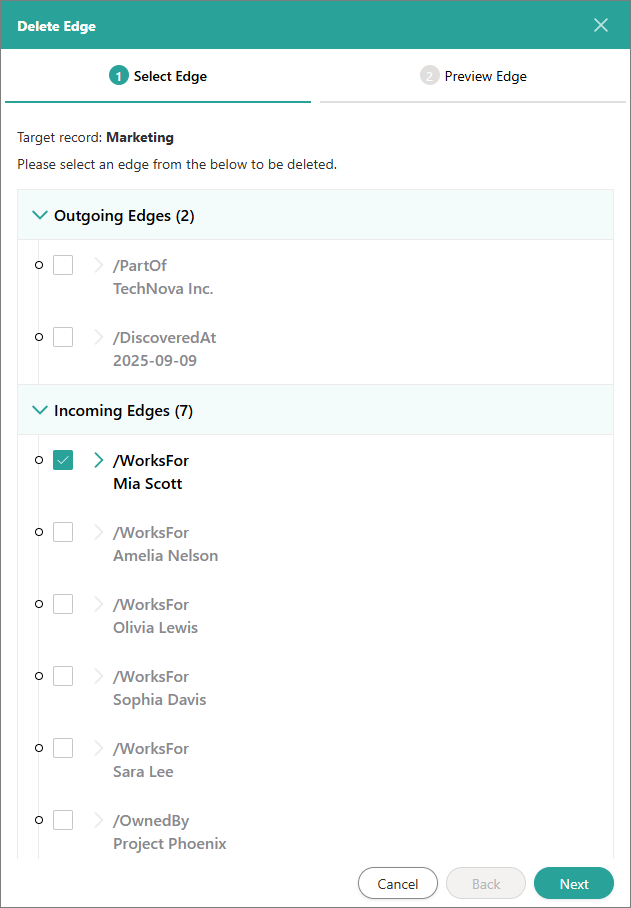
On the Select Edge tab, select the relation that you want to delete. Then, select Next.
-
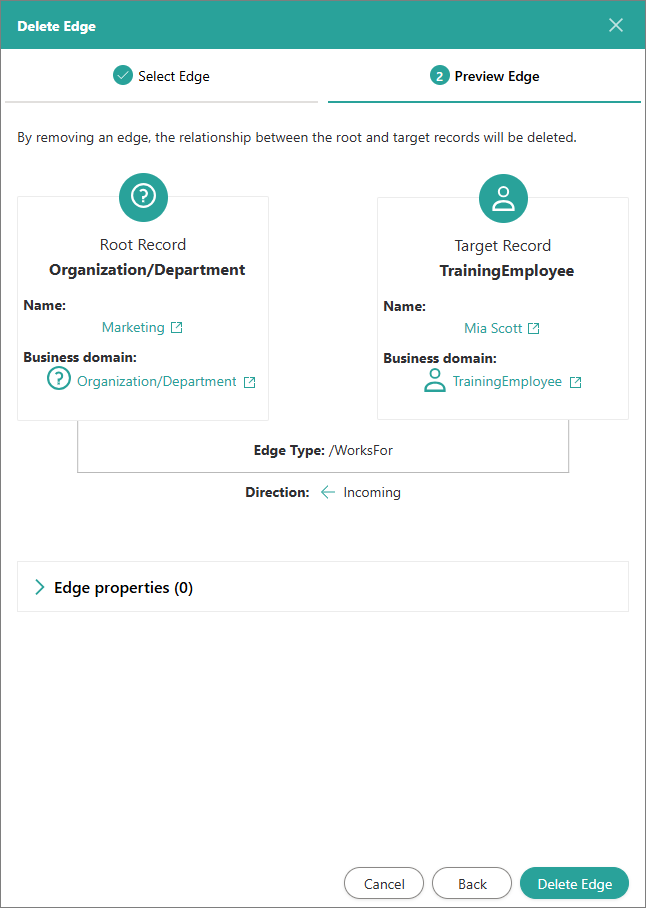
On the Preview Edge tab, select Delete Edge.
-
Confirm the deletion.
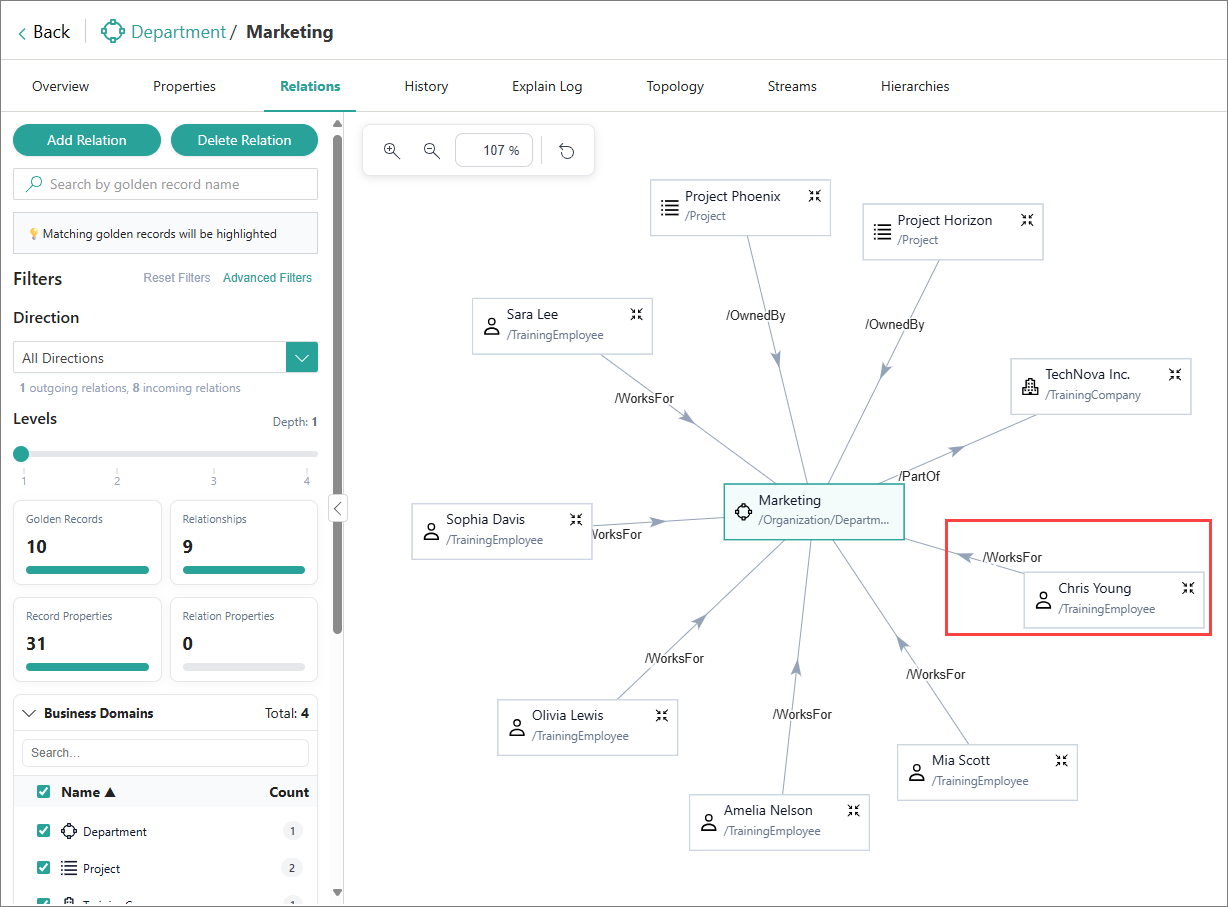
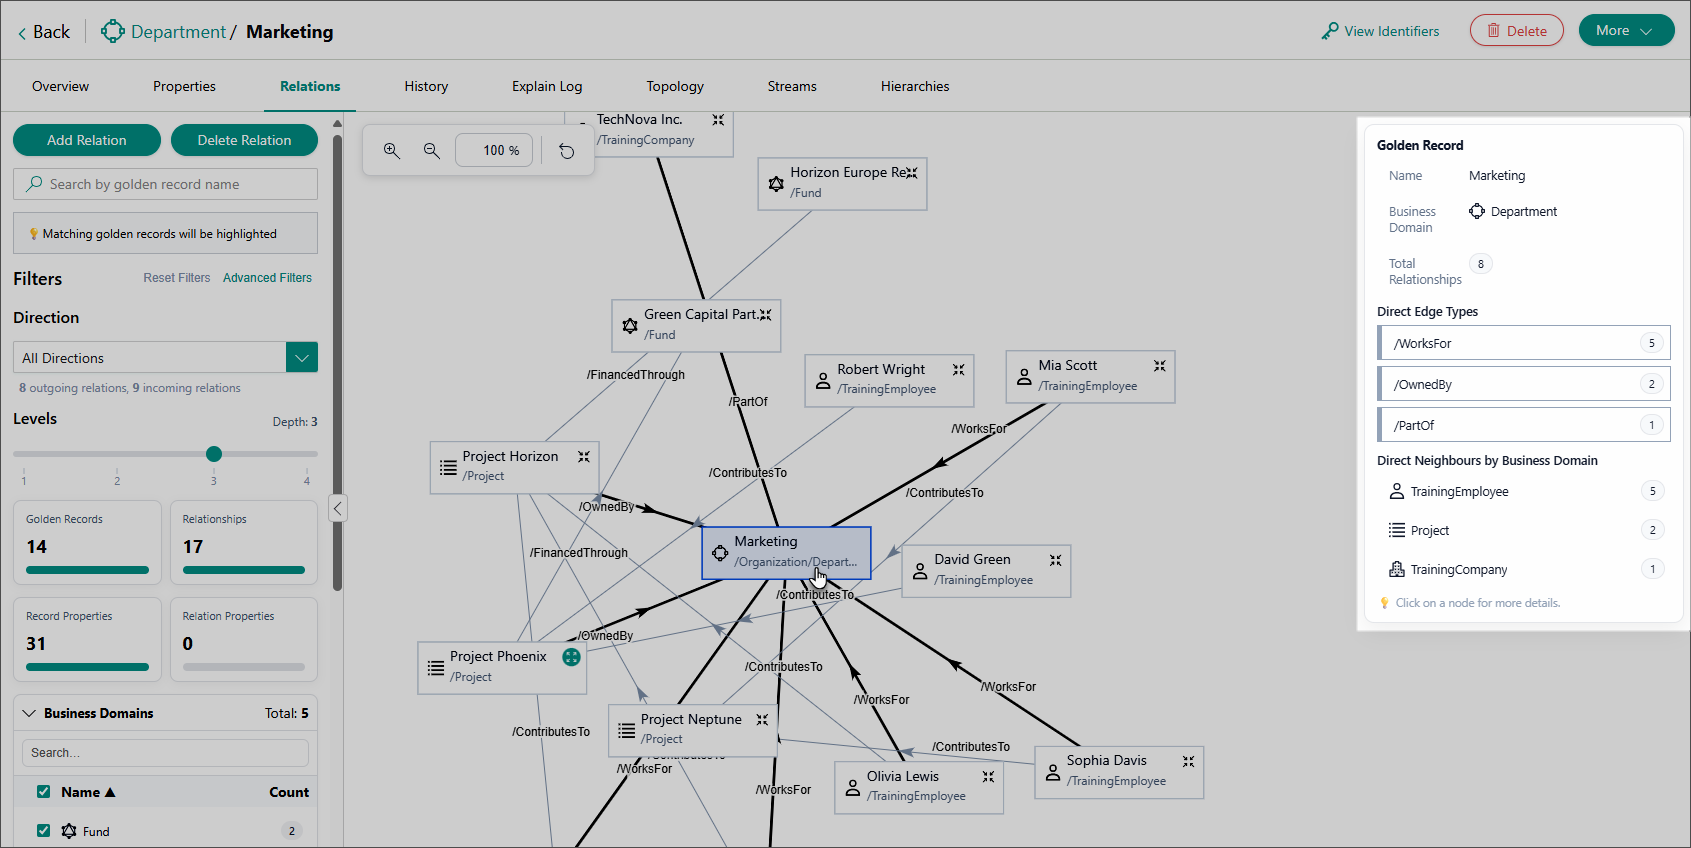
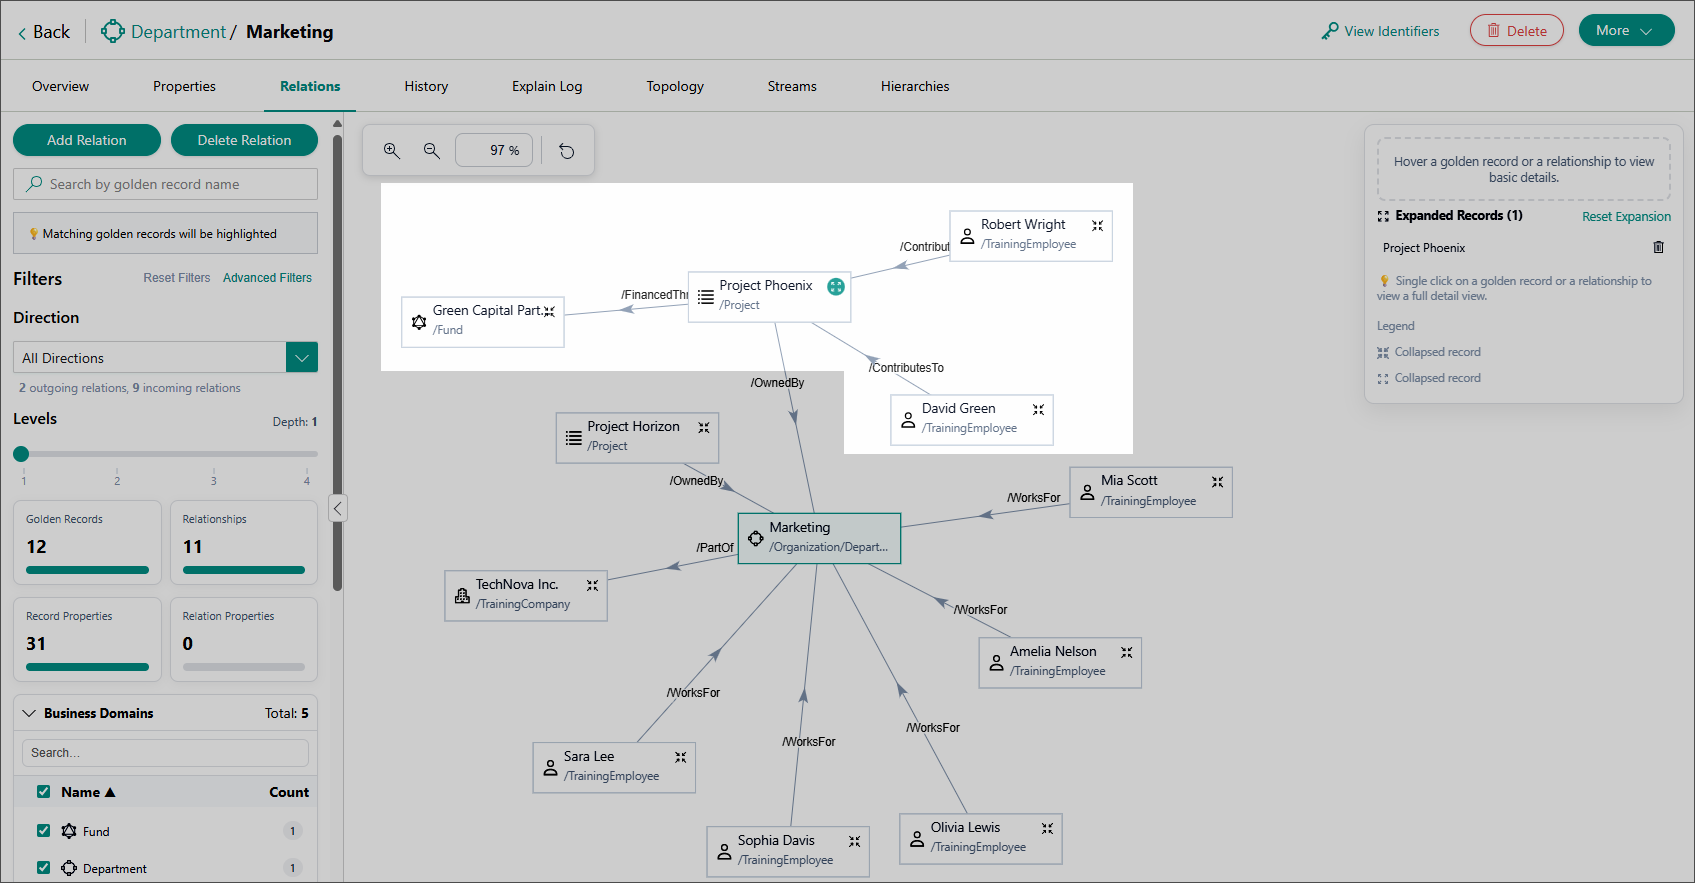
View relations between golden records
Once a golden record is processed, you can view its relations with other golden records. As new records are linked, those relationships are automatically displayed in CluedIn.
To view the relations of a golden record
-
Locate the golden record whose relations you want to view. Then, go to the Relations tab of the record.
Here, you can view all the relations that the record has. As relations are added or removed, the information on the tab is updated accordingly.
-
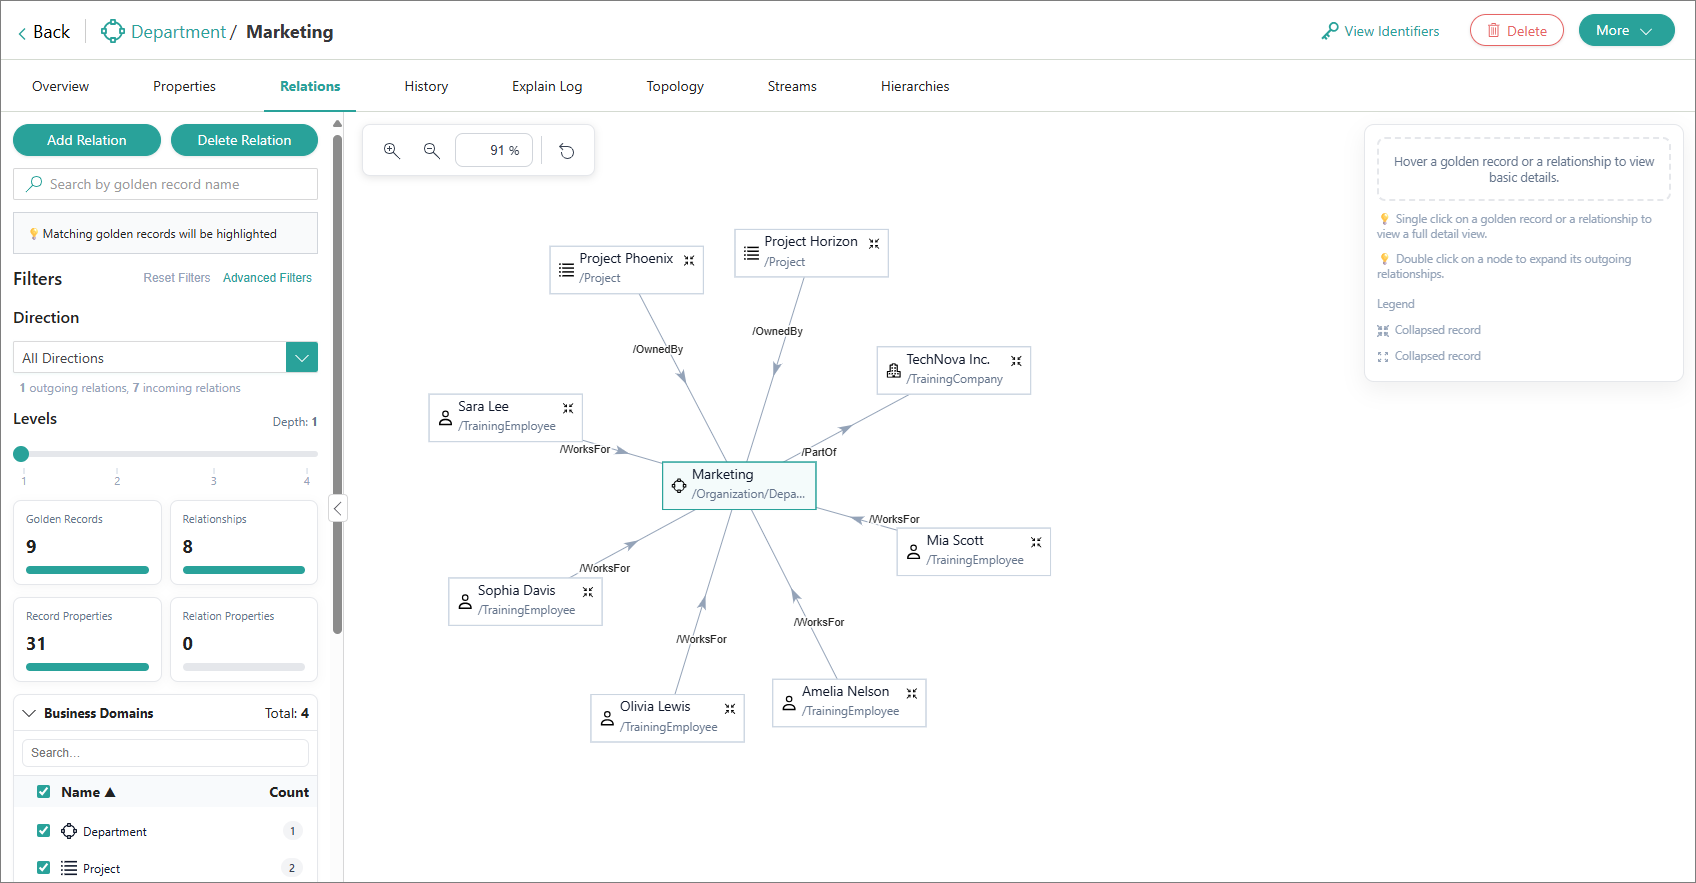
Use levels to define how deeply you want to go in your graph.
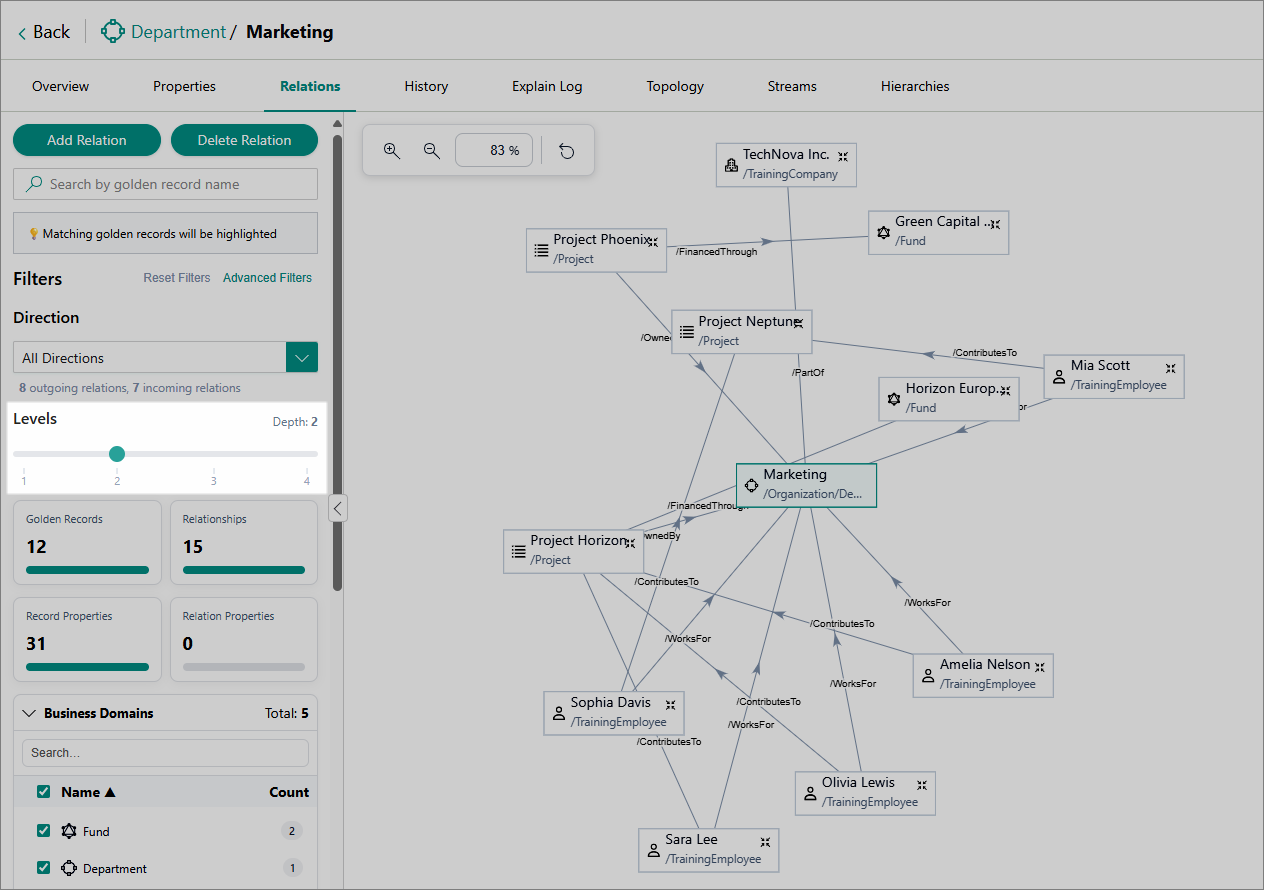
Consider this example: parent company – child company – department. When viewing the relations for the department record, levels work as follows:
-
Level 1 – shows the relation between the department and the child company.
-
Level 2 – expands further to show the relations between the department, the child company, and the parent company.
-
-
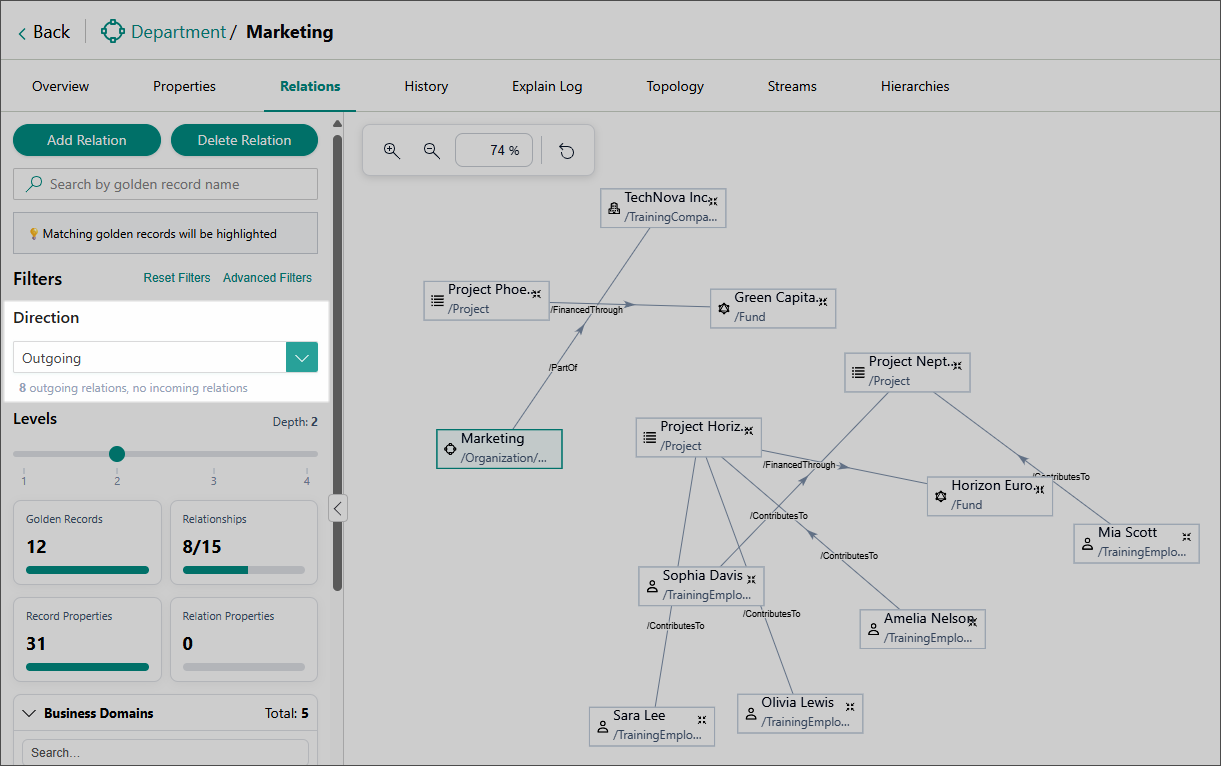
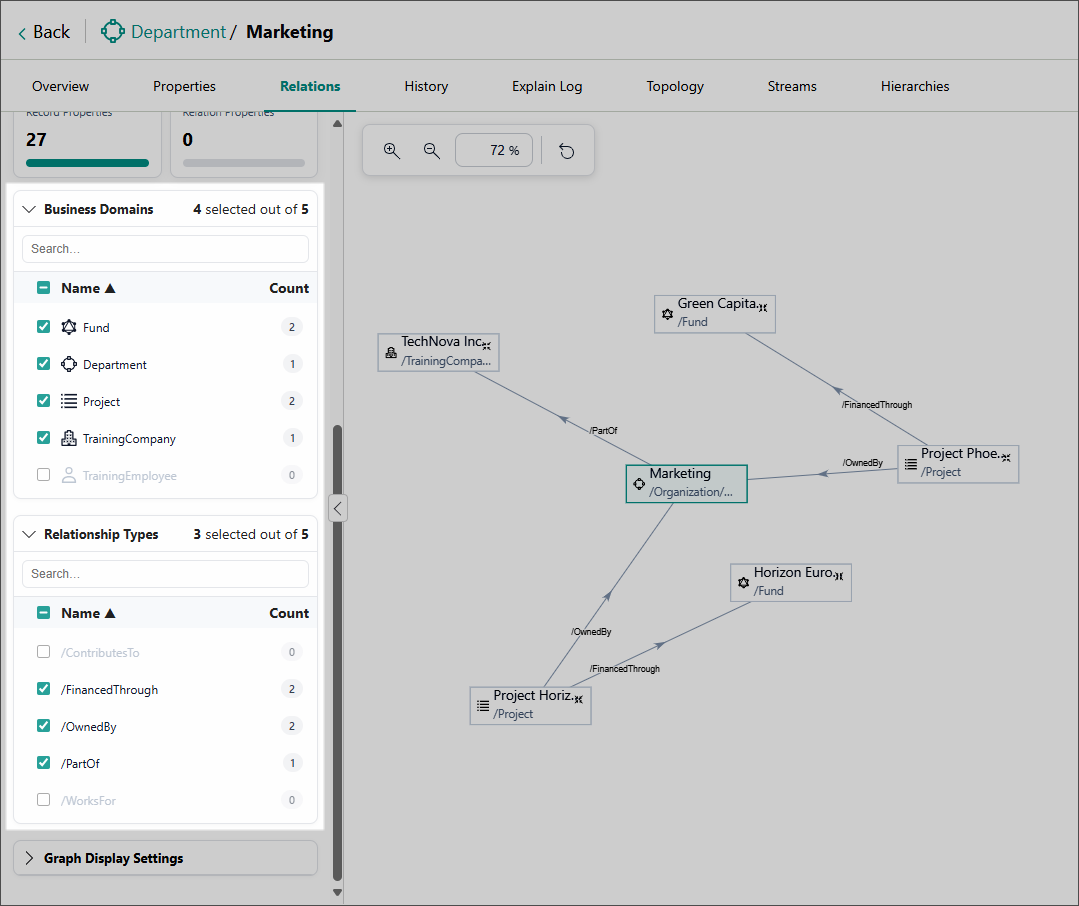
Use filters to narrow down the information displayed in the graph:
-
Direction – choose whether to display incoming, outgoing, or both types of relations.
-
Select which Business Domains and Relationship Types to include in the graph.
-
-
Configure Graph Display Settings:
-
Include all directions – when this option is enabled, the graph will expand all direct relations of the neighbouring records.
-
Include Shadow Records – when this option is enabled, the graph will also show all shadow records associated with the golden records in it. This option may be useful when debugging relations between golden records.
In the following example, the author of the Horizon Campaign Brief is a shadow record (Grace Patterson), and not a regular golden record.
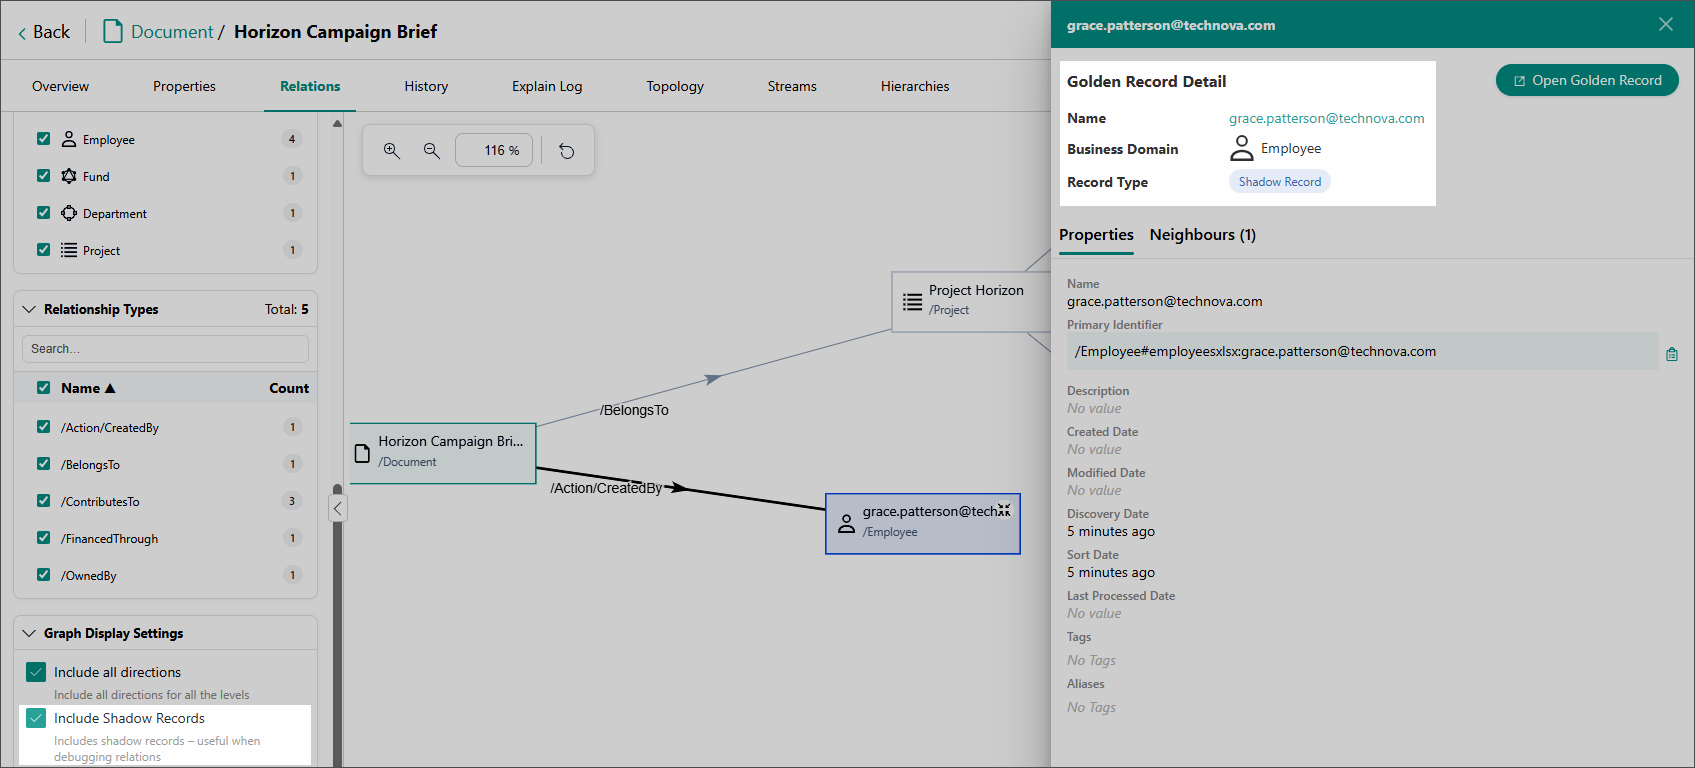
Shadow records are records that exist in CluedIn but are flagged as hidden. This typically happens when a record does not have enough values to be promoted to a golden record and contains only identifiers.
-
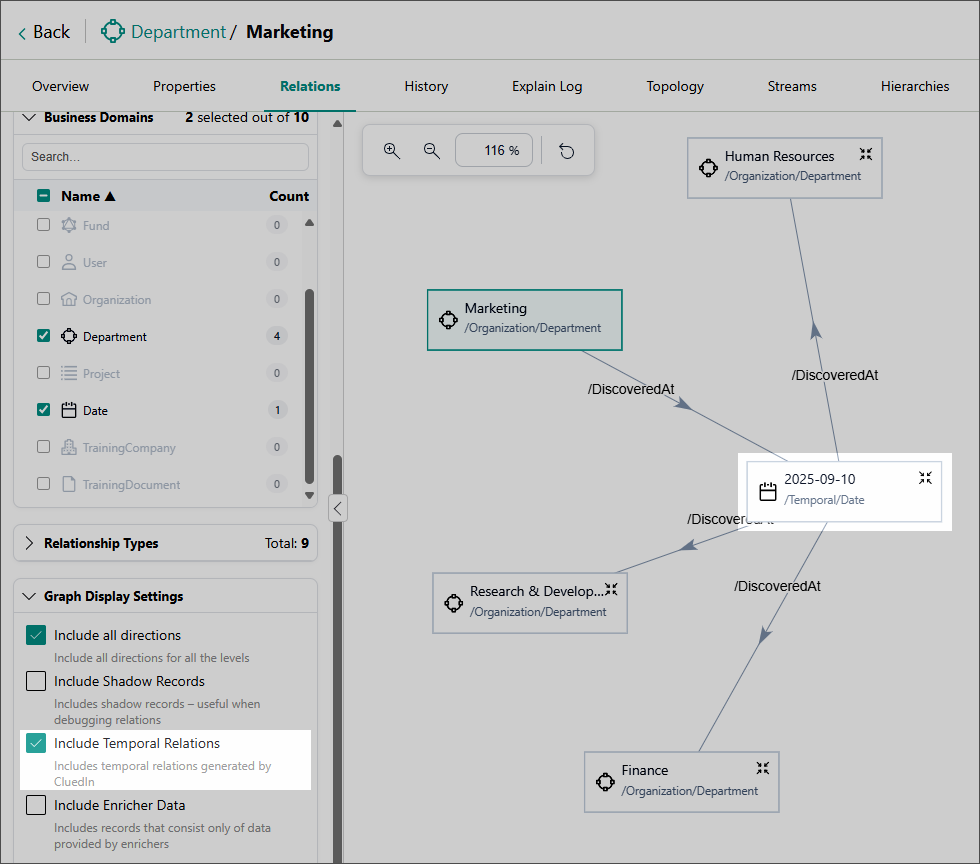
Include Temporal Relations – when this option is enabled, the graph will also show time-based connections between golden records. Temporal relations highlight how records are linked through events or periods in time: for example, showing that a person worked for a company, but only between 2015 and 2020. This option is useful when you need to understand not just how the records are related, but also when those relations existed.
In the following example, the Marketing department record was added to CluedIn on September 10, 2025. On the same date, several more relations were created.
-
Include Enricher Data – when this option is enabled, the graph will also show records that consist only of data provided by enrichers.
-
-
Find and highlight specific nodes in the graph:
-
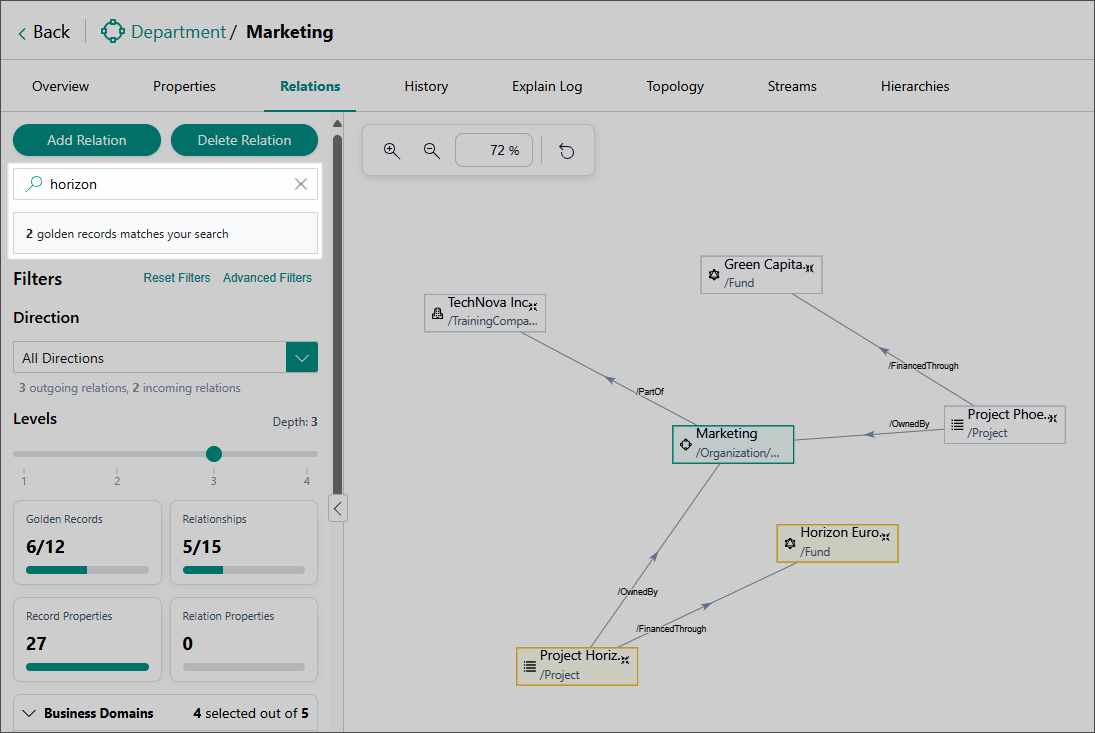
To find records by their display name, on the settings panel on the left side of the page, enter the needed search keyword. In the graph, matching records become highlighted in yellow.
-
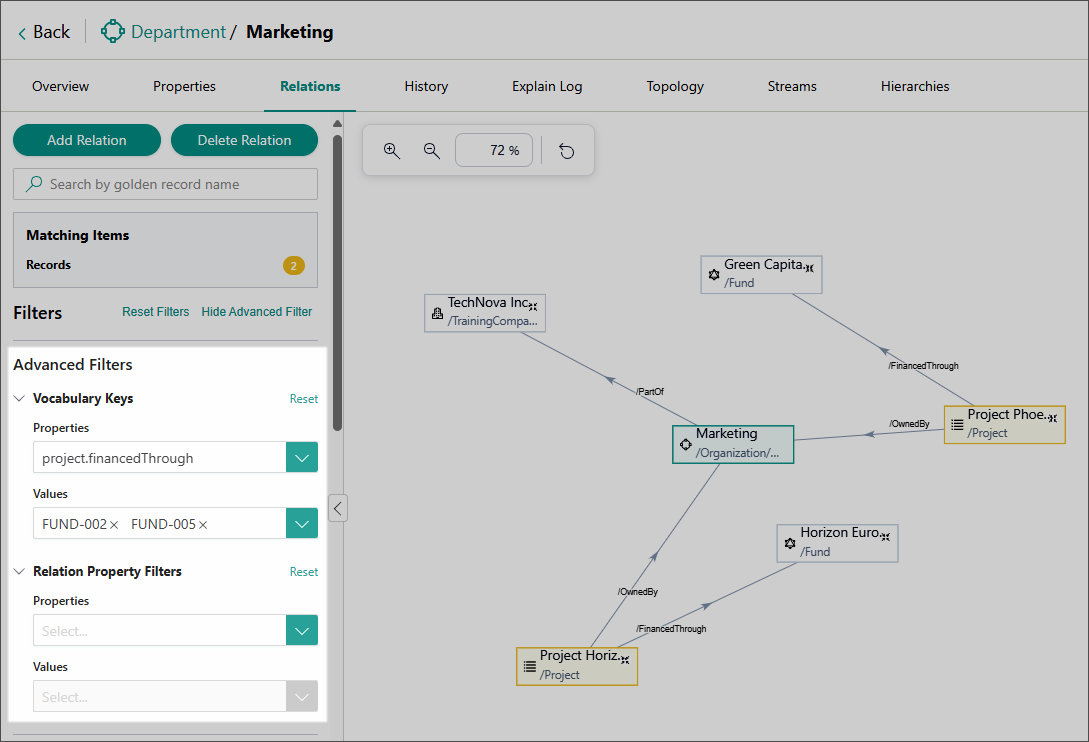
To find records that have a specific value (vocabulary key value or relation property value), at the top of the settings panel, select Advanced Filters.

Then, in the Advanced Filters section, select the values of interest. In the graph, matching records become highlighted in yellow.
-
-
Review the information about the relations and nodes that appear in the graph:
-
To view basic information about a relation or a node in the graph, hover over that element. The corresponding information appears in the details panel on the right of the page.
-
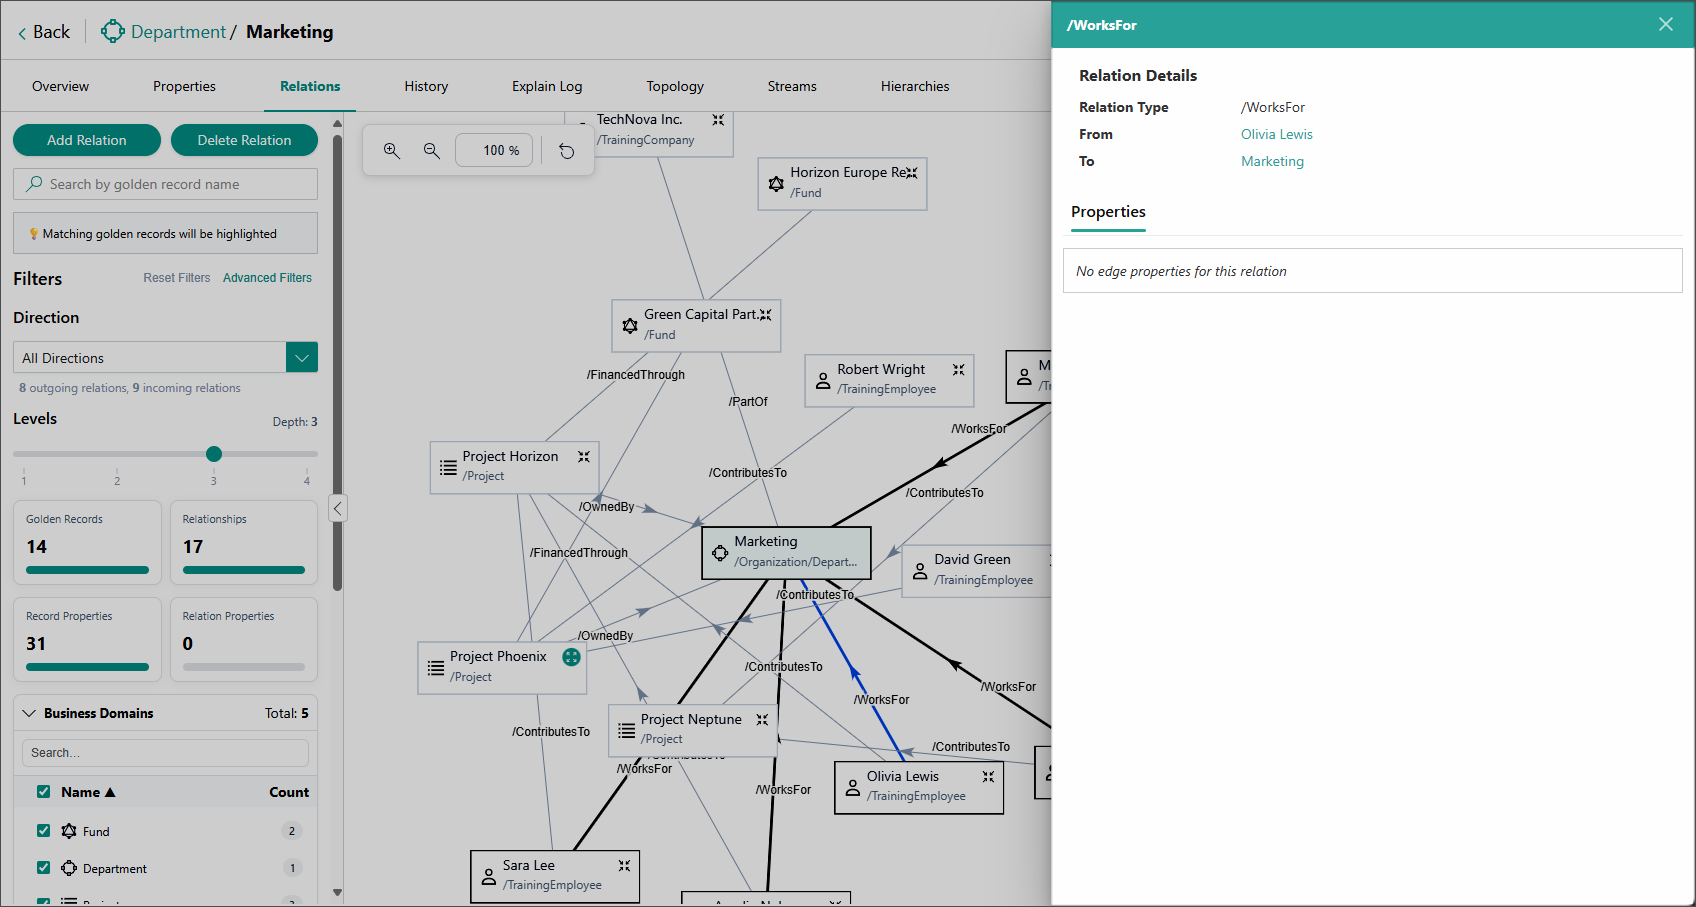
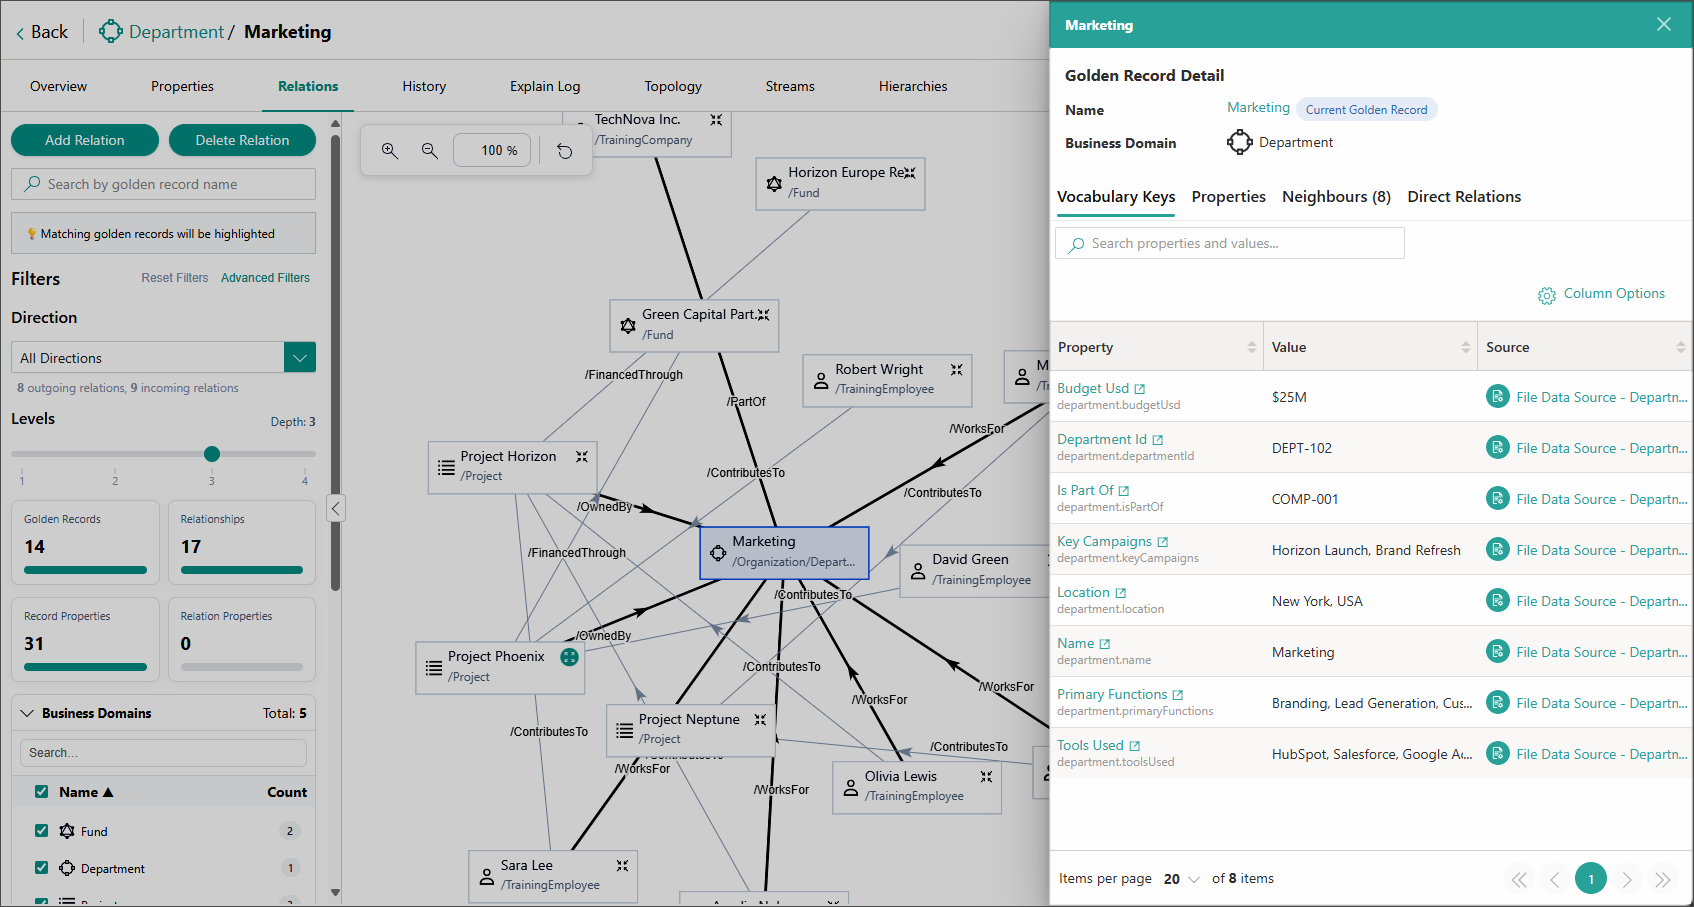
To view detailed information about a relation or a node, click that element in the graph.
Example of detailed information for a relation:
Example of detailed information for a node:
-
To expand a node and view all of its direct relations, double-click that node in the graph.
As an example, pay attention to the Project Phoenix node before being expanded.
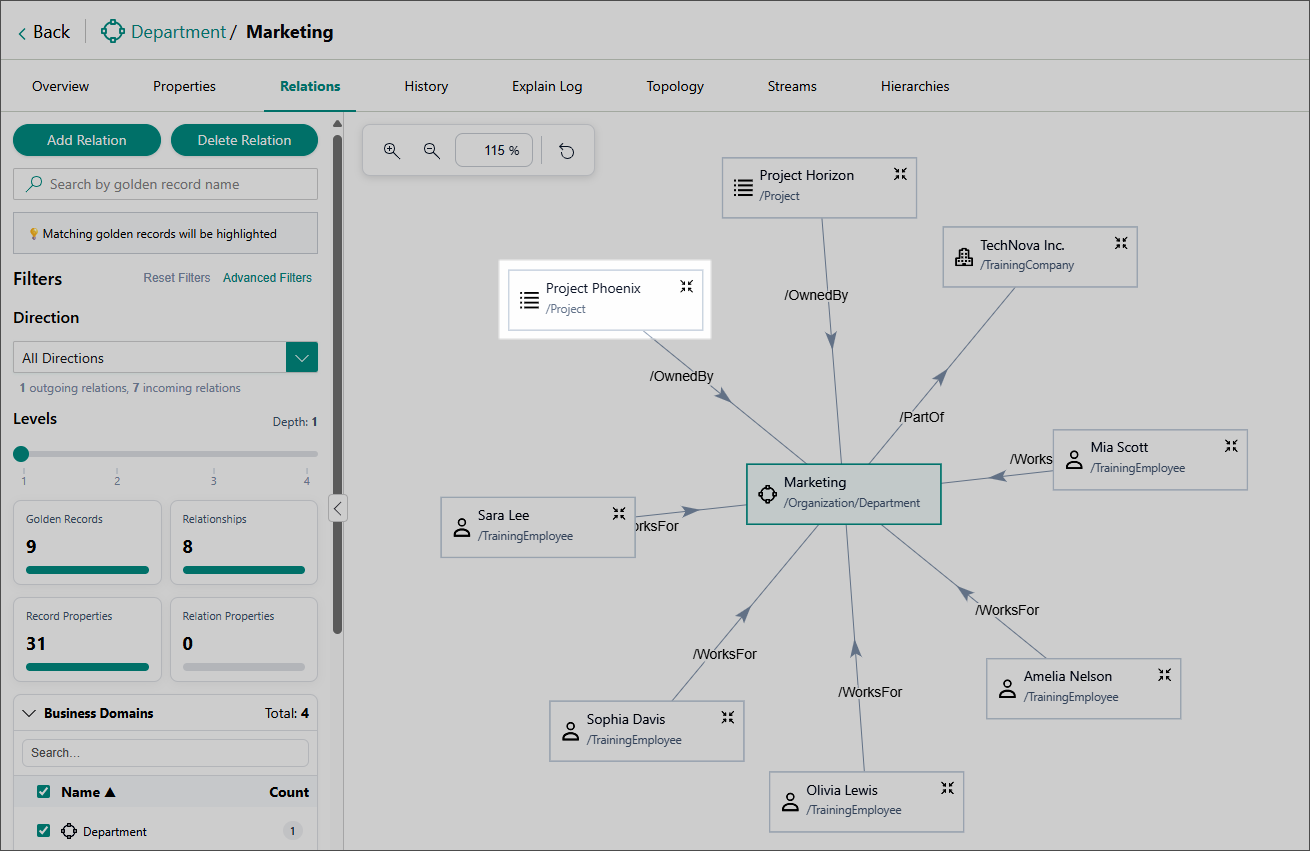
After being expanded, the node reveals three additional relations.
-