Add an enricher
On this page
In this article, you will learn how to add and configure an enricher. While CluedIn offers a range of predefined enrichers for your use, you also have the option to create custom enrichers tailored to your specific needs.
Add and configure an enricher
You can add an enricher both before and after processing the data.
To add and configure an enricher
-
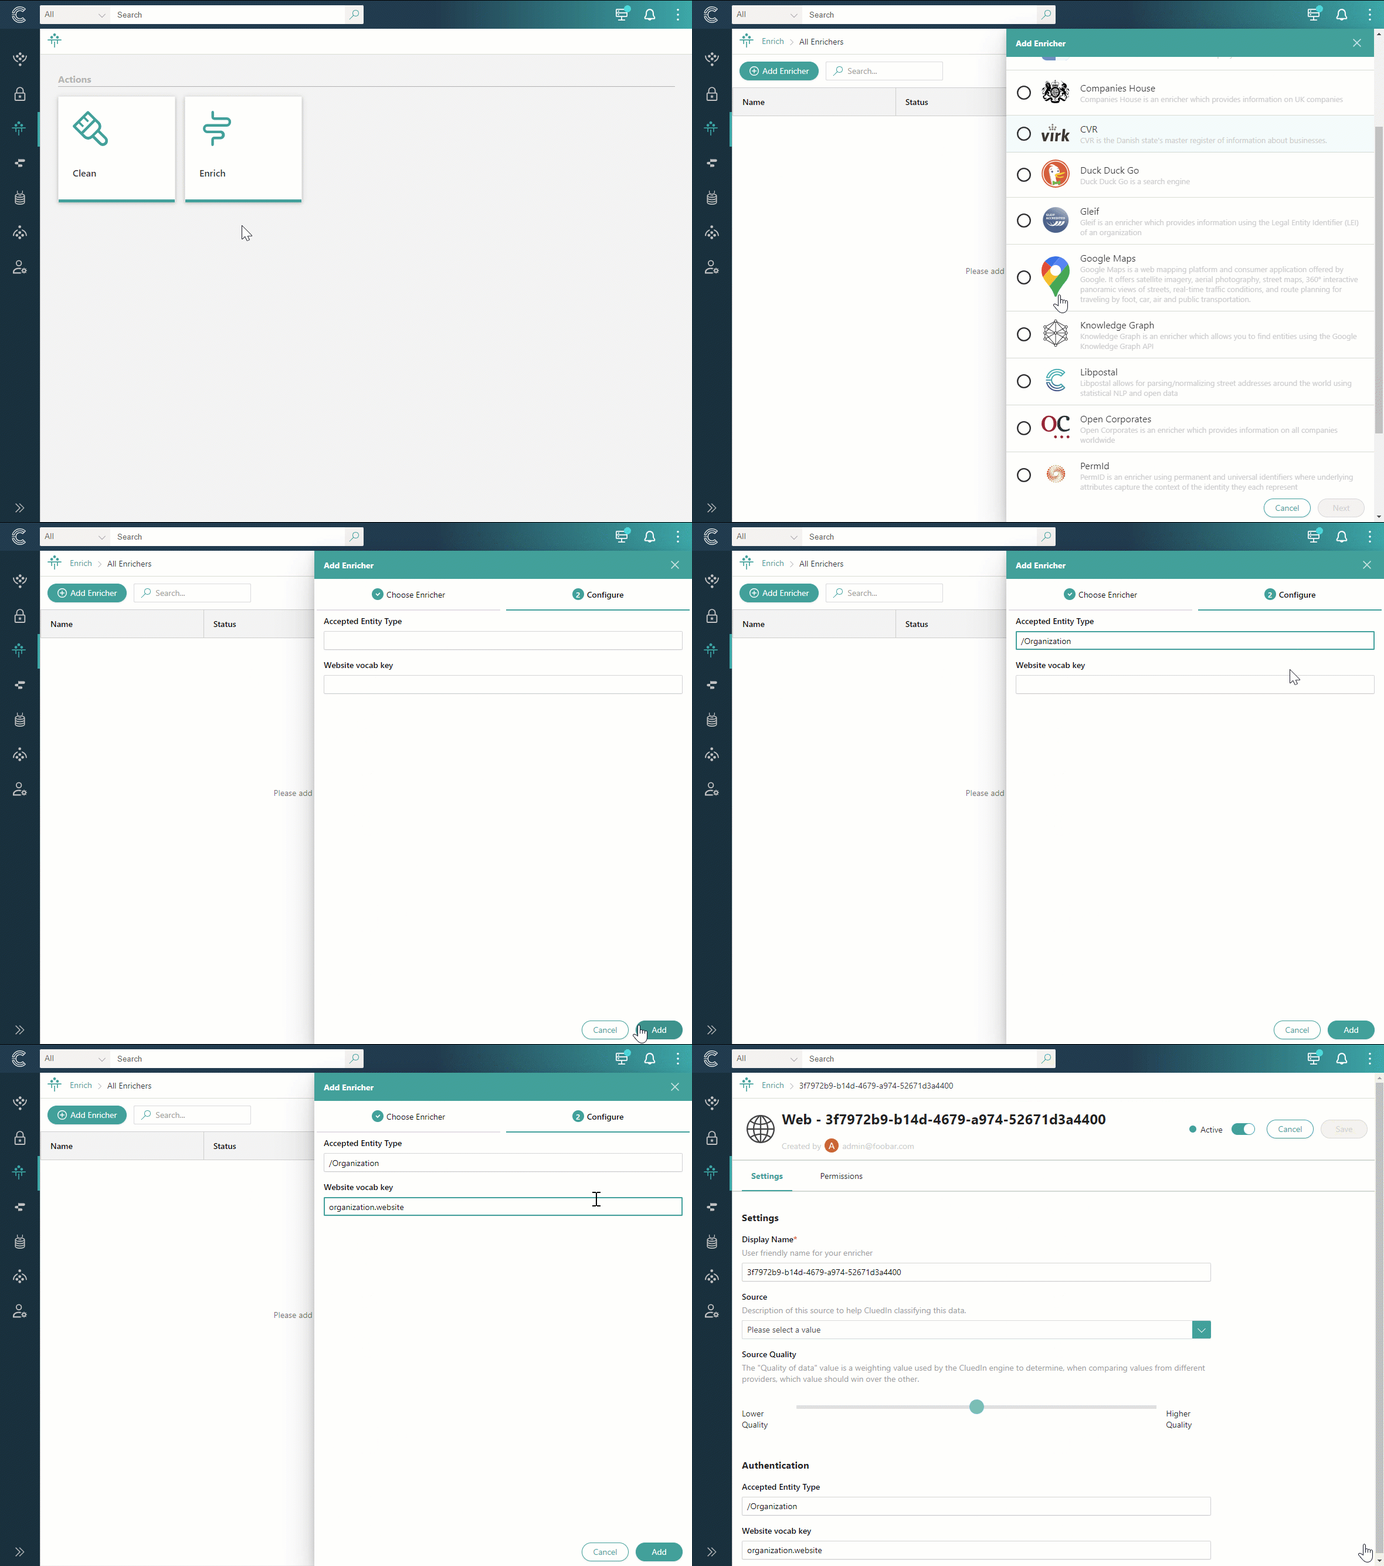
On the navigation pane, go to Preparation > Enrich.
-
Select Add Enricher.
-
On the Choose Enricher tab, select the needed enricher, and then select Next.
-
On the Configure tab, enter the authentication details. The list of fields that you need to complete depends on the selected enricher. You can complete the fields now or do it later on the enricher details page.
-
Select Save.

The enricher details page opens, where you can view and change configuration information and other settings. The enricher is active, which means that the enrichment process will begin immediately after you start processing. If you have already processed the data before adding an enricher, you can trigger the enrichment for the existing golden records.
On the enricher details page, you can manage the enricher:
-
Change the display name of the enricher.
-
Select the source of data coming through the enricher.
-
Specify the quality of data coming through the enricher.
-
Inactivate the enricher if you no longer need it.
-
Manage users who have access to the data coming through the enricher. For more details, see Data access.
Trigger enrichment
If you process the data and then add an enricher, the enrichment won’t start automatically. To enrich the existing golden records, you can trigger enrichment in one of the following ways:
-
Using the GraphQL tool.
-
Manually trigger enrichment for each golden record.
To trigger enrichment using the GraphQL tool
-
On the navigation pane, go to Consume > GraphQL.
-
Enter a query to enrich all golden records that belong to a certain business domain. Replace /Organization with the needed name of business domain.
{ search(query: "entityType:/Organization") { entries { actions { enrich } } } } -
Execute the query.
You triggered the enrichment for the golden records belonging to the specified business domain. Now, you can view the enrichment results on the golden record details page.
To trigger enrichment for each golden record manually
-
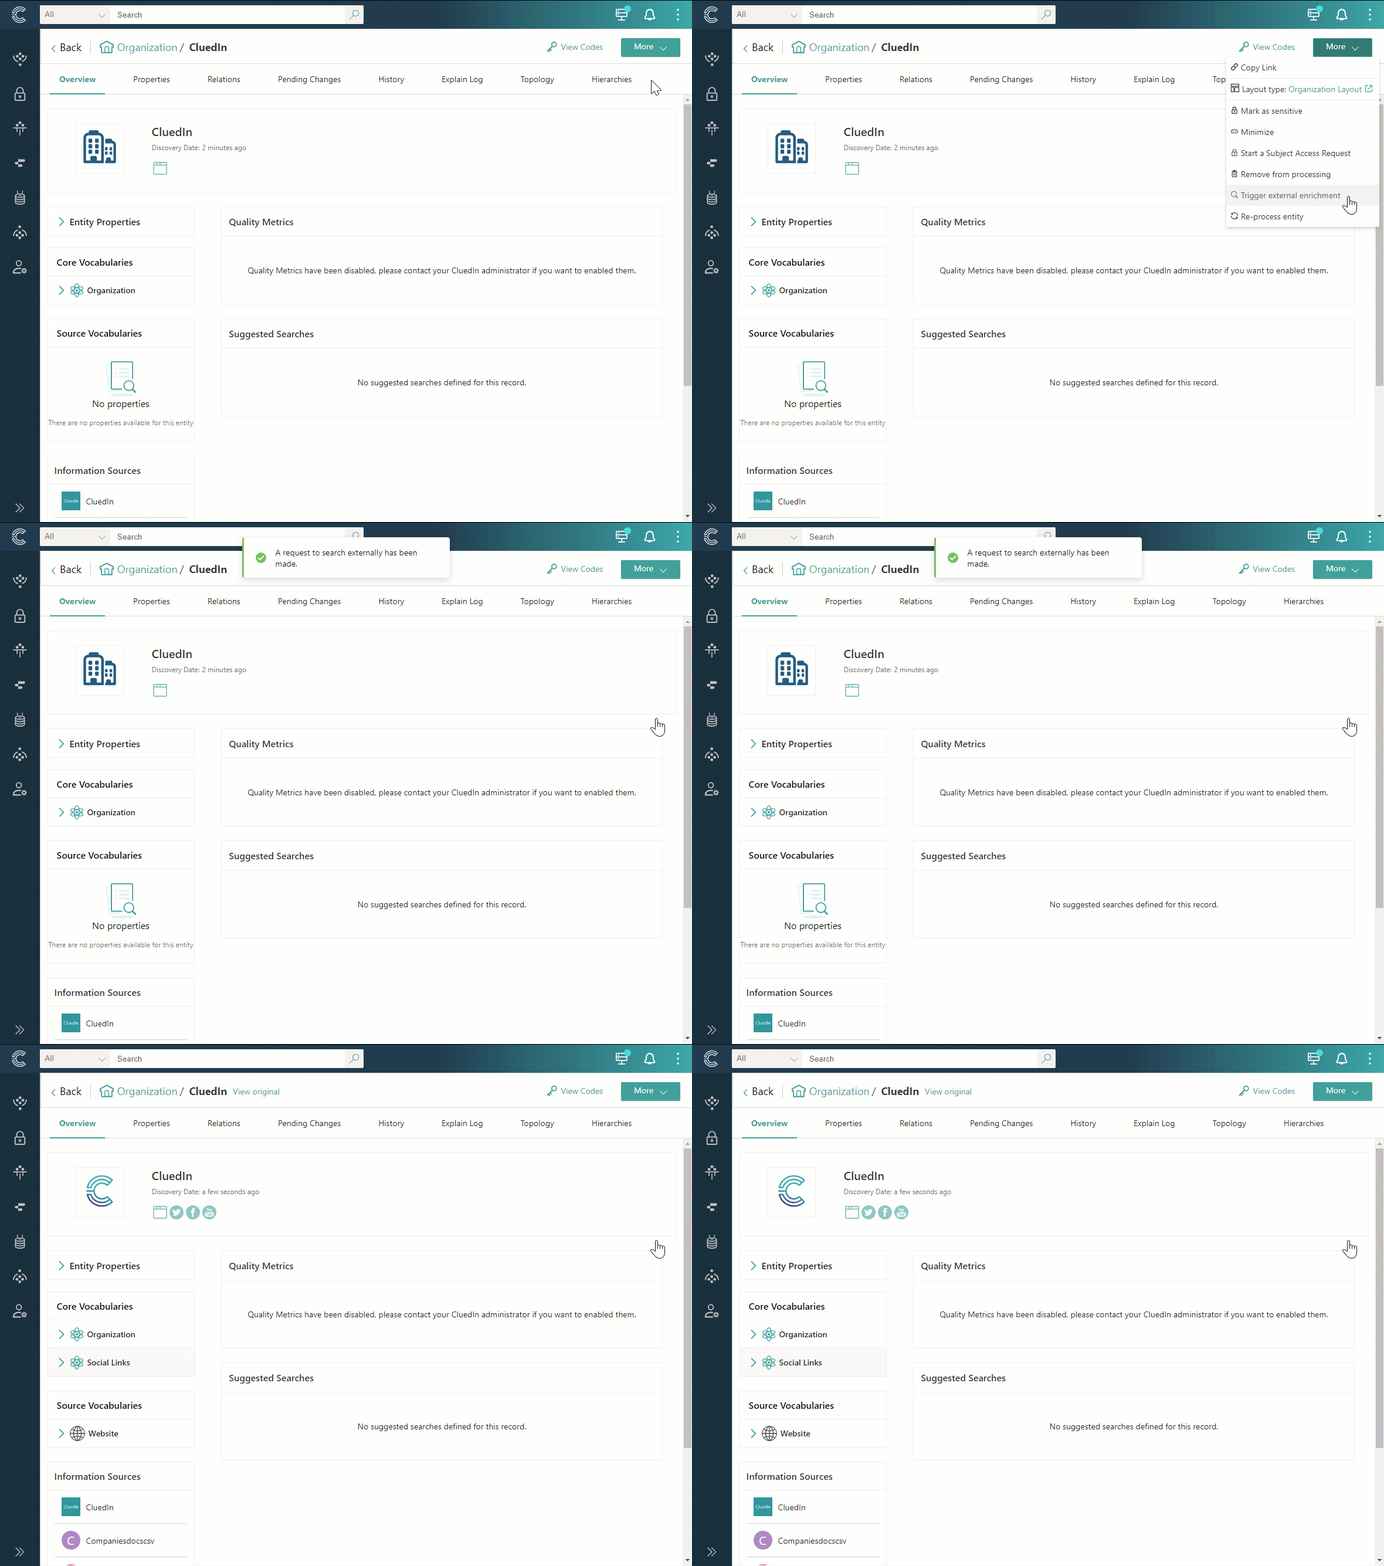
Find and open the needed golden record.
-
In the upper-right corner of the golden record details page, select More > Trigger external enrichment.

Now, you can view the enrichment results on the golden record details page.
View enrichment results
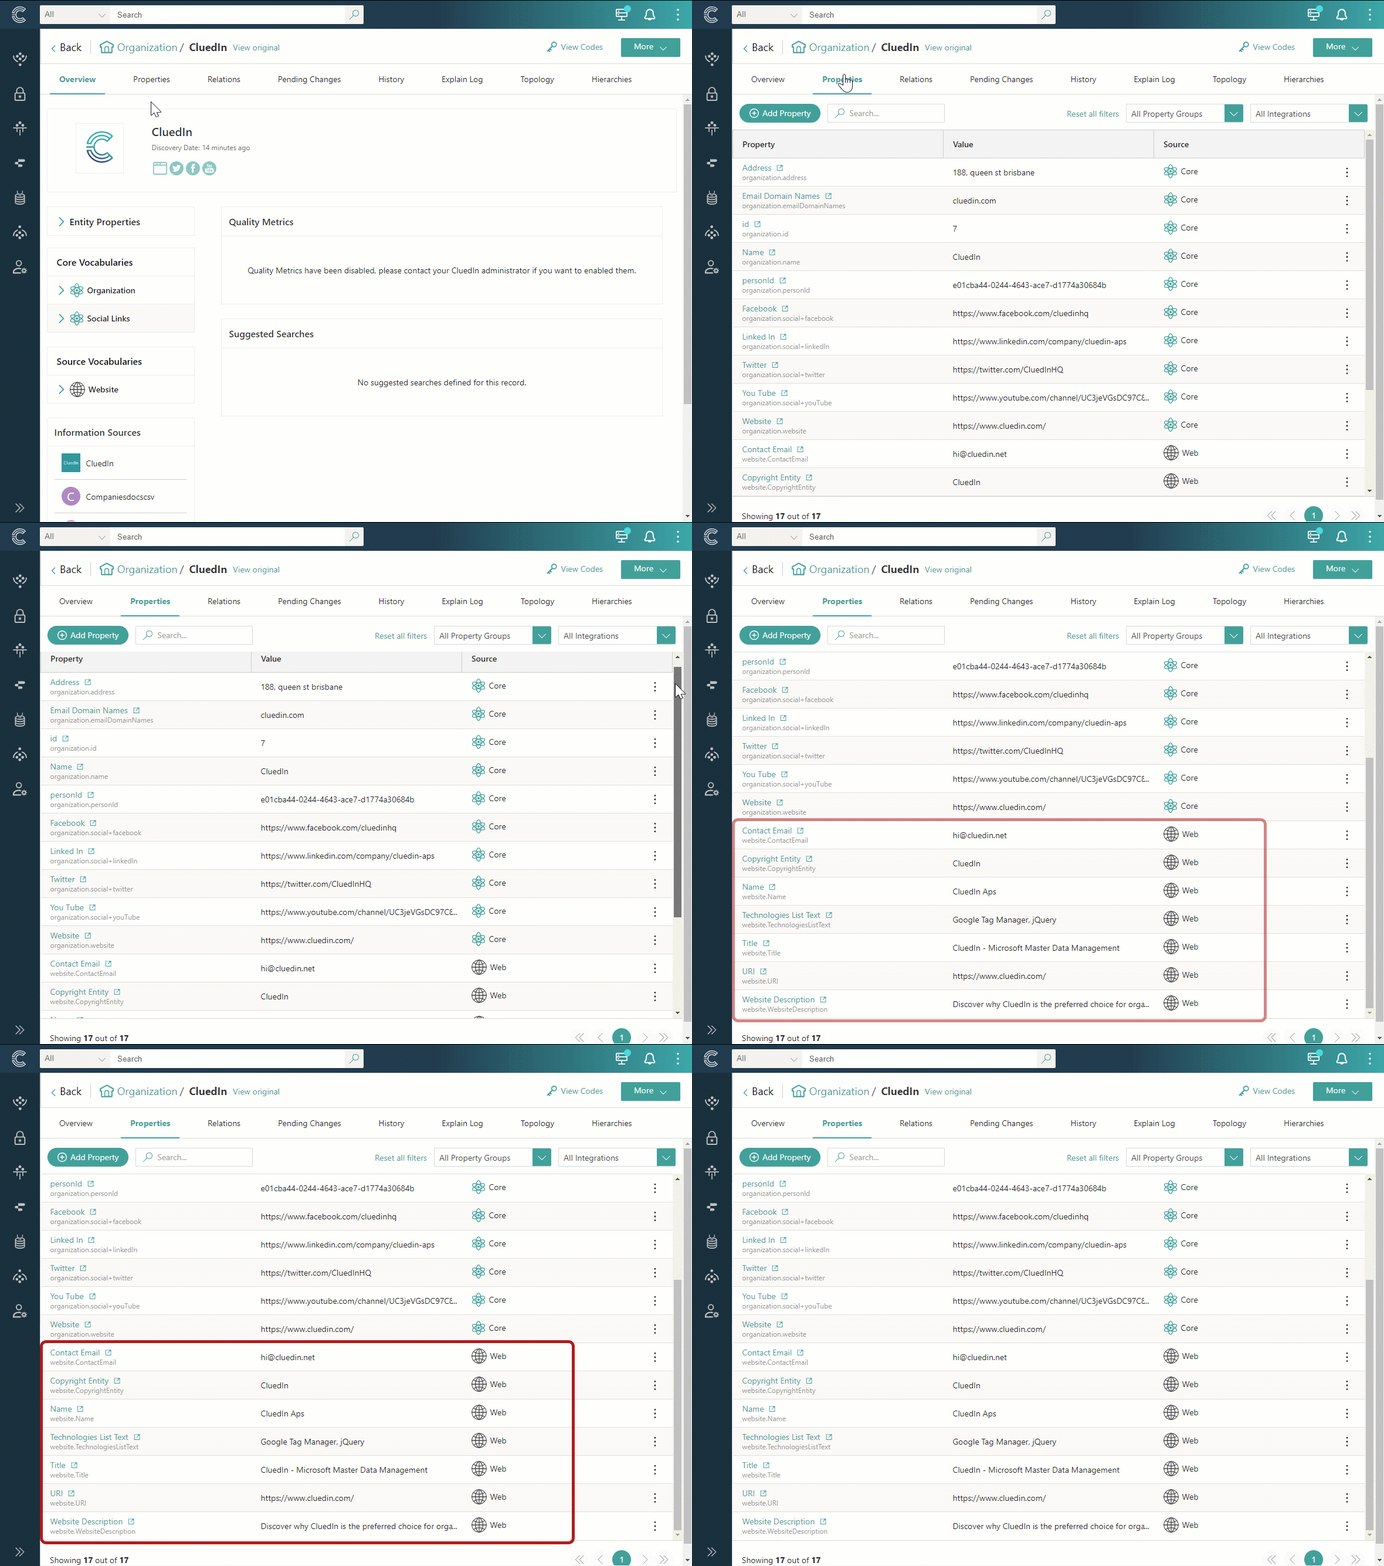
The Properties tab of the golden record lists new properties added through enrichment. The source of these properties is specified based on the type of enricher through which they were obtained.

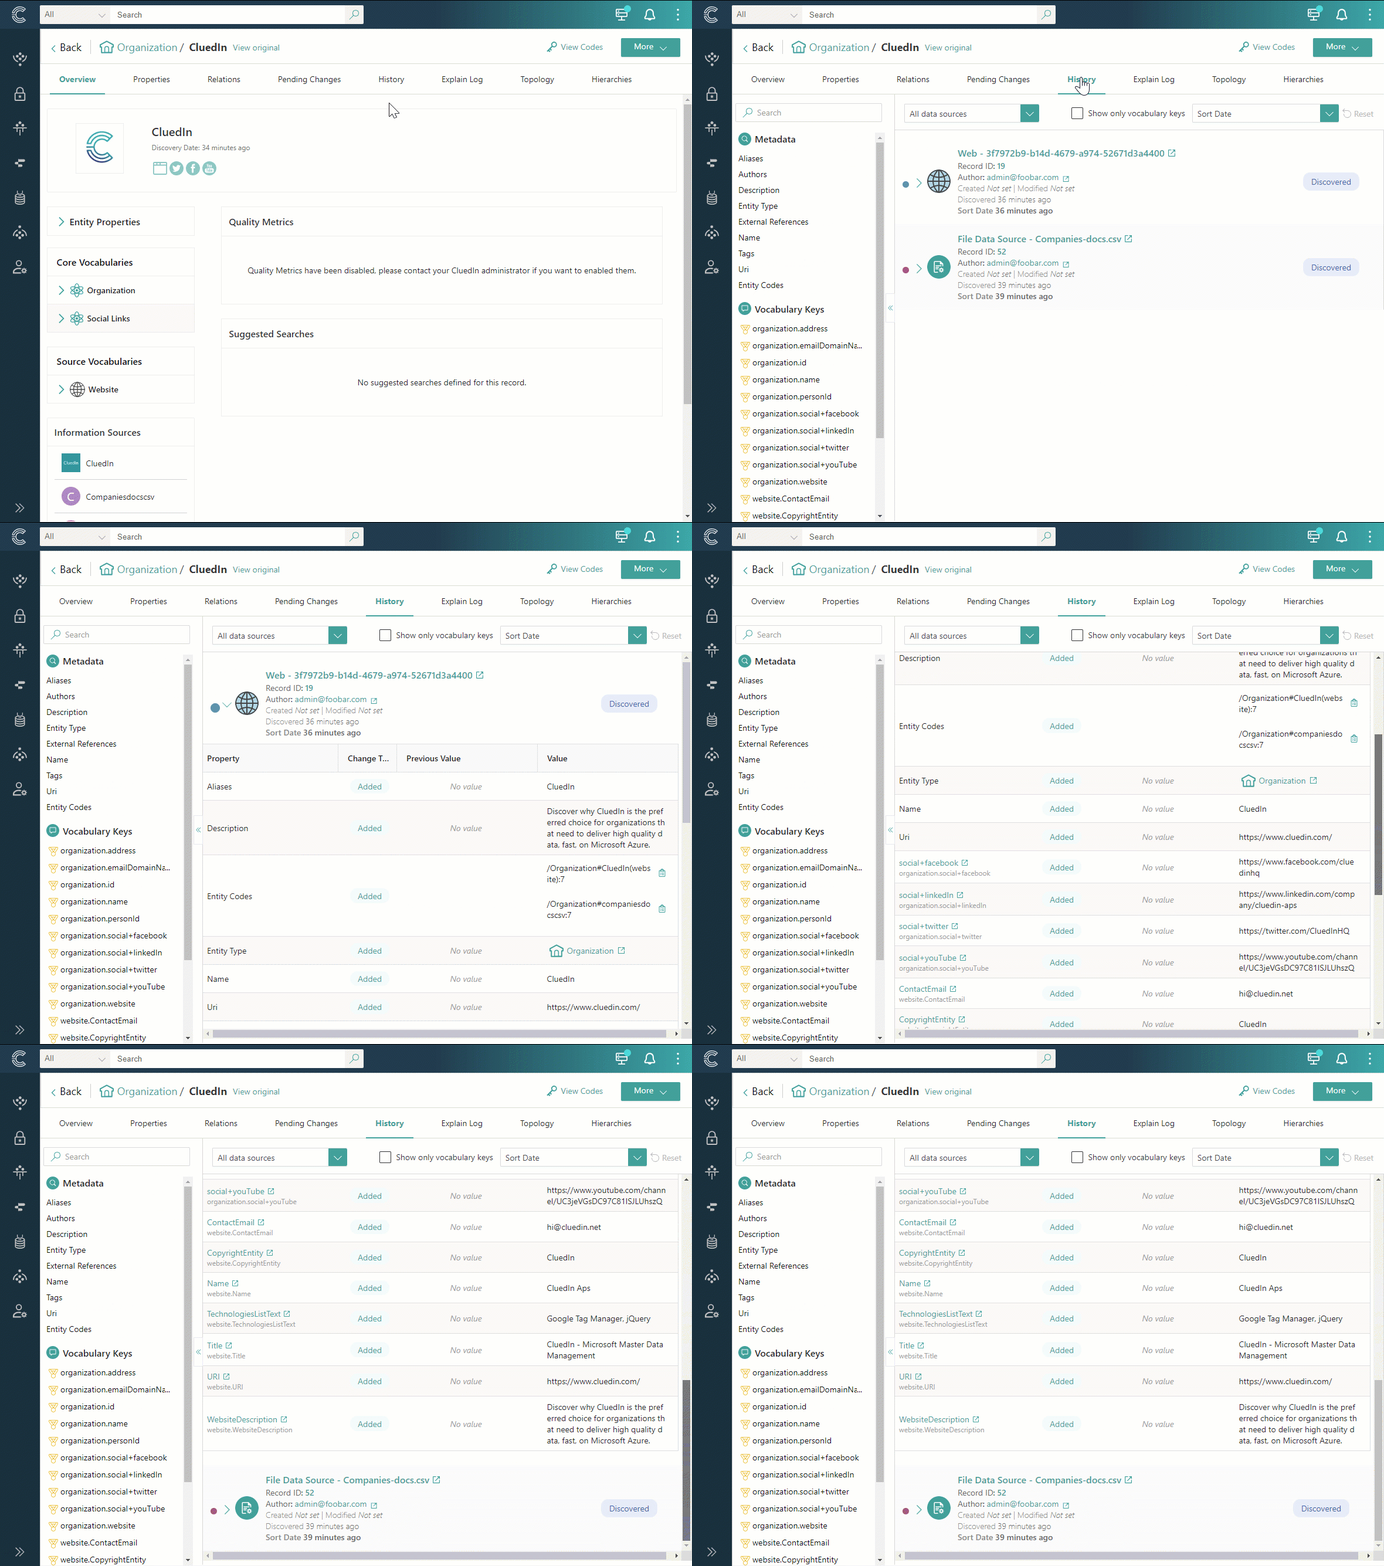
According to the data life cycle, properties added through enrichment appear in CluedIn as a clue. This clue is then transferred to the data part, which in turn becomes the constituent element of the golden record. The History tab of the golden record contains all the data parts that make up that golden record, including the data parts that came from the enricher. For more information, see History.
