ADF pipeline automation
On this page
In this article, you will learn how to configure the Azure Data Factory (ADF) pipeline automation to sync data between Purview and CluedIn.
To configure the ADF pipeline to sync data between Purview and CluedIn, complete three steps:
-
Prepare ADF resource and ADF service principal in the Azure portal – register the ADF application and assign the appropriate permissions.
-
Prepare data source in Purview – create a glossary term and associate it with the data sources that you want to sync.
-
Configure settings in CluedIn – provide ADF credentials, enable the ADF pipeline automation feature, and provide the glossary term to identify the data sources for syncing.
Preparation
This section contains the steps required to prepare for syncing data from Purview to CluedIn with the help of ADF pipeline.
Preparation in Azure portal
-
Register an application for ADF following the steps described in Register an application and create a service principal. You will need the Application (client) ID and Directory (tenant) ID to configure ADF in CluedIn.
-
Create a client secret for ADF application following the steps described in Register an application and create a service principal.
-
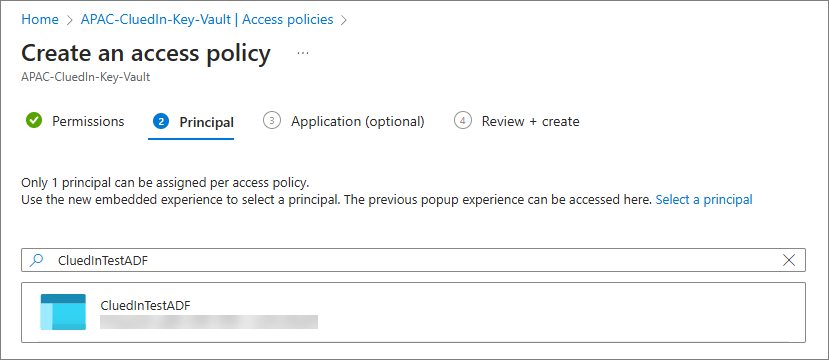
Register ADF application in the key vault that you created in Create a key vault and register Purview:
-
Go to Access policies and select Create.
-
On the Permissions tab, in the Secret permissions column, select the checkboxes for Get and List, and then select Next.
-
On the Principal tab, find and select the ADF service principal, and then select Next.
-
Select Create.
-
On the Application (optional) tab, select Next.
-
On the Review + create tab, select Create.
-
-
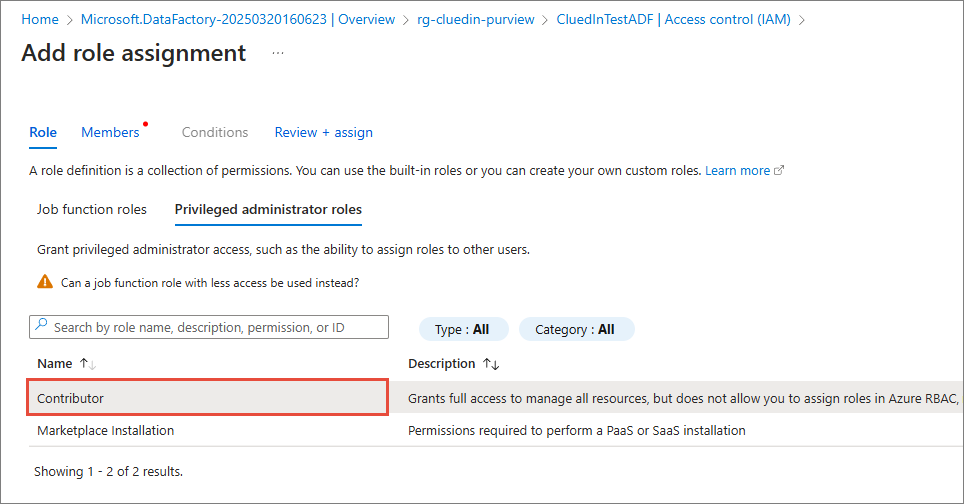
Give a Contributor role to the ADF application to the data factory resource:
-
In the ADF resource, go to Access control (IAM), and then select Add > Add role assignment.
-
On the Role tab, go to Privileged administrator roles, and review information about the Contributor role.
-
Select Next.
-
In Members > Select members, find and select ADF service principal.
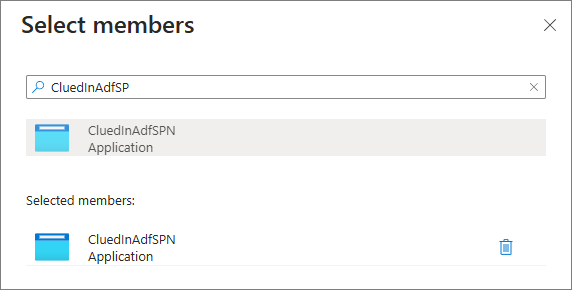
-
Select Review + assign.
As a result, the ADF application now has the Contributor access to the data factory resource.

-
Preparation in Purview
-
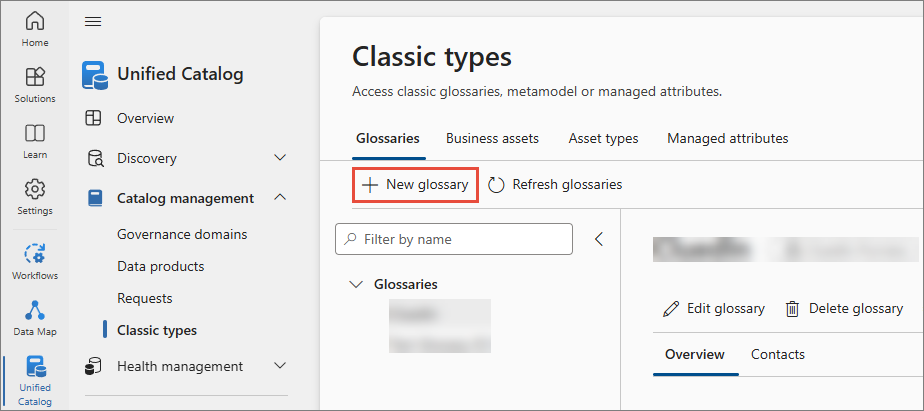
In the Microsoft Purview portal, navigate to Unified Catalog > Catalog management > Classic types.
-
Find and select the glossary that you created in Sync data sources.
-
Add a term to the glossary:
-
On the terms card, select View terms.
-
Select New term.
-
Select the System default term template and select Continue.
-
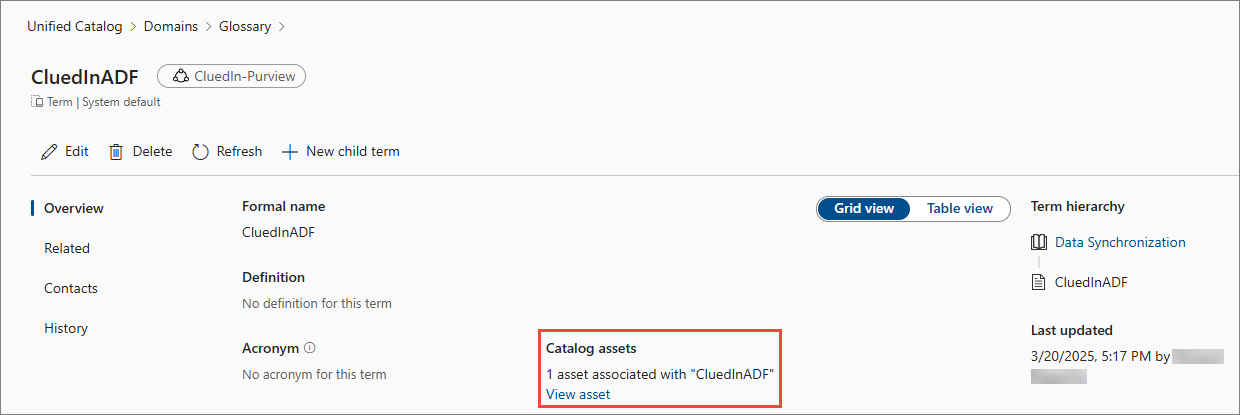
Enter the Name of the term and select Create.
The new term is added to the glossary. Next, add the term to the asset that you want to sync with CluedIn.

-
-
To add the term to the asset that you want to sync with CluedIn:
-
Navigate to Data Map > Domains. In your default domain, select the collection that stores the assets from Azure Data Lake Storage.
-
Select the assets card.
-
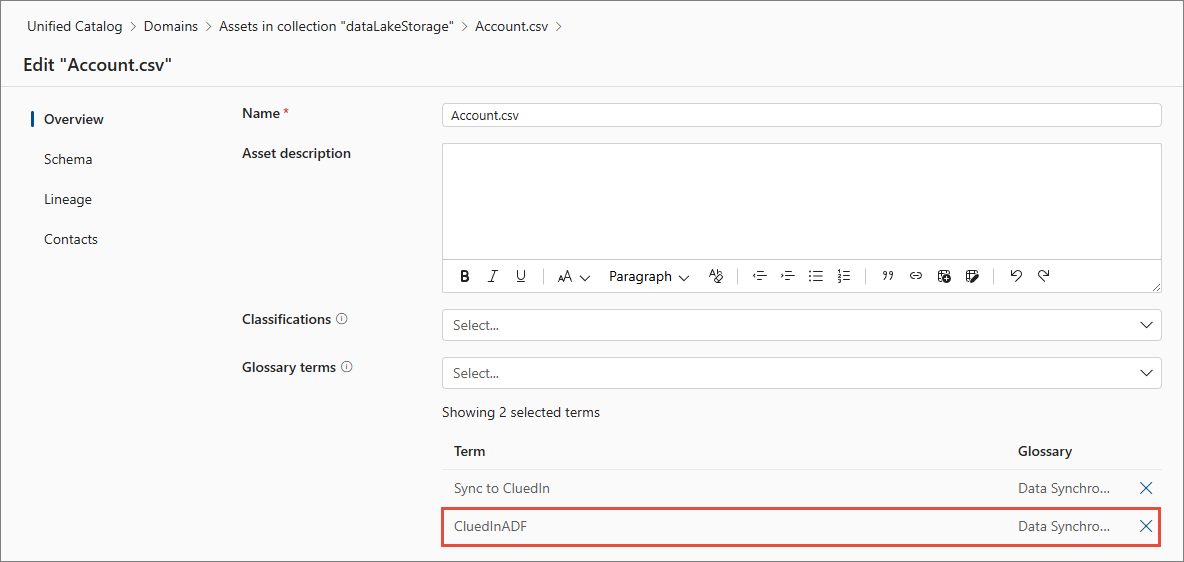
Find and select the asset that you want to sync with CluedIn.
-
On the asset details page, select Edit.
-
In Glossary terms, find and select the term you created in step 3.
-
Select Save.
The term is added to the asset that you want to sync with CluedIn. On the term details page, you can find the assets associated with the term.
Once you have prepared the data sources that you want to sync, configure the appropriate settings in CluedIn.
-
Preparation in CluedIn
-
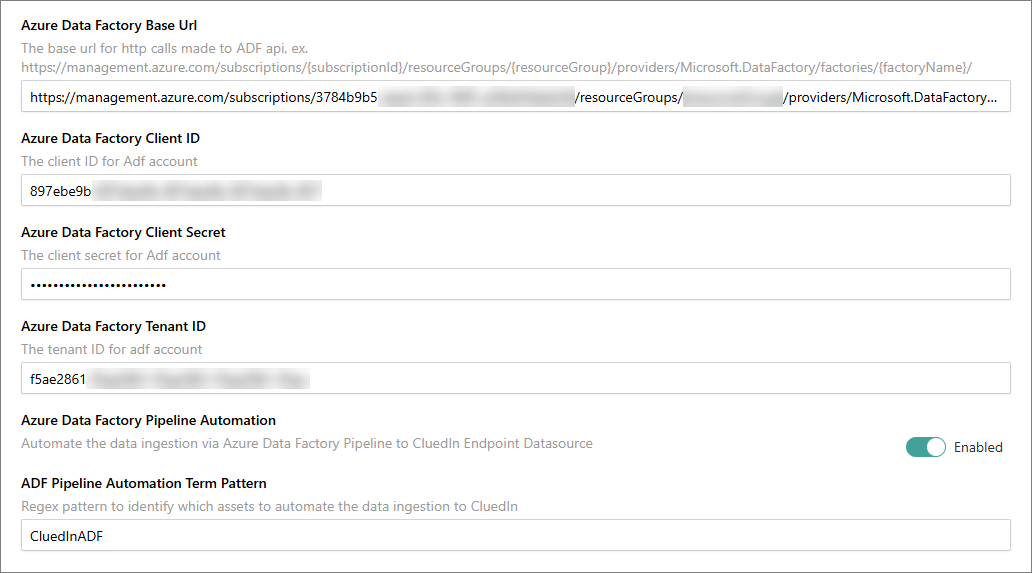
In CluedIn, go to Administration > Settings, and then scroll down to find the Purview section.
-
In Azure Data Factory Base Url, enter the resource ID of your ADF resource. To find the resource ID, go to your ADF resource, select JSON View, and then copy the value of Resource ID. The resource ID should be in the following format:
https://management.azure.com/subscriptions/{subscriptionId}/resourceGroups/{resourceGroup}/providers/Microsoft.DataFactory/factories/{factoryName}/.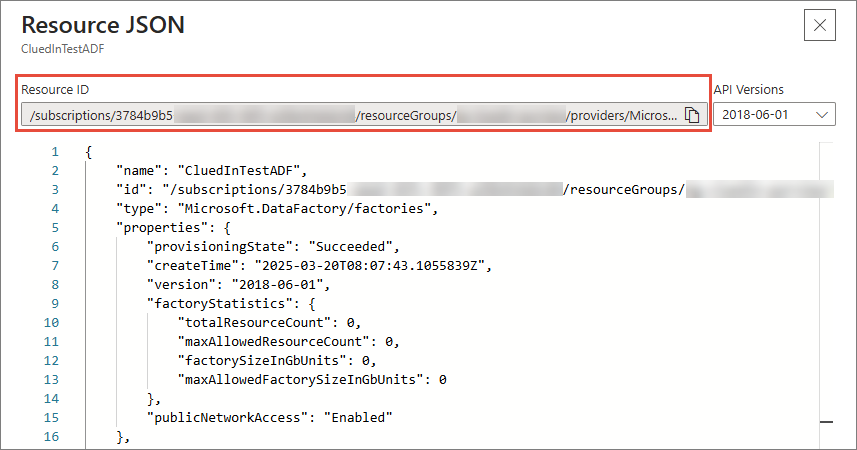
-
In Azure Data Factory Client ID, enter a unique identifier assigned to the ADF application when you registered it in Microsoft Entra ID. You can find this value on the application overview page, in Application (client) ID.
-
In Azure Data Factory Client Secret, enter a string value that your ADF application uses to prove its identity when requesting a token.
-
In Azure Data Factory Tenant ID, enter a unique identifier for your Microsoft Entra ID tenant in which your ADF application is registered. You can find this value on the application overview page, in Directory (tenant) ID.
-
Turn on the toggle in Azure Data Factory Pipeline Automation.
-
In ADF Pipeline Automation Term Pattern, enter the name of the term that is associated with assets you want to ingest into CluedIn via automated pipeline.
-
Select Save.
Once you save the changes, the data will start to come forward to CluedIn ingestion endpoint.
Feature overview
When the synchronization is completed, you will receive a notification.

How to check the pipelines in ADF?
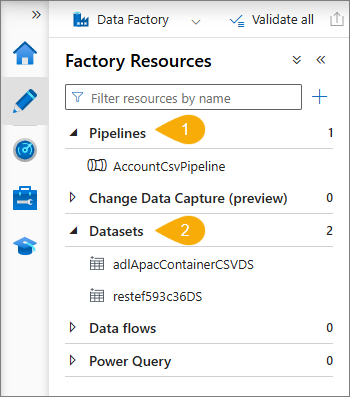
The ADF pipelines are created automatically for each Purview asset. To verify the pipelines in ADF, go to Author, and then do the following:
-
Expand the Pipelines dropdown list – you will see the pipeline that has been created automatically.
-
Expand the Datasets dropdown list – you will see the dataset that has been sent to CluedIn as well as REST connection to CluedIn ingestion endpoint.
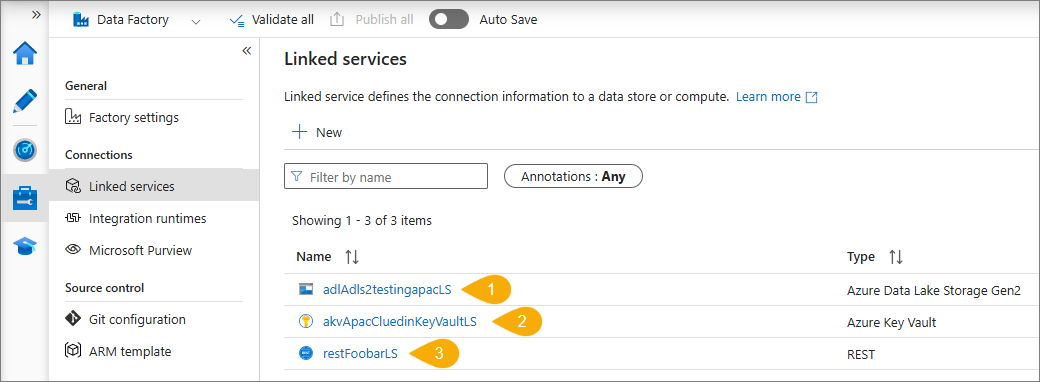
Additionally, go to Manage > Linked services. Here, you will see the linked services that define connection information to a data store. For example, in the following screenshot, there are three linked services:
-
Azure Data Lake Storage – connects ADF to your Azure Data Lake Storage account and allows you to copy data from the storage account.
-
Azure Key Vault – connects ADF to Azure Key Vault, where ADF retrieves the credentials at runtime to access the data store.
-
REST – connects ADF to CluedIn ingestion endpoint.
Finally, go to Monitor > Pipeline runs to verify that the pipeline has run successfully.

How to check the ingested data in CluedIn?
As a result of pipeline run, the data source in CluedIn now contains a data set.