Create a rule
On this page
In this article, you will learn how to create a rule, validate it on one golden record to ensure it works as expected, and then apply the rule to all records.
Create a rule
Creating a rule involves defining the golden records to which the rule will be applied and specifying the actions to modify these records. The procedure of creating a rule is the same for all types of rules. However, the actions associated with each type of rule are different.
To create a rule
-
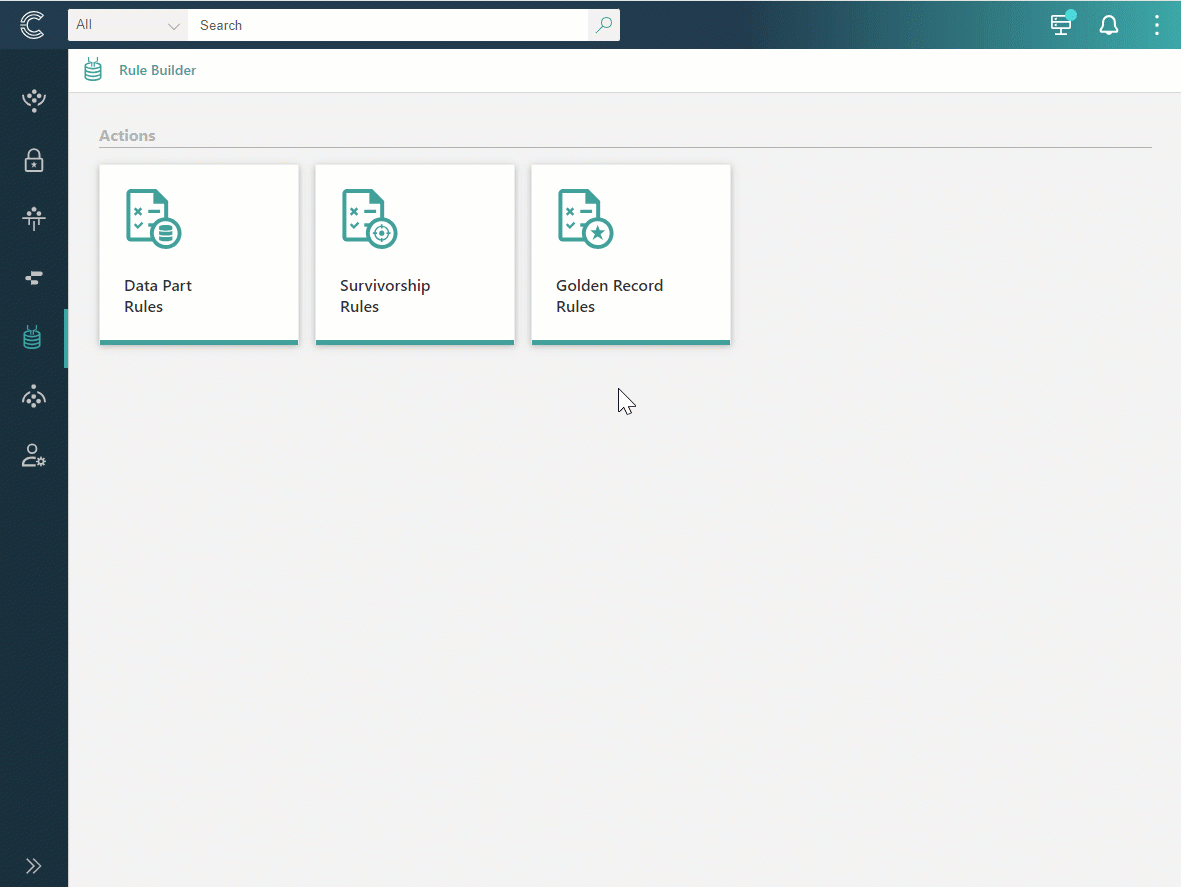
On the navigation pane, go to Management > Rule builder.
-
Choose the type of rule that you want to create. Then, select Create rule.
-
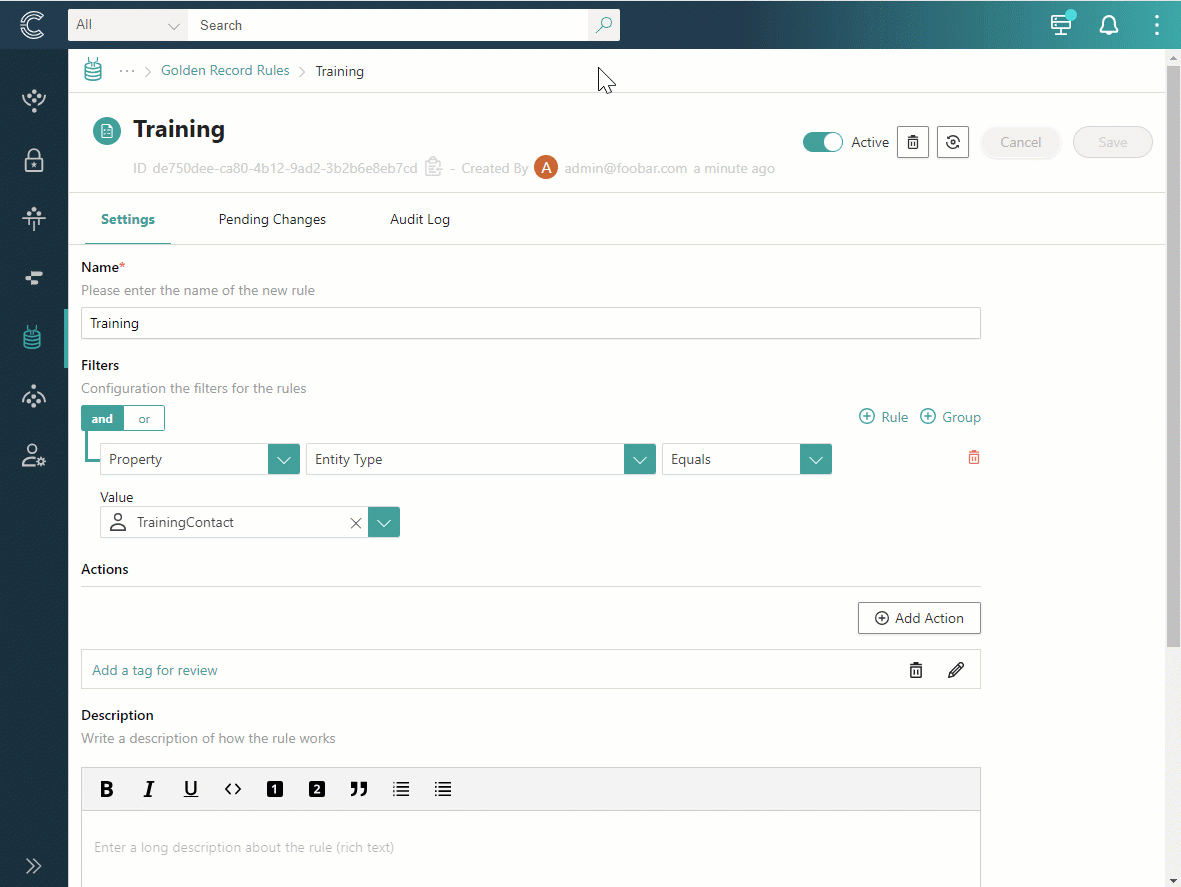
Enter the name of the rule, and then select Create. The rule details page opens.
-
In the Filters section, select Add first filter, and then specify the golden records to which the rule will be applied. For more information on how to set up a filer, see Filters.
-
In the Actions section, select Add action, and then configure the action that will be applied to the golden records matching the filters:
-
Enter the name of the action.
-
In the Action section, choose the action to be performed by the rule. For more information about the available actions for each rule type, see Rules reference. Depending on the chosen action, you might need to provide additional details.
-
In the lower-right corner, select Add action.
-
-
If you want to add more actions to the rule, repeat step 5.
-
Near upper-right corner, select Save, and then confirm that you want to save the rule.
-
Activate the rule by turning on the toggle next to the rule status.
At this point, the rule has not yet been applied to the golden records. To ensure the rule is configured correctly, we recommend applying it to one golden record to verify the results.
Test a rule on one record
After creating a rule, it is a good idea to test it on one golden record to verify that the configuration is correct. This way, you can reprocess just the one golden record instead of all affected golden records. If you find that the rule’s actions have not been applied as intended, you can edit the rule and test it on one golden record again until you achieve the desired configuration.
To test a rule on one golden record
-
Go to search and add the same filters that you set up in the rule (step 4 in Create a rule). Then, start the search.
-
Open one golden record from the search results.
-
Near upper-right corner, select More > Re-process entity.
-
After you see a notification that the request for reprocessing has been sent, reload the page.
-
Check if the golden record has been modified according to the rule.
-
Check what rule has been applied to the golden record:
-
Go to the Explain log tab.
-
Expand the Golden record entry.
-
Expand Evaluate rules > Summaries.
In the tables, you can view the rules and actions that have been applied to the golden record.
-
-
Depending on the results of your review, do one of the following:
-
If the rule has been applied to the golden record as you intended, proceed to apply the rule to all golden records.
-
If the rule has not been applied to the golden record as intended, edit the rule, and then repeat steps 1–7 until you achieve the desired result.
-
Apply a rule to all records
After testing a rule on one golden record and verifying that it is applied as intended, you can proceed to apply the rule to all golden records.
To apply a rule to all golden records
-
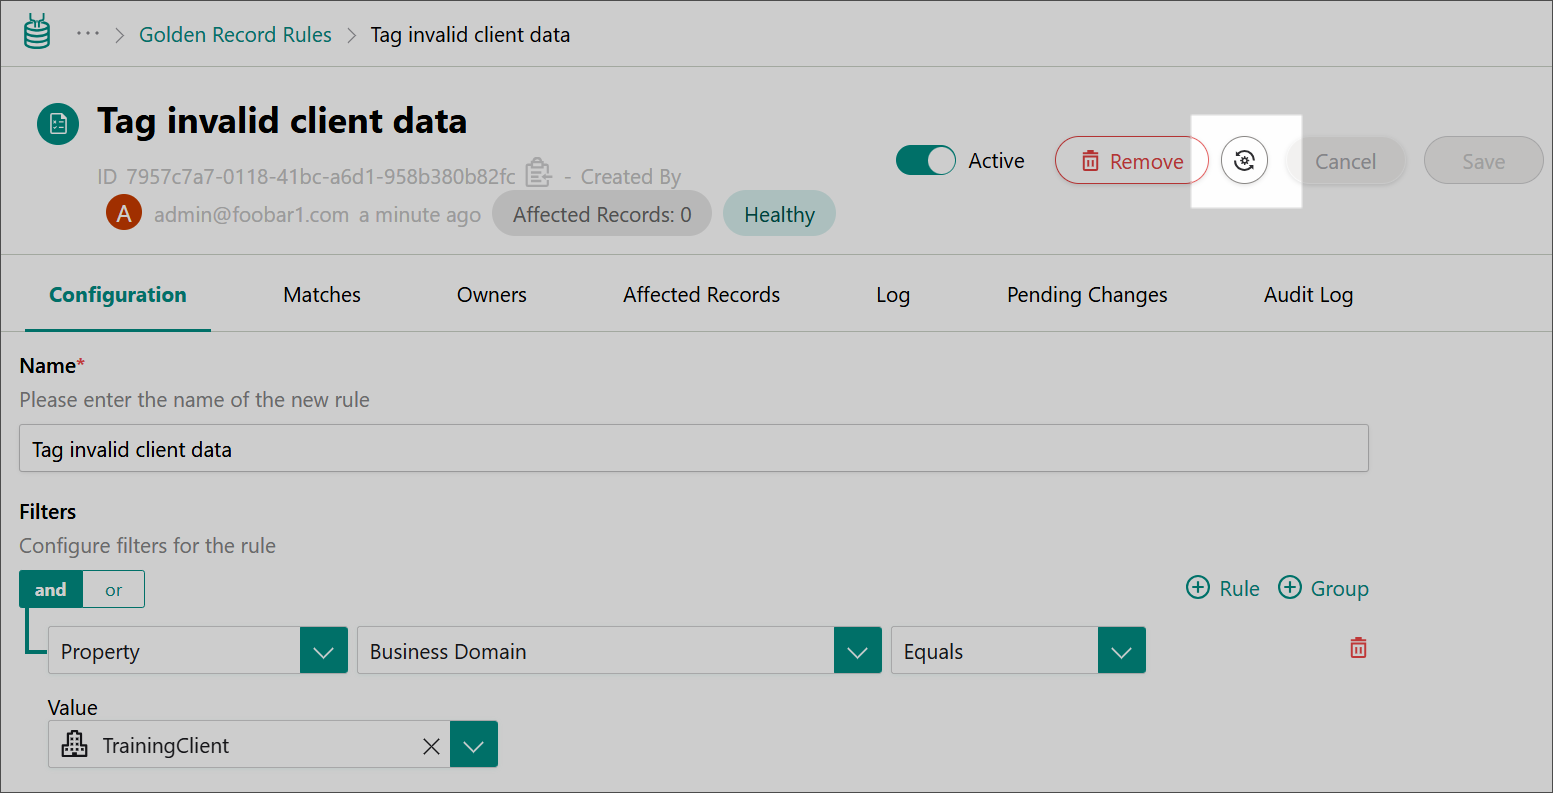
On the navigation pane, go to Rule Builder (or, alternatively, Management > Rule Builder).
-
Choose the needed type of rule, and then open the rule that you created.
-
In the upper-right corner of the page, select the reprocessing button.
-
Confirm that you want to reprocess all golden records that match the rule’s filters.
The reprocessing option available on the rule details page is applicable only to the records that match the rule’s filters.
You can track the reprocessing of records in the status bar. If, during the reprocessing, you decide to add another action to the rule or modify a filter, you can cancel the current reprocessing operation and make the needed changes.

-
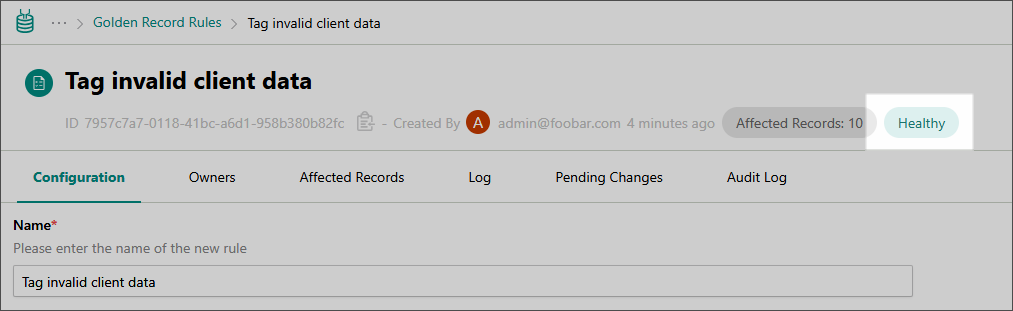
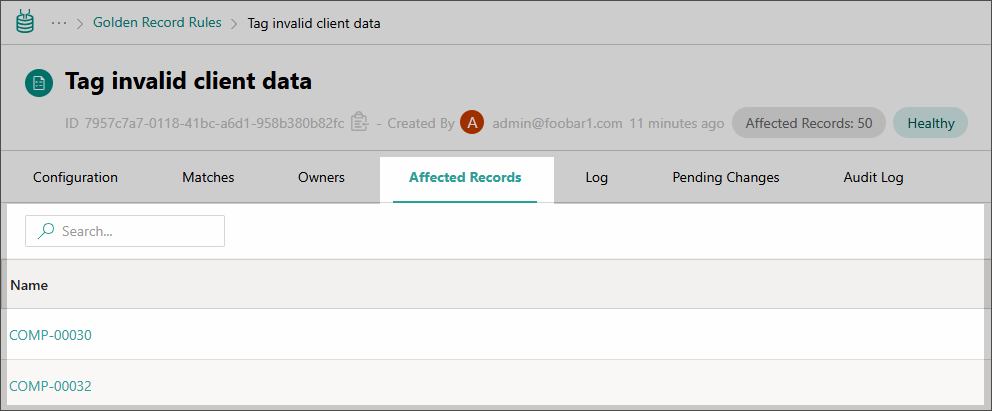
After the reprocessing is complete, check the rule status.
-
Healthy – the rule executed successfully:
-
Records associated with the rule are modified in accordance with the rule’s actions.
-
The Affected Records tab shows the list of modified records.
To view the changes made to a specific record, go to the History or Topology tab of the golden record page.
-
-
Unhealthy – issues occurred during rule execution. Open the rule execution logs to review the details and adjust the rule as needed.
-
There is an alternative approach to reprocess the records associated with the rule. It involves the GraphQL tool.
To reprocess records using GraphQL
-
On the navigation pane, go to Consume > GraphQL.
-
Enter a query to reprocess the records that should be affected by the rule.
For example, the following query will reprocess all records that contain the “customer.location” vocabulary key set to “New York”.
{ search(query: "customer.location:New York") { entries { actions { postProcess } } } } -
Execute the query.
After the query is executed, the rule’s action will be applied to the records matching the rule’s filter.
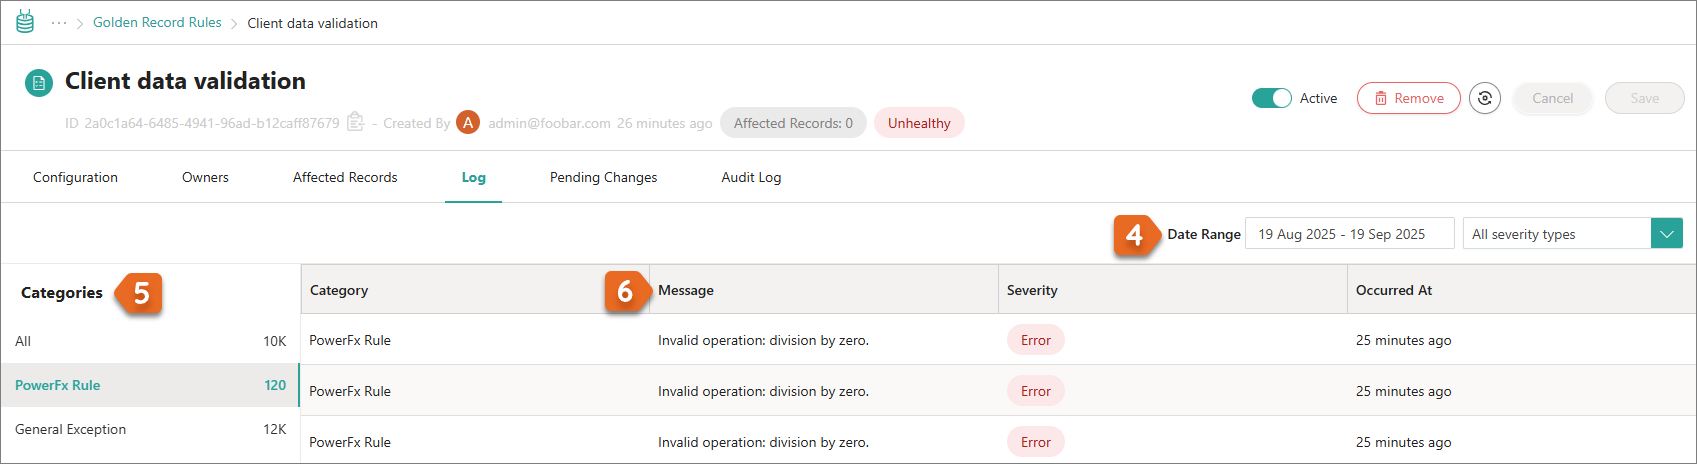
View rule execution logs
If there are issues in the rule configuration or when applying the rule to the golden records, corresponding information appears in rule execution logs. Use these logs to identify the root cause of an issue and adjust the rule as needed.
CluedIn stores logs only from the last unsuccessful rule execution. Historical logs from earlier executions are not retained.
Each log entry is assigned a severity type, which indicates the importance or seriousness of the logged event. Currently, CluedIn retains only logs of the Error severity type (messages about problems that prevented part of a rule from executing correctly). Support for additional severity types will be added in the future.
To view rule execution logs
-
On the navigation pane, go to Rule Builder (or, alternatively, Management > Rule Builder).
-
Choose the needed type of rule, and then open the rule that you created.
-
On the rule page, go to the Log tab.
-
In the upper-right corner of the page, select the period for which you want to view the logs.
-
Select the category of interest:
-
PowerFx Rule – contains logs about errors caused by the configuration of PowerFx formulas in the rule.
-
General Exceptions – contains logs about other errors that prevented the rule from executing correctly.
-
All – includes both types of information: errors related to PowerFx rules and general exceptions.
-
-
Review the Message column for details about why the issue occurred.