Pre-installation checklist
On this page
- Check qualification
- Check quota
- Register resource providers
- Configure firewall settings
- Configure network settings
- Analyze Azure policies and tagging
- Results
- Next steps
In this article, you will learn about the pre-installation processes that you must perform to ensure successful installation of CluedIn PaaS.
Check qualification
As a Microsoft Azure Administrator, you should have expertise in implementing, managing, and monitoring your organization’s Microsoft Azure environment.
Because CluedIn will be installed in your Azure resource group, you need to be the Owner of that resource group or at least the Contributor to that resource group.
In addition, you should have permission to purchase paid applications from the Azure Marketplace. Set the permission to Free + Paid to complete the purchase registration in the Azure Marketplace.

Navigate to Billing Policies in Azure Portal
To access Policies for a specific billing tenant in the Azure Portal:
- Open the Azure Portal.
- In the left-hand navigation menu, go to Cost Management.
- Click on Billing Profiles.
- Select the appropriate Tenant from the list.
- In the sidebar, choose Settings.
- Under Settings, click on Policies.
Note: Ensure you have the appropriate permissions to view or modify billing policies. If you don’t see these options, verify your directory and tenant context in the portal.
To learn how to allow purchases, see Azure Marketplace purchasing.
Check quota
You should perform a quota check to make sure that your subscription has enough quotas for creating VMs required for CluedIn clusters. Each cluster will contain multiple nodes which are made up of virtual machines (VM).
There are 3 common VM family types that CluedIn will create as part of the AKS node pools. Your subscription must have enough spare vCPU quota to provision different nodes. For details on the quota for each VM, see the table below.
| VM | Quota |
|---|---|
| System Pool (1 x Standard_DS2_v5) | At least 2 vCPUs in the Standard DSv5 Family vCPUs quota |
| General Pool (2 x Standard_D8s_v4) | At least 16 vCPUs in the Standard DSv4 Family vCPUs quota |
| Data Pool (3 x Standard D8as_v5) | At least 24 vCPUs in the Standard DASv5 Family vCPUs quota |
In addition, check if you have enough quota for your plan.
| Plan | Quota |
|---|---|
| Essential & PAYG | At least 8 vCPUs in the StandardDASv5Family quota |
| Professional | At least 16 vCPUs in the StandardDASv5Family quota |
| Elite | At least 32 vCPUs in the StandardDASv5Family quota |
And finally, ensure that the region you’re deploying to also has enough quota. This is called ‘Total Regional vCPUs’ in Azure and must be equal to or greater than the sum of all vCPUs being deployed.
You can check if you have enough quota by running a verification script.
If the quota is not available, then the installation will fail.
Register resource providers
Before using a resource provider, register your Azure subscription for that specific resource provider.
Make sure that the following resource providers are registered:
- Microsoft.Cache
- Microsoft.Capacity
- Microsoft.Compute
- Microsoft.ContainerService
- Microsoft.EventHub
- Microsoft.KeyVault
- Microsoft.ManagedIdentity
- Microsoft.Network
- Microsoft.OperationalInsights
- Microsoft.OperationsManagement
- Microsoft.Resources
- Microsoft.Storage
- Microsoft.Sql
You can register the resource providers in two ways: manually in the Azure portal and automatically by running a script.
After you register the resource providers, run the verification script to make sure that all resource providers are registered.
Manual registration of resource providers
This section contains the step-by-step procedure for manual registration of resource providers in the Azure portal.
To register resource providers
-
In the Azure portal, find and select the subscription where you need to install CluedIn.
For more information about the subscription, see Get subscription and tenant IDs in the Azure portal.
-
On the left menu, under Settings, select Resource providers.
-
One by one, find and select the resource providers that you want to register, and then select Register.
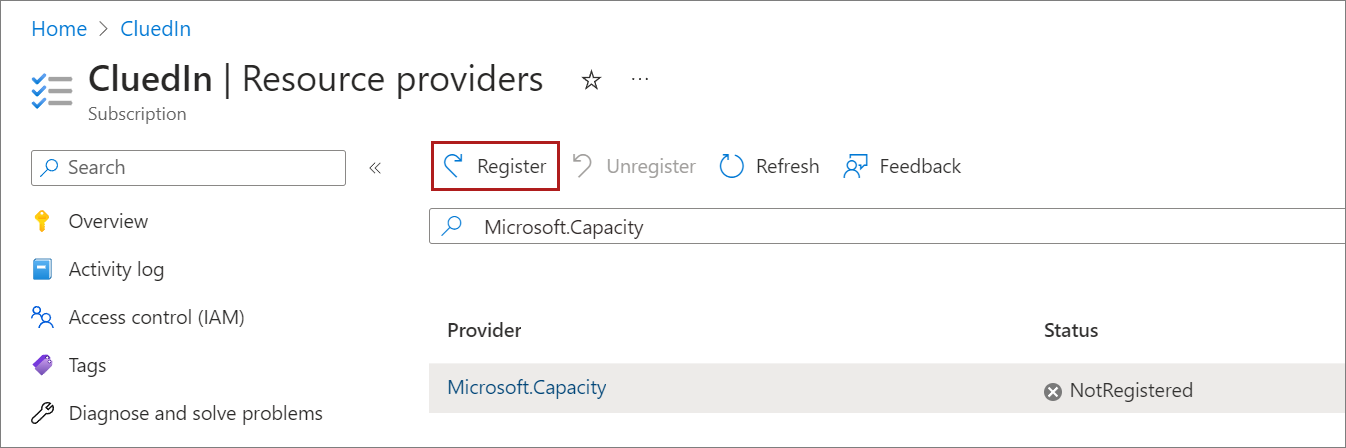
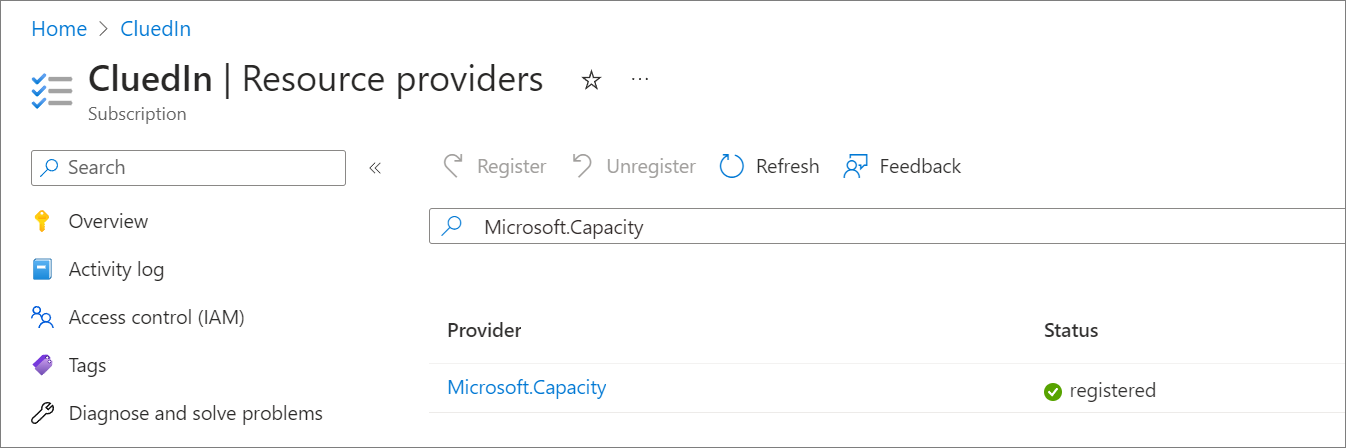
Wait until the status of the resource provider is changed from Registering to Registered.
-
Run the verification script to make sure that all resource providers are registered.
For more information about registering resource providers, see Azure documentation.
Automatic registration of resource providers
If you want a faster way to register the needed resource providers, run the script for automatic registration of resource providers.
Prerequisites
-
PowerShell 7. We recommend installing PowerShell via Winget:
winget search Microsoft.PowerShell. For more details, see Installing PowerShell on Windows. -
Azure CLI. We recommend installing Azure CLI via Winget:
winget install -e --id Microsoft.AzureCLI. For more details, see Install Azure CLI on Windows. -
Your Azure subscription ID. For more details, see Find your Azure subscription.
To run the script for registering resource providers
-
Download this script.
-
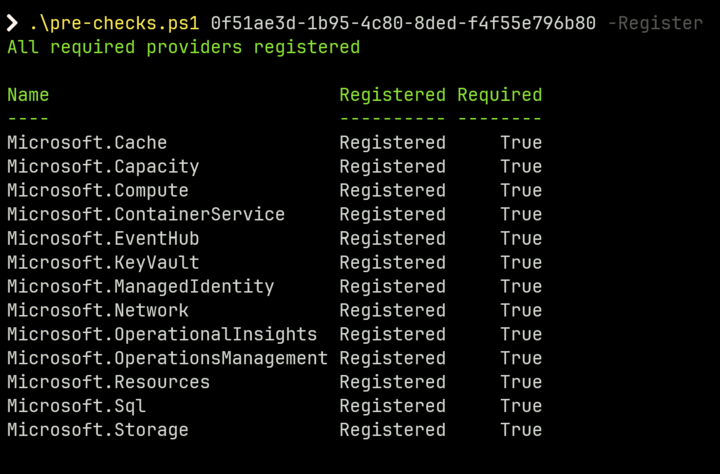
Open your PowerShell terminal and run the following:
.\pre-checks.ps1 <subscrioptionId> -Register
# e.g. .\pre-checks.ps1 abc68d12-8e99-4890-b3a0-ca25816b1c26 -Register
You will get an autput similar to the following.
Verification script
The verification script checks if you have enough quota and if all required resource providers are registered.
Prerequisites
-
PowerShell 7. We recommend installing PowerShell via Winget:
winget search Microsoft.PowerShell. For more details, see Installing PowerShell on Windows. -
Azure CLI. We recommend installing Azure CLI via Winget:
winget install -e --id Microsoft.AzureCLI. For more details, see Install Azure CLI on Windows. -
Your Azure subscription ID. For more details, see Find your Azure subscription.
-
Azure region that you will select during installation.
To run the verification script
- Download this verification script.
- Open your PowerShell terminal and run the following:
.\check.ps1 -SubscriptionId <subscrioptionId> -Location <location>
# e.g. .\check.ps1 -SubscriptionId abc68d12-8e99-4890-b3a0-ca25816b1c26 -Location uksouth
As a result, you will get a file named results_location.json that will be stored in the same directory. The file will contain the details about the quota and the status of resource providers.
Example output of quota check
"Location": "westeurope",
  "Quotas": [
    {
      "Name": "Standard Dv4 Family vCPUs",
      "Plan": "All",
      "Required": 40,
      "Available": 50,
      "IncreaseRequired": false
    }
Example output of resource providers check
"Providers": [
    {
      "Name": "Microsoft.Authorization",
      "Registered": "Registered"
    },
    {
      "Name": "Microsoft.Cache",
      "Registered": "Registered"
    }
Configure firewall settings
Your Azure Firewall should cover the following:
- Default AKS functionality – logs and pods should be able to see Kubernetes API Server (as recommended in Outbound network and FQDN rules for AKS clusters).
- CluedIn resource access – resources needed for the CluedIn installation.
For the list of firewall rules that should be added to your Azure Firewall, see Configure firewall.
If the rules have not been added, the installation will fail.
Configure network settings
CluedIn is very flexible in terms of network configuration and comes out of the box with a new vnet with a predefined address space and subnet. CluedIn is isolated out of the box, and this should work for most setups, but we do allow granular control over the network to support zero-trust and integrations.
If you prefer to use an existing vnet or would like to do some advanced configuration, please contact one of our infrastructure experts before installation to ensure it’s properly implemented as it can be challenging to change post-deployment.
Define VNet
During the installation process, you will have the option to update the vnet from the default address space of 10.0.0.0/8 and a subnet 10.0.0.0/16 for the Azure Kubernetes Service.
If you have an existing VNet and you want to reuse it for CluedIn installation, contact one of our infrastructure experts for assistance. You can specify the existing VNet in the Network and monitoring step of CluedIn installation.
Analyze CluedIn network configuration
The following diagram shows default CluedIn network configuration after installation.
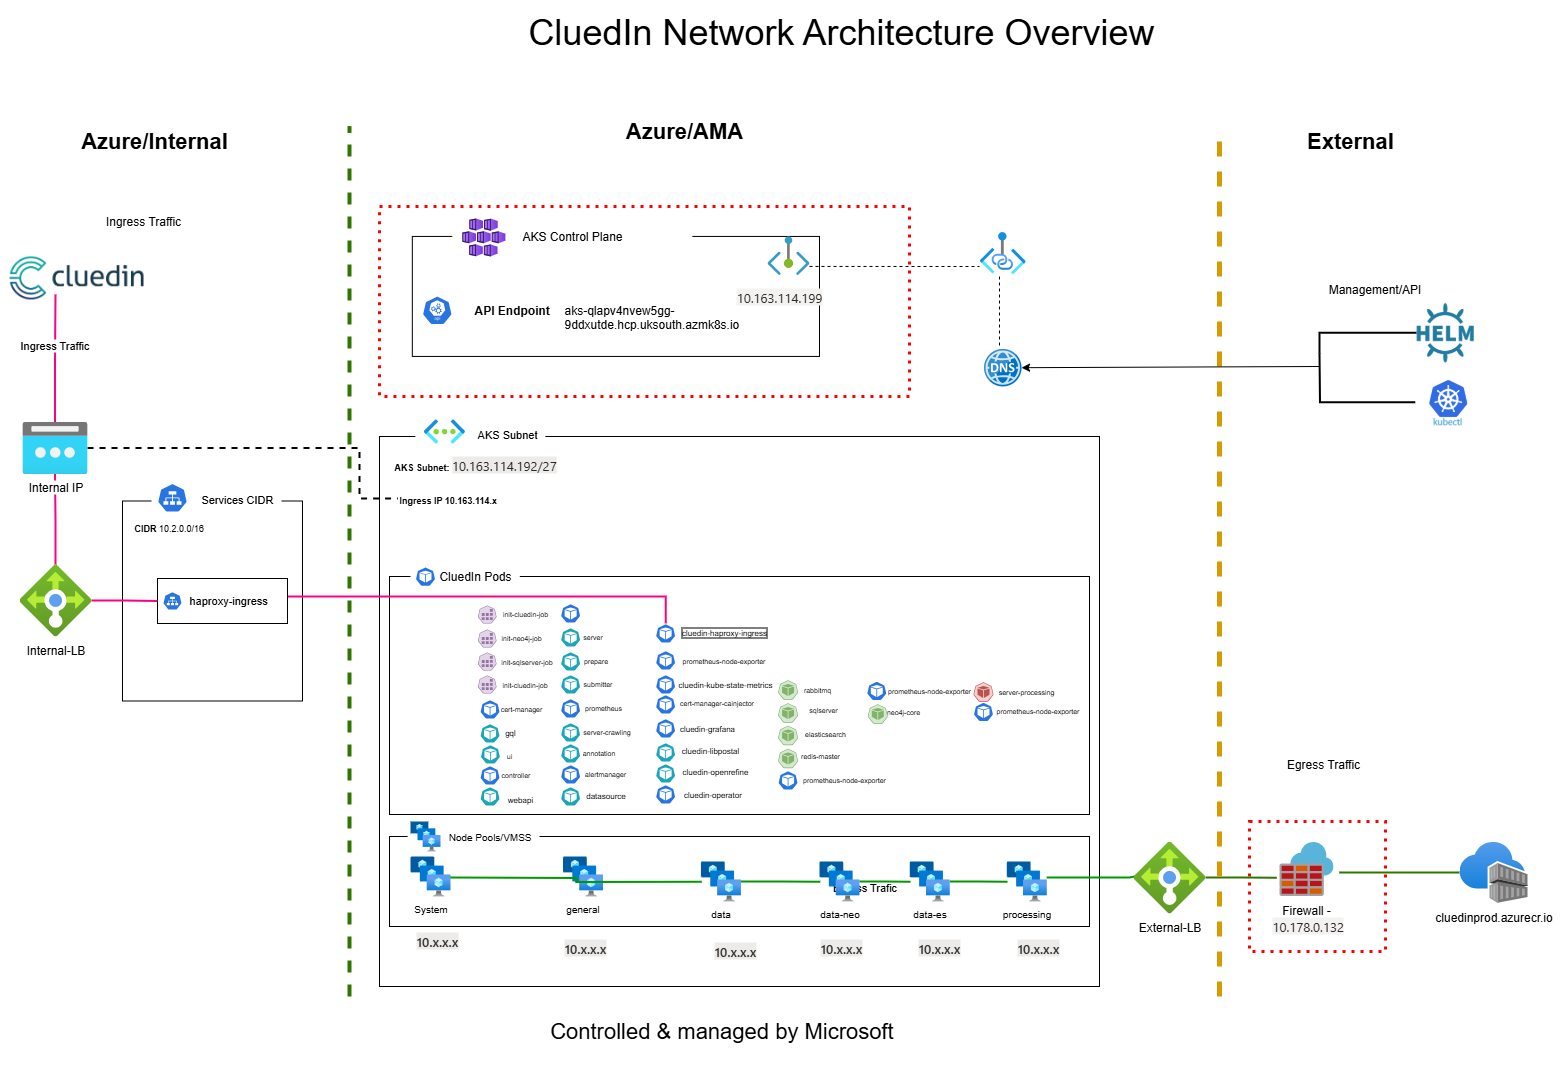
The deployed Azure Kubernetes Service is deployed with a single Azure Load Balancer that is used for both ingress and egress traffic. It is possible to update this post-deployment so that access is only possible via internal vnet integration, but it does require a number of steps.
If you would like support on this, please reach out to one of CluedIn’s infrastructure engineers to assist you with this change.
More information regarding networking can be found in Advanced network configuration.
Analyze Azure policies and tagging
The installation wizard supplies consumers to add resource tags during runtime. Please be aware of how tagging works before going through the installation as additional steps may be required.
Tags supplied at runtime will apply to the deployed CluedIn resources. This includes the AKS cluster, key vault, virtual network, log analytics, and a few other resources.
It does not apply to the managed resource group, the AKS node resource group, or the managed application resource itself. This is a limitation of how the Marketplace Applications works.
If your tenant has comprehensive tagging, it is recommended to add a temporary exemption for the subscription at install time, and then add tags post-deployment.
Results
- You are qualified to perform the CluedIn installation process, and you have all the required permissions.
- Your Azure subscription can sustain the required quota.
- You have registered the required resource providers.
- Your firewall is ready and configured to support the installation of CluedIn.
- You have planned your network architecture.
- Your security team is comfortable with CluedIn having co-ownership of the deployed resources.
Next steps
Start the CluedIn installation process as described in our Installation guide.