Prerequisites to using AI agents
On this page
- Enable the AI Agents feature
- Configure AI settings
- Configure organization-wide settings for AI agents
In this article, you will learn about the steps required to start using the AI agents in CluedIn. Because AI agents depend on platforms that provide access to large language models (LLMs), you need to supply the details of the platform, the deployed model, and the model endpoint configuration for your specific use case.
To use AI agents in CluedIn, take the following steps:
Enable the AI Agents feature
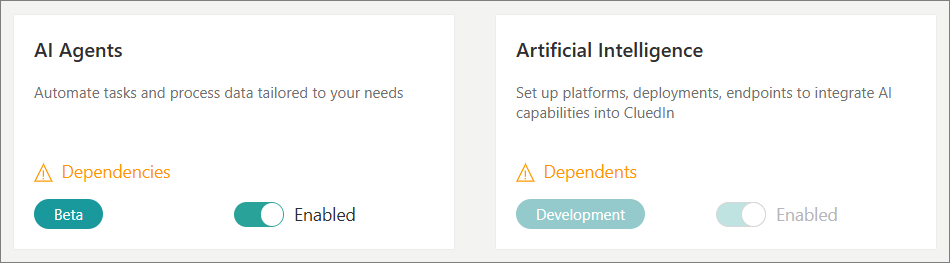
The AI Agents feature is controlled by feature flags and is not enabled by default. You must enable the feature to use it.
To enable the AI Agents feature
-
On the navigation pane, go to Administration > Feature Flags.
-
Locate the AI Agents feature and turn on the corresponding toggle.
Once you enable the AI Agents feature, the Artificial Intelligence feature will become enabled by default.
The following takes place:
-
The AI Agents item becomes available on the navigation pane.
-
The AI Agents feature becomes available in the Management module.
-
The Artificial Intelligence feature becomes available in the Administration module.
-
Configure AI settings
The AI Agents feature requires you to define the configuration for the following:
-
Platform – that is, the environment where your AI model lives. For example, in Azure, the platform is the Azure OpenAI Service.
-
Deployment – that is, a specific version of a model you want to use (for example, gpt-35-turbo or gpt-4.1).
-
Endpoint – that is, the address (URL) where your deployed model can be accessed.
Configure a platform
A platform is an external AI service provider that hosts and manages the AI models used by agents. The platform defines the foundational capabilities and APIs that agents interact with. An example of a platform is Azure OpenAI Service.
To configure a platform
-
On the navigation pane, go to Administration > Artificial Intelligence, and then select Platforms.
-
Select Create Platform.
-
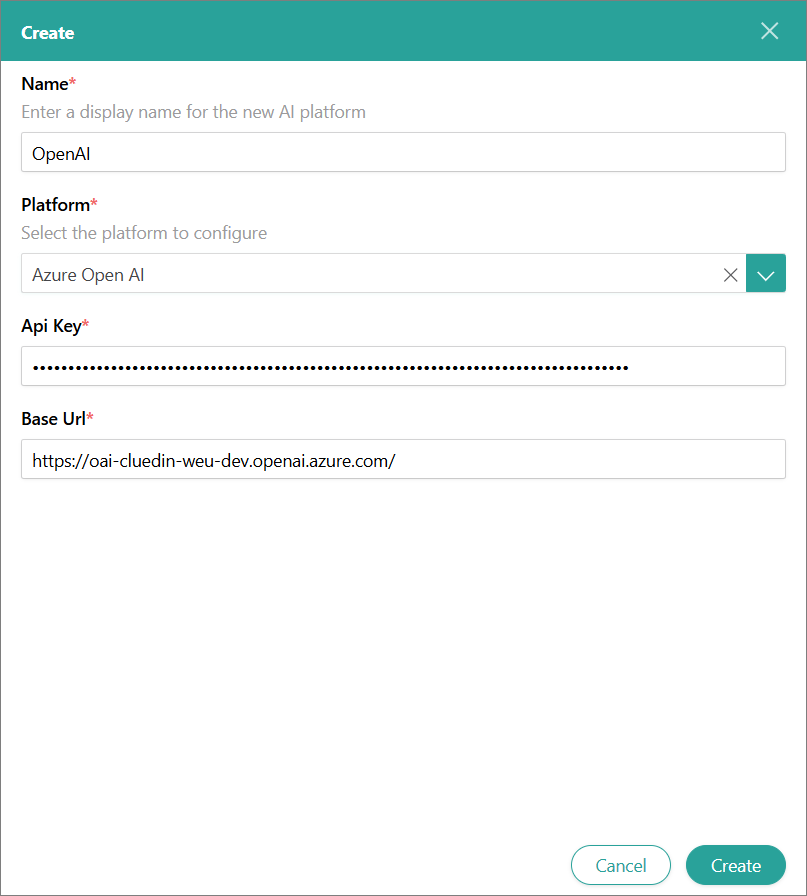
Enter a user-friendly Name of the platform.
-
In the Platform list, select one of the available platforms. Currently, only the Azure Open AI platform is available.
-
Provide the API Key and Base URL so that CluedIn can authenticate and send requests to the platform hosting the AI models.
-
Select Create.
The platform is created, and you can proceed to configure the deployment.
Configure a deployment
A deployment is a specific instance or configuration of an AI model (such as GPT-3.5 or GPT-4.1) hosted on a platform that AI agents use to perform their tasks. It defines how and where the AI model runs, including the model version, resource allocation, and any customizations applied.
To configure a deployment
-
On the navigation pane, go to Administration > Artificial Intelligence, and then select Deployments.
-
Select Create Deployment.
-
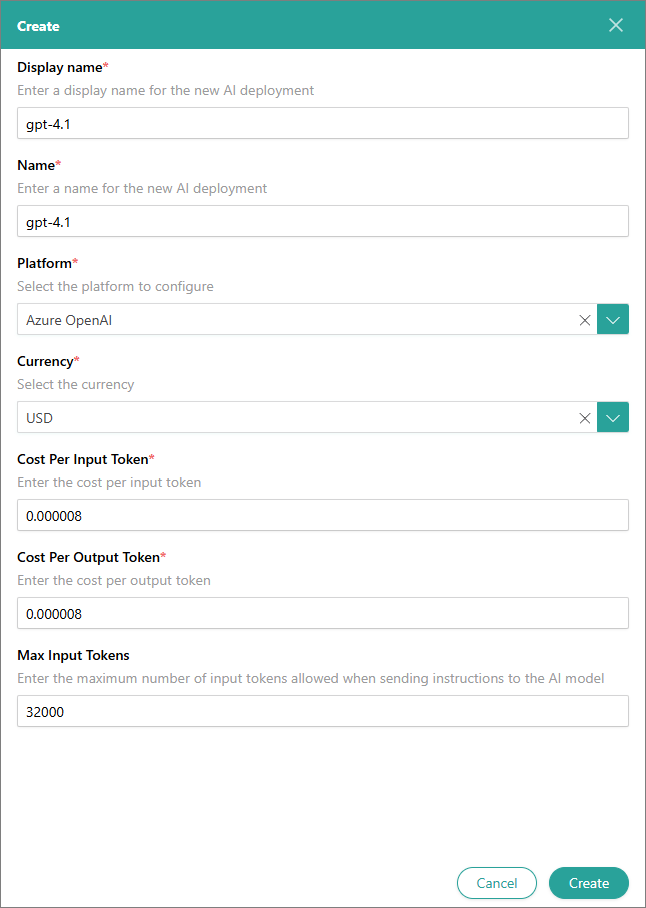
Enter a user-friendly Display Name of the deployment.
-
Enter the Name of the deployment as it appears in the platform.
-
Select the Platform that hosts the deployment.
-
Select the Currency in which the model usage is billed. Then, enter the Cost Per Input Token and the Cost Per Output Token.
If the cost per token is free, enter 0 in the corresponding field.
-
In Max Input Tokens, enter the maximum number of input tokens allowed when sending instructions to the AI model.
-
Select Create.
The deployment is created, and you can proceed to configure the model endpoint.
Configure a model endpoint
An endpoint is the address (URL) through which AI agents communicate with the deployed AI model. It serves as the access point for sending requests and receiving responses from the AI service. Typically, each deployment is associated with a unique endpoint, establishing a one-to-one mapping between them.
To configure an endpoint
-
On the navigation pane, go to Administration > Artificial Intelligence, and then select Endpoints.
-
Select Create Endpoint.
-
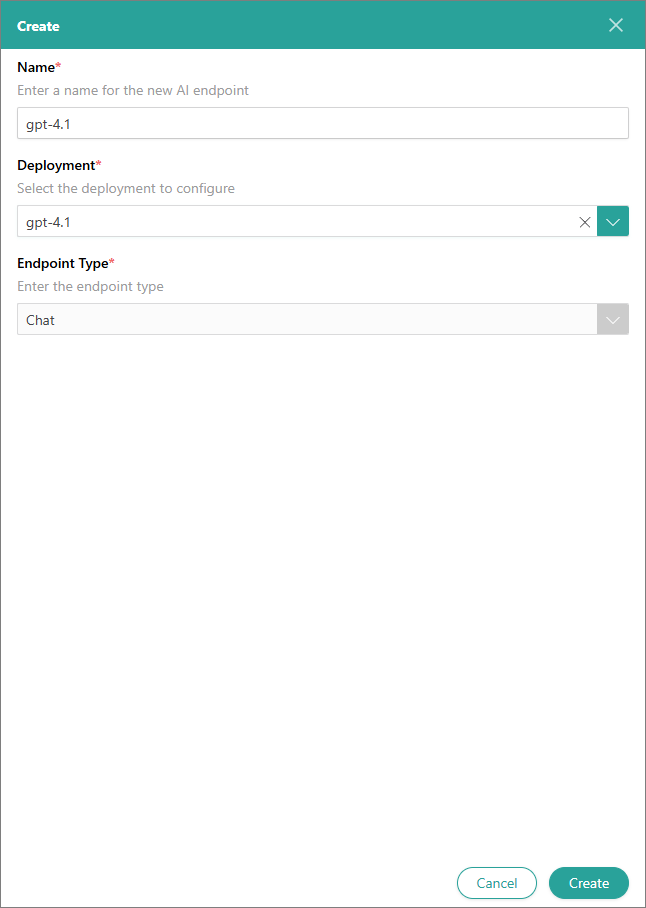
Enter a user-friendly Name of the endpoint.
-
Select the Deployment (model) that is associated with the endpoint.
The Endpoint Type defines the kind of service the model endpoint should handle. Currently, only the Chat type is available – it supports conversational interactions with context.
-
Select Create.
The model endpoint is created, and you can proceed to create AI agents and jobs.
Configure organization-wide settings for AI agents
Organization-wide settings apply to all AI agents and AI agent jobs that exist within your organization, regardless of who created an AI agent or an AI agent job.
To configure organization-wide settings for AI agents
-
On the navigation pane, go to Administration > Settings.
-
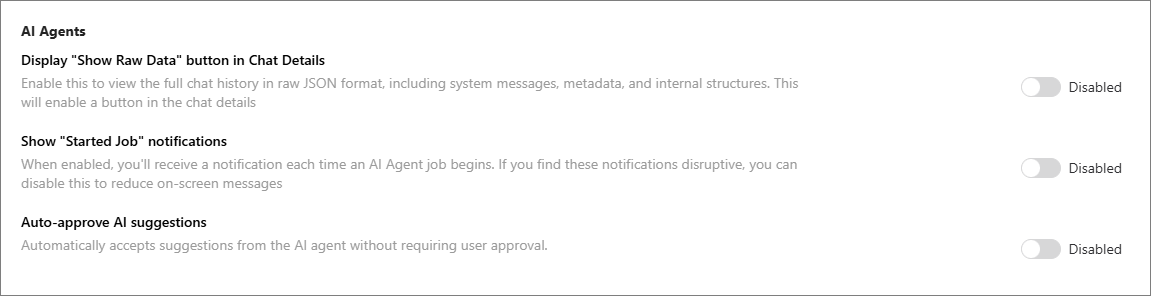
Scroll down the page until you reach the AI Agents section.
-
Configure the following settings:
-
Display “Show Raw Data” button in Chat Details – when enabled, this option adds the Show Raw Data button to the AI agent job page (Configuration tab > Logs section). The button reveals the raw JSON data for requests and responses exchanged between CluedIn and the LLM.
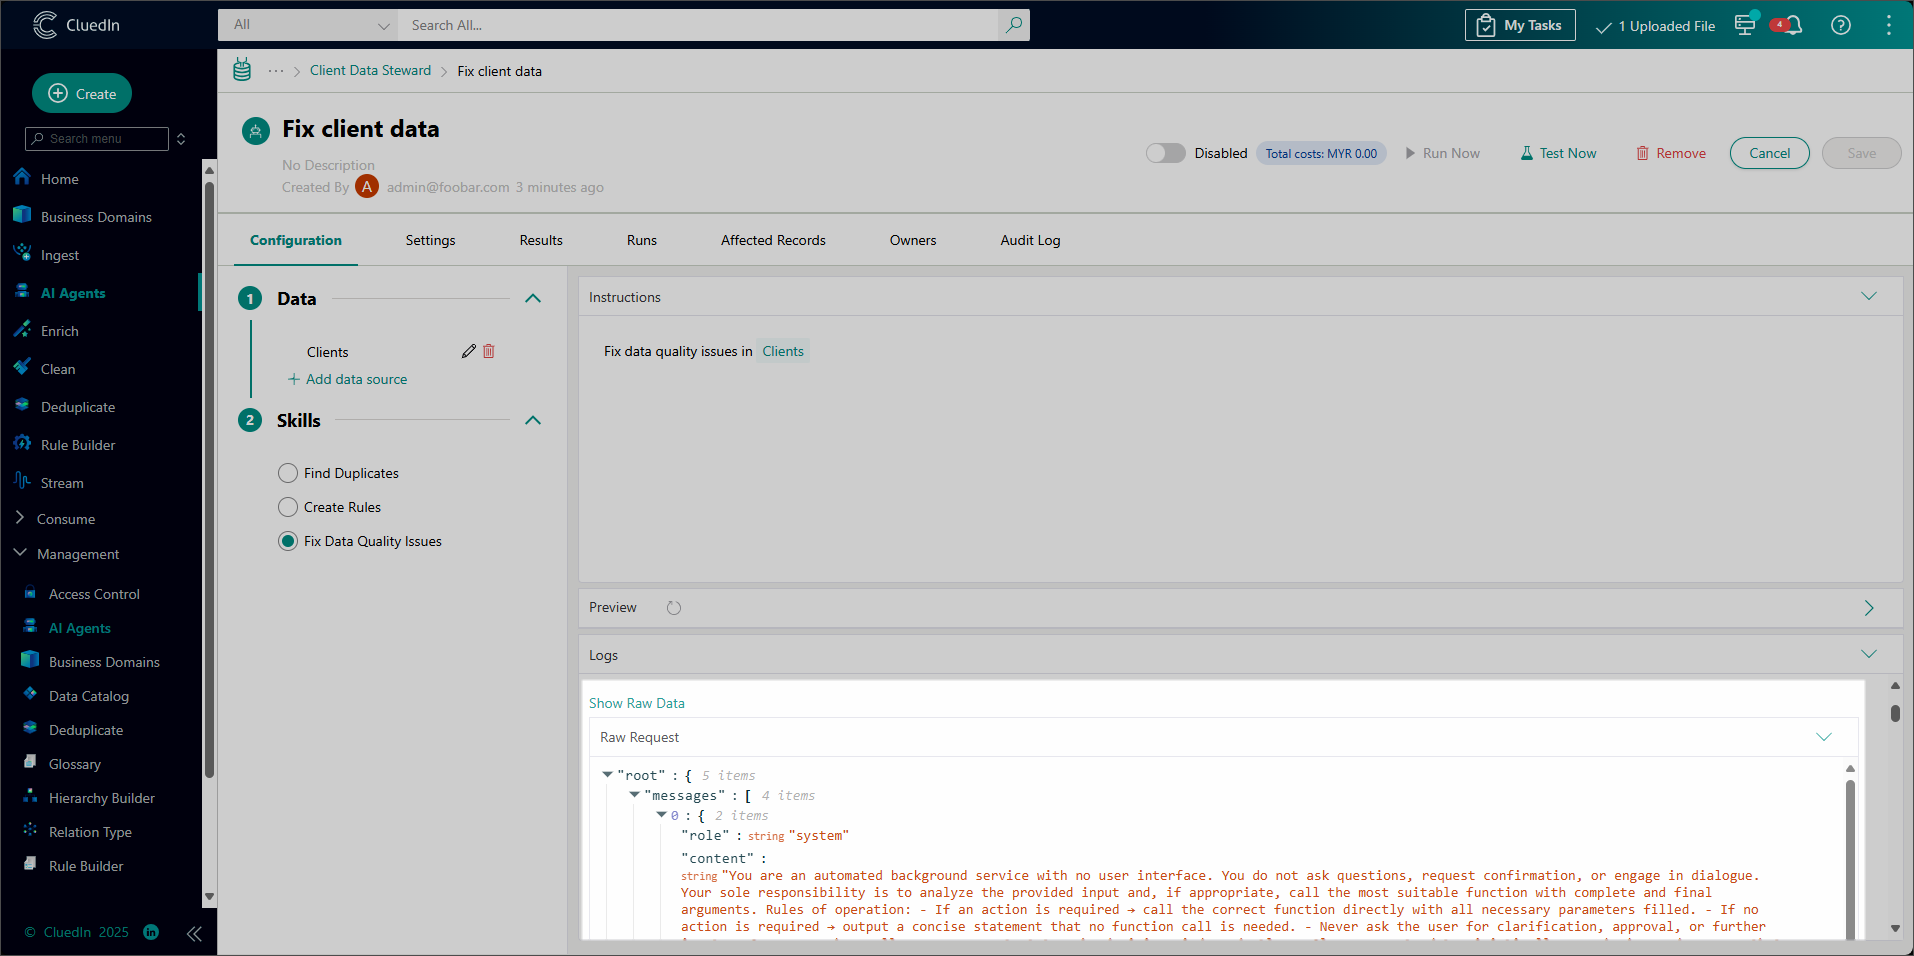
This feature is useful for fine-tuning prompts but is best suited for users with a strong technical background in LLMs and JSON.
-
Show “Started Job” notification – when enabled, the user will receive a notification every time they start an AI agent job.
-
Auto-approve AI suggestions – when enabled, all suggestions returned by an AI agent will be automatically approved. The users will not need to manually review and approve/reject the suggestions.
-