Tag monitoring
On this page
- Enable the Tag Monitoring functionality
- Monitor tag usage
- Fix tagged records with AI
- Create a Clean project for tagged records
- Add new tags
Tags are an essential mechanism that helps you flag golden records that have data quality issues. With the Tag Monitoring module, you can gain insight into tag usage across CluedIn. In particular, you can monitor the following information:
-
List of tags used across CluedIn.
-
History of tag usage over time.
-
Statistics on the numbers of golden records tagged.
-
List of records tagged.
In addition to providing insight, the Tag Monitoring module also allows you to act on the information presented to you. In particular, you can do the following:
-
Create a clean project for the tagged records.
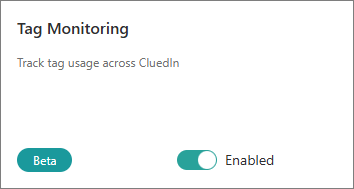
The tag monitoring functionality is not enabled by default. To use it, you must first enable it.
Enable the Tag Monitoring functionality
The tag monitoring functionality is not enabled by default. To use it, you must first enable it.
To enable the tag monitoring functionality
-
On the navigation pane, go to Administration > Feature Flags.
-
On the Tag Monitoring card, set the toggle to Enabled.
You can now proceed to monitor tag usage.
Monitor tag usage
With the Tag Monitoring module, you can monitor the following information:
-
List of most-used tags, based on the number of records flagged with them.
-
List of all tags used—including the following: history of tag usage over time, statistics on the number of golden records tagged, and the list of records tagged.
This article explains how to monitor both types of information.
To monitor the most-used tags
-
On the navigation pane, go to Home.
-
Scroll down until you reach the Golden Records Overview section.
-
Review the Top tags by golden record count chart. It displays up to 5 most-used tags based on the number of records that are currently flagged with them.

If the chart is not available, this may mean that the Tag Monitoring functionality is not enabled.
-
Select a tag to view detailed information about it. You are now redirected to the Tag Monitoring module, where that tag is already selected in the list for you. For details on how to use the Tag Monitoring module, see the following procedure.
To monitor all tags used
-
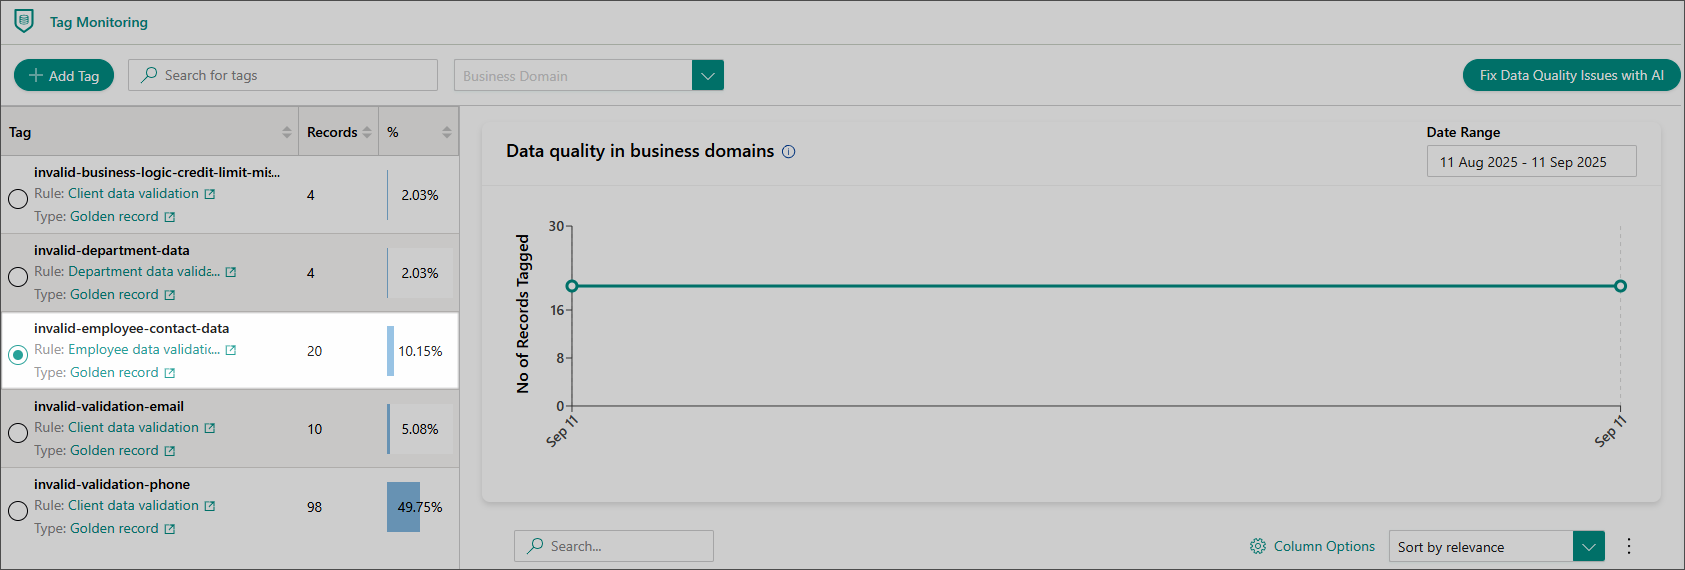
On the navigation pane, go to Governance > Tag Monitoring.
If the Tag Monitoring module is not available, this may mean that the tag monitoring functionality is not enabled.
-
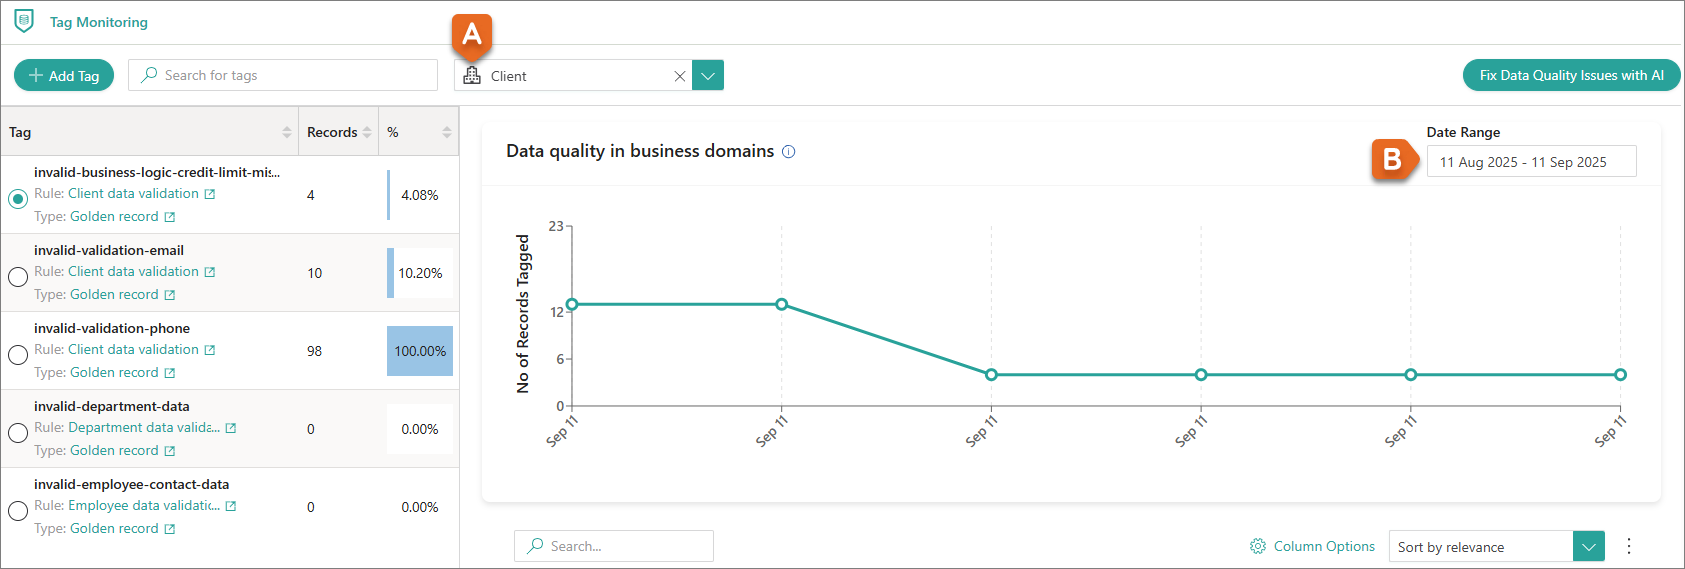
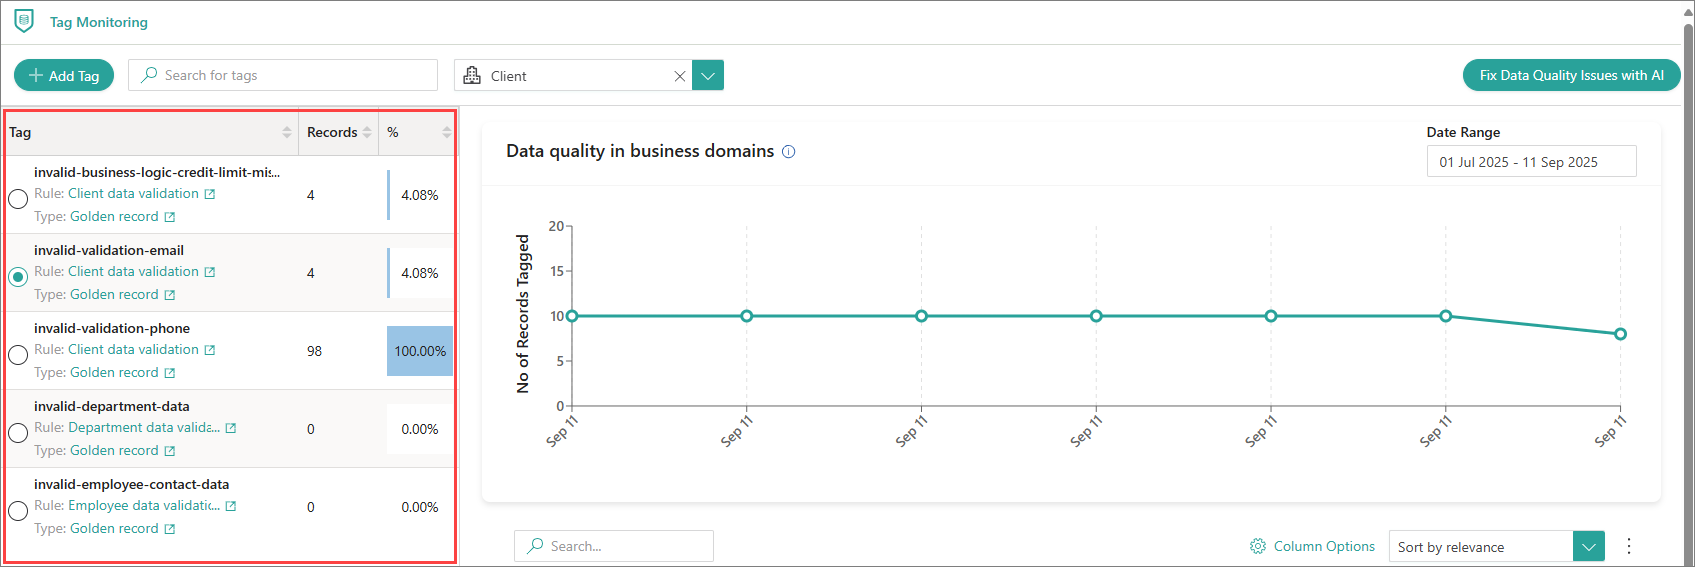
By default, the Tag Monitoring page shows the data for all business domains and for the last month going back from today.
If needed, select the following:
-
Business domain of interest.
-
Period of interest.
-
-
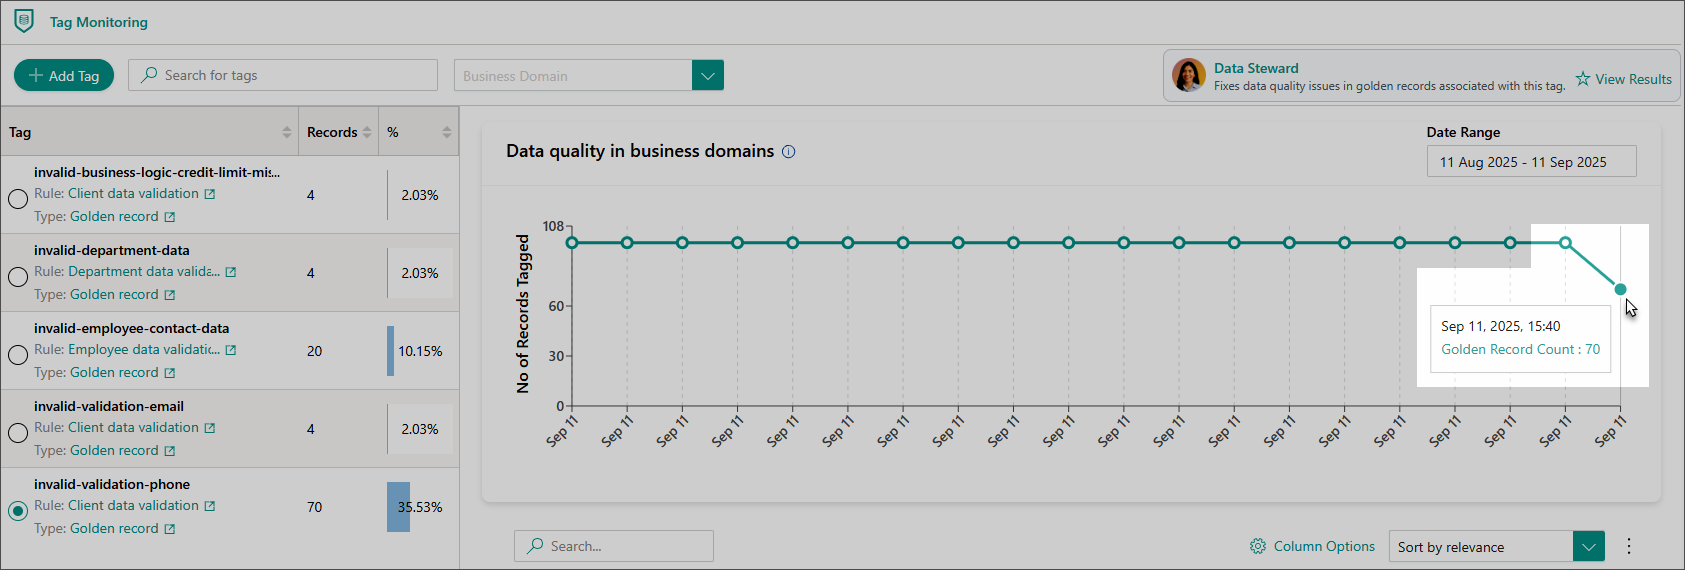
On the tags panel on the left, select the tag of interest.
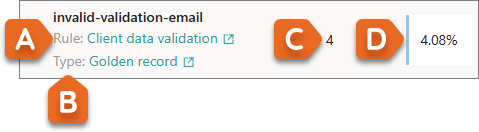
The tags panel shows the following information about a tag:
-
The rule that was used to apply this tag.
-
Rule type (data part rule or golden record rule).
-
The total number of golden records that are currently flagged with this tag.
This number takes into account the currently selected domain. For example, if there are a total of 100 records flagged, and 20 of them are from the /Client business domain, they you will see the number 20 when you select the /Client domain. Otherwise, you will see the number 100.
-
The percentage of golden records that are currently flagged with this tag.
-
If you selected a business domain in step 2a, then the percentage refers to the number of tagged records only within that domain.
-
If no domain is selected, the percentage refers to the number of tagged records compared to all records in CluedIn.
-
-
-
In the Data quality in business domains chart on the right, review the information about the tag usage over time. To view the number of records tagged at a specific time, hover over the corresponding data point in the chart.
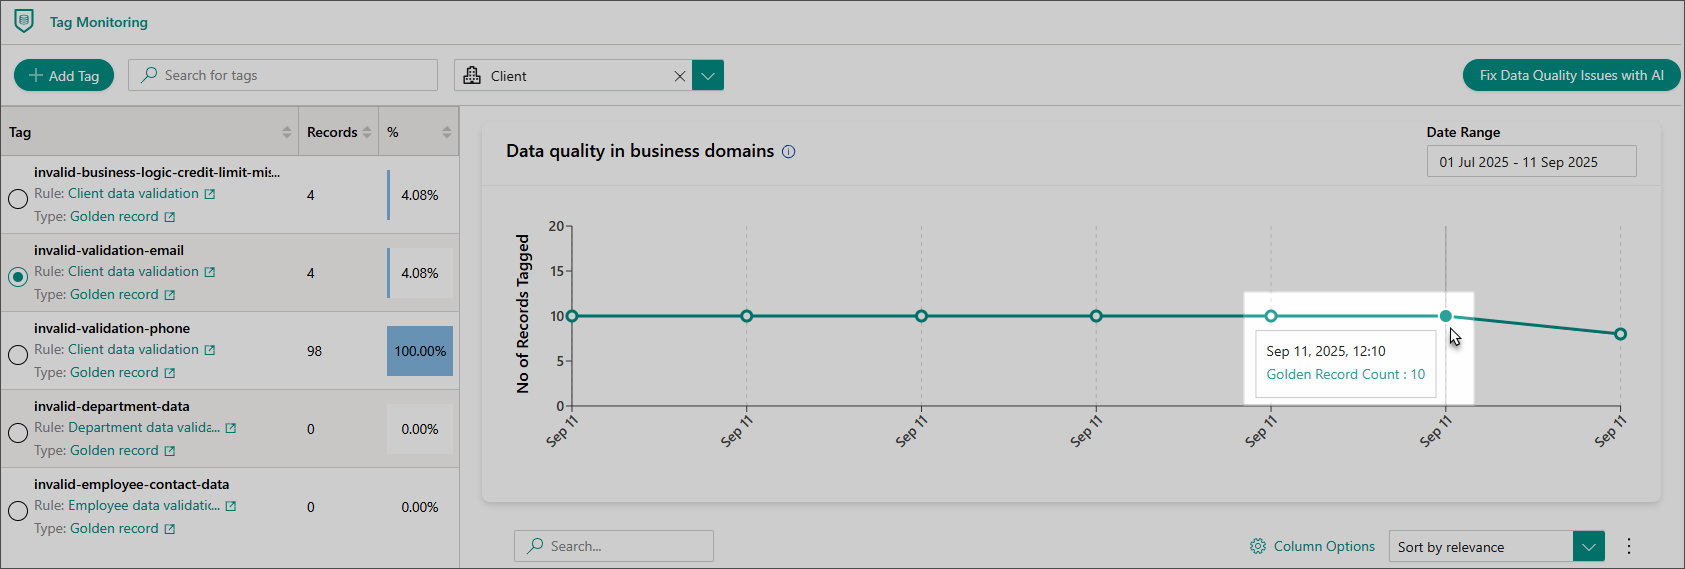
By default, the data in the chart refreshes every 15 minutes. Your administrator can change this interval in Administration > Settings > High Time Resolution Metric interval in minutes.
-
At the bottom of the page, review the list of golden records tagged with the selected tag.
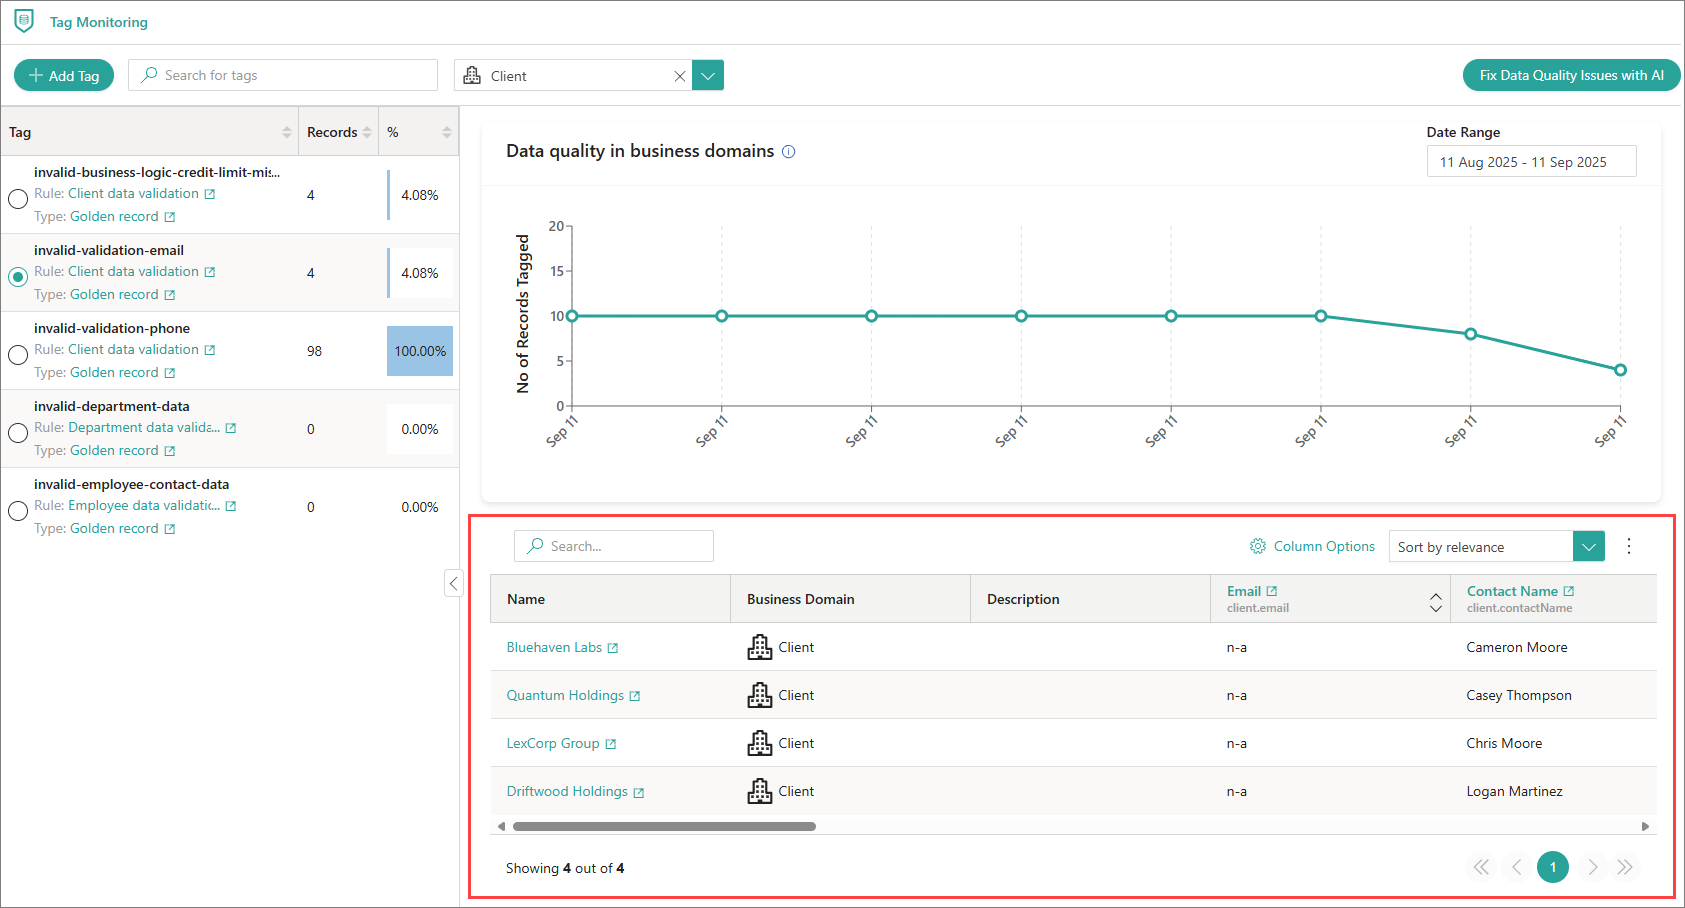
If needed, adjust how the list is displayed:
-
Select which properties should appear in the table. To do this, above the table, select Column Options. Then, select the needed properties or vocabulary keys. For details on how to work with column options, see Search.
-
By default, the records in the table are sorted by relevance. To sort the records in a different way, above the table, expand the sorting dropdown menu, and then select the needed sorting option.
-
-
Act on the tagged golden records. You can perform the following actions:
-
Create a clean project for the records tagged.
-
Add new tags if the current ones are not sufficient.
Fix tagged records with AI
You can leverage AI agents to fix the golden records flagged with a specific tag.
Prerequisites
- The AI agents feature must be enabled. For details, see Prerequisites to using AI agents.
To fix tagged records with AI
-
On the navigation pane, go to Governance > Tag Monitoring.
If the Tag Monitoring module is not available, this may mean that the tag monitoring functionality is not enabled.
-
On the tags panel on the left, select the tag of interest.
-
In the upper-right corner of the page, select Fix Data Quality Issues with AI.
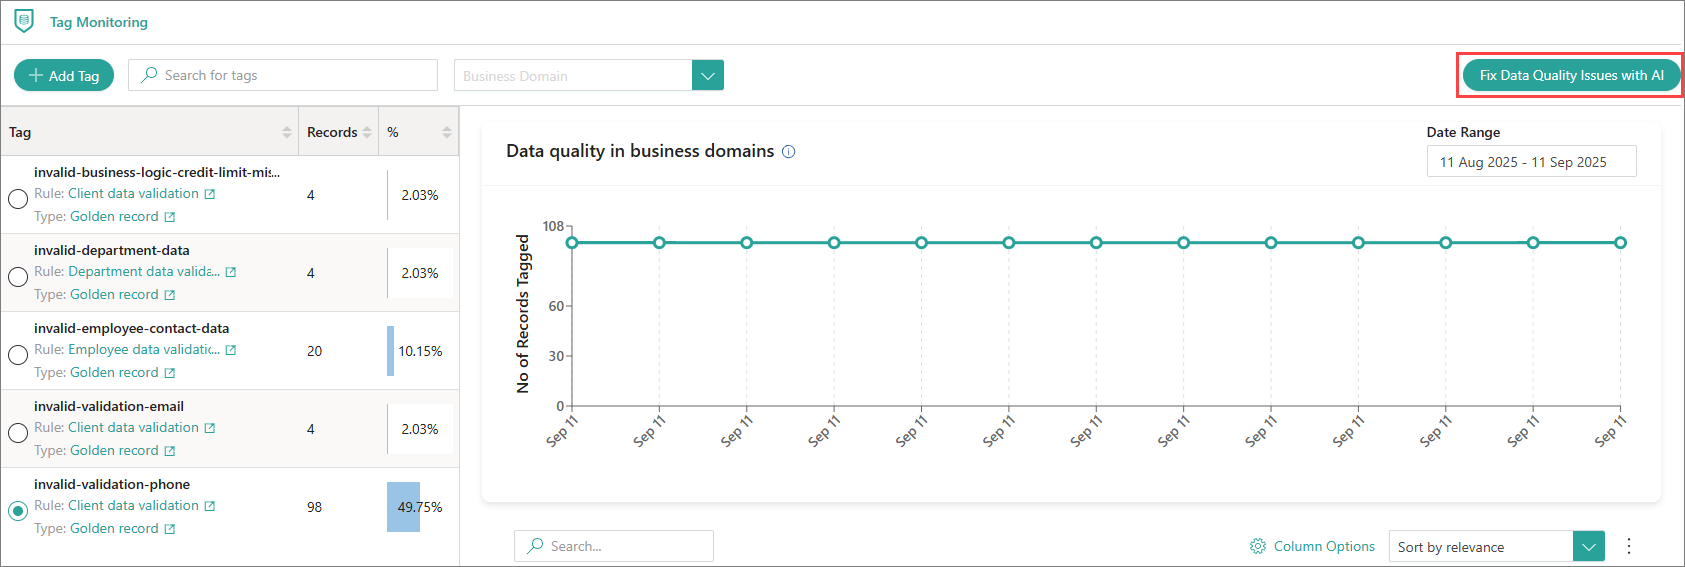
If the Fix Data Quality Issues with AI button is unavailable, this may mean that the AI agents feature is not enabled.
The Fix Data Quality Issues with AI panel opens on the right of the page.
-
On the Fix Data Quality Issues with AI panel, do the following:
-
Select an AI Agent and an Endpoint that are most suitable to fix the tagged records.
-
Use the Active toggle to set whether the job should be enabled by default. You can update this setting later on the job page.
-
Select Create AI Job.
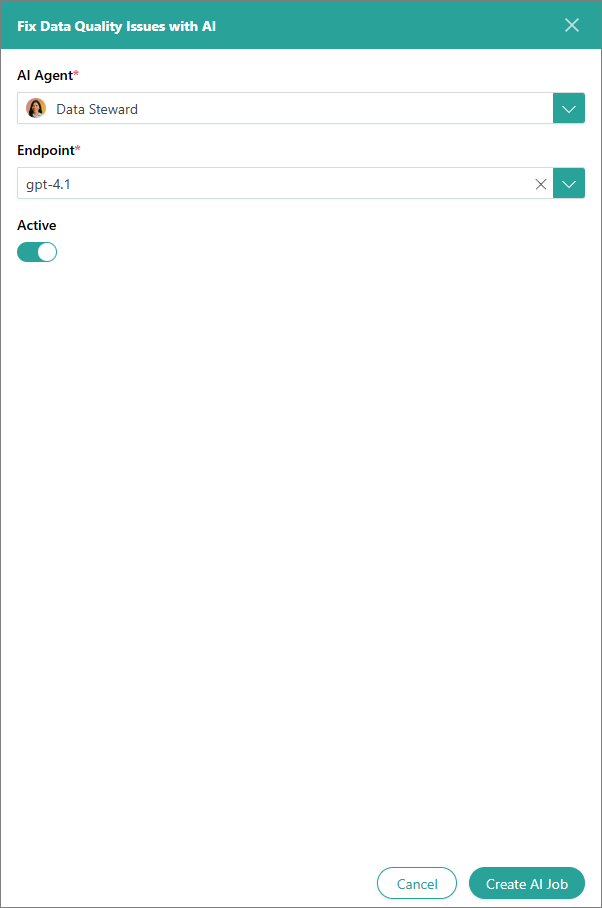
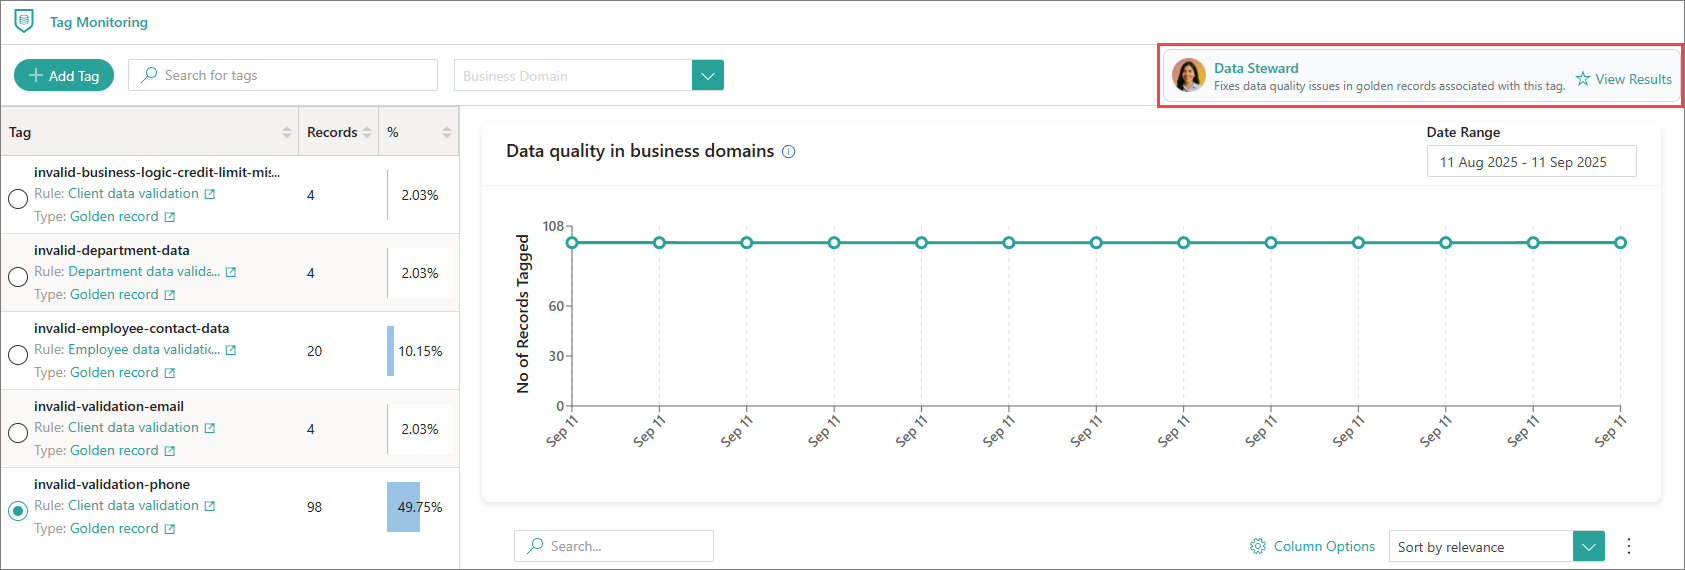
An AI agent job is created to handle the selected tagged records. A corresponding label appears in the upper-right corner of the page.
At this point, the AI agent did not analyze or change the records in any way.
-
-
Configure, test, and run the AI agent job:
-
In the upper-right corner of the page, select View Results.
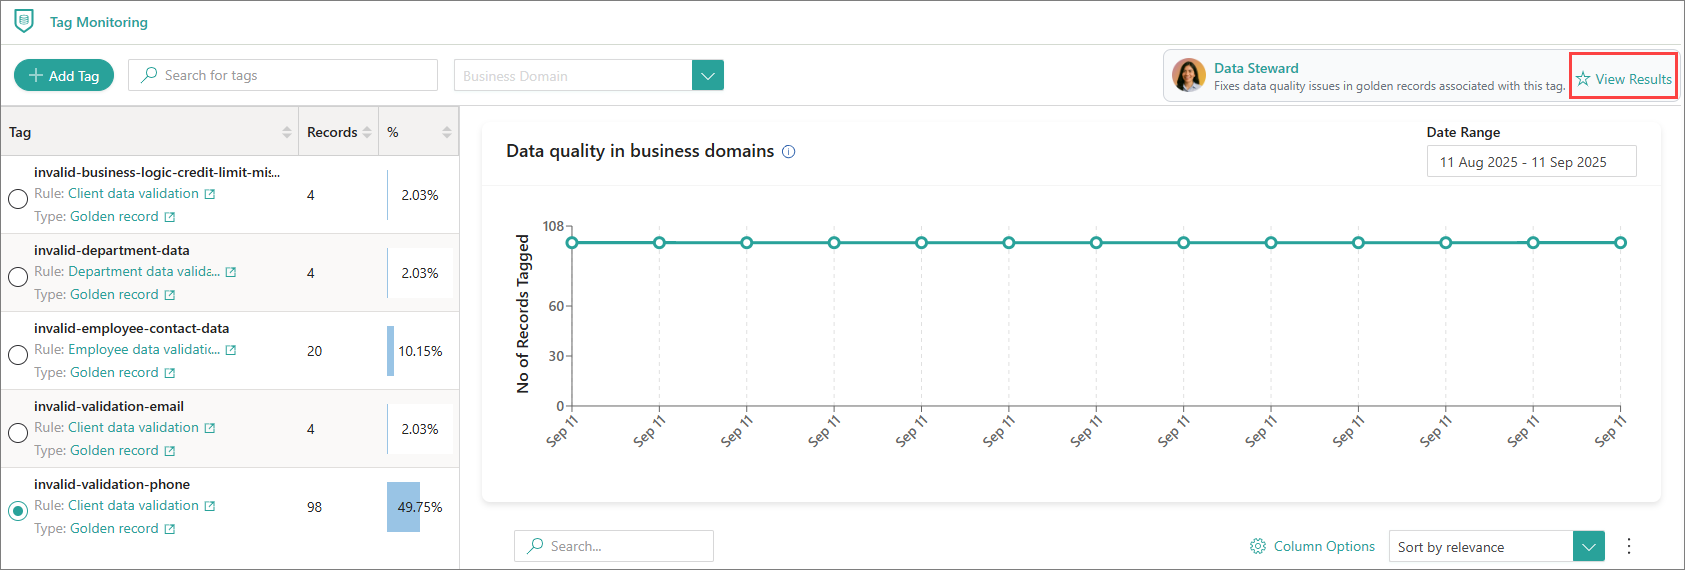
You are redirected to the AI agent job page.
-
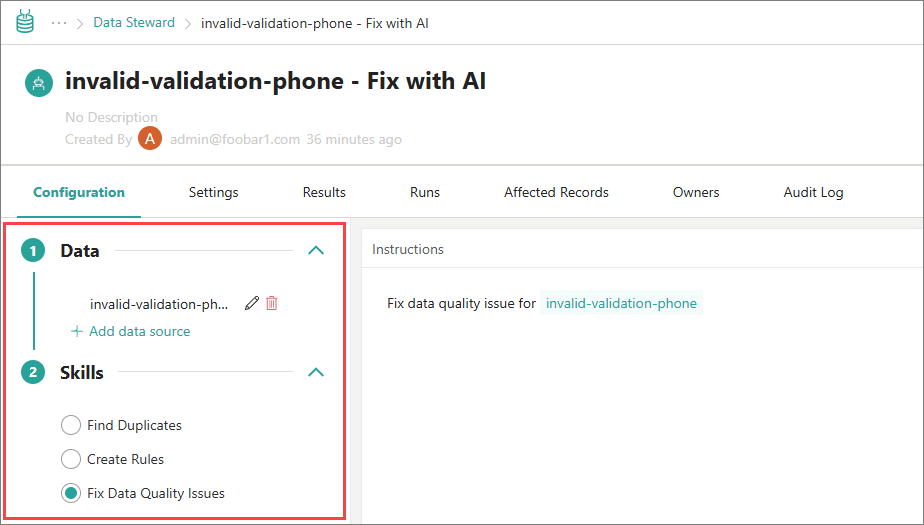
Go to the Configuration tab of the job. Note that the Data and Skills sections are filled out for you.
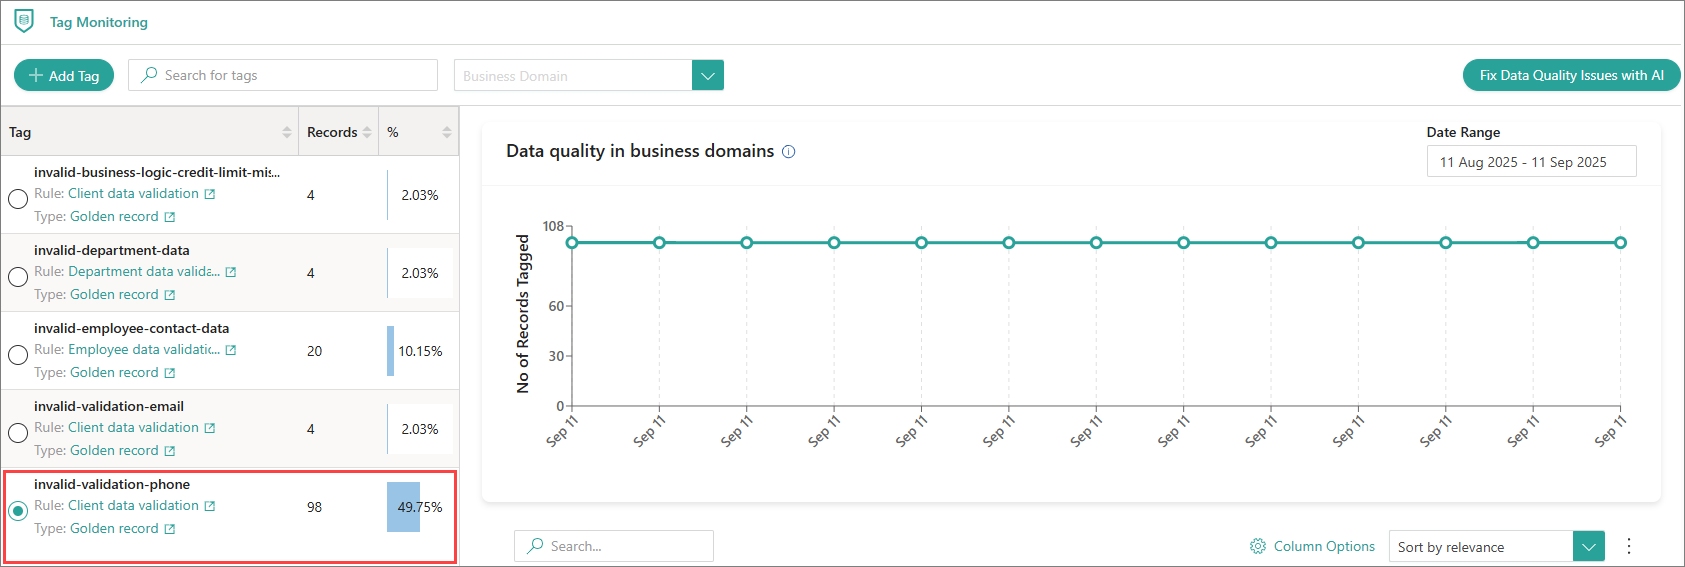
The Data section defines the subset of data the AI agent should work on. When you create an AI agent job, CluedIn automatically includes all records flagged with the selected tag (in this example, invalid-validation-phone). This selection applies across all business domains, even if you have a domain selected on the Tag Monitoring page.
-
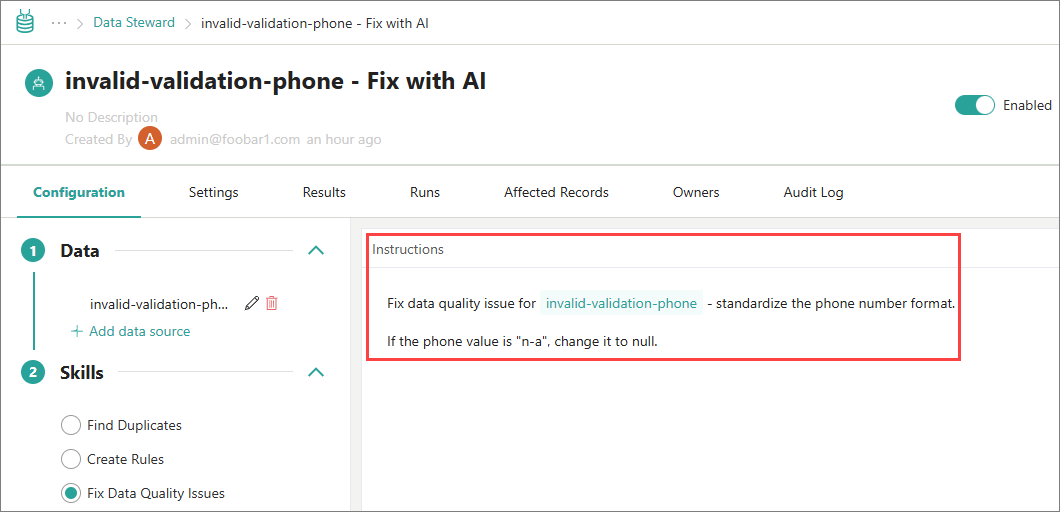
Review the provided Instructions. If needed, provide any additional ones.
-
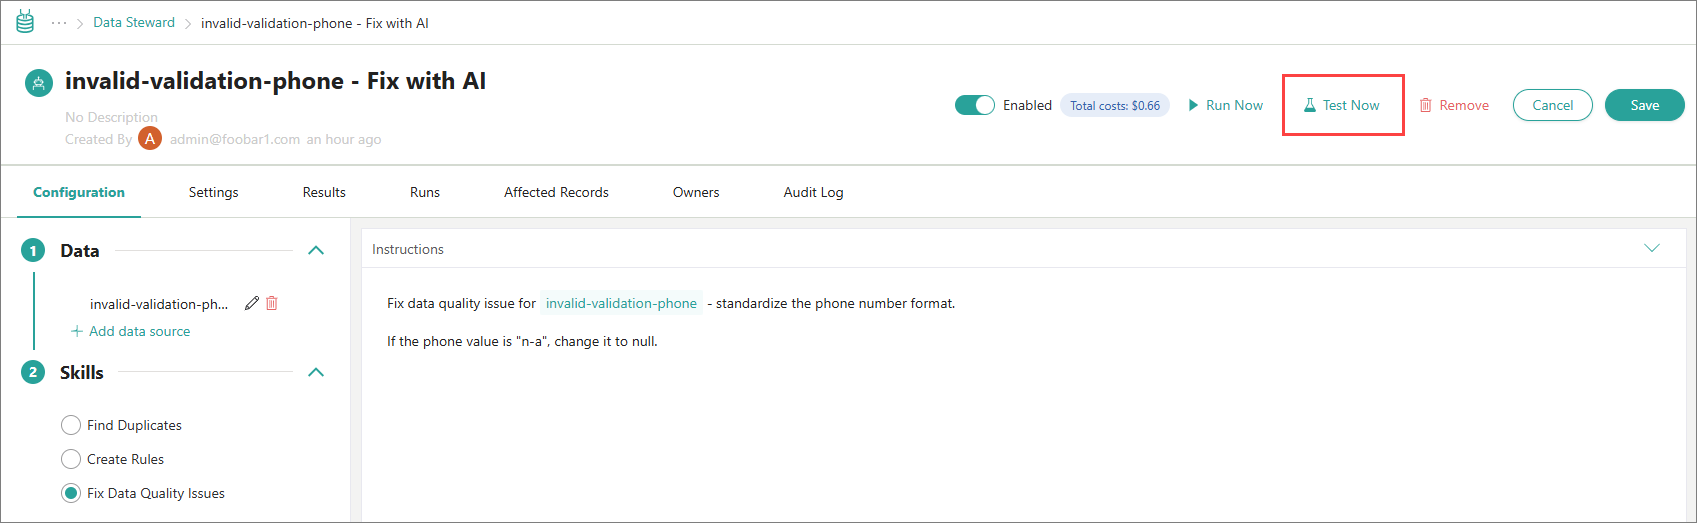
Test the job to verify that it fixes the records as expected.
-
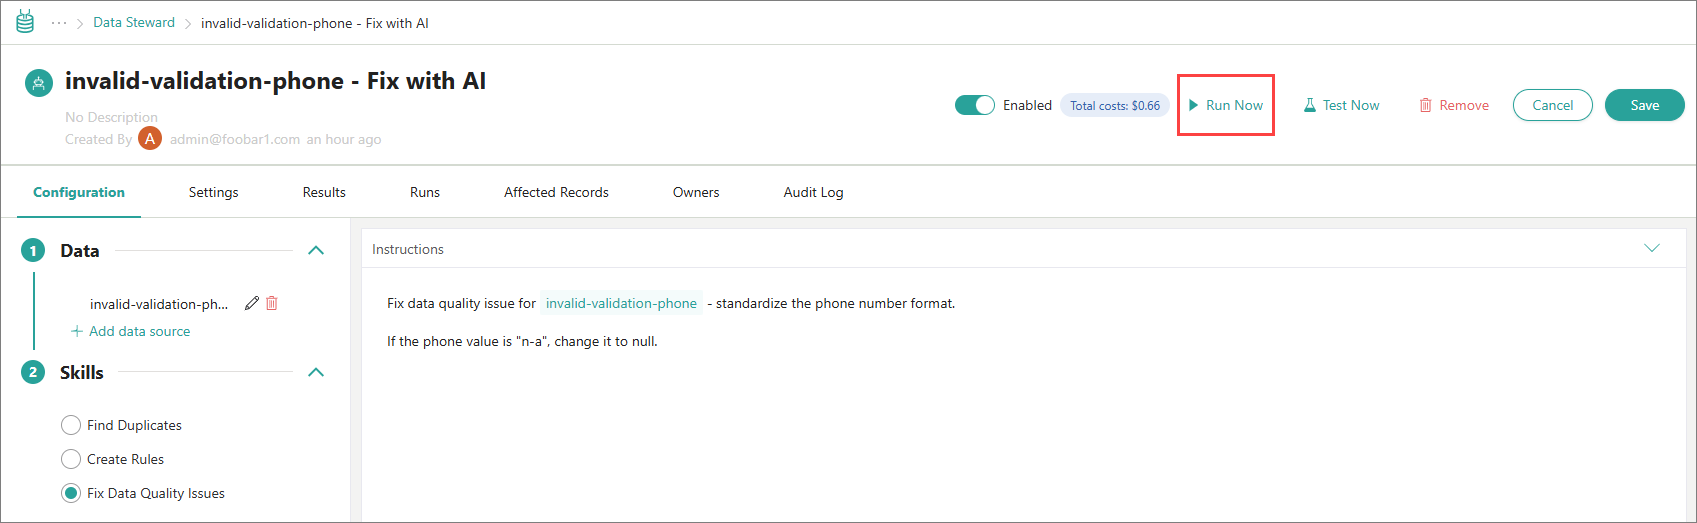
Run the job and review its results to have the records fixed.
-
-
When done, go back to Governance > Tag Monitoring to verify that there is a decrease in the number of records flagged with the selected tag.
By default, the data in the chart refreshes every 15 minutes. Your administrator can change this interval in Administration > Settings > High Time Resolution Metric interval in minutes.
Create a Clean project for tagged records
After you use the Tag Monitoring page to display the list of golden records flagged with a specific tag, you can create a clean project for these golden records.
Clean projects are intended to fix the records manually. You can also leverage the AI agents to fix the records automatically and at scale.
To create a clean project for tagged golden records
-
On the navigation pane, go to Governance > Tag Monitoring.
If the Tag Monitoring module is not available, this may mean that the tag monitoring functionality is not enabled.
-
On the tags panel on the left, select the tag of interest.

-
Above the list of tagged golden records, open the three-dot menu, and then select Clean.

The Create Clean Project pane opens for you to configure the clean project. Note that the Filters section is already filled in so that the project is targeted at records with the selected tag.
-
On the Configure tab, do the following:
-
Enter the name of the clean project.
-
If needed, add more Filters to narrow down the scope of data targeted by the clean project.
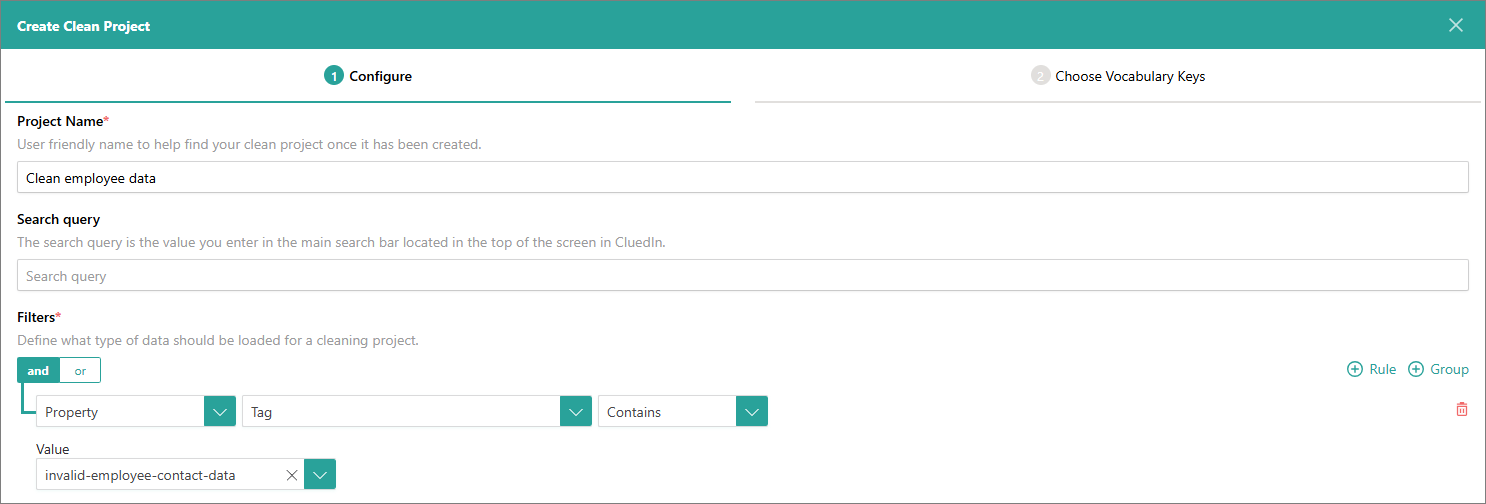
-
Select Next.
-
-
On the Choose Vocabulary Keys tab, do the following:
-
Review the list of properties and vocabulary keys pre-selected for this clean project. If needed, remove any of the properties or keys.
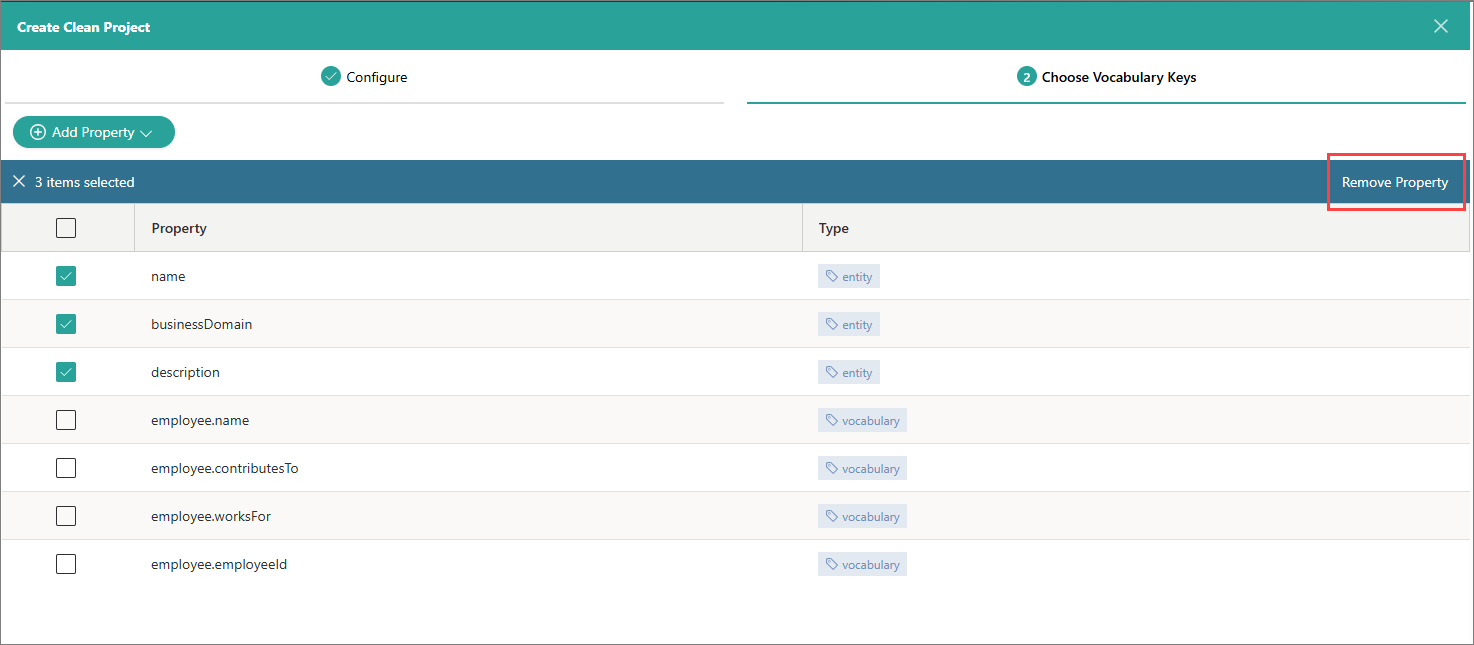
-
If you want to load more properties or vocabulary keys into the project, select Add Property. Then choose what type of property—record property or vocabulary property—you want to load to the clean project.

Depending on the type of property that you chose, select the record properties or find and select the vocabulary keys that you want to load to the clean project. Then, select Save Selection.
-
Select Create.
You created the clean project from the Tag Monitoring module. The next step is to generate results of the clean project.
-
Add new tags
The Tag Monitoring page lists all tags that are currently used in CluedIn. If this list is not sufficient, and you need new tags in place, you can create these tags directly from the Tag Monitoring page.
You can also use the Rule Builder module to create new tags. For a step-by-step walkthrough, see Identifying and labelling incorrect data.
To add tags from the Tag Monitoring page
-
On the navigation pane, go to Governance > Tag Monitoring.
If the Tag Monitoring module is not available, this may mean that the tag monitoring functionality is not enabled.
-
In the upper-left corner of the page, select Add Tag.
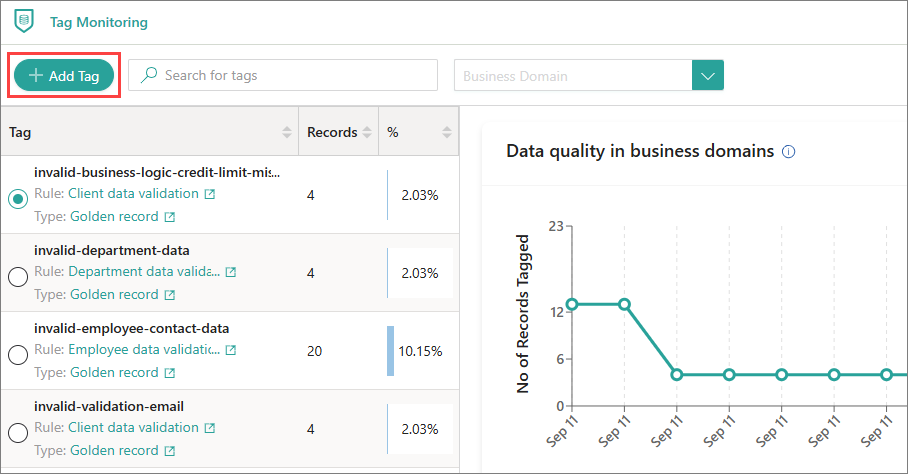
The Add Tag panel opens on the right of the page.
-
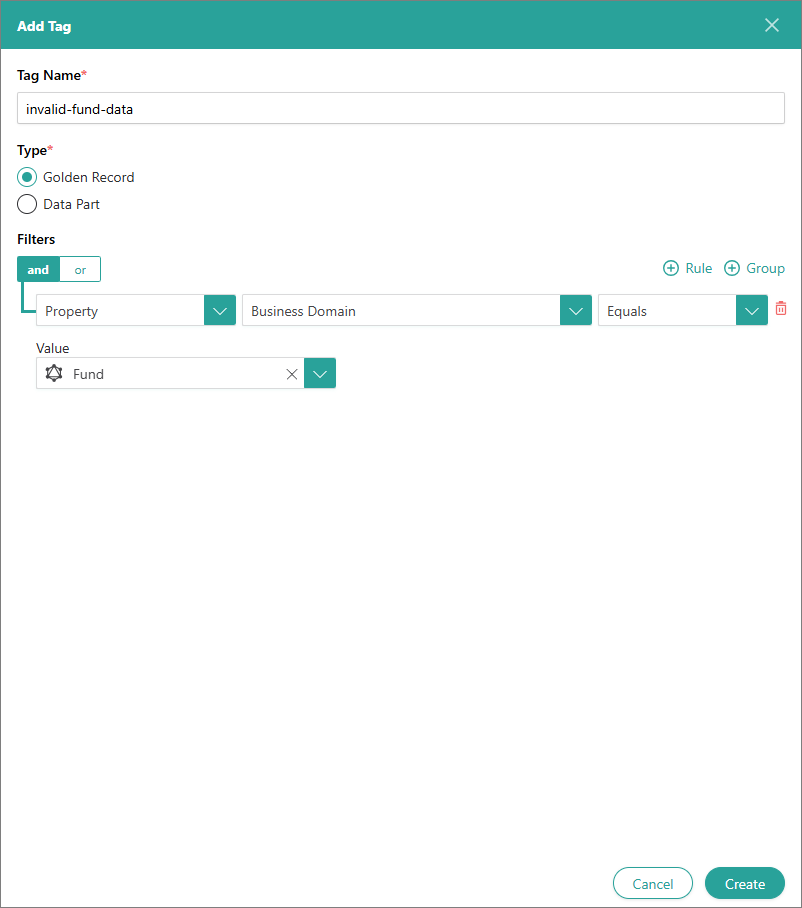
Enter a user-friendly Tag Name.
-
Select the Type of rule that will be created to apply the tag – data part rule or golden record rule. For details about these rules types, see:
-
Use Filters to specify the subset or records to which the tag will apply.
-
Select Create.
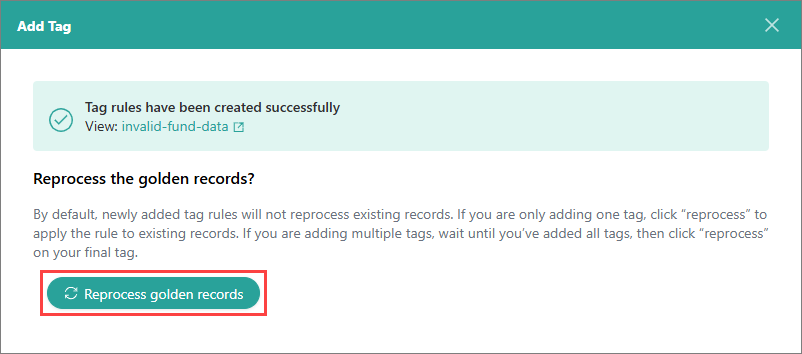
The tag, and the corresponding rule, are created. You can find the rule in the Rule Builder module:
-
The rule is active and will automatically apply the tag to new matching records.
-
If you want the rule to apply to existing records as well, on the Add Tag panel, select Reprocess existing records. Then, wait until the processing is completed.
-