Ingest data
On this page
This article will walk you through the process of data ingestion in CluedIn, explaining the steps your data undergoes to enter the system.
Before loading data into CluedIn, ensure that it does not contain unsupported characters. Refer to our knowledge base article for information about supported and unsupported characters.
Files
When you need to upload a large set of records to CluedIn, we recommend that you start by uploading a small, representative subset of your data in CSV or JSON format. This approach allows you to verify the accuracy of mapping and relations before dealing with a large set of records. Once the golden records generated from this subset align with your expectations, you can safely remove those records from the system, while keeping the mapping configuration intact. After that you can upload a large set of records and use the existing mapping to generate golden records in an efficient way.
CluedIn file uploader accommodates structured data, so you can upload the files in CSV, JSON, or basic Excel formats. After you upload a JSON or XLS/XLSX file, we recommend that you download an example file provided by the system. This example serves as a reference to confirm the expected data format. If your file deviates from this format, adjust it according to the example to ensure a smooth data ingestion process.
The data ingestion process for files consists of three stages: uploading, parsing, and loading. When your file adheres to the required data format and each stage executes without interruption, the entire process runs seamlessly. However, to efficiently address issues that might arise during the data ingestion process, get acquainted with the potential reasons for failure at each stage:
-
If the upload fails, the recovery of the file is not possible. Such a situation may arise if the file upload was initiated but the browser tab was closed while the upload was in progress. To resolve this, remove the data source and upload the file again.
-
If the parsing fails—for example, due to the file being corrupted or having invalid data format—you will see a corresponding error message from the parser. To resolve this, remove the data source, fix the file and make sure it conforms to the required data format, and upload the file again.
-
If the loading fails, you will see an error message with the number of chunks that could not be loaded. To resolve this, retry to load the data or remove the data source altogether and upload the file again.
To ingest data from files
-
On CluedIn home page, in the Integrations section, select Import from files.
-
In the Add files section, either drag the file or choose it from your computer. You can upload up to 5 files at once, and the total file size should not exceed 1 GB.
-
Specify the Group where the data source will be stored. You can choose the existing group or create a new group. If you upload several files, they will be stored as separate data sources within a group.
-
In the lower-right corner, select Upload.
The data has been ingested to CluedIn, and you can view it on the Preview tab of the data set. Next, check the logs to make sure all your records are valid. To turn your data into golden records, create a mapping and process the data.
Ingestion point
Data ingestion using an endpoint is a default solution to push your data easily into CluedIn, especially if you are using tools like Azure Data Factory, Databricks, or Apache NiFi.
When you need to push a large set of records into CluedIn, we recommend that you start by pushing a small, representative subset of your data. As with files, this approach allows you to verify the accuracy of mapping and relations before pushing a large set of records. Once the golden records generated from this subset align with your expectations, you can safely remove those records from the system, while keeping the mapping configuration intact. After that you can push a large set of records and use the existing mapping to generate golden records in an efficient way.
The data ingestion process for endpoints consists of two stages: parsing and loading. Due to performance and scalability considerations, CluedIn defers parsing tasks to data source processing rather than executing them in real time. As a result, while CluedIn promptly receives your request, it cannot ensure the validity of the sent data. Once CluedIn receives the data, it initially stores it in a temporary storage, accessible through the Preview tab. To turn the received data into golden records, you need to map it to the semantic model and then process it.
CluedIn provides the following processing options for turning your data into golden records:
-
Manual processing - when CluedIn receives the data from the endpoint, you are required to process the data manually. You can view the received data in the temporary storage at any time, and you can process the data set as many times as you need. In CluedIn, once a record has been processed, it won’t undergo processing again. When you trigger processing, CluedIn will check for identical records. If identical records are found, they won’t be processed again. However, if you change the origin code for the previously processed records, CluedIn will treat these records as new and process them.
-
Automatic processing - when CluedIn receives the data from the endpoint, this data is processed automatically. You can view the received data in the temporary storage at any time.
-
Bridge mode – all your JSON records will be transformed into golden records directly, without being stored in the temporary storage. However, you can rely on data set logs for debugging purposes.
Bridge mode allows you to use less storage and memory, resulting in increased performance. Use this mode when your mapping will not change over time and you want to use the ingestion endpoint only as a mapper.
The process of ingesting data from an ingestion point involves two steps:
When you send the data to CluedIn via ingestion point, a separate data set is created. If you want to send more data, add a new ingestion point instead of reusing the existing one.
Add ingestion point
An ingestion point is a channel through which CluedIn can receive data from external sources.
To add an ingestion point
-
On CluedIn home page, in the Integrations section, select Import from ingestion point.
The Import from ingestion point pane opens, where you can choose the group for storing the data source and define preliminary mapping configuration.
-
On the Configure tab, do the following:
-
Enter the Name of the data source.
-
Specify the Group where the data source will be stored. You can choose the existing group or create a new group.
-
In the lower-right corner, select Next.
-
-
On Add ingestion point tab, do the following:
-
Enter the Endpoint name that will be used as the name of the data set.
-
Select the Mapping configuration option:
-
New mapping – you can create a new mapping for the data set. If you choose this option, you need to select the existing entity type or create a new one. If you create a new entity type, select an icon to visually represent the entity type.
-
Existing mapping – you can reuse the mapping from the data set that has the same structure. If you choose this option, you need to indicate the data set with the required mapping configuration. To do that, choose the following items one by one: a data source group, a data source, and a data set.
-
-
In the lower-right corner, select Add.
The ingestion point is added to CluedIn. It has a label No data sent, which indicates that CluedIn has not received data for this ingestion point.
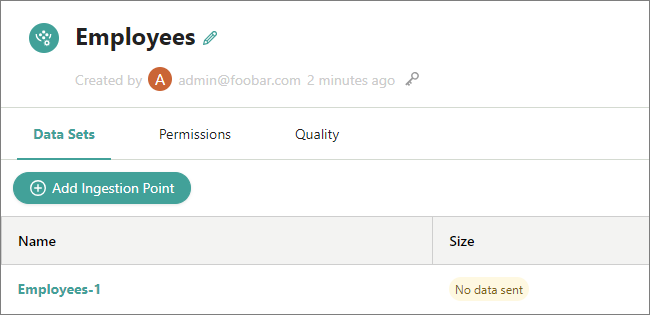
Now, you can send data to CluedIn by creating HTTP POST requests.
-
Send data
In this section, Postman is used as a tool to demonstrate how to send an HTTP POST request to CluedIn.
Prerequisites
To be accepted by CluedIn, your HTTP POST request should meet the following prerequisites:
-
The request’s authorization type should be set to Bearer Token and the value should be a valid API token from CluedIn. You can find the API token in CluedIn in Administration > API Tokens.
-
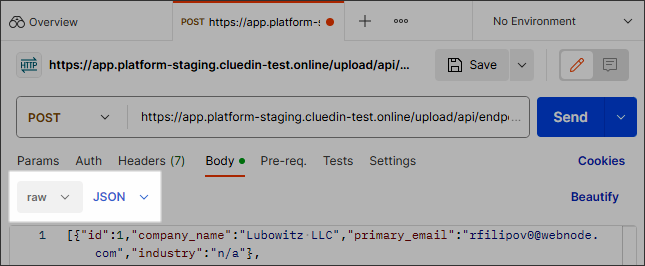
The request’s body should contain raw data in JSON format.
-
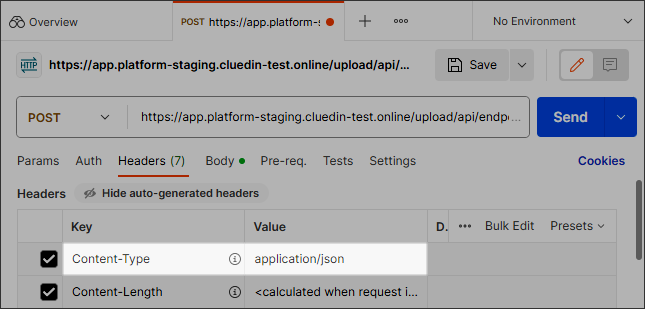
The content-type in the request’s header should be set to application/json.
To send data to CluedIn
-
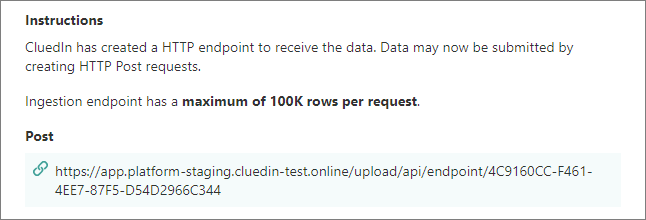
In CluedIn, open the data set that was created in the previous procedure, and then select View instructions.
On the Ingestion point instructions pane, find and copy the POST URL that you can use to send data to CluedIn.
-
In Postman, paste the URL that you copied to the URL input field of your request. Then, send the request.
The data has been sent to CluedIn. You can now view it on the Preview tab of the data set. The next steps involve creating a mapping and processing the data.
Database
You can ingest the database tables to CluedIn if you have the read permission to these database tables. The process of ingesting data from the database involves two steps:
Prerequisites
To be able to ingest the data from a database, go to Administration > Feature Flags and make sure that the Import databases in Data Source module feature is enabled.
Add connection to database
To be able to access the database tables in CluedIn, first establish a connection to the database.
To add a connection to the database
-
On CluedIn home page, in the Integrations section, select Import from database.
The Import from database pane opens, where you can provide the database connection details and choose the group for storing the data source.
-
On the Connection string tab, do the following:
-
Choose the SQL database technology to query the data (Microsoft SQL Server, MySQL, or Postgres).
-
Enter the database connection details such as Host, Database name, Username, and Password. Optionally, you may add Port number.
-
In the lower-right corner, select Test connection. After you receive a notification that the connection is successful, select Next.
-
-
On the Configure tab, do the following:
-
Enter the Name of the data source.
-
Specify the Group where the data source will be stored. You can choose the existing group or create a new group.
-
In the lower-right corner, select Add.
The database connection is added to CluedIn.
Now, you can add database tables to CluedIn.
-
Ingest database tables
With an established connection to the database, you can choose which database tables you want to ingest into CluedIn.
To ingest database tables
-
Open the data source, and then select Add new table.
The Add data table pane opens, where you can view all tables existing in the database.
-
Select the checkboxes next to the tables you want to ingest into CluedIn. Then, in the lower-right corner, select Add.
The tables are added to CluedIn. Each table is added as a separate data set. Next, create mapping and process data.