Connections setup
On this page
- Create a connection
- Get the connection ID
- Share connection with the application user
- Add connection ID to organization settings
To be able to automate the workflow creation, you need to manually create some connections and share them with the Application User.
Create a connection
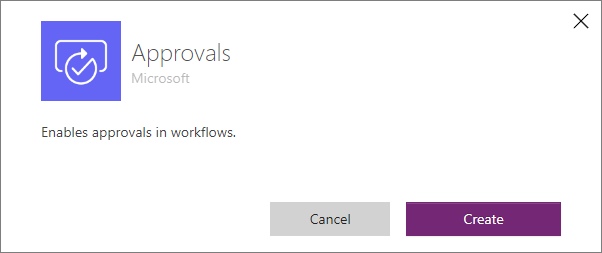
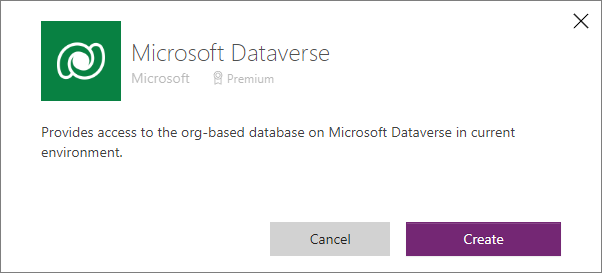
You need to create two connections: Approvals and Dataverse.
To create a connection
-
In Power Apps, on the left navigation pane, select Connections.
-
Select New connection.
-
In the list that appears, find and select a connection that you want to create. In this example, we are selecting Approvals.
-
Select Create.
-
Create the Dataverse connection following steps 1–4.
Get the connection ID
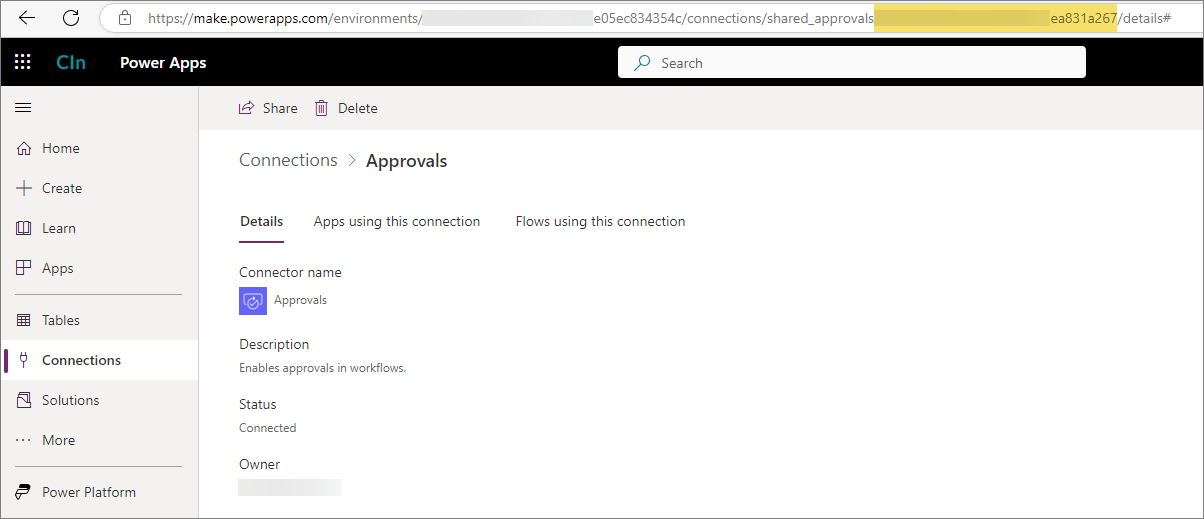
Open the Approvals connection that you’ve just created, and then copy the connection ID in the URL field.
Share connection with the application user
-
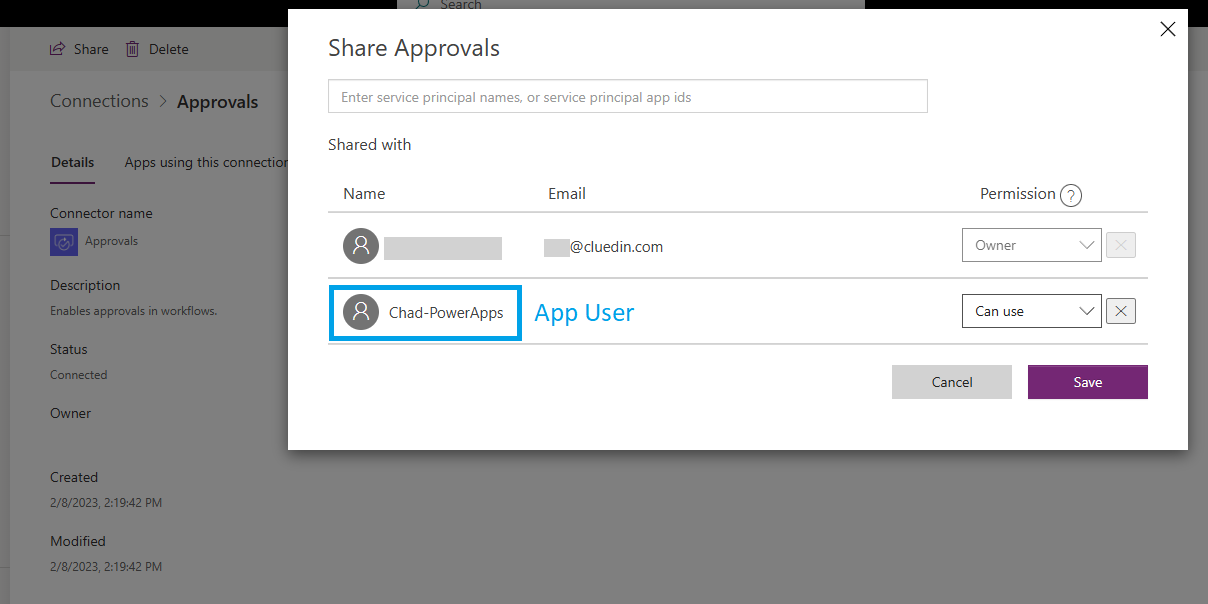
On the top of the page, select Share.
-
Find and select the application user. Then, grant the Can use or Can edit permission.
-
Select Save.
Add connection ID to organization settings
-
In CluedIn, on the navigation pane, go to Administration > Settings, and then find the PowerApps section.
-
In Approval Connection Id, enter the Approval connection ID. This connection ID will allow you to create the approval workflow.

-
In Dataverse Connection Id, enter the Dataverse connection ID. This connection ID will allow you to access the Power Apps table in the Power Automate workflow.
