Prepare for the upgrade
On this page
- Get access to CluedIn application
- Prepare the kubeconfig file
- Configure kubectl
- Configure Helm
- Connect Lens or Freelens to your CluedIn cluster
Before upgrading CluedIn, it’s important to make sure your environment is ready. Proper preparation helps reduce downtime, avoid data loss, and ensures a smooth transition to the new version. This page covers stage 2 of the CluedIn upgrade process. It walks you through the key steps to check and complete before starting the upgrade process.
Get access to CluedIn application
Before starting an upgrade, it is best practice to open the CluedIn UI and confirm that all services are running as expected. If you don’t have direct access, make sure that someone who does is available to assist throughout the upgrade process. For instructions, see Check CluedIn UI.
Prepare the kubeconfig file
You need a valid kubeconfig file to connect Helm and kubectl to the CluedIn Azure Kubernetes Service (AKS) cluster.
To prepare the kubeconfig file
-
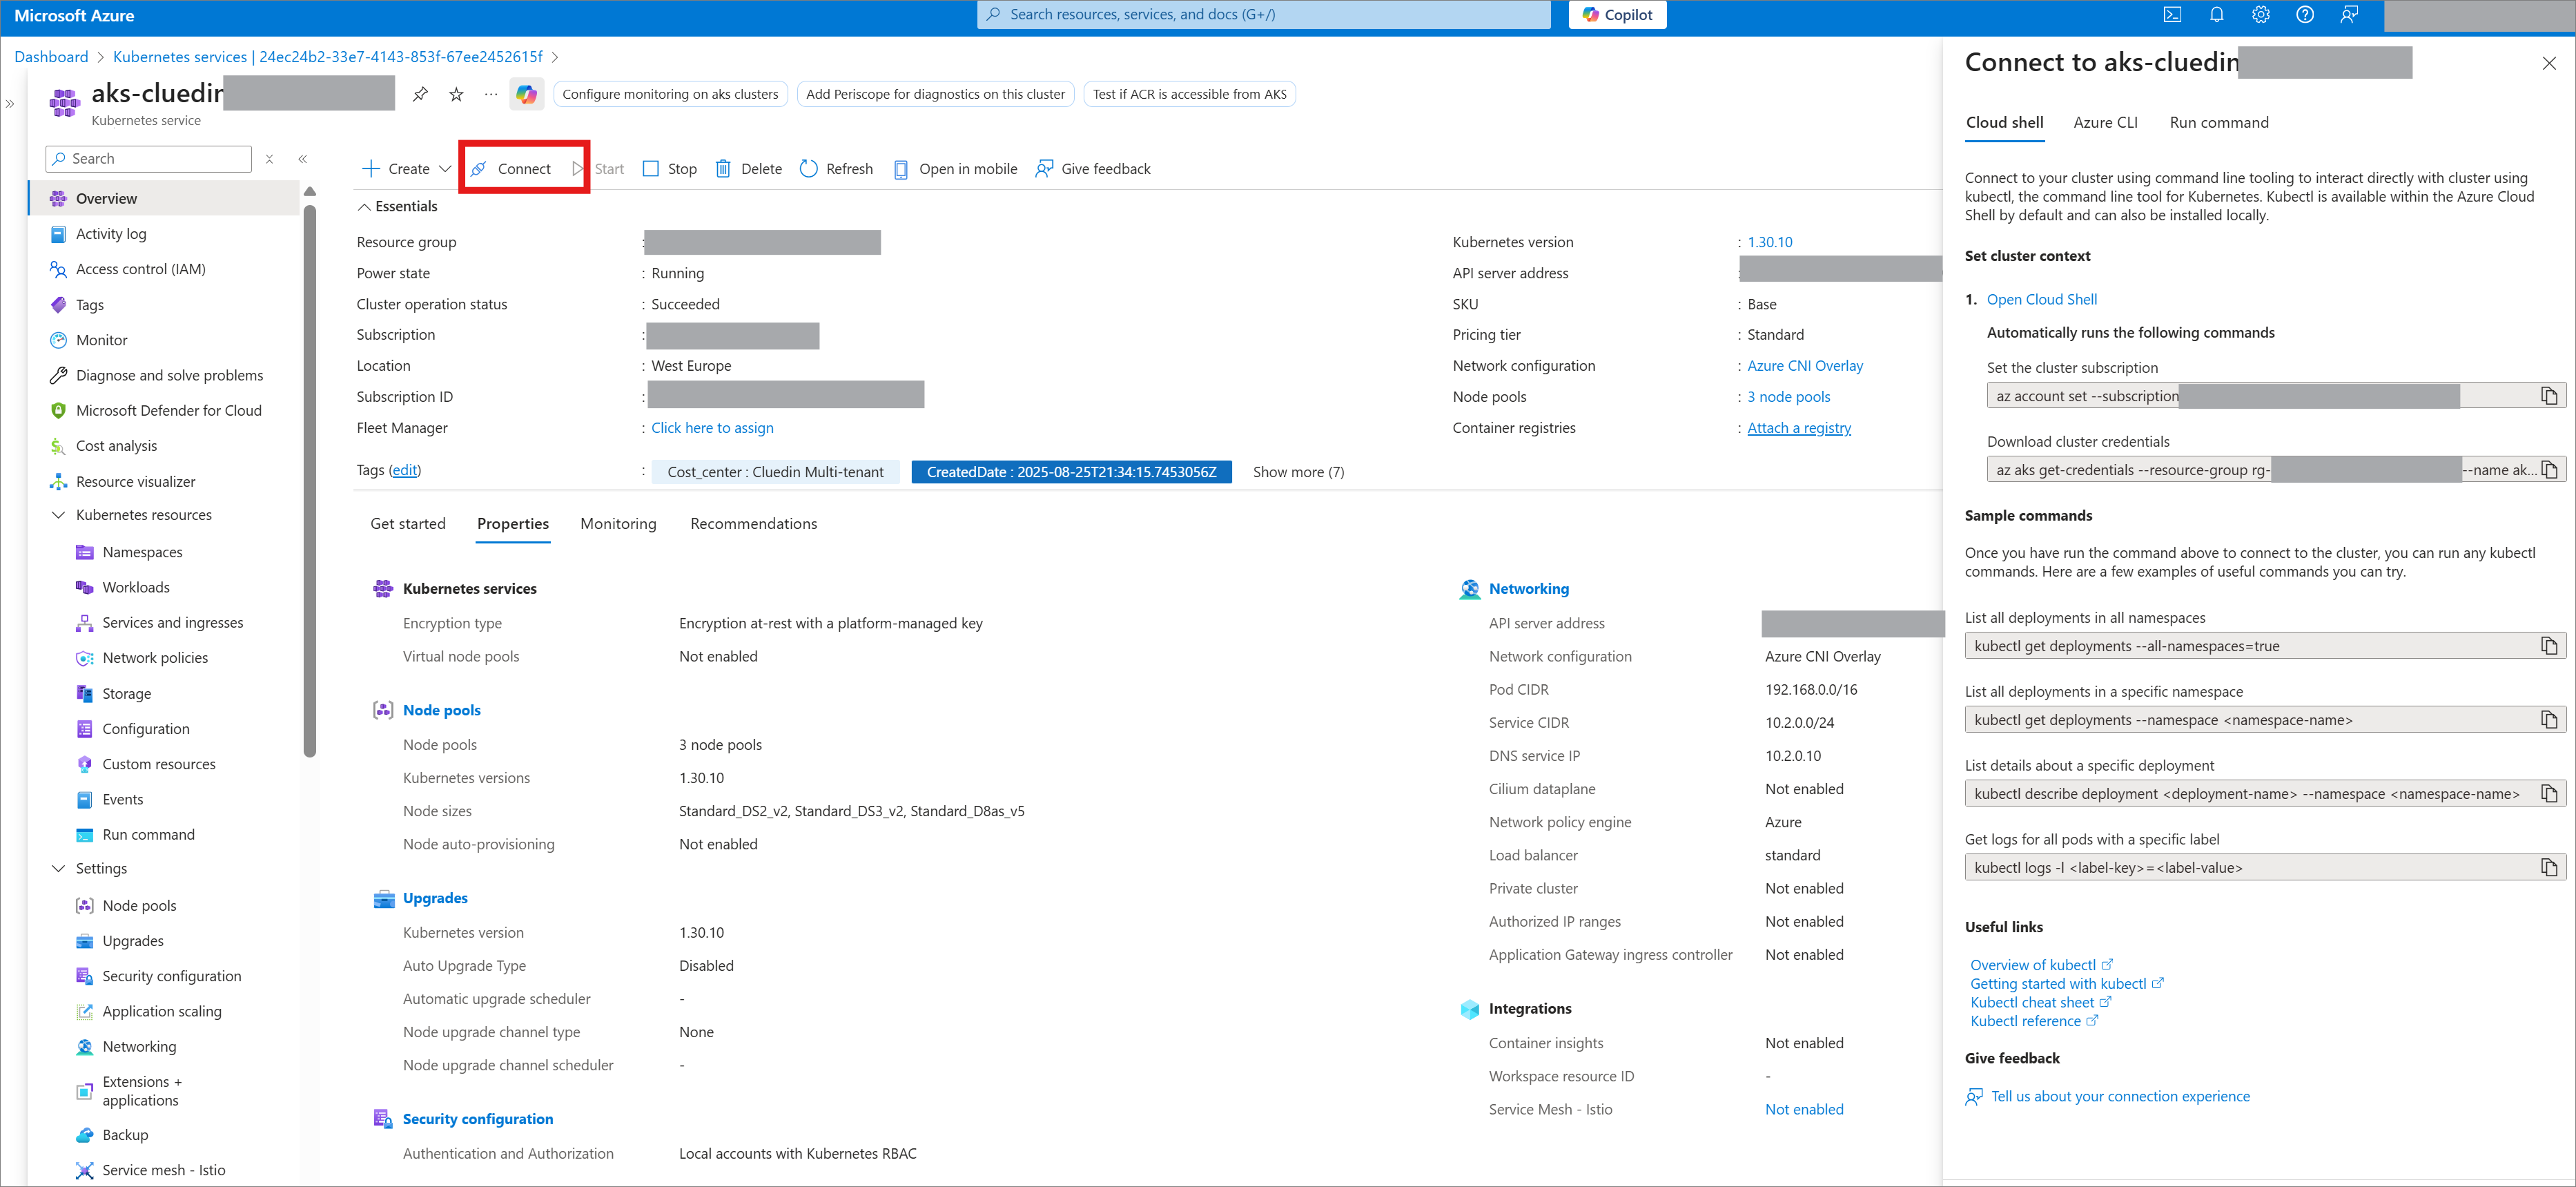
Contact your Azure administrator and ask them to provide the kubeconfig file to you.
Your administrator can find the kubeconfig file in Azure Portal.
-
Store the file in a secure location.
Treat this file as sensitive information – it contains access credentials and cluster details.
Do not commit the file to a source control tool. -
Once you have the kubeconfig file, configure your environment to use it. For example, in PowerShell, run the following:
$env:KUBECONFIG="path-to-file"This ensures that both kubectl and Helm commands will use the correct cluster context.
Configure kubectl
Before performing an upgrade, you need to ensure that kubectl is both installed and properly connected to your Kubernetes cluster. The steps below help you verify the installation and confirm that kubectl can communicate with the cluedin namespace.
To configure kubectl
-
To verify that kubectl is installed correctly, run the following command in PowerShell:
kubectl version --client-
If kubectl is installed, you’ll see the client version details (for example, Client Version: v1.30.0).
-
If not, you’ll get a “command not found” error. In this case, contact your system administrator to install and configure kubectl properly.
-
-
To confirm that kubectl is correctly connected to your cluster, run the following command in PowerShell:
kubectl get pods --namespace cluedin-
You should see a list of pods as a result.
-
If not, your kubeconfig or network access may not be configured correctly. Contact your administrator.
-
Configure Helm
Before upgrading CluedIn, you need to make sure Helm is installed, connected to the correct Kubernetes cluster, and configured with the CluedIn Helm repository. The steps below walk you through verifying your Helm setup and updating to the latest charts.
To configure Helm
-
To verify that Helm is installed correctly, run the following command in PowerShell:
helm version-
If Helm is installed, you’ll see the client version details (e.g., v3.x.x).
-
If you get a “command not found” error, this means that Helm is not installed or is not in your PATH. In this case, contact your system administrator to install and configure it properly.
-
-
To verify that you are connected to the cluster, run the following command in PowerShell:
helm config current-context-
You should see the cluster name (for example, aks-cluedin-eastus).
-
If you get an error similar to “current-context is not set”, contact your system administrator to ensure that the kubeconfig is configured correctly.
-
-
CluedIn publishes its latest Helm charts to a dedicated Helm repository. Verify that the repository is configured by running the following command:
helm repo list-
If CluedIn appears in the list, you are ready to use the repository.
-
If not, add the repository by running the following command:
  Helm repo add https://cluedin-io.github.io/Charts
  Helm repo list
-
-
Before performing any upgrade, always fetch the latest CluedIn charts:
Helm repo updateThis ensures that you are deploying the most up-to-date configurations and fixes.
Connect Lens or Freelens to your CluedIn cluster
This step is optional. It does not depend on the previous steps, you can perform it whenever appropriate.
Connecting Lens or Freelens to your CluedIn cluster gives you a graphical interface to explore, monitor, and manage your Kubernetes environment. This makes it easier to visualize resources, check pod health, and debug issues compared to working only with the command line.
Lens or Freelens (depending on what you selected) connects to Kubernetes using your kubeconfig file.
To connect Lens or Freelens to your CluedIn cluster
-
Use on of the following methods:
-
Drop-in method – Place your kubeconfig into the system’s
.kubefolder (commonly located at~/.kube/config). -
UI method – Import or configure your cluster directly through the Lens (or Freelens) graphical interface.
-