Dataverse connector
On this page
- Configure Dataverse connector
- Prerequisites
- Create a security role
- Create an application user
- Stream requirements
- Sync changes back from Dataverse
- Dataverse schema
This article outlines how to configure the Dataverse connector to publish data from CluedIn to Microsoft Dataverse.
Configure Dataverse connector
Before you begin, make sure you have completed the prerequisites, including creating a security role and creating an application user.
-
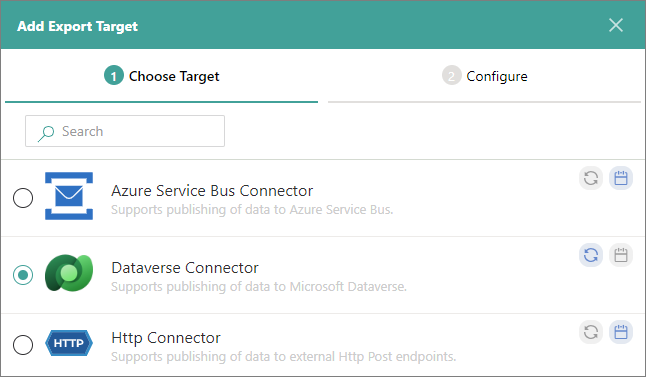
On the navigation pane, go to Consume > Export Targets. Then, select Add Export Target.
-
On the Choose Target tab, select Dataverse Connector. Then, select Next.
-
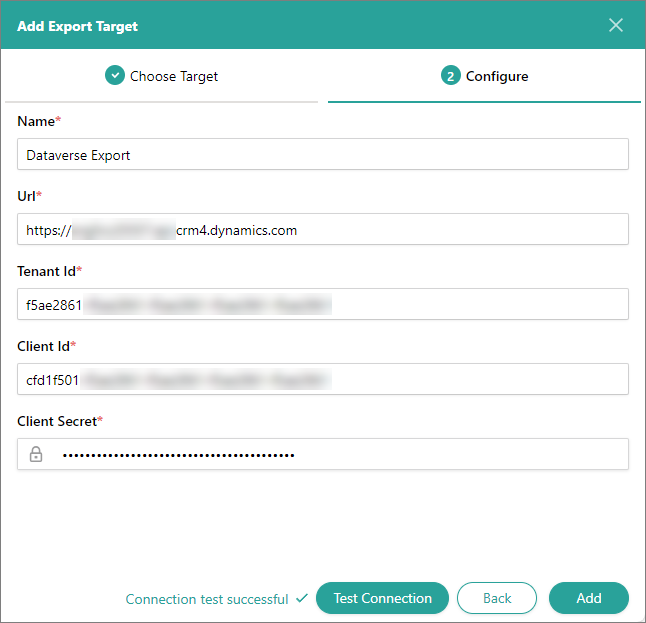
On the Configure tab, enter the connection details:
-
Name – user-friendly name of the export target that will be displayed on the Export Target page in CluedIn.
-
URL – you can find this value in Power Apps, in the environment that contains your Dataverse instance. In the upper-right corner of the Power Apps page, select the settings icon, and then select Developer Resources. Copy the value in Web API endpoint and paste it to the URL field in CluedIn. You do not need to copy the version of the API (
/api/data/v9.2).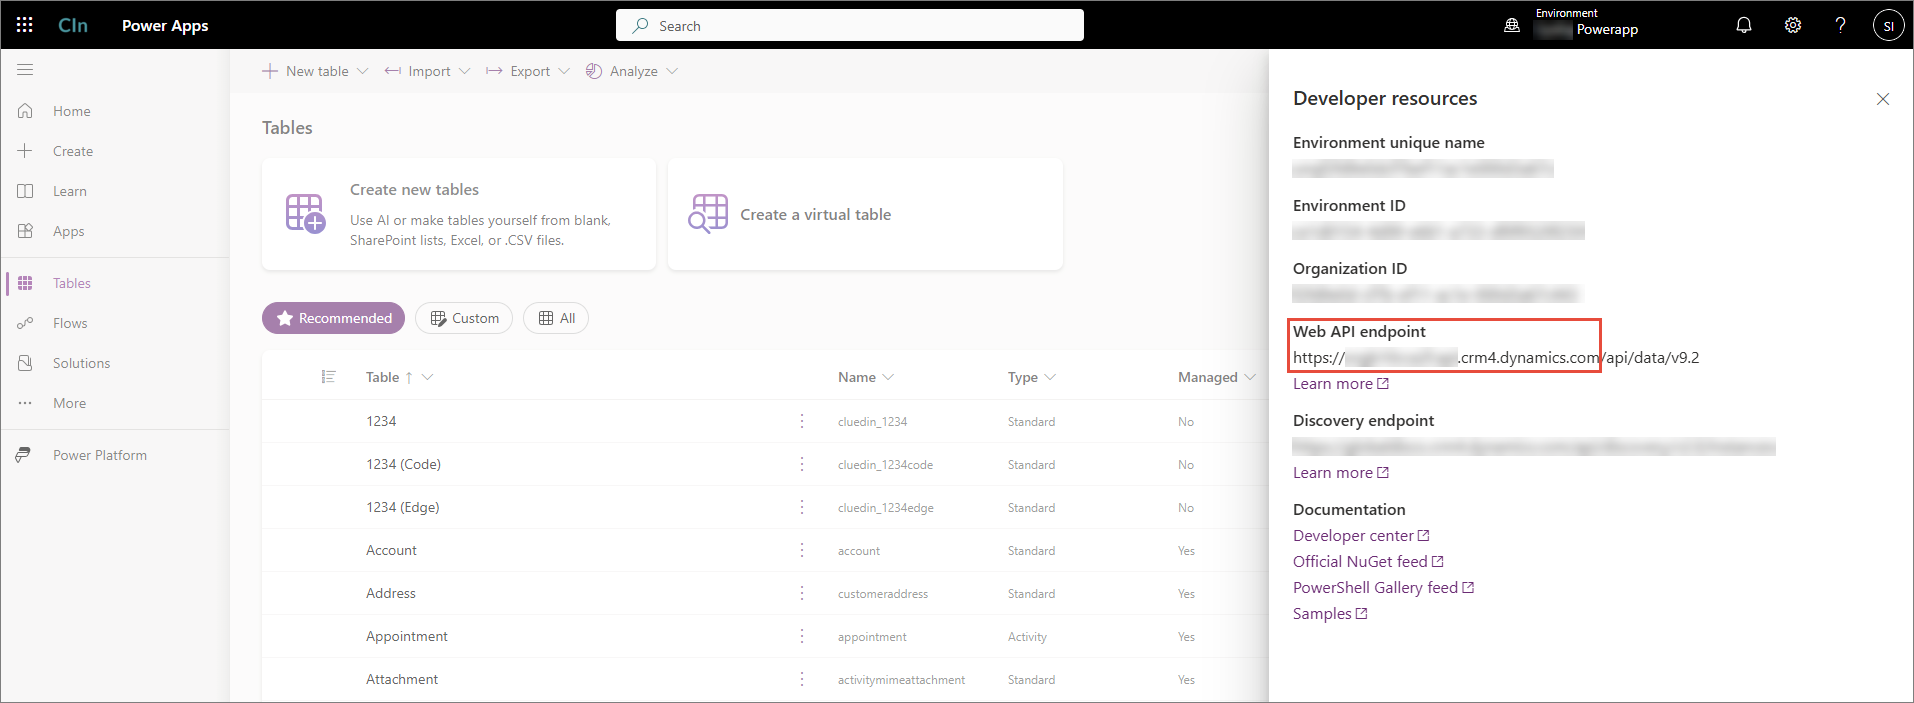
-
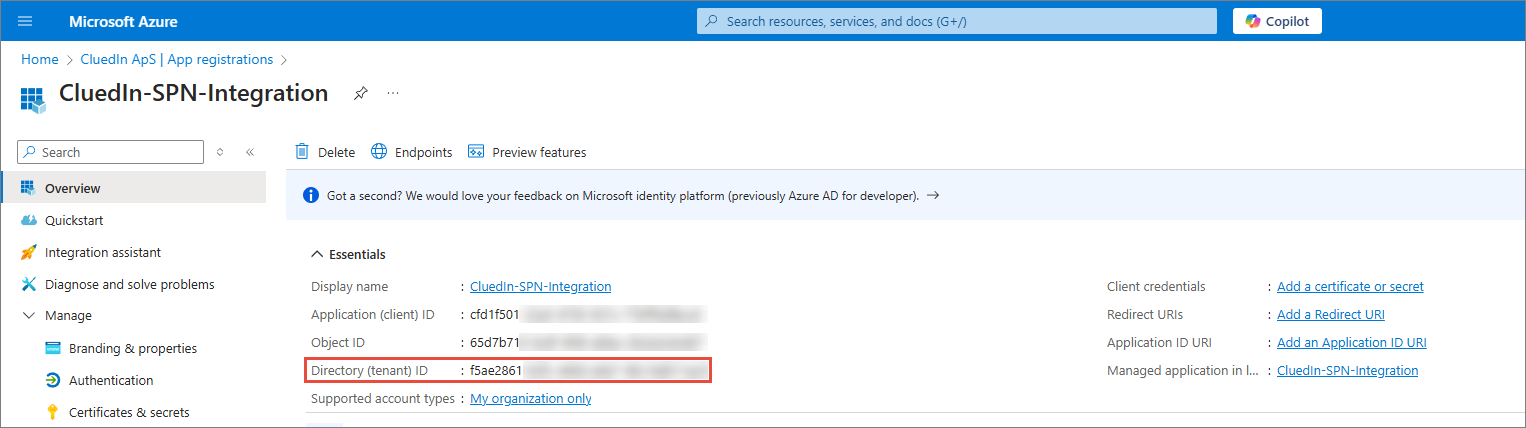
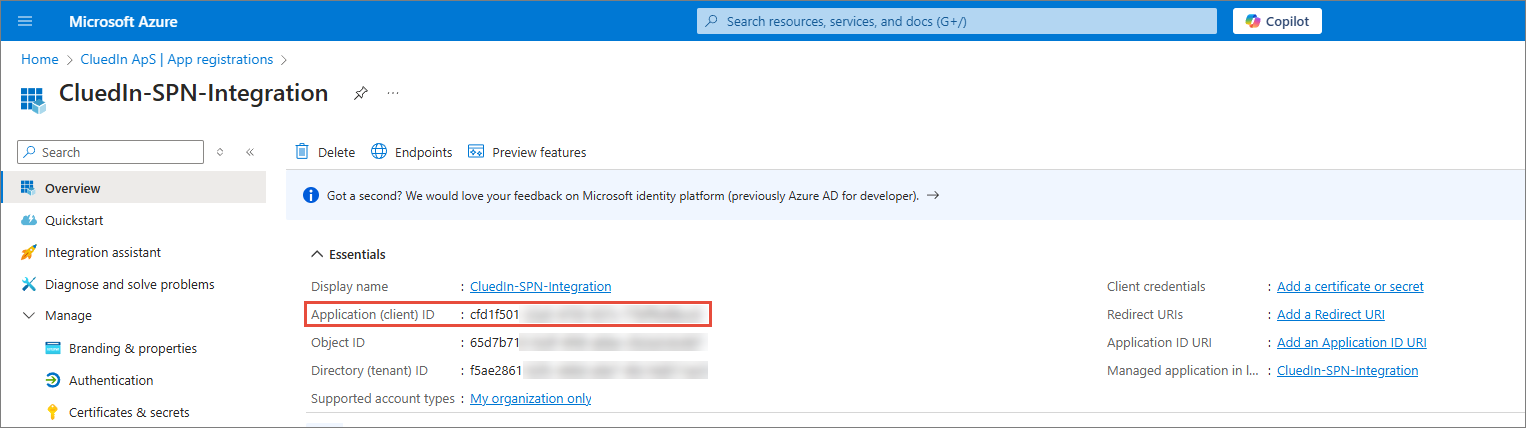
TenantID – unique identifier for your Microsoft Entra tenant. You can find this value in the Overview section of app registration.
-
ClientID – unique identifier assigned to the Dataverse app when it was registered in the Microsoft identity platform. You can find this value in the Overview section of app registration.
-
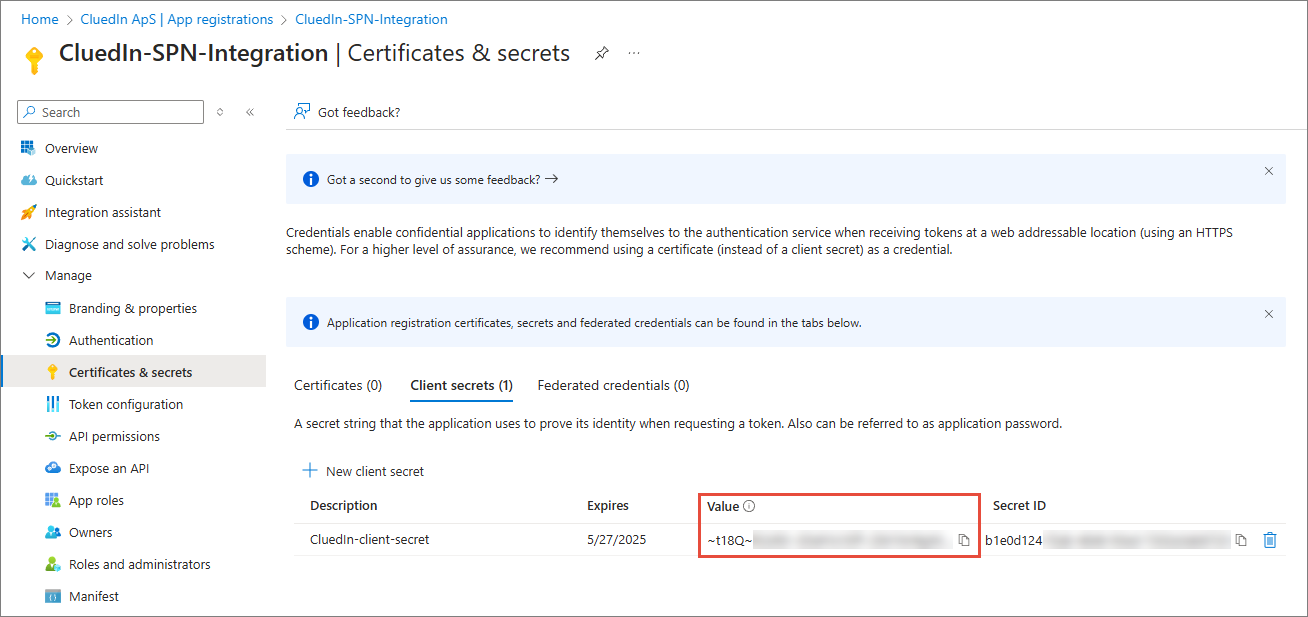
ClientSecret – confidential string used by your Dataverse app to authenticate itself to the Microsoft identity platform. You can find this value in the Certificates & secrets section of app registration.
-
-
Test the connection to make sure it works, and then select Add.
Prerequisites
-
Create a service principal (app registration) by following the instructions in this article. This step is needed to get Client ID, Tenant ID, and Client Secret for connector configuration.
-
Make sure you use a service principal to authenticate and access Dataverse.
-
Make sure you have a Power Apps account. For more information on how to sign up for Power Apps, see Microsoft documentation.
-
Create a security role in Power Platform Admin Center by following the instructions in the Create a security role section.
-
Create an application user and tag it with 2 security roles—the role you created in the previous step and the System Administrator role—by following the instructions in the Create an application user section.
Create a security role
This section outlines how to create a security role in Power Apps in order to use it for the Dataverse connector.
-
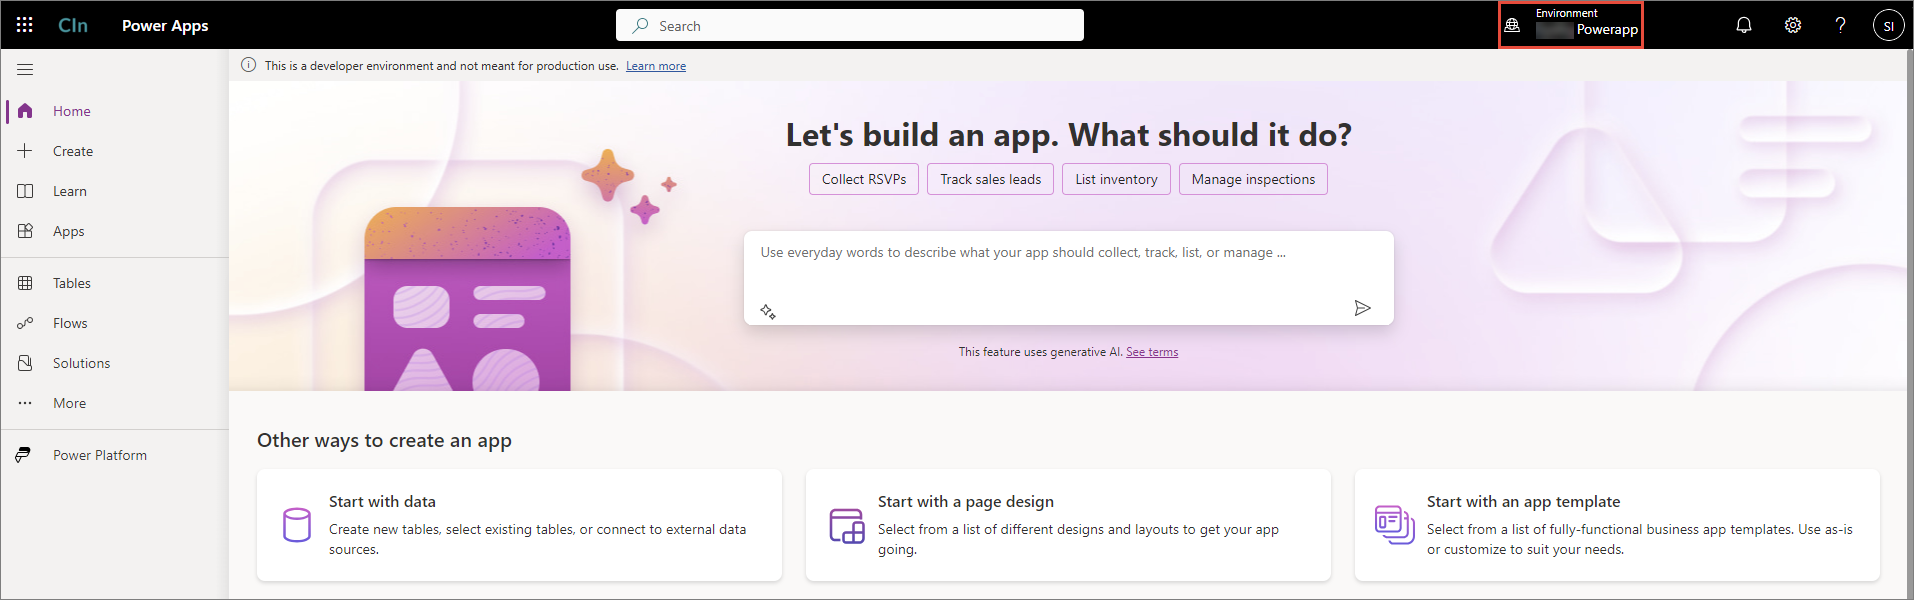
Sign in to your Power Apps account and make sure you are in the intended environment.
-
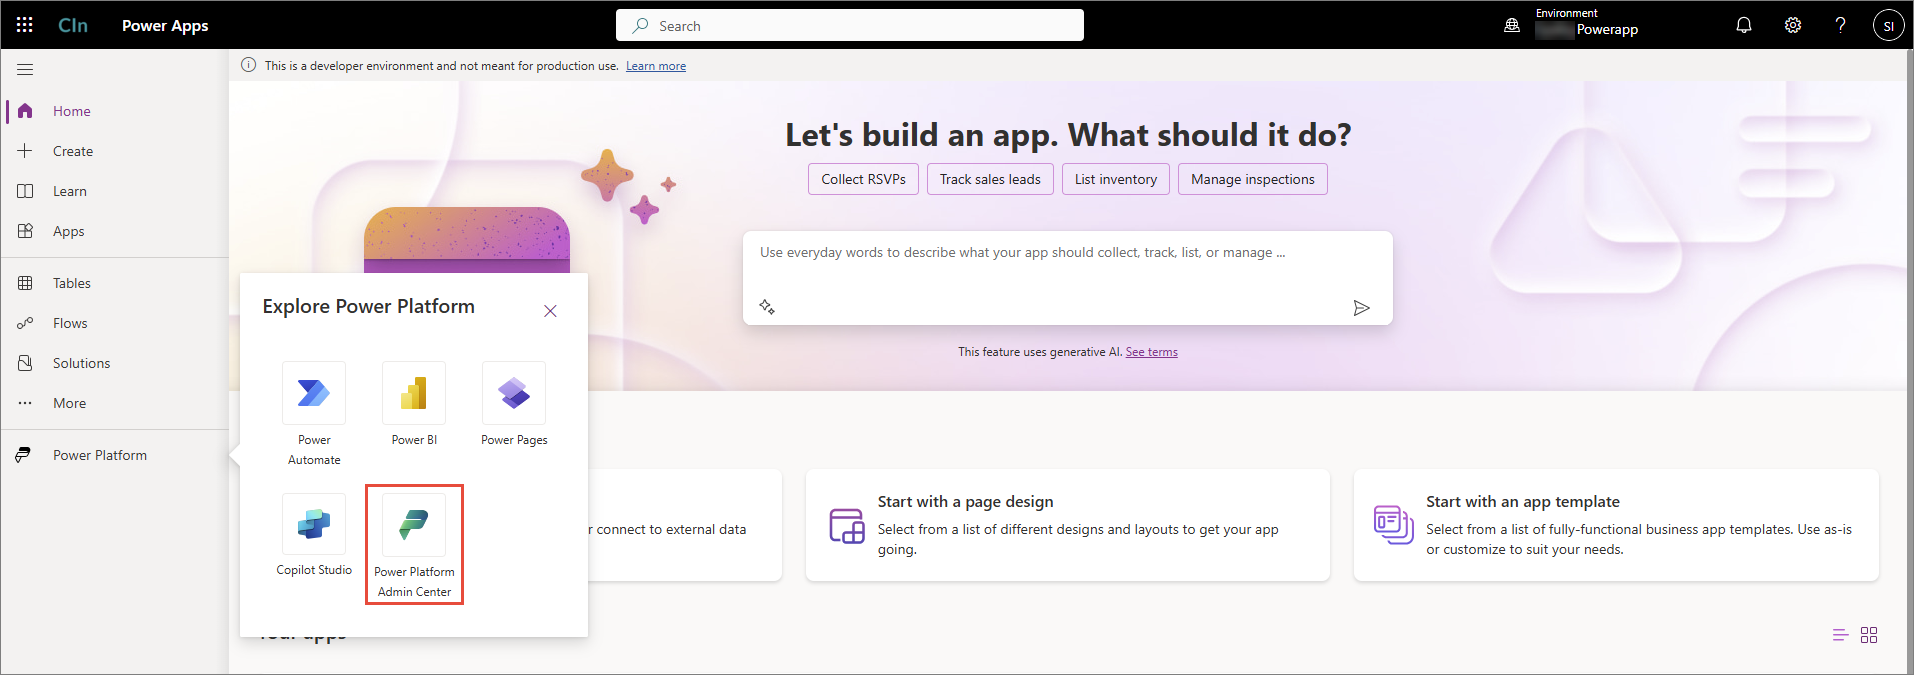
Select Power Platform > Power Platform Admin Center.
-
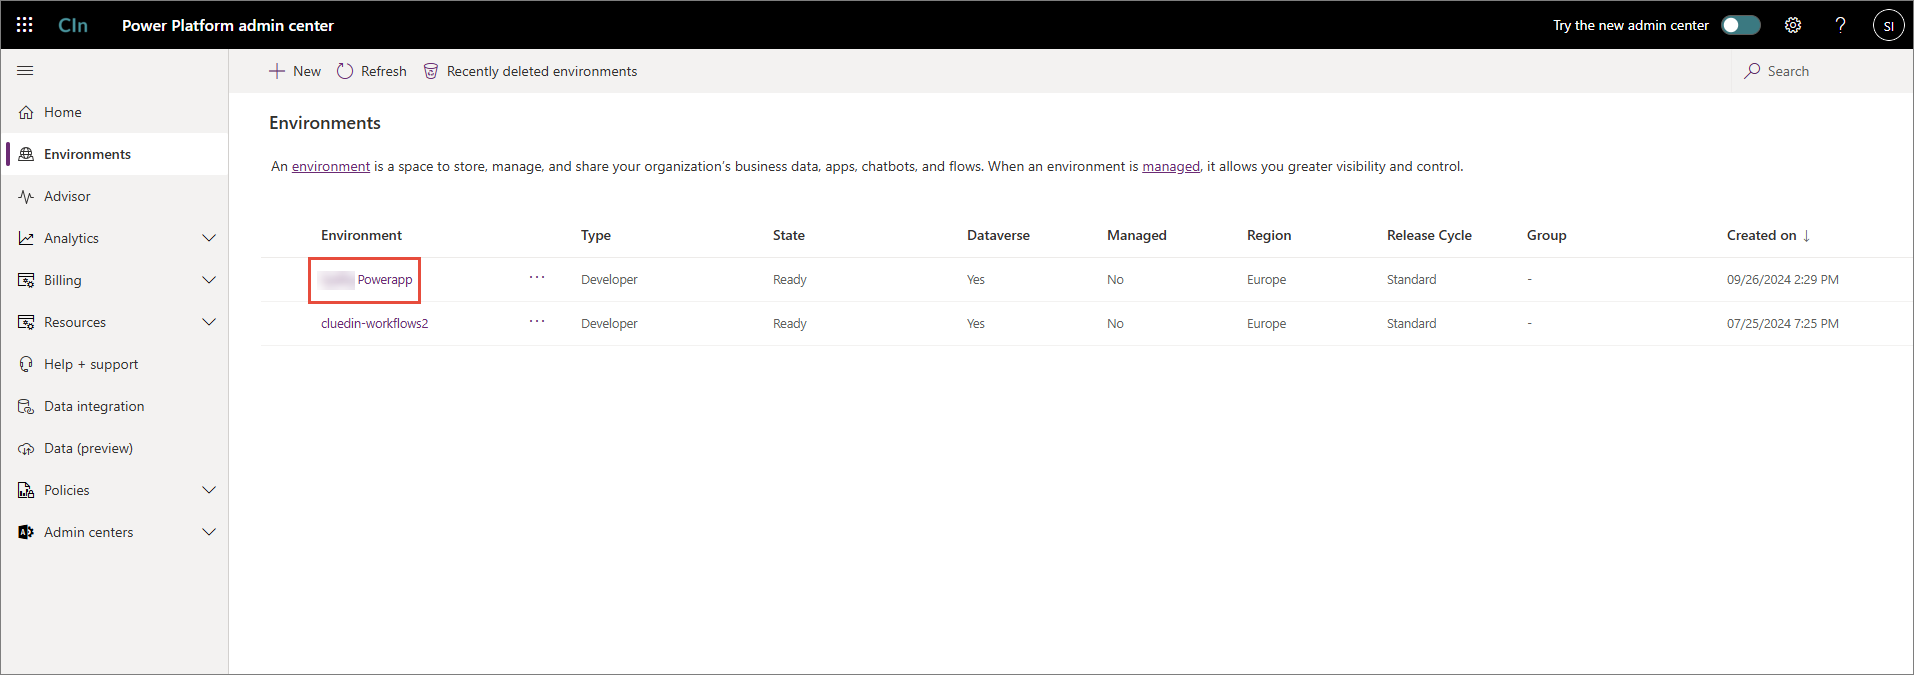
Select Environments, and then select your intended environment.
-
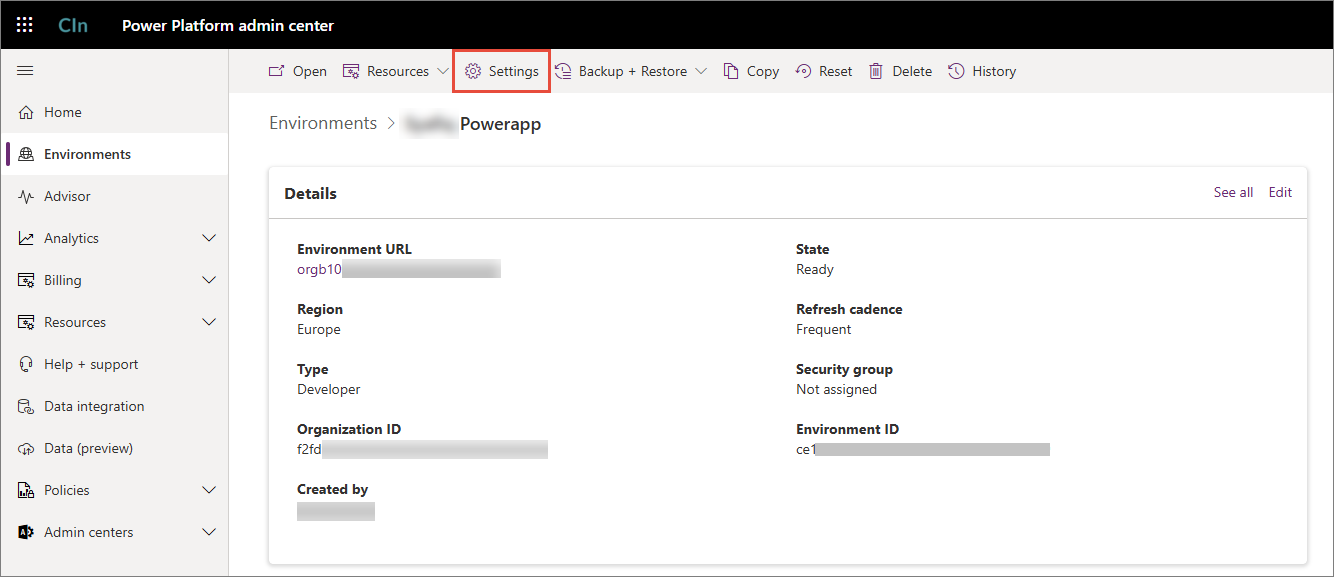
At the top of the page, select Settings.
-
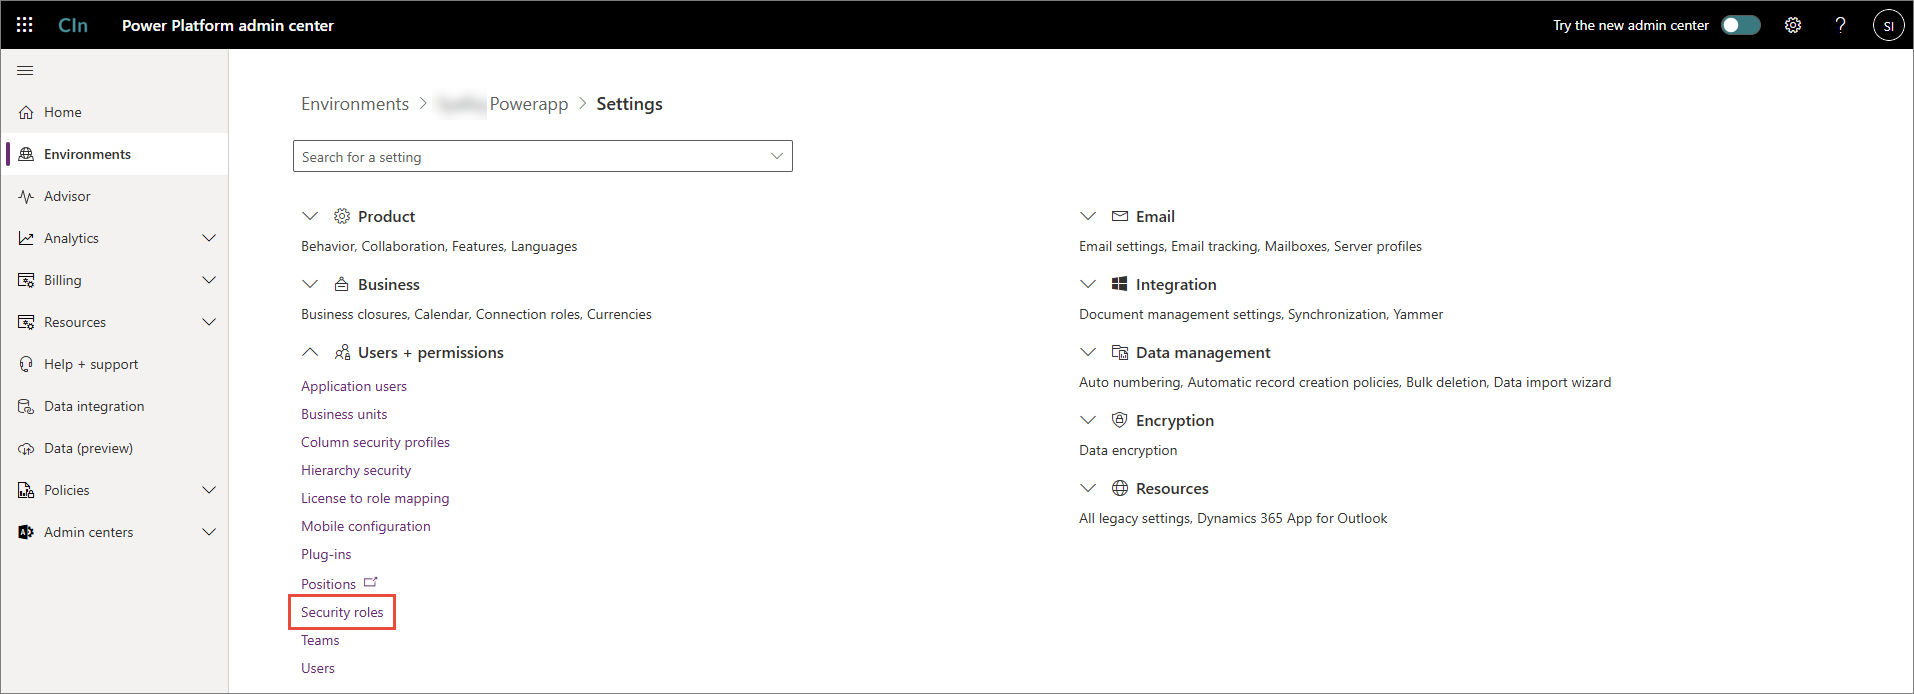
Expand the Users + permissions dropdown, and then select Security roles.
-
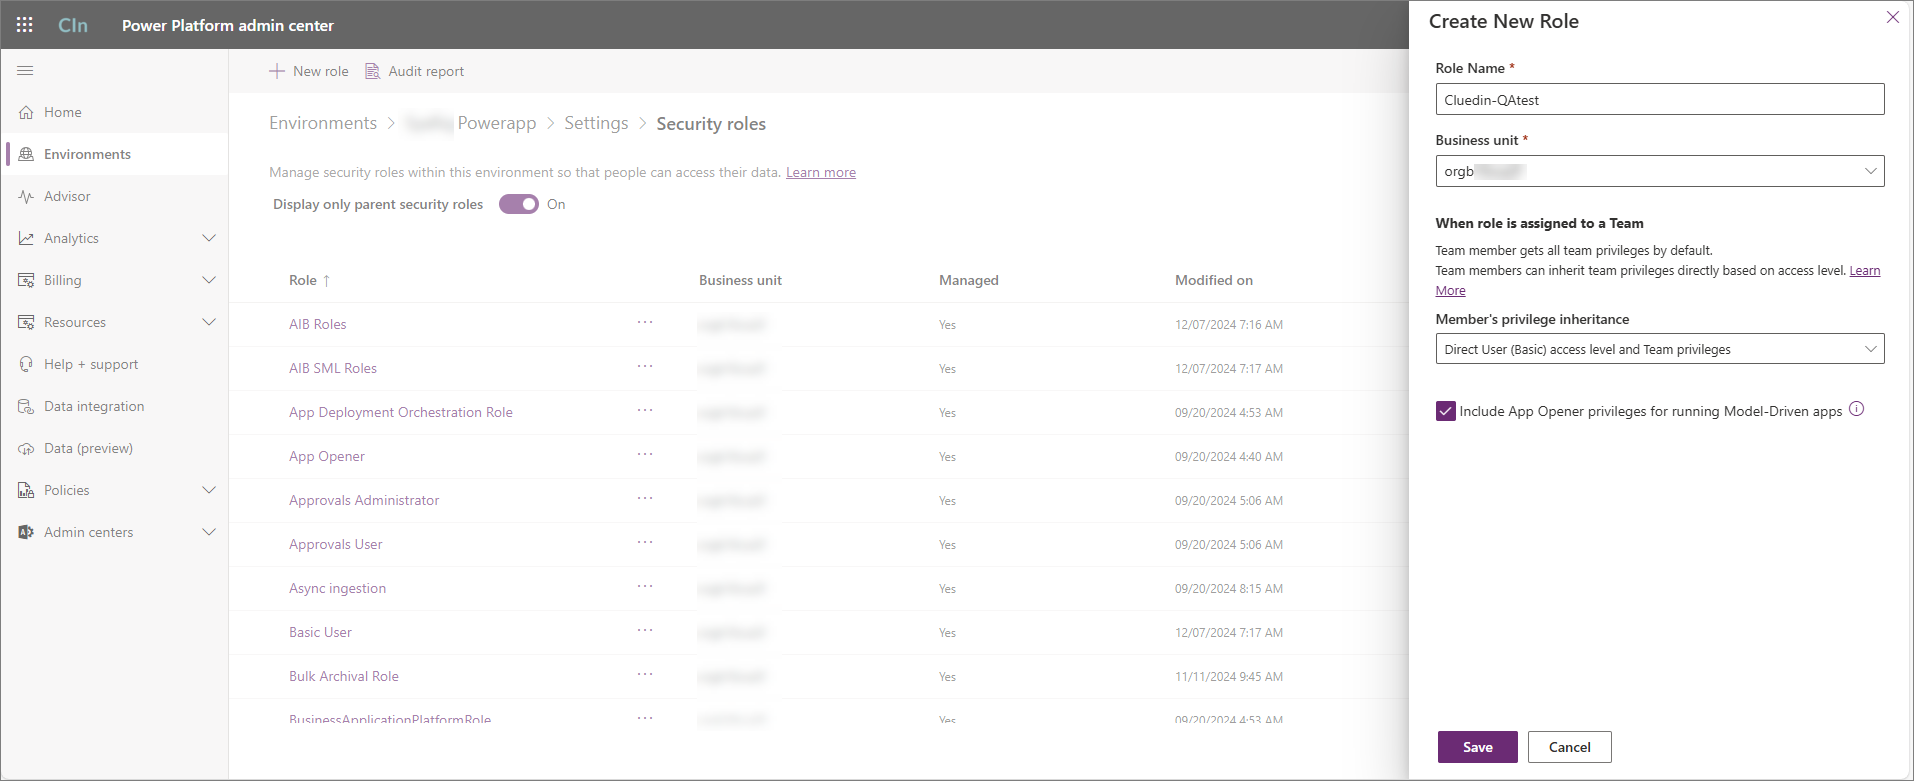
At the top of the page, select New role. Enter the Role Name and select the Business unit of your organization. If needed, change the Member’s privilege inheritance according to your preference. Finally, select Create.
-
In the list of all security roles, find and select the role that you’ve just created.
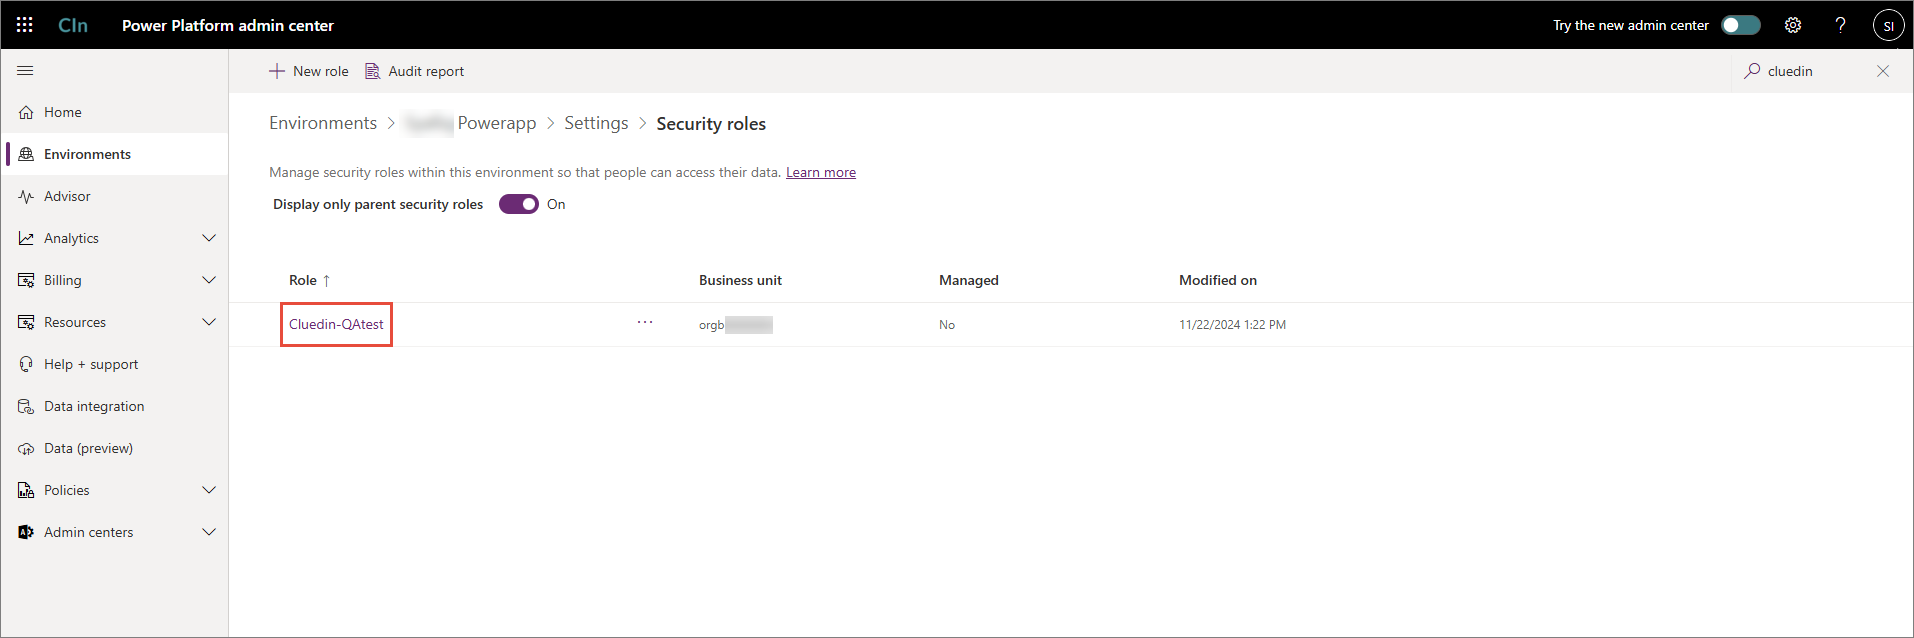
-
Edit the security role’s privileges according to the security role privileges reference. To open the edit mode, select the three-dot button next to the table that you want to edit.
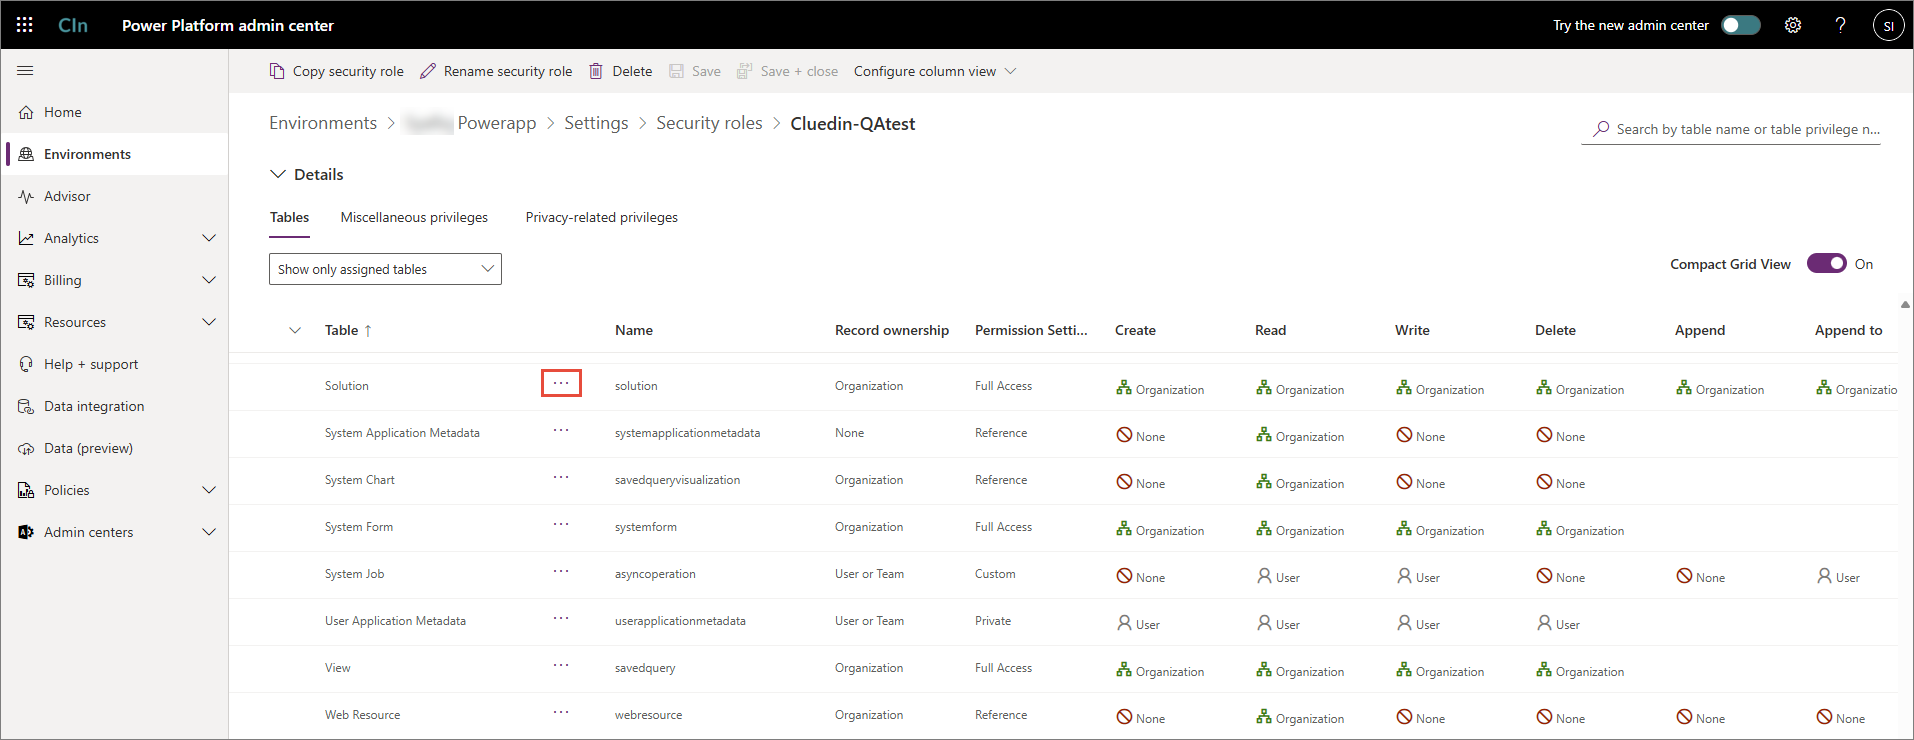
-
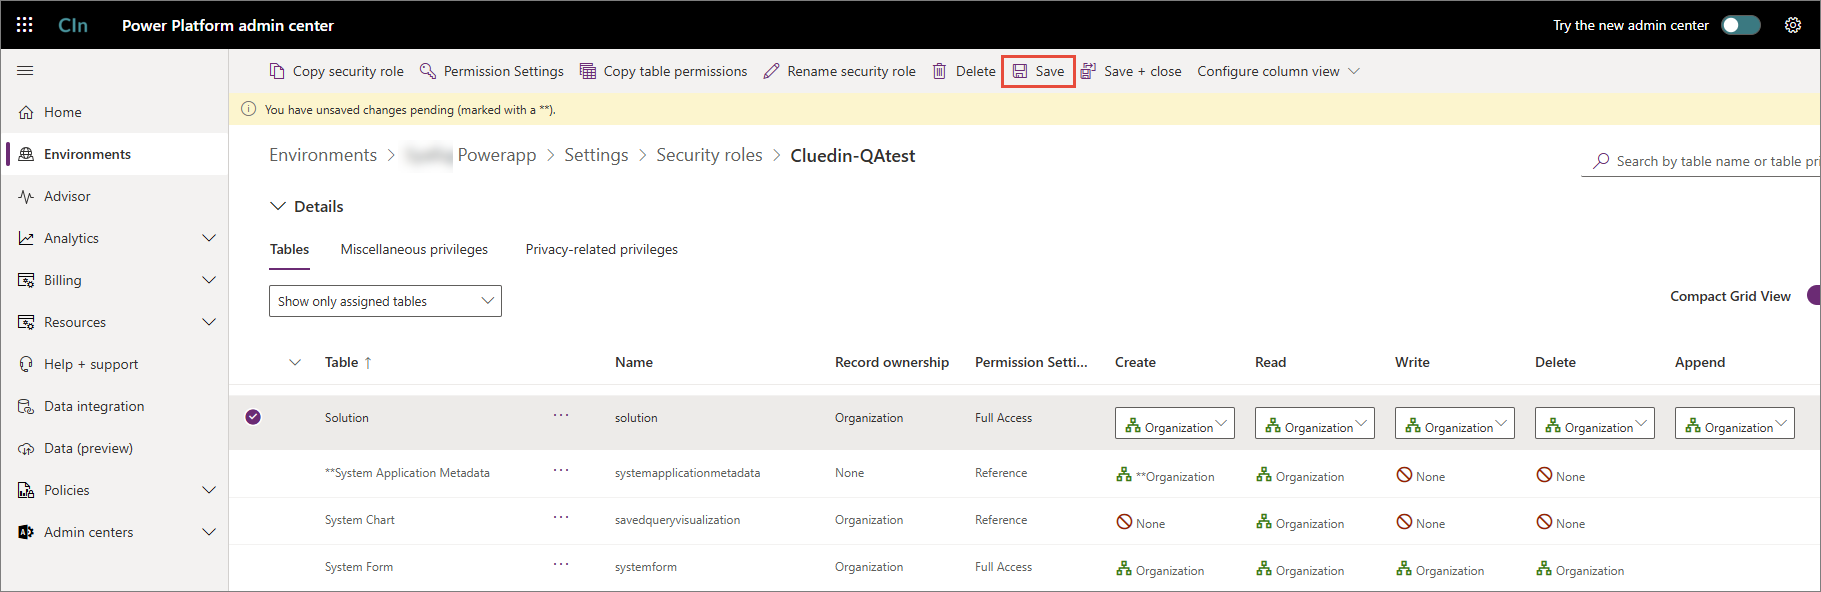
Once you’ve updated the security role’s privileges according to the security role privileges reference, select Save.
Security role privileges
If the service principal is granted the System Administrator role on the Power Platform environment, none of the privileges below are required. The table below only applies when using a custom security role with limited permissions.
In addition to the privileges in this table, the service principal must also have Create, Read, Write, and Delete access at Organization level on every Dataverse table that is being streamed from CluedIn.
| Table | Create | Read | Write | Delete |
|---|---|---|---|---|
| Customization | ||||
| Solution | Organization | Organization | Organization | Organization |
| Publisher | Organization | Organization | Organization | Organization |
| Entity | Organization | Organization | Organization | Organization |
| Entity Key | Organization | Organization | Organization | |
| Attribute | Organization | Organization | Organization | Organization |
| System Form | Organization | Organization | Organization | Organization |
| View | Organization | Organization | Organization | Organization |
| Custom Control Default Config | Organization | Organization | Organization | |
| Process | Organization | Organization | Organization | Organization |
| Relationship Entity | Organization | Organization | Organization | Organization |
| Sdk Message Processing Step | Organization | Organization | Organization | Organization |
| Sdk Message Processing Step Image | Organization | |||
| Service Endpoint | Organization | Organization | Organization | Organization |
Create an application user
This section outlines how to create an application user in Power Apps in order to use it for the Dataverse connector.
-
Sign in to your Power Apps account and make sure you are in the intended environment.
-
Select Power Platform > Power Platform Admin Center.
-
Select Environments, and then select your intended environment.
-
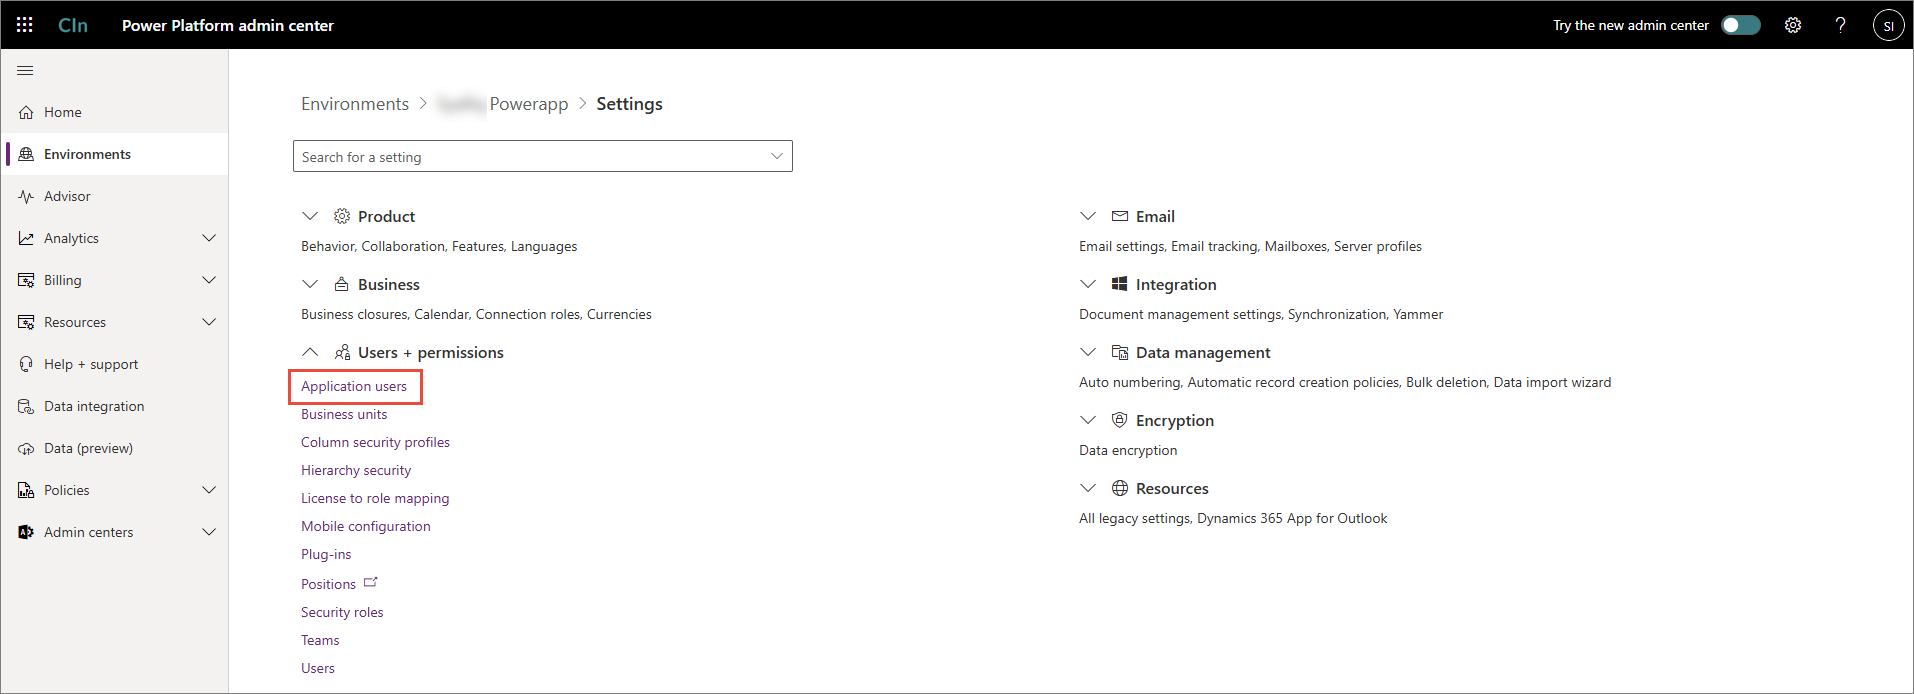
At the top of the page, select Settings.
-
Expand the Users + permissions dropdown, and then select Application users.
-
At the top of the page, select New app user.
-
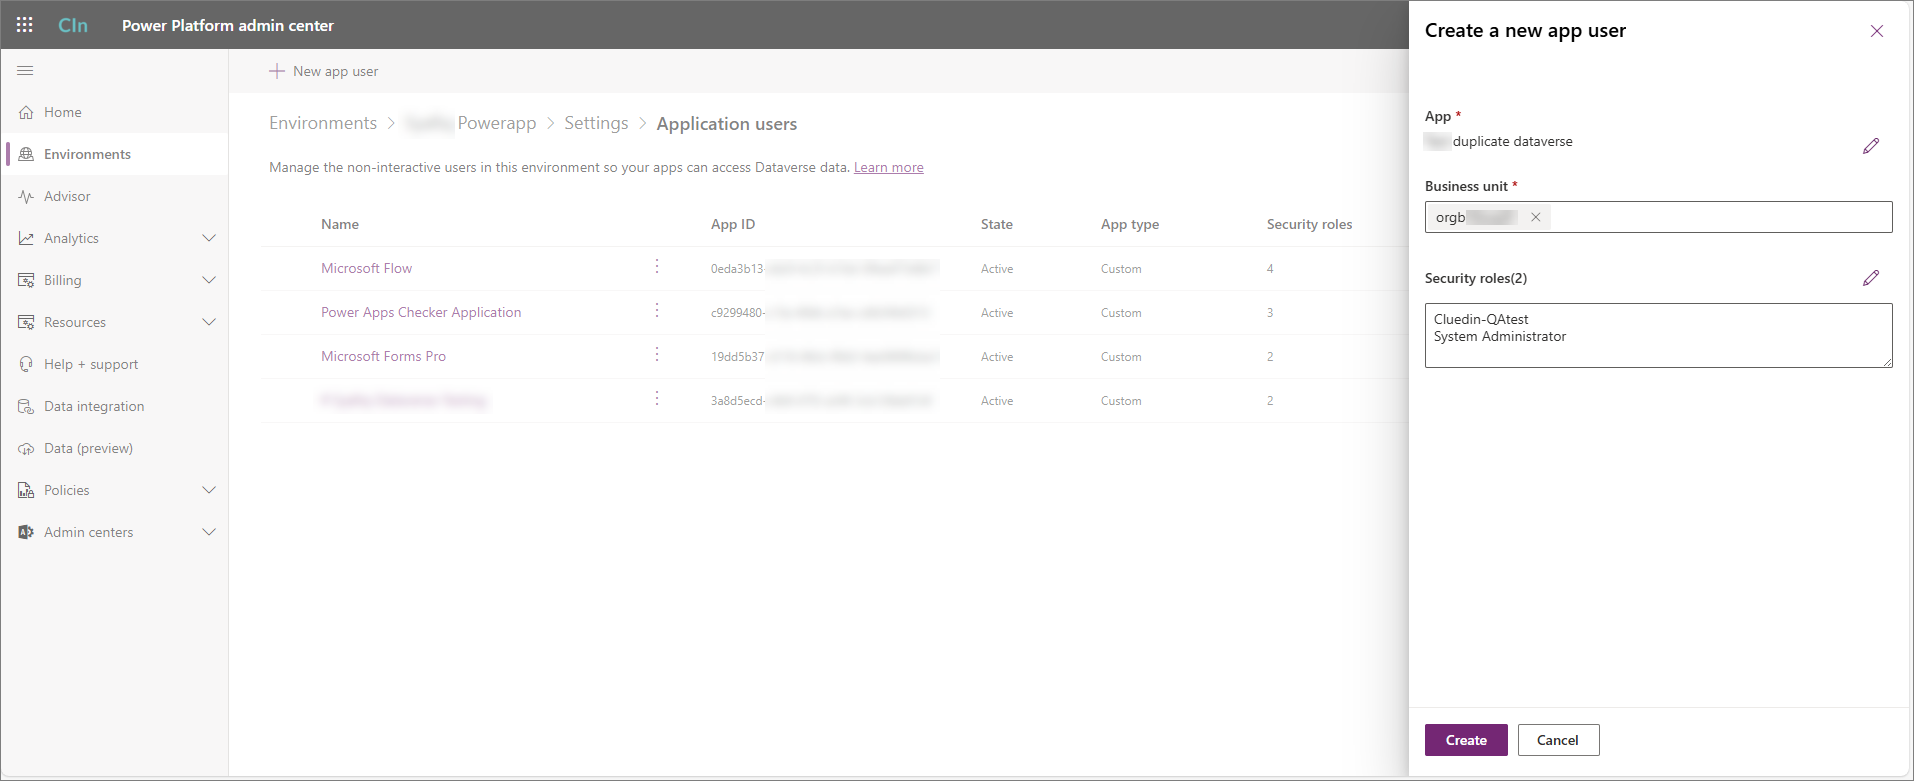
In the Create a new app user pane, do the following:
-
Select Add an app, and then select the app registration (service principal) created earlier. This must be the app registration that you use to get Client ID, Tenant ID, and Client Secret for Dataverse connector configuration.
-
Enter the Business unit.
-
In the Security roles field, select the pencil icon, and then enter the security role created earlier. Also, you need to enter the System Administrator role to the new app user. The Security roles field must contain two roles.
-
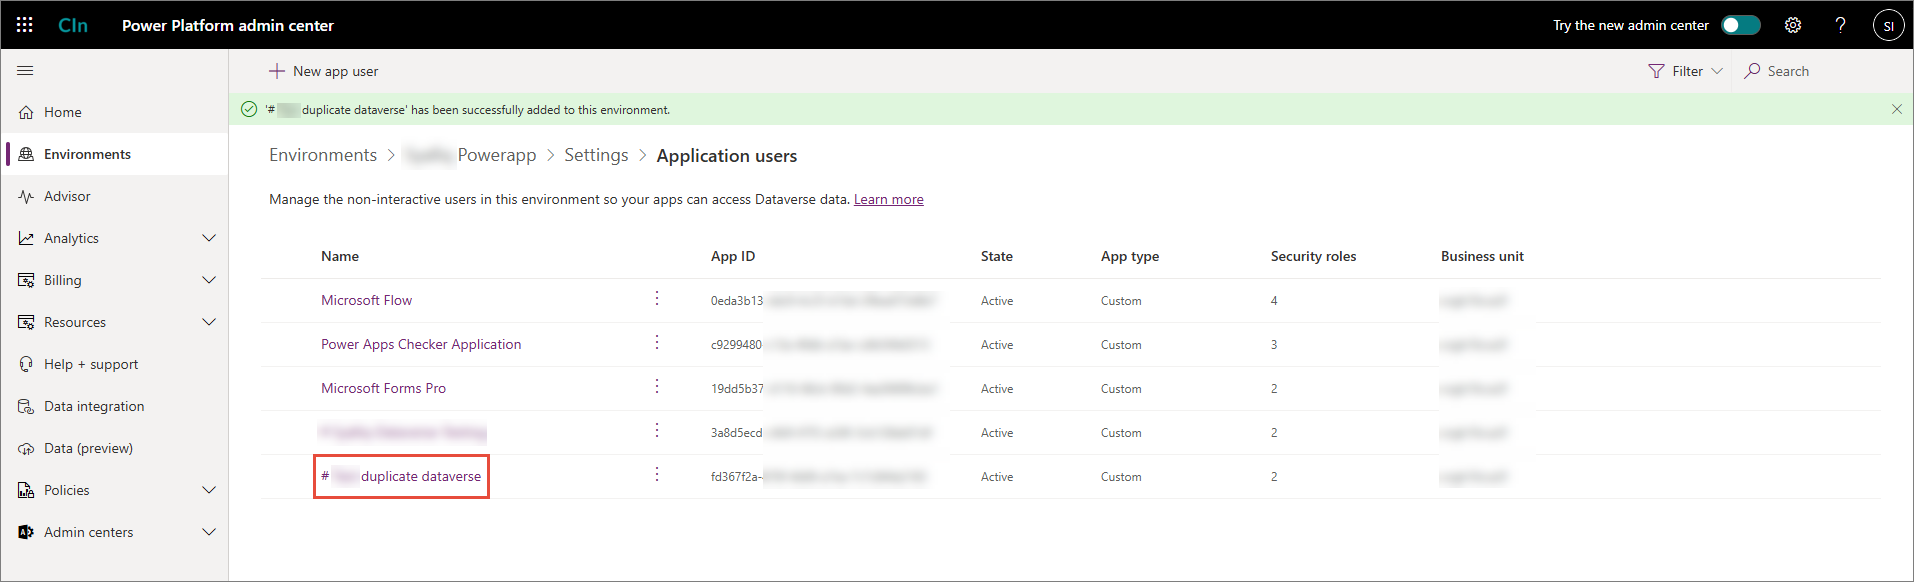
Select Create.
As a result, the new application user is created.
-
Stream requirements
When adding a Dataverse Connector V2 stream, the following constraint applies regardless of whether sync mode is enabled.
Required Name property
All Dataverse tables are required by Microsoft to have a column named Name. To satisfy this constraint, the properties configured for export in the stream must include the Golden Record Property called Name.
Sync changes back from Dataverse
By default, the Dataverse connector exports data in one direction: from CluedIn to Dataverse. However, you can optionally enable bidirectional synchronization so that edits made directly in your Dataverse tables are automatically reflected back in the corresponding CluedIn records.
This feature is configured per stream, in the Export target configuration > Connector properties section.
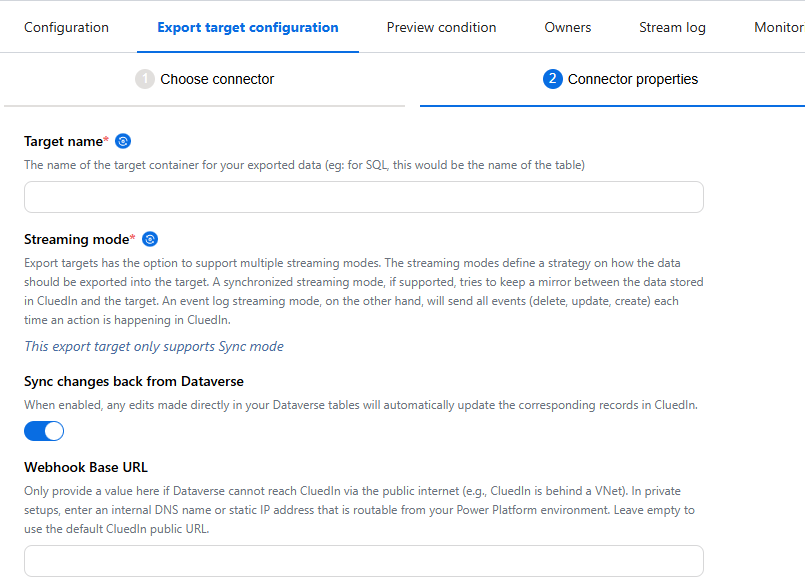
Toggle Sync changes back from Dataverse to enable it. When the toggle is on, CluedIn automatically registers a Dataverse plug-in and attaches plug-in steps that listen for record change events on the Dataverse tables that belong to the stream. When a change is detected, the plug-in posts the updated data back to CluedIn, which then updates the corresponding golden record. No manual setup in Dataverse is required.
Additional stream constraints when sync is enabled
Enabling Sync changes back from Dataverse enforces the following additional constraints on the stream:
-
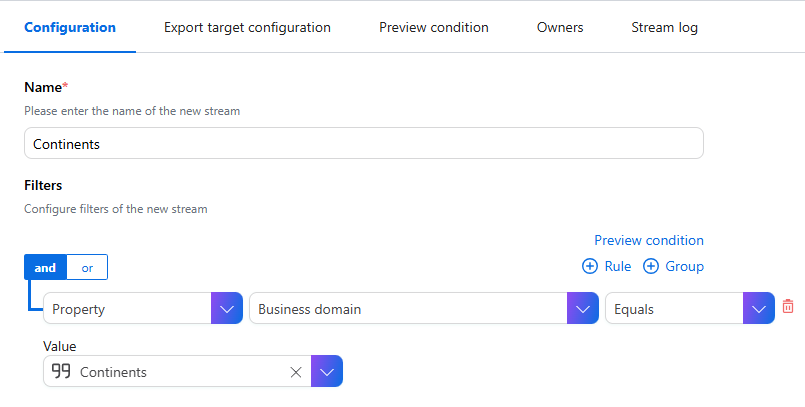
Business domain filter – The stream’s filter must contain exactly one condition: a Business domain equals constraint. This is required to support the case where new rows are added directly in Dataverse: when the plug-in notifies CluedIn of a newly created record, CluedIn needs to know which Business Domain to assign to that record. Without this constraint there is no way to determine the correct Business Domain for the incoming change.
Webhook Base URL
The Webhook Base URL field is only required when Dataverse cannot reach CluedIn over the public internet—for example, when CluedIn is deployed behind an Azure Virtual Network (VNet). In private deployments, enter an internal DNS name or static IP address that is routable from your Power Platform environment (such as an internal load balancer or private DNS record for CluedIn). Leave the field empty to use the default CluedIn public URL.
Why a plug-in instead of a standard Dataverse webhook
Dataverse supports both webhooks and plug-ins for responding to data changes. CluedIn uses a plug-in rather than a webhook for an important networking reason.
Webhooks in Dataverse are dispatched by the Power Platform infrastructure in a shared, publicly-routed execution context. They are not subject to Azure VNet enterprise policies, which means they cannot route calls through your organization’s private network. If CluedIn is hosted privately and not reachable from the public internet, a Dataverse webhook cannot deliver the notification.
Plug-ins, by contrast, run inside a container that is injected into your delegated Azure subnet when Azure Virtual Network support is enabled for the Power Platform environment. Because plug-in outbound calls are subject to your VNet’s network policies, they can resolve private DNS names and reach resources inside your private network—including a CluedIn instance that is not publicly exposed. As a result, CluedIn registers a plug-in (not a webhook) to ensure reliable and secure change delivery in both public and private network topologies.
Background: Dataverse plug-ins and plug-in steps
A Dataverse plug-in is a custom .NET assembly deployed to a Dataverse environment that executes in response to platform events (such as record creation, update, or deletion). Plug-ins can run synchronously (within the same database transaction) or asynchronously (in the background, outside the transaction).
Plug-in steps (also called SDK message processing steps) define when a plug-in fires. Each step is registered against a specific message (for example, Update) and entity (table). When the registered event occurs, Dataverse invokes the associated plug-in step, which runs the plug-in logic—in this case, posting the changed record data to CluedIn.
When you enable Sync changes back from Dataverse, CluedIn automatically registers its plug-in assembly and the appropriate steps for each table in the stream. These registrations are managed by CluedIn and are removed if you disable the feature.
Azure Virtual Network considerations
If your Power Platform environment is configured with Azure Virtual Network support—also known as subnet delegation via enterprise policies—all plug-in outbound calls are routed through your delegated subnet and are subject to your network policies. In this configuration:
- CluedIn must be reachable from within the delegated subnet. Provide the Webhook Base URL field with an internal address (DNS name or static IP) that Dataverse can route to through the VNet.
- The plug-in’s outbound calls will respect your network policies, including any firewall rules or private DNS configuration applied to the subnet.
- Standard Dataverse webhooks would not work in this scenario because they execute outside the VNet injection context and cannot route traffic through the enterprise policy.
For detailed guidance on configuring Azure VNet support for Power Platform environments, see the Microsoft documentation:
Dataverse schema
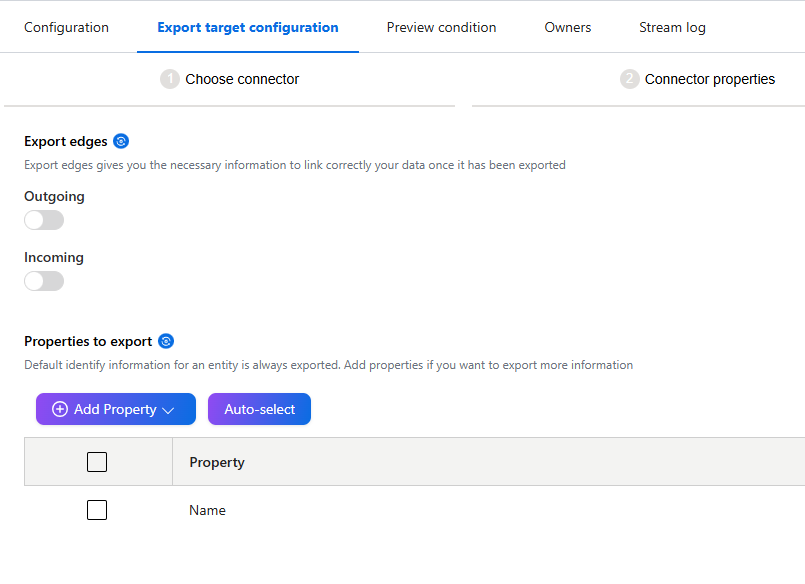
When you create a stream using the Dataverse Connector V2, CluedIn automatically provisions a set of Dataverse tables to represent the exported data. The tables created depend on which export options you enable in the stream—entity properties are always created, while edge and edge property tables are only created when the corresponding options are toggled on.
The following example is based on a stream with a Target name of demoContinents, with outgoing edges, outgoing edge properties, incoming edges, and incoming edge properties all enabled, and the following properties configured for export: continents.continentCode, continents.continentName, continents.id, and Name.
Table naming convention
All table logical names follow a structured pattern:
cln_{streamId}_{targetName}_{suffix}
cln_– the CluedIn publisher prefix applied to all Dataverse objects created by CluedIn.{streamId}– a short unique identifier derived from the stream, used to avoid naming collisions across streams.{targetName}– the Target name you configured on the stream (lowercased, spaces removed).{suffix}– indicates the purpose of the table (_entity_code,_entity_edge,_entity_edge_property). The root entity table has no suffix.
Schema diagram

Entity table
Display name: demoContinent
Logical name: cln_t2dotuxm_democontinents_entity
This is the primary table and is always created. It holds one row per exported golden record. The columns it contains are determined by the properties you select for export on the stream, plus the mandatory Name column.
| Display name | Logical name | Type | Notes |
|---|---|---|---|
| demoContinent | cln_t2dotuxm_democontinents_entityid | Unique Identifier | Primary key |
| Name | cln_name | String | Primary name column. Populated from the Name Golden Record Property. Required by Dataverse |
| Continent Code | cln_continentscontinentcode | String | Mapped from continents.continentCode |
| Continent Name | cln_continentscontinentname | String | Mapped from continents.continentName |
| Id | cln_continentsid | String | Mapped from continents.id |
Property logical names are derived by removing dots and lowercasing the CluedIn property key (e.g., continents.continentCode → cln_continentscontinentcode).
Code table
Display name: demoContinent Code
Logical name: cln_t2dotuxm_democontinents_entity_code
This table is always created alongside the entity table. It stores the CluedIn entity codes (origin codes / identifiers) associated with each exported record. A single entity can have multiple codes, so this is a child table with a one-to-many relationship to the entity table.
| Display name | Logical name | Type | Notes |
|---|---|---|---|
| demoContinent Code | cln_t2dotuxm_democontinents_entity_codeid | Unique Identifier | Primary key |
| Code | cln_code | String | The entity code value |
| Entity | cln_t2dotuxm_democontinents_entity_code_entityid | Lookup | Foreign key → entity table |
Edge table
Display name: demoContinent Edge
Logical name: cln_t2dotuxm_democontinents_entity_edge
This table is created when outgoing or incoming edges are enabled on the stream. Each row represents a single relationship (edge) connected to the exported entity, regardless of direction. Edges are deleted and recreated with their parent entity record (cascade delete).
| Display name | Logical name | Type | Notes |
|---|---|---|---|
| demoContinent Edge | cln_t2dotuxm_democontinents_entity_edgeid | Unique Identifier | Primary key |
| Name | cln_name | String | Human-readable label, maintained automatically by CluedIn |
| Direction | cln_direction | Picklist | Incoming or Outgoing relative to the entity |
| EdgeType | cln_edgetype | String | The relationship type/label from CluedIn |
| FromReference | cln_fromreference | String | The entity reference from which the edge originates |
| ToReference | cln_toreference | String | The entity reference to which the edge points |
| Entity | cln_t2dotuxm_democontinents_entity_edge_entityid | Lookup | Foreign key → entity table |
Edge property table
Display name: demoContinent Edge Property
Logical name: cln_t2dotuxm_democontinents_entity_edge_property
This table is created when outgoing edge properties or incoming edge properties are enabled. Each row stores a single key-value property on an edge. Properties are cascade-deleted with their parent edge.
| Display name | Logical name | Type | Notes |
|---|---|---|---|
| demoContinent Edge Property | cln_t2dotuxm_democontinents_entity_edge_propertyid | Unique Identifier | Primary key |
| Key | cln_key | String | The property key |
| Value | cln_value | String | The property value |
| Edge | cln_t2dotuxm_democontinents_entity_edge_property_edgeid | Lookup | Foreign key → edge table |